43 Working with the Documents Service Task Flows and Document Components
In a WebCenter Portal: Spaces application, you can add content from one or more connected content repositories to the application, as summarized in Chapter 41, "Introduction to Adding and Managing Content."
See Also:
For an overview of content management in Spaces, see Section 2, "Leveraging Content Management."
This chapter describes how to use the Documents service task flows and document components to access, add, and manage folders and files in a Spaces application:
-
Section 43.1, "What You Should Know About the Documents Service Task Flows"
-
Section 43.2, "What You Should Know About Document Components"
-
Section 43.4, "Adding a Documents Service Task Flow to a Page"
-
Section 43.5, "Understanding the Documents Service Task Flow Menus and Actions"
-
Section 43.19, "Viewing, Entering, and Deleting Comments on a File"
-
Section 43.22, "Viewing and Modifying Folder and File Properties"
-
Section 43.23, "Setting Security Options on a Folder or File"
Note:
Many of the tasks described in this chapter can also be accomplished for Microsoft Office (Word, Excel, and PowerPoint) files using the task pane available through Microsoft Office shared document management functionality, as described in Chapter 48, "Working with Microsoft Office and Explorer Integration."
This chapter is intended for Spaces users who want to view, create, edit, and manage folders and files as individual items or in one of the Documents service task flows on a page in a Spaces application.
To perform the tasks described in this chapter, users need to be assigned a role that includes the Edit Pages, View Documents, Create and Edit Documents, and Delete Documents permissions. For information about roles and permissions, see Section 54.2.1.2, "Understanding Permissions and Permission Models in a Space."
43.1 What You Should Know About the Documents Service Task Flows
The Documents service task flows provide a variety of formats to display folders and files, including wikis and blogs, on a page in a Spaces application. You can choose the task flows appropriate for your application to provide features for accessing, adding, and managing folders and files; configuring and viewing file and folder properties; and searching file and folder content in Content Server, Oracle Portal, or SharePoint content repositories, and your Spaces administrator has completed the prerequisite configuration.
Note:
The availability of SharePoint as a content repository requires the installation of the SharePoint adapter. Administration for SharePoint is performed using WLST commands, not Oracle Enterprise Manager Fusion Middleware Control Console.
In a space, you can add Documents service task flows to a page without necessarily enabling the Documents service in the space. If the Documents service is not enabled in a space, adding a Documents service task flow to a page does not auto-populate the task flow with folders and files by default, unless you edit the default task flow properties. Once you enable the Documents service in the space (see Section 53.10.1, "Enabling and Disabling Services Available to a Space"), the following additional content functionality is made available:
-
Documents service task flows added to the space are auto-populated by default with folder and file listings based on the default content repository connection.
-
Documents added to the space are stored in a folder whose security is managed by the space.
-
You can add a Documents service task flow that displays only the documents belonging to the current space (in the Content Management section of the Composer Resource Catalog, select Space Documents).
Table 43-1 provides an overview of the Documents service task flows, which offer different ways to display folder and file listings to add and manage content in the connected content repository, or to display individual files in Spaces.
Table 43-1 Documents Service Task Flows
| Folder and File Listings | Individual Folders | Individual Files | |
|---|---|---|---|
|
Document Explorer task flow. Displays folders and files in two panes, combining the functionality of the Document Navigator and Folder Viewer task flows. It provides in-place previewing and editing, and robust document management capabilities with an interface that should be familiar to users of Windows Explorer. Size: medium to full page width. |
X |
X |
|
|
Document List Viewer task flow. Displays folders and files in a single pane as a flat listing. It provides preview and editing in separate window, and some management capabilities. Size: narrow to medium page width. |
X |
X |
|
|
Document Manager task flow. Displays folders and files as specified by its |
X |
X |
|
|
Document Navigator task flow. Displays a nested hierarchy of folders and files in a single pane, providing expand and collapse on folders to show the full hierarchy. Intended for use as a component of another Documents task flow (such as the Document Explorer task flow). Clicking folders and files in this task flow standalone performs no action. Size: narrow to medium page width. |
X |
X |
|
|
Folder Viewer task flow. Displays the contents of a folder in a single pane as a flat listing, providing in-place preview and editing, and robust document management capabilities with a straightforward interface that should be familiar to Windows users. Size: medium to full page width. |
X |
X |
|
|
Recent Documents task flow. Displays a list of the files most recently created or modified in the current folder. This task flow is available only when the connected content repository is Content Server. |
X |
||
|
Document Viewer task flow. Displays a preview of a file, or file properties for files that do not support a preview. A tabbed set of panes at the bottom of the task flow provide access to comments, tags, history, info (properties), and links. |
X |
||
|
Document Mini Properties task flow. Displays the Basic properties of a file in a read-only view. |
X1 |
X |
|
|
Document Properties task flow. Displays both Basic and Advanced properties of a file, along with an Edit button to allow you to modify property values. |
X1 |
X |
|
|
Document Version History task flow. Displays a list of versions of a file, allowing for deletion of a selected version. |
X |
Footnote 1 To show folder information in a Document Viewer, Document Mini Properties, or Document Properties task flow, you can set the task flow's Item ID or Resource ID property to the ID of the target folder. See Chapter 44, "Setting Documents Service Task Flow and Document Component Properties."
For more information about each Documents service task flow, refer to the following sections:
-
Section 43.1.1, "Understanding the Document Explorer Task Flow"
-
Section 43.1.2, "Understanding the Document List Viewer Task Flow"
-
Section 43.1.3, "Understanding the Document Manager Task Flow"
-
Section 43.1.4, "Understanding the Document Navigator Task Flow"
-
Section 43.1.6, "Understanding the Recent Documents Task Flow"
-
Section 43.1.7, "Understanding the Document Viewer Task Flow"
-
Section 43.1.8, "Understanding the Document Mini Properties Task Flow"
-
Section 43.1.9, "Understanding the Document Properties Task Flow"
-
Section 43.1.10, "Understanding the Document Version History Task Flow"
43.1.1 Understanding the Document Explorer Task Flow
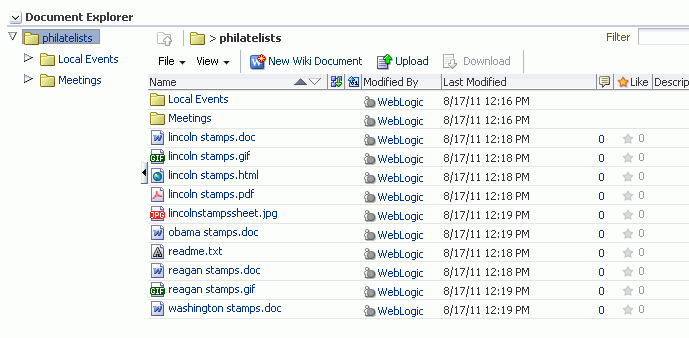
The Document Explorer task flow displays a list of folders and files in two panes, combining the functionality of the Document Navigator and Folder Viewer task flows. The left pane shows folders in a nested hierarchy, and the right pane shows the contents of the currently selected folder (Figure 43-1). This task flow provides robust document management capabilities with an interface that should be familiar to users of Windows Explorer. The size of this task flow is medium to full page width.
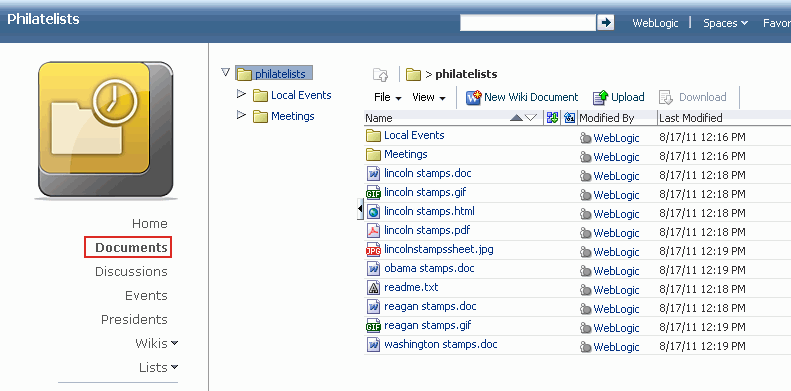
This is the task flow used to display folders and files on the Documents page in a space, as shown in Figure 43-2 (see Section 7.3.1, "What You Should Know About System Pages").
Note:
The Documents service is exposed on the Documents page and administration settings in a space only with Content Server 11g. If the connected content repository is Content Server 10g, the Documents page is not shown in a space, and the Documents service is not available in the space administration settings (Services and Roles). To use the Documents service functionality in 10g, you can create a page in a space and add Documents service task flows to the page (see Section 43.4, "Adding a Documents Service Task Flow to a Page").
If you see only a single pane (default), click the Restore Pane icon to expose the left pane (Figure 43-3).
Conversely, click the Collapse Pane icon to hide the left pane (Figure 43-4).
The Document Explorer task flow is a feature-rich Documents service task flow for viewing, managing, and collaborating on folders and files. In the Document Explorer task flow, you can:
-
Click the expand and collapse icons for a folder to show and hide the subfolders.
-
Click a folder in the left or right pane to display the contents of that folder in the right pane, and drill down further into subfolders.
-
Click a file in the right pane to display a preview of the file contents in the Document Viewer preview pane, with file management options, including in-place editing for some file types. If the file type does not support a preview (for example,
.mp3music files, video files, or.zipfiles), the preview pane displays the file properties (see Section 43.1.7, "Understanding the Document Viewer Task Flow"). -
Click in a row (not on the folder or file name) in the right pane to perform menu actions on the folder or file in that row (see Section 43.5.1, "Menus and Actions in the Documents Service Task Flows").
Alternatively, right-click a folder or file to display a context menu of available actions (see Section 43.5.1.6, "Folder Context Menu" and Section 43.5.1.7, "File Context Menu").
-
Drag and drop folders and files in the task flow hierarchy to reorganize the file or folder structure.
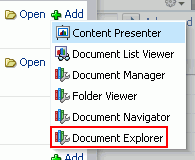
To add a Document Explorer task flow to a page, refer to Section 43.4, "Adding a Documents Service Task Flow to a Page." In the default Resource Catalog, open Content Management, then click Add next to Document Explorer to display the default listing of folder and files in the root folder of the active content repository connection.
43.1.1.1 Changing the Document Explorer Task Flow Default Listing
You can change the default listing displayed in a Document Explorer task flow in either of the following ways:
Selecting a Specific Folder in the Resource Catalog
To change the default listing displayed in a Document Explorer task flow by selecting a specific folder to display:
-
Drill down to a target folder in the Resource Catalog, then click the corresponding Add link, and select Document Explorer (Figure 43-5). For more information, see Section 43.3, "Adding a Selected Folder or File to a Page."
To change the default listing displayed in a Document Explorer task flow by modifying the task flow properties:
-
Edit the page, and click the properties Edit icon (wrench) in the task flow chrome (Figure 43-6) to open the Component Properties dialog.
-
To change the target folder, set the
Connection NameandRoot Folder Pathproperties on the Parameters tab (see Table 44-1, "Document Explorer Task Flow Parameters").
43.1.2 Understanding the Document List Viewer Task Flow
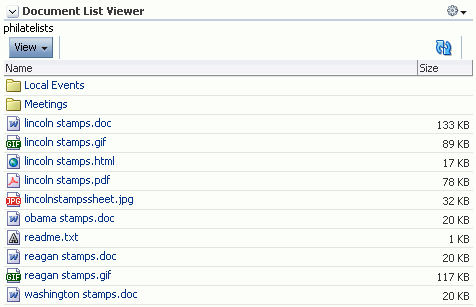
The Document List Viewer task flow displays the contents of a folder in a single pane as a flat listing (Figure 43-7). In this task flow, you can navigate a folder hierarchy, and customize search queries. While this task flow may be useful for a specific need, its search functionality is replicated and enhanced by using the Content Presenter task flow instead. The size of this task flow is narrow to medium page width.
In the Document List Viewer task flow, you can:
-
Click a folder to display the contents of that folder, and drill down further into subfolders.
-
Click a file to display a preview of the file contents in a separate Document Viewer preview window, with file management options, including editing for some file types. If the file type does not support a preview (for example,
.mp3music files, video files, or.zipfiles), the preview window displays the file properties. See Section 43.1.7, "Understanding the Document Viewer Task Flow." -
Click in a row to perform View menu actions on the folder or file in that row. View is the only menu available for this task flow.
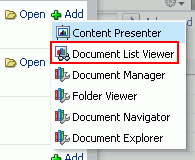
To add a Document List Viewer task flow to a page, refer to Section 43.4, "Adding a Documents Service Task Flow to a Page." In the default Resource Catalog, open Content Management, then click Add next to Document List Viewer.
43.1.2.1 Changing the Document List Viewer Task Flow Default Listing
You can change the default listing displayed in a Document List Viewer task flow in any of the following ways:
Selecting a Specific Folder in the Resource Catalog
To change the default listing displayed in a Document List Viewer task flow by selecting a specific folder to display:
-
Drill down to a target folder in the Resource Catalog, then click the corresponding Add link, and select Document List Viewer (Figure 43-8). For more information, see Section 43.3, "Adding a Selected Folder or File to a Page."
To change the default listing displayed in a Document List Viewer task flow by modifying the task flow properties:
-
Edit the page, and click the properties Edit icon (the second wrench icon in the task flow chrome) (Figure 43-9) to open the Component Properties dialog.
-
To display folders as well as files, select the
Show Foldersparameter check box. -
To change the target folder, set the
Connection NameandRoot Folder Pathproperties on the Parameters tab (see Table 44-2, "Document List Viewer Task Flow Parameters").
Specifying Detailed Content Source Criteria
To change the default listing displayed in a Document List Viewer task flow to list content that matches specified criteria:
-
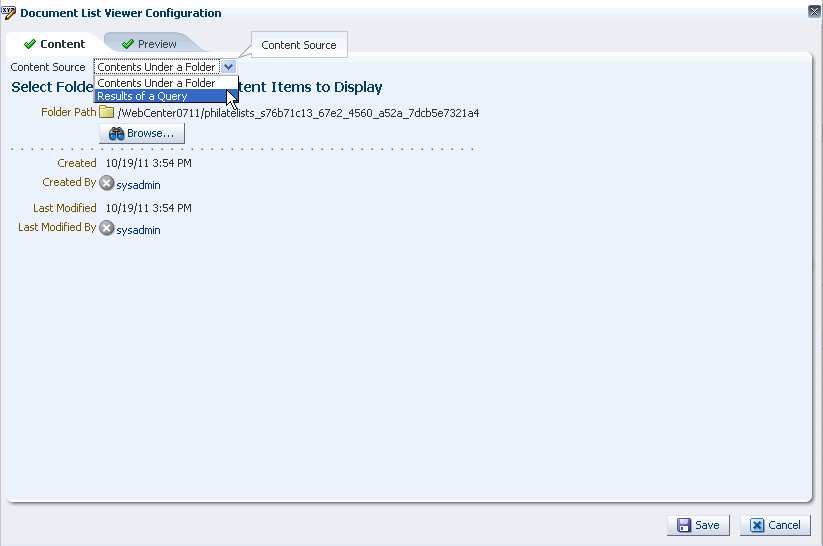
In the task flow heading, click the configuration Edit icon (the first wrench icon in the task flow chrome) (Figure 43-10) to open the Document List Viewer Configuration dialog.
-
In the Document List Viewer Configuration dialog (Figure 43-11), select from the Content Source dropdown list:
-
Contents Under a Folder (folders display in the task flow pane only when the
Show Foldersparameter is selected). Click the Browse icon, navigate to and select the folder with the content you want to initially display in the task flow, then click Save. -
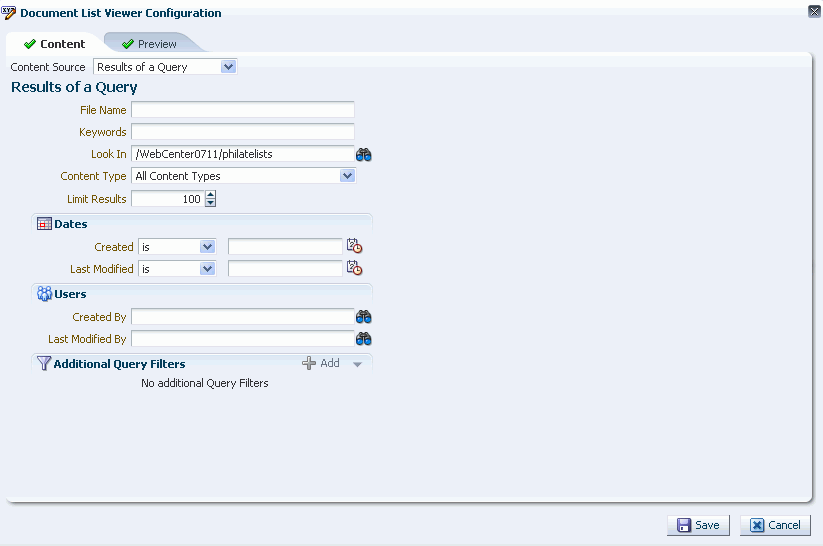
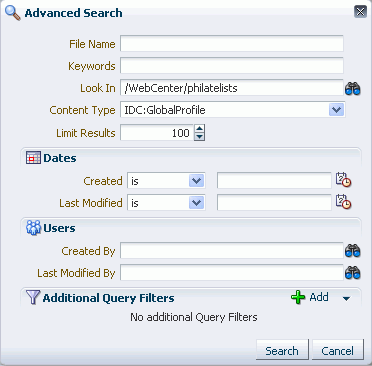
Results of a Query. In the Results of a Query pane (Figure 43-12 and Figure 43-13), enter desired values in the fields that you want the query to retrieve, as described in Table 43-2.
Table 43-2 Specifying Query Criteria for Results of a Query
Element Description File Name
Enter the name of a file in the specified Repository that you want to display in the Document List Viewer task flow. You can use
*as a wild card character to retrieve multiple files; for example:*.jpg.Keywords
Enter any value that may be present in the content of the documents. The value may be one or more words or phrases. Keyword search requires full-text search to be configured in Content Server by enabling FullText Search Option, as described in "Configuring the Oracle Content Server Instance" in Oracle Fusion Middleware Installation Guide for Oracle Enterprise Content Management Suite.
Content Type
Select All Content Types to retrieve content items regardless of the content type. Or, select the name of a content type profile defined in Content Server. A content type profile specifies properties that define a specific type of content (for example, a press release, or a news flash, or an image). The content type IDC:GlobalProfile is the name of a default content type profile defined in Content Server that can be applied if no other content type profiles are defined.
Limit Results
Specify the maximum number of content items to be returned by the query.
Dates
In the Created and/or Last Modified fields, select a modifier to search for content items matching an exact date (is), a following date (is after), a preceding date (is before), or a date between two other dates (is between), which adds an additional date field for entering the second date. Click the Select Date icon to select a date in the correct format (
mm/dd/yy), for example11/18/11, or enter a date manually.Users
In the Created By (user who uploaded) and Last Modified By fields, enter a user name for the creator or last modifier of the content item, or click the Browse icon to open the Search Users dialog where you can select from a list of users or search for a user name. For tips on searching for a user in the identity store, see Section 54.3.4.1, "Searching for a User or Group in the Identity Store."
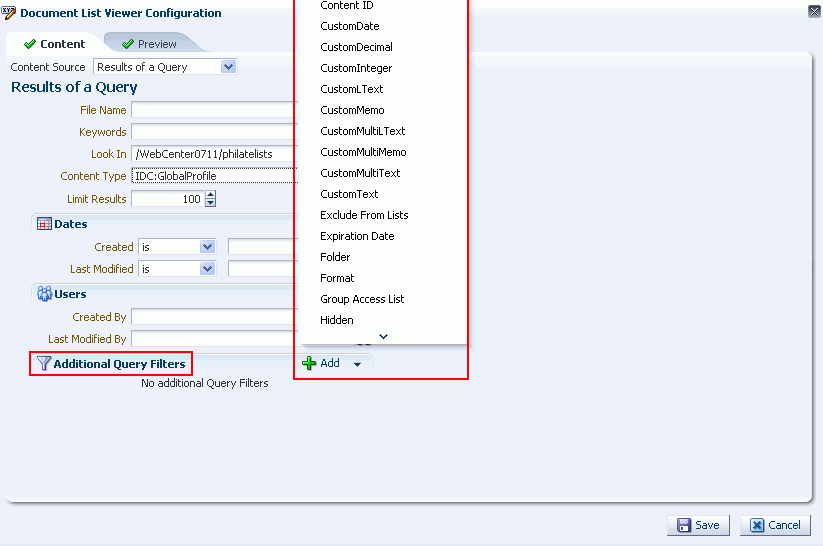
Additional Query Filters
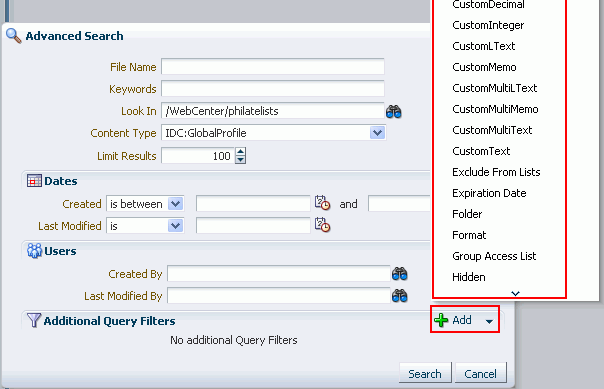
Not applicable when Content Type is set to All Content Types. For a selected content type profile (prefixed IDC:), click the Add icon to list all the properties that are defined for the selected profile (Figure 43-13). Select one or more properties to refine the query to find content items with specific property settings.
Sort Order
Not applicable when Content Type is set to All Content Types. For a selected content type profile (prefixed IDC:), specify a sort order for the properties shown in the Sort On list.
-
-
Click the Preview tab to view the content that will display in the Document List Viewer task flow.
Note:
If the content repository includes an invalid type configuration, then no content displays on the Preview tab. Instead, an error message reports
Unable to retrieve content type information.
43.1.3 Understanding the Document Manager Task Flow
The Document Manager task flow displays folders and files as specified by its Layout property (see Section 44.4, "Setting Document Manager Task Flow Properties"):
-
Explorer layout (default): Displays folders and files in two panes; the left pane shows folders, and the right pane show the contents of the currently selected folder (Figure 43-14). This layout is identical to the Document Explorer task flow, without the properties
Show Documents,Show Folders, andCollapse Tree Navigation(see Section 44.2, "Setting Document Explorer Task Flow Properties"). -
Table layout: Displays only the contents of the current folder in a single pane, with the capability to click a folder to drill down, refreshing the pane with the folder contents (Figure 43-15).
-
Tree Table layout: Displays the folder hierarchy in a single pane, beginning with the root folder, with the capability to expand and collapse folders (Figure 43-16). This layout may be familiar to Mac OS X users.
In the Document Manager task flow, you can:
-
Click the expand and collapse icons for a folder to show and hide the contents in the folder within the folder hierarchy.
-
Click a folder to display the contents of only that folder, and drill down further into subfolders.
-
Click a file to display a preview of the file contents in the Document Viewer preview pane, with file management options, including in-place editing for some file types. If the file type does not support a preview (for example,
.mp3music files, video files, or.zipfiles), the preview pane displays the file properties. See Section 43.1.7, "Understanding the Document Viewer Task Flow." -
Click in a row (not on the folder or file name) in the right pane to perform menu actions on the folder or file in that row (see Section 43.5.1, "Menus and Actions in the Documents Service Task Flows").
Alternatively, right-click a folder or file to display a context menu of available actions (see Section 43.5.1.6, "Folder Context Menu" and Section 43.5.1.7, "File Context Menu").
-
Drag and drop folders and files in the task flow hierarchy to reorganize the file or folder structure.
To add a Document Manager task flow to a page, refer to Section 43.4, "Adding a Documents Service Task Flow to a Page." In the default Resource Catalog, open Content Management, then click Add next to Document Manager to display the default listing of folders and files in the root folder of the active content repository connection.
Note:
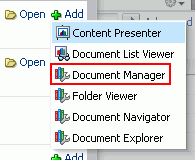
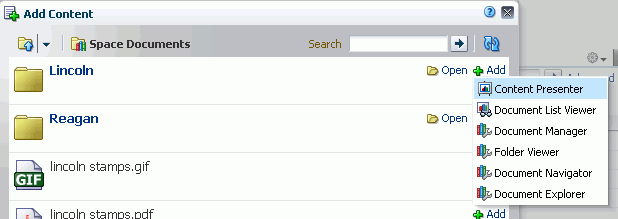
The Document Manager task flow is not shown under Content Management in the default Resource Catalog provided out-of-the-box with Spaces, so you will only see an entry for this task flow if it has been added to a custom Resource Catalog that has been made available to the page. However, if you navigate to a specific folder in the default Resource Catalog, this task flow is selectable from the Add menu for the folder (Figure 43-17).
For information about creating a custom Resource Catalog, see Chapter 16, "Working with Resource Catalogs", specifically Section 16.3.1.2, "Adding Resources" (in the Add Resource Catalog Item dialog, select Task Flows, then scroll to Documents for a list of all available content task flows).
43.1.3.1 Changing the Document Manager Task Flow Default Listing
You can change the default listing displayed in a Document Manager task flow in either of the following ways:
Selecting a Specific Folder in the Resource Catalog
To change the default listing displayed in a Document Manager task flow by selecting a specific folder to display:
-
Drill down to a target folder in the Resource Catalog, then click the corresponding Add link, and select Document Manager (Figure 43-17). For more information, see Section 43.3, "Adding a Selected Folder or File to a Page."
To change the default listing displayed in a Document Manager task flow by modifying the task flow properties:
-
Edit the page, and click the properties Edit icon (wrench) in the task flow chrome (Figure 43-18) to open the Component Properties dialog.
-
To change the target folder, set the
Connection NameandRoot Folder Pathproperties on the Parameters tab (see Table 44-3, "Document Manager Task Flow Parameters").
43.1.4 Understanding the Document Navigator Task Flow
The Document Navigator task flow displays a nested hierarchy of folders and files in a single pane, with the capability to expand and collapse folders to view folder hierarchy within the current folder (Figure 43-19). There are no menu options available for this task flow. This task flow is intended for use as a component of another Documents service task flow (such as the Document Explorer task flow). Clicking folders and files in this task flow standalone performs no action. The size of this task flow is narrow to medium page width.
In the Document Navigator task flow, you can:
-
Click the expand and collapse icons for a folder to show and hide the contents in the folder within the folder hierarchy.
-
Drag and drop folders and files in the task flow hierarchy to reorganize the file or folder structure.
To add a Document Navigator task flow to a page, refer to Section 43.4, "Adding a Documents Service Task Flow to a Page." In the Resource Catalog, open Content Management, then click Add next to Document Navigator to display the default listing of folders in the root folder of the active content repository connection.
Note:
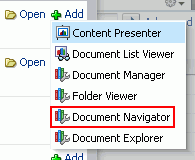
The Document Navigator task flow is not shown under Content Management in the default Resource Catalog provided out-of-the-box with Spaces, so you will only see an entry for this task flow if it has been added to a custom Resource Catalog that has been made available to the page. However, if you navigate to a specific folder in the default Resource Catalog, this task flow is selectable from the Add menu for the folder (Figure 43-20).
For information about creating a custom Resource Catalog, see Chapter 16, "Working with Resource Catalogs,", specifically Section 16.3.1.2, "Adding Resources" (in the Add Resource Catalog Item dialog, select Task Flows, then scroll to Documents for a list of all available content task flows).
43.1.4.1 Changing the Document Navigator Task Flow Default Listing
You can change the default listing displayed in a Document Navigator task flow in either of the following ways:
Selecting a Specific Folder in the Resource Catalog
To change the default listing displayed in a Document Navigator task flow by selecting a specific folder to display:
-
Drill down to a target folder in the Resource Catalog, then click the corresponding Add link, and select Document Navigator (Figure 43-20). For more information, see Section 43.3, "Adding a Selected Folder or File to a Page."
To change the default listing displayed in a Document Navigator task flow by modifying the task flow properties:
-
Edit the page, and click the properties Edit icon (wrench) in the task flow chrome (Figure 43-21) to open the Component Properties dialog.
-
To change the target folder, set the
Connection NameandStart Folder Pathproperties on the Parameters tab (see Table 44-4, "Document Navigator Task Flow Parameters").
43.1.5 Understanding the Folder Viewer Task Flow
The Folder Viewer task flow displays the contents of a folder in a single pane as a flat listing (Figure 43-22), providing in-place preview and editing of the contents of the folder, and robust document management capabilities with a straightforward interface that should be familiar to Windows users. The size of this task flow is medium to full page width.
In the Folder Viewer task flow, you can:
-
Click a folder to display the contents of that folder, and drill down further into subfolders.
-
Click a file to display a preview of the file contents in the Document Viewer preview pane, with file management options, including editing for some file types. If the file type does not support a preview (for example,
.mp3music files, video files, or.zipfiles), the preview pane displays the file properties. See Section 43.1.7, "Understanding the Document Viewer Task Flow." -
Click in a row (not on the folder or file name) in the right pane to perform menu actions on the folder or file in that row (see Section 43.5.1, "Menus and Actions in the Documents Service Task Flows").
Alternatively, right-click a folder or file to display a context menu of available actions (see Section 43.5.1.6, "Folder Context Menu" and Section 43.5.1.7, "File Context Menu").
-
Drag and drop folders and files in the task flow hierarchy to reorganize the file or folder structure.
To add a Folder Viewer task flow to a page, refer to Section 43.4, "Adding a Documents Service Task Flow to a Page." In the default Resource Catalog, open Content Management, then click Add next to Folder Viewer to display the default listing of folders and files in the root folder of the active content repository connection.
43.1.5.1 Changing the Folder Viewer Task Flow Default Listing
You can change the default listing displayed in a Folder Viewer task flow in either of the following ways:
Selecting a Specific Folder in the Resource Catalog
To change the default listing displayed in a Folder Viewer task flow by selecting a specific folder to display:
-
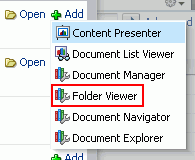
Drill down to a target folder in the Resource Catalog, then click the corresponding Add link, and select Folder Viewer (Figure 43-23). For more information, see Section 43.3, "Adding a Selected Folder or File to a Page."
To change the default listing displayed in a Folder Viewer task flow by modifying the task flow properties:
-
Edit the page, and click the properties Edit icon (wrench) in the task flow chrome (Figure 43-24) to open the Component Properties dialog.
-
To change the target folder, set the
Connection NameandStart Folder Pathproperties on the Parameters tab (see Table 44-5, "Folder Viewer Task Flow Parameters").
43.1.6 Understanding the Recent Documents Task Flow
The Recent Documents task flow displays a listing of the files most recently created or modified by the current user (Figure 43-25).
In the Recent Documents task flow, you can:
-
Click a file to display a preview of the file contents in a separate Document Viewer preview window, with file management options, including editing for some file types. If the file type does not support a preview (for example,
.mp3music files, video files, or.zipfiles), the preview window displays the file properties. See Section 43.1.7, "Understanding the Document Viewer Task Flow."
To add a Recent Documents task flow to a page, refer to Section 43.4, "Adding a Documents Service Task Flow to a Page." In the default Resource Catalog, open Content Management, then click Add next to Recent Documents to display the most recently created or modified files in the current space.
The default property settings add a listing of the most recently created or modified files in the entire root folder of the active content repository connection to the page. See Section 44.7, "Setting Recent Documents Task Flow Properties" to modify the property settings for the Recent Documents task flow.
43.1.7 Understanding the Document Viewer Task Flow
The Document Viewer task flow can display:
-
Folder properties and settings. To show folder information in a Document Viewer task flow, you can set the task flow's
Item IDproperty to the ID of the target folder. See Section 44.8, "Setting Document Viewer Task Flow Properties." -
For files that do not support a preview (for example,
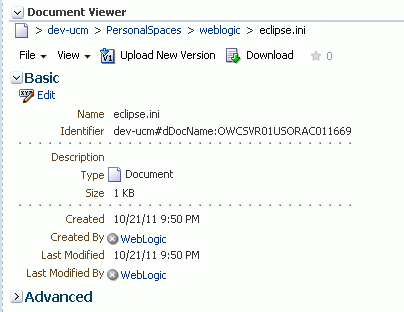
.mp3music files, video files, or.zipfiles), the file's properties (Figure 43-26). -
For file types that support a preview, a preview of the file's content. Under the preview, the Document Viewer includes the following tabbed panes:
-
Comments: Enter or delete comments for a file to provide additional information that you want to convey to other users about the file. See Section 43.19, "Viewing, Entering, and Deleting Comments on a File."
-
Tags: Specifies keywords related to the content of the file. Tags are useful for making a file more widely discoverable in search results. See Section 43.20, "Working with Tags."
-
History: Provides version information about the current file, and allows you to selectively delete versions. For more information, see Section 43.21, "Viewing and Deleting File Version History."
-
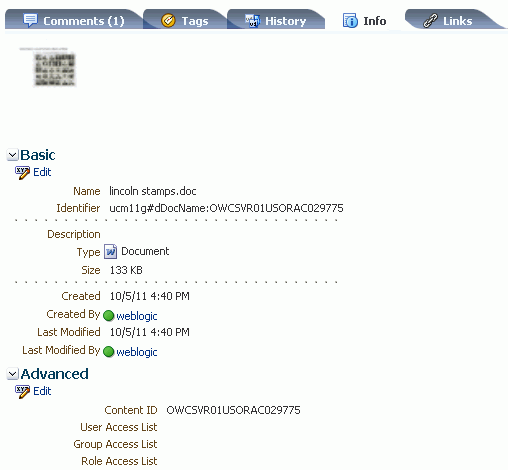
Info: Provides the option to edit some properties such a file name and description. In the Advanced section, displays metadata property settings for the file. See Section 43.22, "Viewing and Modifying Folder and File Properties."
-
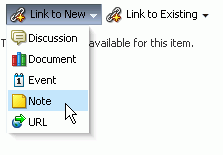
Links: Provides a way to view, access, and associate related information by linking a file to a discussion, document, event, note, or URL. For example, you can create a link to associate a project plan document with a list of project issues. See Section 43.24, "Working with Links."
-
Recommendations: Provides suggestions of other documents you might want to view, based on the current document. This list uses the Similar Items task flow of the Activity Graph service, which must be configured to display this pane. See Section 43.25, "Working with Recommendations."
-
For file types that support content preview, the Document Viewer task flow includes selections unique to the file type:
-
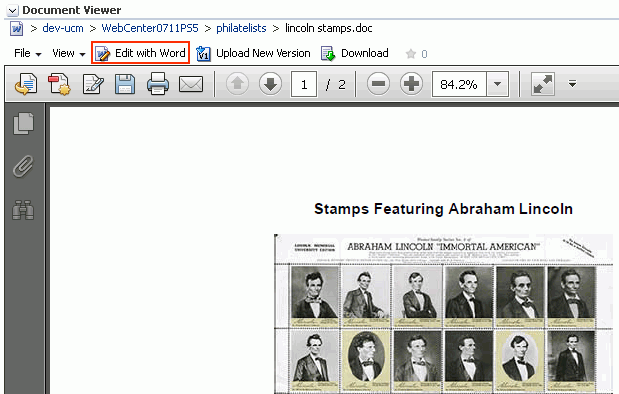
A preview of a Microsoft Office document includes an Edit with
Applicationaction to open the file in-place in its Microsoft Office application (Figure 43-27). -
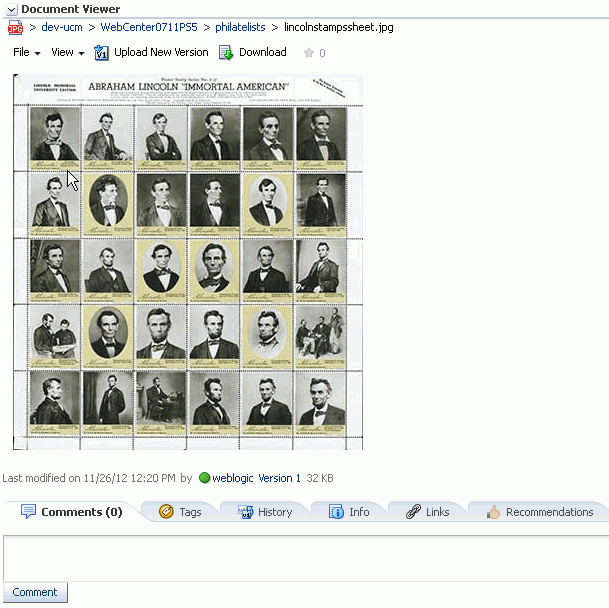
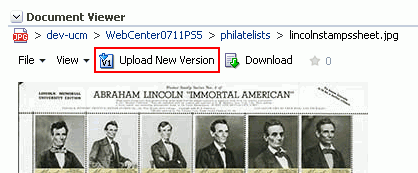
A preview of an image includes only the selections available to all file types: File menu, View menu, Upload New Version action, and Download action (Figure 43-28).
-
A preview of an HTML file or a wiki document includes an Edit action to open the HTML file or wiki document in the Rich Text Editor (RTE) (Figure 43-29).
-
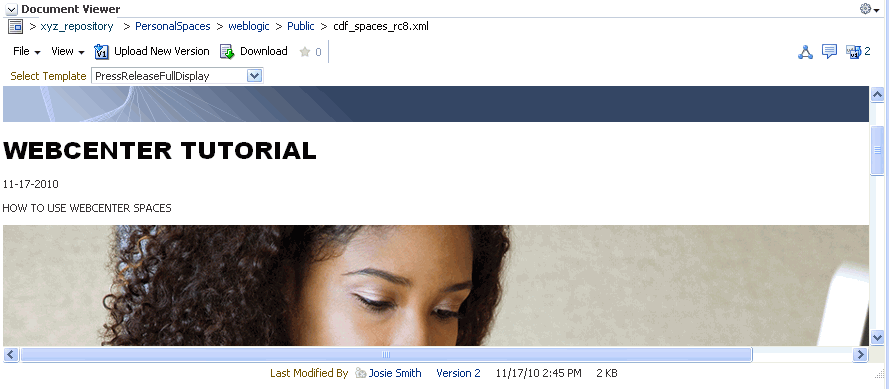
A preview of an Oracle Site Studio file includes a Select Template menu for choosing a Site Studio region display template or a custom Content Presenter display template to preview how the Site Studio file will look in the selected template (Figure 43-30).
Note:
The Document Viewer task flow is intended to provide only a preview of Site Studio content based on a selected template. To publish the content on a page, use the Content Presenter task flow. See Chapter 42, "Publishing Content Using Content Presenter."
To add a Document Viewer task flow to a page, refer to Section 43.3, "Adding a Selected Folder or File to a Page." In the default Resource Catalog, open Content Management, navigate to the folder or file that you want to add to the page, then click the Add link next to the folder or file, and select Document Viewer.
For information about setting properties on the Document Viewer task flow, see Section 44.8, "Setting Document Viewer Task Flow Properties."
43.1.8 Understanding the Document Mini Properties Task Flow
The Document Mini Properties task flow can display:
-
Folder properties and settings. To show folder information in a Document Mini Properties task flow, you can set the task flow's
Resource IDproperty to the ID of the target folder. See Section 44.9, "Setting Document Mini Properties Task Flow Properties." -
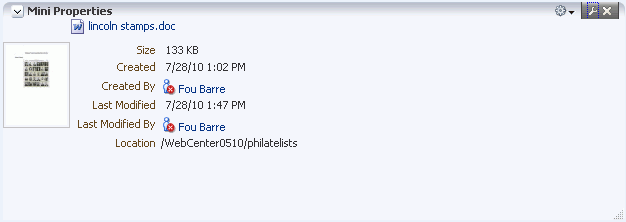
The Basic properties of an individual file in a read-only view (Figure 43-31). This choice is available for all file types.
To add a Document Mini Properties task flow to a page, refer to Section 43.3, "Adding a Selected Folder or File to a Page." In the default Resource Catalog, open Content Management, navigate to the folder or file that you want to add to the page, then click the Add link next to the folder or file, and select Mini Properties.
For information about setting properties on the Mini Properties task flow, see Section 44.9, "Setting Document Mini Properties Task Flow Properties."
43.1.9 Understanding the Document Properties Task Flow
The Document Properties task flow can display:
-
Folder properties and settings. To show folder information in a Document Properties task flow, you can set the task flow's
Item IDproperty to the ID of the target folder. See Section 44.10, "Setting Document Properties Task Flow Properties." -
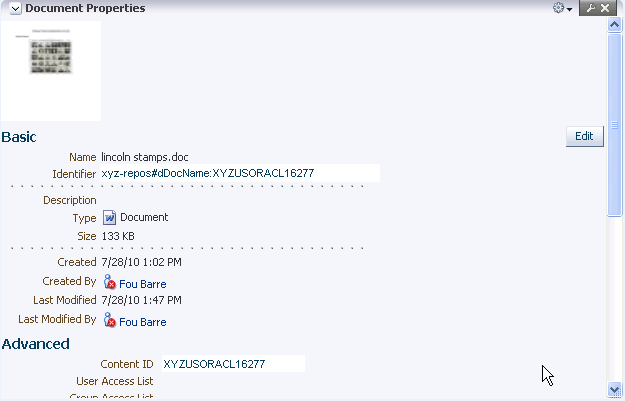
Both Basic and Advanced properties of an individual file, along with an Edit button to allow you to modify property values (Figure 43-32). This choice is available for all file types. See Section 43.22, "Viewing and Modifying Folder and File Properties."
To add a Document Properties task flow to a page, refer to Section 43.3, "Adding a Selected Folder or File to a Page." In the default Resource Catalog, open Content Management, navigate to the folder or file that you want to add to the page, then click the Add link next to the folder or file, and select Document Properties.
For information about setting properties on the Document Properties task flow, see Section 44.10, "Setting Document Properties Task Flow Properties."
43.1.10 Understanding the Document Version History Task Flow
The Document Version History task flow displays a list of versions of an individual file, allowing for deletion of a selected version (Figure 43-33 and Figure 43-34). This choice is available for all file types. See Section 43.21, "Viewing and Deleting File Version History."
Figure 43-33 Version History Task Flow for File: vertical layout (Horizontal Layout property deselected (default))

To add a Document Version History task flow to a page, refer to Section 43.3, "Adding a Selected Folder or File to a Page." In the default Resource Catalog, open Content Management, navigate to the file that you want to add to the page, then click the Add link next to the file, and select Version History.
You can set the Horizontal Layout property of the task flow to specify whether you want the version history information to format vertically (Figure 43-33) or horizontally (Figure 43-34). For information about setting properties on the Document Version History task flow, see Section 44.11, "Setting Document Version History Task Flow Properties."
43.2 What You Should Know About Document Components
The Documents service provides features for adding document components to a page in a Spaces application. As described in Section 43.3, "Adding a Selected Folder or File to a Page", you use the Resource Catalog to add a document component to a page as a container for a selected folder or file (Figure 43-35).
Document components enable you to display an individual file on a page in a variety of ways, depending on the file type:
-
A document Link displays the name of a selected file as a link, which end users can click to display the file content in its native application (Figure 43-36).
-
A document Inline Frame displays the content of a selected file as a preview (Figure 43-37).
-
A document Image displays a selected file as an image (Figure 43-38).
Table 43-3 shows the content types that support each of these document components.
Table 43-3 Components for Folders and Files
| Content Type | Document Components |
|---|---|
|
Documents of various types (XML, PDF, JAVA, TXT, DOC, XLS, HTM) |
Link |
|
Documents that can be rendered in a browser (HTML, flash, PDF and image) |
Inline frame |
|
Images (PNG, JPG, GIF) |
Link Inline Frame Image |
To display a folder or file using one of these document components, see Section 43.3, "Adding a Selected Folder or File to a Page."
43.3 Adding a Selected Folder or File to a Page
You can display an individual folder or file from a connected content repository on a page, by choosing the required container for the selected folder or file in the Resource Catalog, as shown in Figure 43-39 and Figure 43-40.
Note:
When you add a folder or file from Content Server to a page in a Spaces application, it can be viewed and managed from within Spaces. However, any folder shortcuts created in Content Server cannot be viewed and managed from within Spaces.
Table 43-4 lists all containers available for displaying folders and files on a portal page.
Table 43-4 Adding Individual Folders and Files to a Page
| For Folders | For Individual Files |
|---|---|
|
|
Footnote 1 To show folder information in a Document Viewer, Document Mini Properties, or Document Properties task flow, you can set the task flow's resource ID parameter to the ID of the target folder. See Chapter 44, "Setting Documents Service Task Flow and Document Component Properties."
For more information about any of the containers listed inTable 43-4, see Section 42.1, "What You Should Know About the Content Presenter Task Flow," Section 43.1, "What You Should Know About the Documents Service Task Flows," and Section 43.2, "What You Should Know About Document Components."
Note:
Another way of adding folders and files to a page is through a custom navigation model added to a page. Spaces application designers can build custom navigation models, which can be added to the page templates for a space to allow end users to navigate the documents in the space. For more information, see Section 12.2.2.1.1, "Adding a Document to a Navigation Model."
Note:
When an item that is stored in a content repository is added to a page, the Spaces application instructs the browser to check whether the content is up-to-date before a cached copy, if available, displays in the browser. The default content validation process supports collaboration use cases that require real-time content exchange.
For static content or content that does not change frequently, content validation checks incur an unnecessary performance overhead. For static content, Oracle recommends the following:
-
Content Server: use Content Presenter to display static content stored in Content Server. Content Presenter shows the latest released version of content; and provides controls to preview unreleased content that is in workflow.
-
Other content repositories, such as SharePoint: ask your administrator to override the default content cache setting by editing the Web Tier
mod_wl_ohsconfiguration file (mod_wl_ohs.conf). This is fully explained in "Setting the Cache-Control Response Header" in the white paper "Integrating the SharePoint 2007 Adapter with Spaces" available from Oracle Technology Network athttp://www.oracle.com/technetwork/middleware/webcenter/overview/index.html.
To add a selected folder or file to a page in a Spaces application:
-
Go to the page where you want to add a folder or file, and open the page in edit mode.
See Also:
For more information, see Section 18.1, "Entering and Exiting Composer."
-
Click Add Content in the target region to open the Resource Catalog.
-
Navigate to the section of the Resource Catalog that provides access to the folders and files in the connected content repository.
Tip:
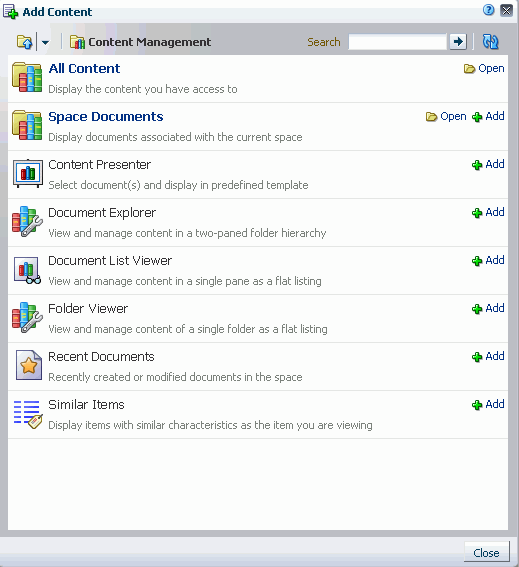
The presence or location of this section depends on how the Resource Catalog is configured. For example, in the default Resource Catalog, next to Content Management, click Open to expose the content selections (Figure 43-41).
-
The next link you click depends on your current location in the application. If you are using the default Resource Catalog (Figure 43-42):
-
Click All Content to display all folders and files to which you have access.
-
In a space, click Space Documents, which provides a shortcut to a list of all of the folders and files to which you have access in the current space. This selection is shown only if the Documents service is enabled in the space (see Section 53.10, "Managing Space Services").
-
In the Home space, click Personal Documents, which provides a shortcut to a list of all the folders and files to which you have access in the Home space.
-
-
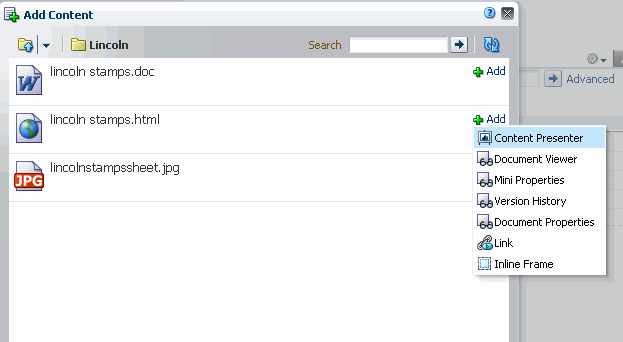
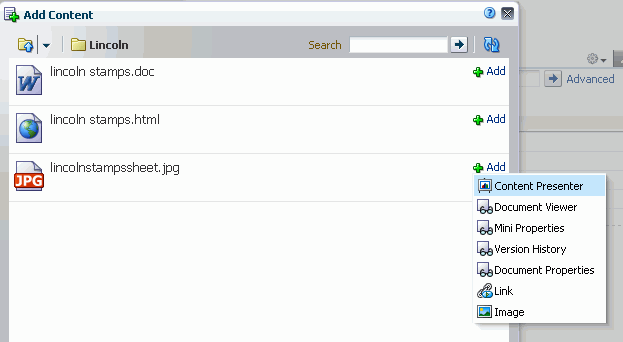
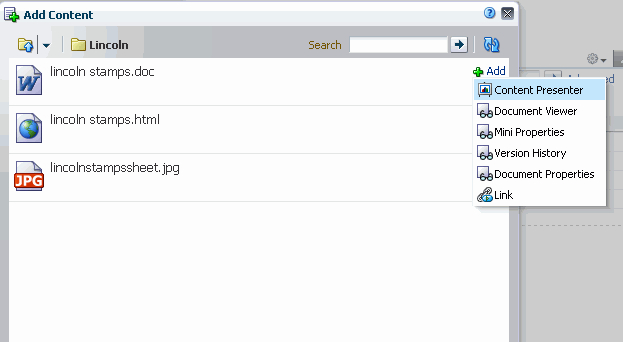
Continue to drill down into folders until you arrive at the folder or file that you want to add to the page, then click the Add link next to the folder or file to display a menu of available containers for the folder or file, applicable to the file type (Figure 43-43, Figure 43-44, Figure 43-45, and Figure 43-46).
Note:
When you drill down to the folders and files in the connected content repository, you are drilling into the live connection with the content repository. The documents you see listed are not static resources, but reflect the latest status of folders and files in the content repository associated with your Spaces application.
-
Select the content task flow or document component that you wish to use. The menu displays only those containers that support the selected folder or file.
Note:
The Content Presenter task flow is available only when the connected content repository is Content Server. When you select the Content Presenter task flow, the folder or file displays in a default display template for its type. For more information, see Chapter 42, "Publishing Content Using Content Presenter."
-
Click Save, then Close.
43.4 Adding a Documents Service Task Flow to a Page
See Section 43.1, "What You Should Know About the Documents Service Task Flows" to help you select the task flow most appropriate for your needs.
If you want to add and manage a specific folder or file in a Documents service task flow, refer to Section 43.3, "Adding a Selected Folder or File to a Page." This section describes how to select and add a Documents service task flow independent of a specific folder or file. The task flow is autopopulated with the folders and files in the connected content repository.
To add a Documents service task flow to a page in a Spaces application:
-
Open the page in edit mode.
See Also:
For more information, see Section 18.1, "Entering and Exiting Composer."
-
Click Add Content in the target region to open the Resource Catalog.
-
Navigate to the section of the Resource Catalog that provides access to the folders and files in the connected content repository.
Tip:
The presence or location of this section depends on how the Resource Catalog is configured. For example, in the default Resource Catalog, next to Content Management, click Open to expose the content selections (Figure 43-47).
Figure 43-47 Opening the Content Management Section in the Resource Catalog
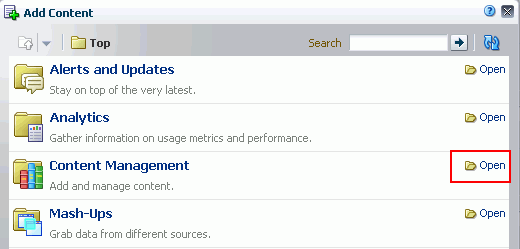
Description of "Figure 43-47 Opening the Content Management Section in the Resource Catalog"
For information about the selections shown in the default Resource Catalog, see Section 41.2, "What You Should Know About Content Management Selections in the Resource Catalog."
-
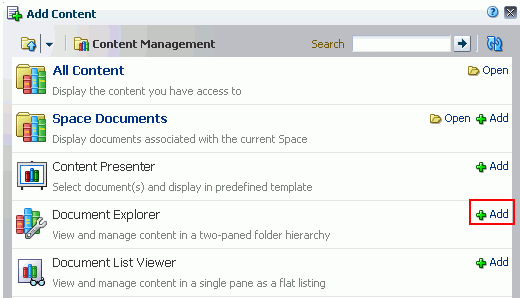
Click Add next to the task flow that you want to add to your page (Figure 43-48).
Note:
The Document Manager and Document Navigator task flows are not shown under Content Management in the default Resource Catalog provided out-of-the-box with Spaces, so you will only see entries for these task flows if they have been added to a custom Resource Catalog that has been made available to the page. However, if you navigate to a specific folder in the default Resource Catalog, these task flows are selectable from the Add menu for the folder (see Section 43.3, "Adding a Selected Folder or File to a Page").
For information about creating a custom Resource Catalog, see Chapter 16, "Working with Resource Catalogs", specifically Section 16.3.1.2, "Adding Resources" (in the Add Resource Catalog Item dialog, select Task Flows, then scroll to Documents for a list of all available content task flows).
In a space, if the Documents service is enabled (see Section 53.10, "Managing Space Services"), the selected task flow will by default display folders and files based on the primary content repository connection, or you can display only documents belonging to the space. If the Documents service is not enabled in a space, folders and files will not display in the task flow unless you edit the default task flow properties to specify a content repository (see Chapter 44, "Setting Documents Service Task Flow and Document Component Properties").
Use the menus and actions available in the Documents service task flow you have added to work with folders and files in the connected content repository, as described in Section 43.5, "Understanding the Documents Service Task Flow Menus and Actions."
43.5 Understanding the Documents Service Task Flow Menus and Actions
The Documents service task flows that offer content management functionality are Document Explorer, Folder Viewer, Document Manager, and the Document Viewer preview pane. The menus and actions for working with folders and files in these task flows are summarized in the tables below:
-
Table 43-5, "Documents Service Task Flow Menus and Actions for Folders and Files"
-
Table 43-6, "Document Viewer Preview Pane Menus and Actions for Folders and Files"
More detail is provided in the following sections:
-
Section 43.5.1, "Menus and Actions in the Documents Service Task Flows"
-
Section 43.5.2, "Menus and Actions in the Document Viewer Preview Pane or Window"
Table 43-5 Documents Service Task Flow Menus and Actions for Folders and Files
| Menu | Actions | In Document Explorer, Folder Viewer, and Document Manager, applicable to: |
|---|---|---|
|
EditFoot 1 |
file |
|
|
Upload New VersionFoot 2 |
file |
|
|
Check OutFoot 3 |
file |
|
|
Cancel Check OutFoot 4 |
file |
|
|
New Folder |
folder |
|
|
Rename |
folder or file |
|
|
Cut |
folder or file |
|
|
Copy |
folder or file |
|
|
Paste |
folder or file |
|
|
Delete |
folder or file |
|
|
Share |
file |
|
|
SecurityFoot 5 |
folder or file |
|
|
Details |
folder or file |
|
|
Get a Link |
folder or file |
|
|
Containing Folder Info |
folder or file |
|
|
Refresh Content |
folder or file |
|
|
Hide Folders |
folder or file |
|
|
Columns submenu |
folder or file |
|
|
Reorder Columns |
folder or file |
|
|
file |
||
|
file |
||
|
file |
Footnote 1 Folder/file listing pane: In-place editing available for wiki documents, blog posts, HTML, and Microsoft Office (Word, Excel, PowerPoint) files only. Wiki documents and HTML files open in RTE; Office files open in their corresponding application.
Footnote 2 Upload New Version not available for wiki documents.
Footnote 3 Check Out not available for wiki documents.
Footnote 4 Cancel Check Out not available for wiki documents.
Footnote 5 Security available only if the Spaces administrator has configured item-level security between Content Server and Spaces.
The Document Viewer preview pane opens when you:
-
Right-click a folder and select Details from the folder context menu (Figure 43-54) to display the details of that folder.
-
Click a file to display a preview of file contents. This allows for file previewing and editing for some file types. If the file type does not support a preview (for example,
.mp3music files, video files, or.zipfiles), the Document Viewer preview pane displays details about the file. See Section 43.1.7, "Understanding the Document Viewer Task Flow."
Table 43-6 summarizes the folder and file management options in the Document Viewer preview pane.
Table 43-6 Document Viewer Preview Pane Menus and Actions for Folders and Files
| Menu | Actions | In Document Explorer, Folder Viewer, and Document Manager, applicable to: |
|---|---|---|
|
Send Mail |
folder or file |
|
|
Subscribe |
file |
|
|
Share |
file |
|
|
Add To Favorites |
folder or file |
|
|
Check OutFoot 1 |
file |
|
|
Worklow Settings Foot 2 |
folder |
|
|
SecurityFoot 3 |
folder or file |
|
|
Open in BrowserFoot 4 |
file |
|
|
Open as PDFFoot 5 |
file |
|
|
Download PDFFoot 6 |
file |
|
|
Comments |
file |
|
|
Version History |
file |
|
|
Properties |
file |
|
|
Get a Link |
folder or file |
|
|
Refresh Content |
folder or file |
|
|
file |
||
|
file |
||
|
file |
Footnote 1 Check Out not available for wiki documents.
Footnote 2 Workflow Settings available only when content repository is Content Server and the Spaces administrator has completed the prerequisite configuration
Footnote 3 Security available only if the Spaces administrator has configured item-level security between Content Server and Spaces.
Footnote 4 Open in Browser available for image, text, and HTML files only.
Footnote 5 Open as PDF available for any file type for which Content Server is configured to convert to PDF.
Footnote 6 Download PDF available any file type for which Content Server is configured to convert to PDF.
Footnote 7 Edit or Edit with Application action available for wiki documents, blog posts, HTML, and Microsoft Office (Word, Excel, PowerPoint) files only.
Footnote 8 Upload New Version not available for wiki documents.
43.5.1 Menus and Actions in the Documents Service Task Flows
The following sections describe the purpose of the menus and actions listed in Table 43-5 when viewing a listing of folders and/or files in a Documents service task flow:
43.5.1.1 File Menu
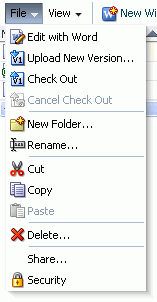
The File menu is available in the Document Manager, Document Explorer, and Folder Viewer task flows for folders and files. The actions available on the File menu (Figure 43-49) are:
-
Edit or Edit with Application: Active for wiki documents, HTML, and Microsoft Office (Word, Excel, and PowerPoint) files only. For a selected file, opens the file in-place in the application that corresponds to the file type and automatically checks the file out. See Section 43.12.4, "Editing Files In-Place."
-
Upload New Version: Inactive for folders and wiki documents. If you have write permissions on a selected file, opens the Upload Document pane where you can specify a new version of the file to upload to replace the existing file. See Section 43.12.5, "Uploading a New Version of an Existing File."
-
Check Out: Inactive for folders and wiki documents. For a selected file, checks the file out, locking it for update by other users. See Section 43.12.1, "Checking a File Out."
-
Cancel Check Out: Inactive for folders and wiki documents. For a selected file, cancels the checked out status without updating it, unlocking it to allowing other users to update it. See Section 43.12.1, "Checking a File Out."
-
New Folder: Opens the Create Folder dialog where you can specify a name for a new folder. The location of the new folder is dependent on the Documents service task flow used, and the current selection. See Section 43.7, "Creating a Folder."
-
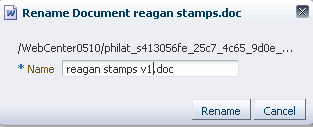
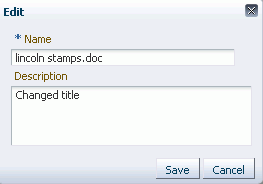
Rename: Opens the Rename dialog where you can rename the selected folder or file. See Section 43.13, "Renaming a Folder or File."
-
Cut: Stores the path to the selected folder(s) or file(s) to paste elsewhere. If a folder or file is not subsequently pasted, it is restored to the location where it was cut. If a folder or file is deleted at the source location before pasting, it will not be moved to the paste location. See Section 43.15, "Moving Folders and Files."
-
Copy: Stores the path to the selected folder or file to paste as a copy elsewhere. If a folder or file is deleted at the source location before pasting, it will not be copied to the paste location. See Section 43.14, "Copying and Pasting Folders and Files."
-
Paste: Pastes the folder or file in the buffer to the current folder. See Section 43.14, "Copying and Pasting Folders and Files."
-
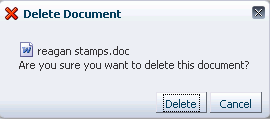
Delete: Deletes the selected folder or file. See Section 43.16, "Deleting Folders and Files."
-
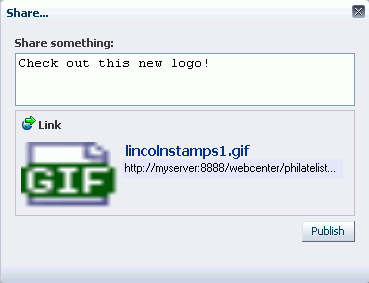
Share: Opens a dialog where you specify the users, groups, or select a space where the URL for the selected file will be published in activity streams, along with a message. See Section 43.27.3, "Publishing the URL for a File to Activity Streams."
-
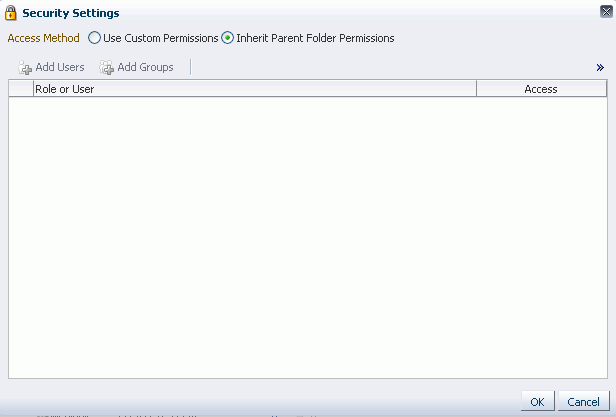
Security: Available only if the Spaces administrator has configured item-level security between Content Server and Spaces. Opens the Security Settings dialog, where you can set custom access permissions for the selected file, or select to inherit the permissions of the parent folder. For more information, see Section 43.23, "Setting Security Options on a Folder or File."
43.5.1.2 View Menu
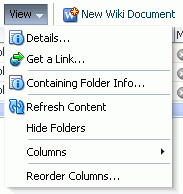
The View menu is available in the Document Manager, Document Explorer, and Folder Viewer task flows, as well as the Document List Viewer task flow, for folders and files. The actions available on the View menu (Figure 43-50) are:
-
Details: For a folder, opens a Properties pane (see Section 43.22, "Viewing and Modifying Folder and File Properties"). For a file, opens a preview of an individual file's content or properties. Previewing the content of a file is available for all file types that support a preview. For files that do not support a preview, such as audio or video files, the preview displays the file properties. Under the preview, the Document Viewer includes the following tabbed panes:
-
Comments: Enter or delete comments for a file to provide additional information that you want to convey to other users about the file. See Section 43.19, "Viewing, Entering, and Deleting Comments on a File."
-
Tags: Specifies keywords related to the content of the file. Tags are useful for making a file more widely discoverable in search results. See Section 43.20, "Working with Tags."
-
History: Provides version information about the current file, and allows you to selectively delete versions. For more information, see Section 43.21, "Viewing and Deleting File Version History."
-
Info: Provides the option to edit some properties such a file name and description. In the Advanced section, displays metadata property settings for the file. See Section 43.22, "Viewing and Modifying Folder and File Properties."
-
Links: Provides a way to view, access, and associate related information by linking a file to a discussion, document, event, note, or URL. For example, you can create a link to associate a project plan document with a list of project issues. See Section 43.24, "Working with Links."
-
Recommendations: Provides suggestions of other documents you might want to view, based on the current document. This list uses the Similar Items task flow of the Activity Graph service, which must be configured to display this pane. See Section 43.25, "Working with Recommendations."
By default, the Comments pane displays as the active pane. If you have previously launched the Document Viewer to preview a file in the current session, then select another file to preview, the active pane in the Document Viewer is the pane that you last selected when previewing the prior file.
-
-
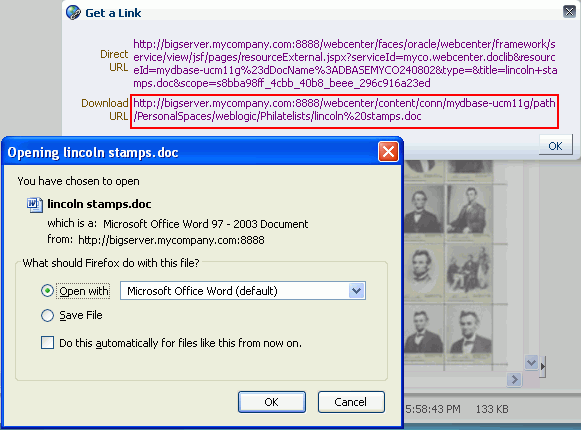
Get a Link: Opens the Get a Link dialog, where Direct URL provides a direct link to open the folder or file in Spaces or a WebCenter Portal: Framework application. For files, the Download URL provides a direct link to allow users to open the file in its default application, or choose to save the file to their local file system. See Section 43.27, "Sharing the URL for a Folder or File."
-
Containing Folder Info: Opens the Properties pane of the parent folder of the current folder or file. See Section 43.22, "Viewing and Modifying Folder and File Properties."
-
Refresh Content: Retrieves the contents of the current folder from the content repository to reflect all changes since the last retrieval. See Section 43.17, "Refreshing Folder Contents."
-
Hide Folders: Refreshes the listing to show only files in the current folder, or show folders if this action is currently active. See Section 43.18, "Hiding and Showing Folders."
-
Columns: Provides a submenu to select the columns that you want to display in the task flow. See Section 43.6.1, "Hiding and Showing Columns."
-
Reorder Columns: Opens the Reorder Columns dialog where you can organize the displayed columns into a different order. See Section 43.6.2, "Reordering Columns."
43.5.1.3 New Wiki Document Action
The New Wiki Document action is available in the Document Manager, Document Explorer, Document Viewer, and Folder Viewer task flows (Figure 43-51).
You can click this action to open the Rich Text Editor where you can define a new wiki document, created at the same level as the currently selected file, or in the current folder. See Section 43.8.2, "Creating a Wiki Document."
43.5.1.4 Upload Action
The Upload action is available in the Document Manager, Document Explorer, and Folder Viewer task flows (Figure 43-52).
You can click this action to upload files from your local file system or a network drive. See Section 43.8.1, "Uploading Files."
43.5.1.5 Download Action
The Download action is available in the Document Manager, Document Explorer, and Folder Viewer task flows (Figure 43-53).
You can click this action to save files to your local file system. See Section 43.12.3, "Downloading a File."
43.5.1.6 Folder Context Menu
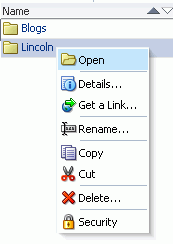
You can right-click a folder on the Documents page or in a Documents service task flow to display a context menu that provides a shortcut to many menu actions (Figure 43-54).
-
Open: Opens a folder to display its contents and make it the top-level folder. See Section 43.9, "Opening a Folder."
-
Details: Opens a Properties pane. See Section 43.22, "Viewing and Modifying Folder and File Properties."
-
Get a Link: Opens the Get a Link dialog, where Direct URL provides a direct link to open the folder in Spaces, and the Download URL provides a direct link to allow users to open the folder in its default application, or choose to save the file to their local file system. See Section 43.27, "Sharing the URL for a Folder or File."
-
Rename: Opens the Rename dialog where you can rename the selected folder. See Section 43.13, "Renaming a Folder or File."
-
Copy: Stores the path to the selected folder to paste as a copy elsewhere. If a folder is deleted at the source location before pasting, it will not be copied to the paste location. See Section 43.14, "Copying and Pasting Folders and Files."
-
Cut: Stores the path to the selected folder(s) to paste elsewhere. If a folder is not subsequently pasted, it is restored to the location where it was cut. If a folder or file is deleted at the source location before pasting, it will not be moved to the paste location. See Section 43.15, "Moving Folders and Files."
-
Delete: Deletes the selected folder. See Section 43.16, "Deleting Folders and Files."
-
Security: Available only if the Spaces administrator has configured item-level security between Content Server and Spaces. Opens the Security Settings dialog, where you can set custom access permissions for the selected folder, or select to inherit the permissions of the parent folder. For more information, see Section 43.23, "Setting Security Options on a Folder or File."
43.5.1.7 File Context Menu
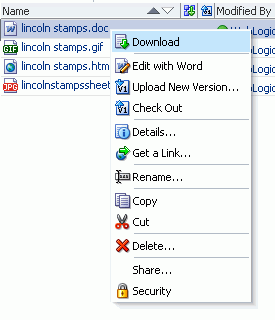
You can right-click a file on the Documents page or in a Documents service task flow to display a context menu that provides a shortcut to many menu actions (Figure 43-55):
-
Download: Available in the Document Manager, Document Explorer, and Folder Viewer task flows for saving files to the local file system. See Section 43.12.3, "Downloading a File."
-
Edit or Edit with Application: Active for wiki documents, HTML, and Microsoft Office (Word, Excel, and PowerPoint) files only. For a selected file, opens the file in-place in the application that corresponds to the file type and automatically checks the file out. See Section 43.12.4, "Editing Files In-Place."
-
Upload New Version: Inactive for folders and wiki documents. If you have write permissions on a selected file, opens the Upload Document pane where you can specify a new version of the file to upload to replace the existing file. See Section 43.12.5, "Uploading a New Version of an Existing File."
-
Check Out/Cancel Check Out: Inactive for folders and wiki documents. For a selected file, checks the file out, locking it for update by other users; or, cancels the checked out status without updating it, unlocking it to allowing other users to update it. See Section 43.12.1, "Checking a File Out."
-
Details: For a file, opens the Properties pane, with the option to edit some properties such a file name and description. In the Advanced section of the Properties pane, displays tabs for Comments, Tags, History, Links, and (if configured), Recommendations.
-
Get a Link: Opens the Get a Link dialog, where Direct URL provides a direct link to open the file in Spaces, and the Download URL provides a direct link to allow users to open the file in its default application, or choose to save the file to their local file system. See Section 43.27, "Sharing the URL for a Folder or File."
-
Rename: Opens the Rename dialog where you can rename the selected file. See Section 43.13, "Renaming a Folder or File."
-
Copy: Stores the path to the selected file to paste as a copy elsewhere. If a file is deleted at the source location before pasting, it will not be copied to the paste location. See Section 43.14, "Copying and Pasting Folders and Files."
-
Cut: Stores the path to the selected file(s) to paste elsewhere. If a folder or file is not subsequently pasted, it is restored to the location where it was cut. If a file is deleted at the source location before pasting, it will not be moved to the paste location. See Section 43.15, "Moving Folders and Files."
-
Delete: Deletes the selected file. See Section 43.16, "Deleting Folders and Files."
-
Share: Opens a dialog where you specify the users, groups, or select a space where the URL for the selected file will be published in activity streams, along with a message. See Section 43.27.3, "Publishing the URL for a File to Activity Streams."
-
Security: Available only if the Spaces administrator has configured item-level security between Content Server and Spaces. Opens the Security Settings dialog, where you can set custom access permissions for the selected file, or select to inherit the permissions of the parent folder. For more information, see Section 43.23, "Setting Security Options on a Folder or File."
43.5.2 Menus and Actions in the Document Viewer Preview Pane or Window
Table 43-5 shows which menus and actions are available when previewing a folder or file in the Document Viewer preview pane or window. The following sections describe the purpose of each available menu and action:
To open a folder or file in the Document Viewer:
-
Right-click a folder and select Details from the folder context menu (Figure 43-54) to display the details of that folder.
-
Click a file to display a preview of file contents. This allows for file previewing and editing for some file types. If the file type does not support a preview (for example,
.mp3music files, video files, or.zipfiles), the Document Viewer preview pane displays details about the file. See Section 43.1.7, "Understanding the Document Viewer Task Flow."
43.5.2.1 File Menu in Document Viewer
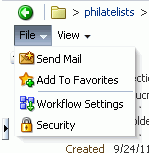
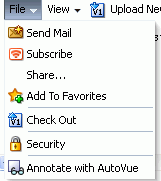
In the Document Viewer preview pane or window, you can select actions from the File menu for a folder (Figure 43-56) or a file (Figure 43-57).
The File menu includes the following actions:
-
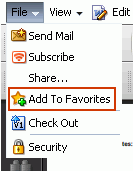
Send Mail: Opens your mail application with the body of the mail message showing the direct URL to the currently open folder or file, as well as the URL to the current space, if applicable. See Section 43.27.2, "Mailing the URL for a Folder or File."
-
Subscribe: Activates monitoring of the activities on a file. Whenever any change is made to the file, you will be notified in your personal Activity Stream in the Home space. See Section 43.28, "Subscribing to a File."
-
Share: Opens a dialog where you specify the users, groups, or select a space where the URL for the selected file will be published in activity streams, along with a message. See Section 43.27.3, "Publishing the URL for a File to Activity Streams."
-
Add To Favorites: Adds the selected folder or file to your Spaces Favorites list. See Section 43.30, "Adding a Folder or File to Your Favorites."
-
Check Out: Inactive for wiki documents. Checks the current file out, locking it from update by other users. See Section 43.12.1, "Checking a File Out."
-
Workflow Settings: Available only when the connected content repository is Content Server and the Spaces administrator has completed the prerequisite configuration. Opens the Workflow Settings dialog, where you can assign workflow to the selected folder in a space. For more information, see Section 45.2, "Assigning a Workflow to a Folder in a Space."
-
Security: Available only if the Spaces administrator has configured item-level security between Content Server and Spaces. Opens the Security Settings dialog, where you can set custom access permissions for the selected folder or file, or select to inherit the permissions of the parent folder. For more information, see Section 43.23, "Setting Security Options on a Folder or File."
-
Annotate with AutoVue: Available only when Oracle AutoVue is installed and the Spaces administrator has configured Oracle AutoVue functionality. Opens the selected file in the AutoVue file viewer on Content Server, where you can provide comments and individualized mark-up. For more information, see Section 47.3, "Collaborating on Documents Using Oracle AutoVue."
43.5.2.2 View Menu in Document Viewer
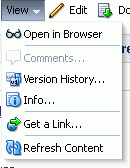
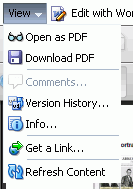
In the Document Viewer preview pane or window, you can select actions from the View menu for a folder (Figure 43-58) or a file (Figure 43-60).
The View menu includes the following actions:
-
Open in Browser: Active for images, text, wiki documents, and HTML files only. Opens the current file in your default browser application. See Section 43.10, "Opening a File."
-
Open as PDF: Active for any file type for which Content Server is configured to convert to PDF. Opens the current file in the Document Viewer preview pane in PDF. See Section 43.10, "Opening a File" and Section 43.26, "Opening or Saving PDF Files."
-
Download PDF: Active for any file type for which Content Server is configured to convert to PDF. Opens a browser dialog where you can choose to open the file with Adobe Acrobat Reader, or save it to your local file system as a PDF file. See Section 43.12.3, "Downloading a File" and Section 43.26, "Opening or Saving PDF Files."
-
Comments: Opens the Comments pane for the current file in the tabbed pane area at the bottom of the Document Previewer, providing a text input area where you can enter a comment for the file. See Section 43.19, "Viewing, Entering, and Deleting Comments on a File."
-
Version History: Opens the History pane for the currently selected file in the tabbed pane area at the bottom of the Document Previewer, showing the existing versions of the file, where you can delete selected versions. See Section 43.21, "Viewing and Deleting File Version History."
-
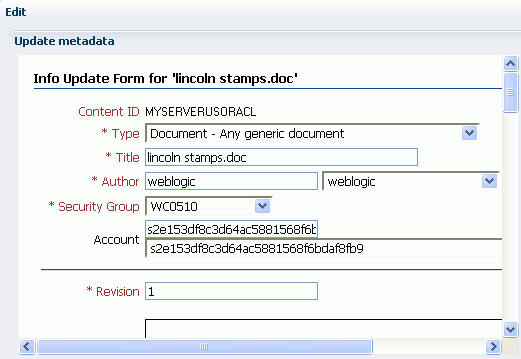
Info: Opens the Info pane for the currently selected file in the tabbed pane area at the bottom of the Document Previewer, where you can view and edit Basic and Advanced properties. See Section 43.22, "Viewing and Modifying Folder and File Properties."
-
Get a Link: Opens the Get a Link dialog for the current folder or file, where Direct URL provides a direct link to open the folder or file in Spaces, and the Download URL provides a direct link to allow users to open the folder or file in its default application, or choose to save the file to their local file system. See Section 43.27, "Sharing the URL for a Folder or File."
-
Refresh Content: Retrieves the current folder or file from the content repository to reflect all changes since the last retrieval.
43.5.2.3 Edit Action
The Edit or Edit with Application action is active for wiki documents, HTML, and Microsoft Office 2003 or higher files (Word, Excel, and PowerPoint) only, as shown in Figure 43-61 for a wiki document and Figure 43-62 for a Microsoft Word file.
Select this action to automatically check the current file out, and open it in-place in the Rich Text Editor (RTE) or its Microsoft application. See Section 43.12.4, "Editing Files In-Place."
43.5.2.4 Upload New Version Action
The Upload New Version action is active for all files except for wiki documents (Figure 43-63).
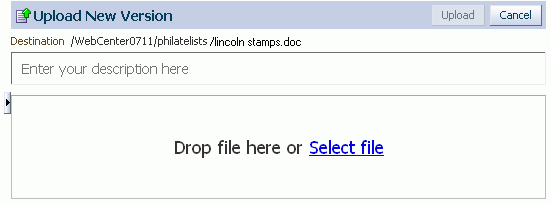
If you have write permissions on the current file, select this action to open the Upload Document screen where you can specify a new version of the file to upload. See Section 43.12.5, "Uploading a New Version of an Existing File."
43.5.2.5 Download Action
The Download action is active for all files (Figure 43-64).
Select this action to open a dialog to download the current file to your local file system. See Section 43.12.3, "Downloading a File."
43.6 Personalizing Your View of Documents
The Documents service supports personalizations that enable you to change your own view of a Documents service task flow by hiding or showing columns and by rearranging the list of documents according to the sort order of a particular column, as described in the following sections:
43.6.1 Hiding and Showing Columns
Hiding and showing one or more informational columns is useful for simplifying or expanding the details that are displayed with folders and files.
To hide or show informational columns in your unique view of a task flow:
-
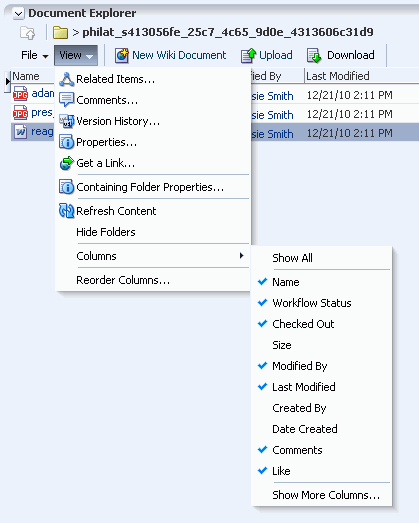
On the Documents page or in a Document Explorer, Document Manager, or Folder Viewer task flow, click the View menu, and select Columns (Figure 43-65).
-
Select or deselect individual columns to show or hide them, or select Show All to display all available columns.
If changes do not display immediately, click the View menu, and select Refresh Content.
43.6.2 Reordering Columns
Reordering the informational columns is useful for prioritizing the details that are displayed with folders and files, depending on the information in which you are most interested.
To reorder the informational columns in your unique view of a task flow:
-
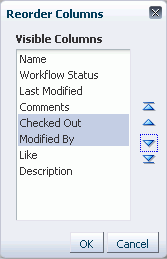
On the Documents page or in a Document Explorer, Document List Viewer, Document Manager, or Folder Viewer task flow, click the View menu, and select Reorder Columns.
The Reorder Columns dialog opens (Figure 43-66).
-
Select one or more columns, then click the reorder icons to rearrange the order of the columns in the task flow.
43.6.3 Sorting Files and Folders
Sorting columns enables you to quickly rearrange the order of files and folders in your view. Each task flow column provides a one-click sorting feature that you can use to instantly rearrange all task flow content according to the ascending (1, 2, 3, A, B, C) or descending (C, B, A, 3, 2, 1) order of a particular column.
To sort folders and files in your unique view of a Documents service task flow:
-
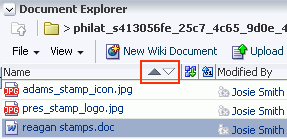
On the Documents page or in a Document Explorer, Document List Viewer, Document Manager, or Folder Viewer task flow, move your cursor over the header of the column you want to use to sort folders and files.
-
Click the Sort Ascending icon to sort the column in ascending order (1, 2, 3, A, B, C, or smallest to largest), or click the Sort Descending icon to sort the column in descending order (C, B, A, 3, 2, 1, or largest to smallest) (Figure 43-67).
Note:
The sorting icons display over the column that is the current sorting column. For other columns, the icons display when you hover your mouse pointer over the column name.
43.7 Creating a Folder
With appropriate permissions, you can create a folder in any Documents service task flow that displays folders. In the Document Manager task flow, when the task flow is configured as a Tree Table layout (see Section 43.1.3, "Understanding the Document Manager Task Flow") and the currently selected item is a file, the new folder is created in the same folder as that file; if the currently selected item is a folder, the new folder is created within that folder. In the Document Explorer or Folder Viewer task flows, the new folder is always created at the same level as the current location. When you create a new folder, this action is not reflected in the Activity Stream in the Home space
If you create a subfolder in a parent folder that is assigned a worfklow (see Section 45.2, "Assigning a Workflow to a Folder in a Space"), the subfolder inherits the workflow assignment of the parent folder.
Note:
Other methods to create and copy folders when the backend content repository is Content Server are:
-
Create a network place to a space, then use Windows Explorer to create and copy folders, as described in Section 48.4, "Working with Microsoft Windows Explorer Integration."
-
Use the task pane available through Microsoft Office shared document management functionality to create a new folder in a space, as described in Section 48.3.3.3, "Adding a New Folder."
To create a folder:
-
On the Documents page or in a Document Explorer, Document Manager, or Folder Viewer task flow, navigate to the folder under which to create the new folder.
-
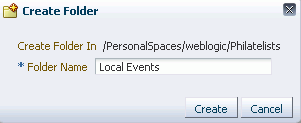
From the File menu, select New Folder.
The Create Folder dialog opens (Figure 43-68).
-
In the Folder Name field, enter a name for the folder; for example,
Local Events. -
Click Create to create the folder and close the dialog.
43.8 Creating a File
You can add new files to the connected content repository by either uploading them, or creating a new wiki document, as described in the following sections:
43.8.1 Uploading Files
Notes:
By default, the maximum upload size for files is 2 MB for Spaces applications. Your system administrator can customize the maximum file upload size by editing the uploadedFileMaxDiskSpace parameter in the webcenter-config.xml file. For details, see "webcenter-config.xml" in Oracle Fusion Middleware Administrator's Guide for Oracle WebCenter Portal.
You can upload new files from your local file system or a mapped network drive to the connected content repository, or refresh multiple existing files with new versions.
To upload a new version of a single existing file that already exists in the connected content repository, see Section 43.12.5, "Uploading a New Version of an Existing File."
Note:
Spaces does not support uploading a new wiki document or a new version of a wiki document from the file system. If you upload an HTML file, you cannot convert it to a wiki document due to differences in underlying metadata. For information about wiki documents in Spaces, see Chapter 49, "Working with Wiki Documents."
Note:
Other methods to upload files when the backend content repository is Content Server are:
-
Create a Windows network place to a space, then use Windows Explorer to add files of any type, as described in Section 48.4, "Working with Microsoft Windows Explorer Integration."
-
Use the Microsoft Office shared document management functionality to save a local Microsoft Word, Excel, or PowerPoint file, or use the task pane to add files of any type to the Content Server repository, as described in Section 48.3.3.2, "Adding a File."
-
Use WebDAV, which is installed with Content Server out-of-the-box, to establish a connection to your Spaces application, then drag and drop content in your Content Server repository to the folder assigned to the target space, or drag and drop content between spaces. When dragging and dropping content to the target folder, do not drag the source folder to the target; drag and drop only the content that is stored under the folder. If you do not know the WebDAV URL for the Content Server that is used to store documents, contact your Fusion Middleware Administrator. If the base URL for that Content Server is
http://host:port/relative_web_root, the WebDAV root URL will behttp://host:port/relative_web_root/idcplg/webdav. For example:http://wchost:16200/dav/cs/idcplg/webdav/ -
Use the Batch Loader utility, as described in "Batchloading Content" in Oracle Fusion Middleware System Administrator's Guide for Oracle Content Server.
To upload files to the connected content repository:
-
On the Documents page or in a Document Explorer, Document Manager, or Folder Viewer task flow, navigate to the folder for the file(s) you plan to upload or create a new folder (see Section 43.7, "Creating a Folder").
-
Click the Upload action (Figure 43-69).
The Upload Document pane opens, providing an area where you can add the file(s) to be uploaded.
Note:
Your system administrator can set the appearance of the Upload Document pane. You will either:
-
(Default) Add files through drag and drop or multi-select, optionally providing a single description that applies to all files (see Section 43.8.1.1.1, "Using the Default Upload Document Pane").
-
Or, add files one at a time, optionally providing a description for each file (see Section 43.8.1.1.2, "Using the Multi-Description Upload Document Pane").
For information about this setting, see “Modifying the Upload Document Pane” in Oracle Fusion Middleware Administrator's Guide for Oracle WebCenter Portal.
-
-
Follow the steps in one of the following sections, depending on whether or not a file is associated with a content profile in Content Server:
43.8.1.1 Uploading One or More Files without a Content Profile
To upload one or more files without an associated content profile, follow the steps for the Upload Document pane configured by your system administrator:
-
Section 43.8.1.1.1, "Using the Default Upload Document Pane"
-
Section 43.8.1.1.2, "Using the Multi-Description Upload Document Pane"
43.8.1.1.1 Using the Default Upload Document Pane
To upload files when the Upload Document pane looks like Figure 43-70:
Figure 43-70 Option 1: Upload Document Pane (in FireFox browser)

Description of "Figure 43-70 Option 1: Upload Document Pane (in FireFox browser)"
-
Select the file(s) to upload, in either of the following ways:
-
(In FireFox, Chrome, or Safari browsers) Select the file(s) in your local file system and drag them into the Upload Document pane.
-
Or, click Select files to navigate to and select the file(s) you want to upload.
-
-
In the Upload Document pane, optionally enter a description of the file(s) in the Description field. This description is assigned to all the files in the upload set.
If the file(s) already exist in the connected content repository, select Always create a new version to create a new version of the file(s). Deselect the check box if you want to be notified if a file with the same name already exists in the target folder in the content repository.

-
Click Upload to add the specified files at the same level as the currently selected file, or under the currently selected folder.
-
If a file with the same name already exists in the target folder, and Always create a new version is selected, a new version of the file is added at same level as the currently selected file. See Section 43.21, "Viewing and Deleting File Version History."
-
If a file with the same name already exists in the target folder, and Always create a new version is selected, but the file is checked out by another user, an Information dialog notifies you that the file cannot be uploaded and provides the name of the user who has it checked out.
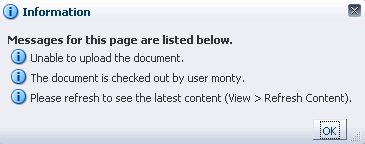
-
If a file with the same name already exists in the target folder, and Always create a new version is not selected, the Resolve Name Conflict pane opens. The figures below show the panes for files that are checked in, and checked out by another user, respectively.
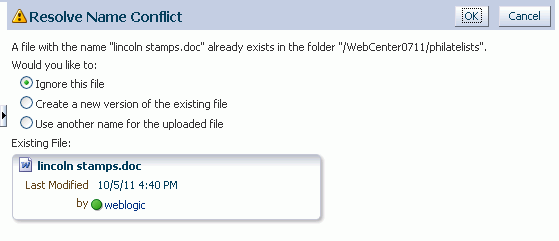
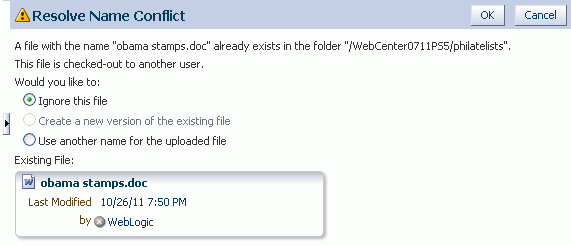
Select the desired action:
-
Ignore this file to cancel the upload operation for the current file. This is useful when uploading multiple files to skip only the current file, and continue to upload subsequent files in the batch.
-
Create a new version of the existing file to create a new version of the file. See Section 43.21, "Viewing and Deleting File Version History."
If the file is already checked out to another user, this selection is disabled.
If you do not have the permissions required to create a new version or overwrite the file, this selection is disabled.
-
Use another name for the uploaded file to display a Name field where you can enter a new name for the file. If you specify a name that matches another existing file, a message notifies you to enter a different name.
-
-
43.8.1.1.2 Using the Multi-Description Upload Document Pane
To upload files when the Upload Document pane looks like Figure 43-71:
-
For each file you want to upload:
-
Click Browse, and then navigate to and select the file you want to upload.
-
Optionally, provide a description of the file in the Description field.
-
-
Click More to add more files, up to a maximum of ten files.
-
Click Upload to add the specified files at the same level as the currently selected file, or under the currently selected folder.
-
If the file is already checked out to another user, the pane displays the message This file is checked-out to another user.
-
If a file with the same name already exists in the target folder, the Resolve Name Conflict pane opens.

Select the desired action:
-
Ignore this file to cancel the upload operation for the current file. This is useful when uploading multiple files to skip only the current file, and continue to upload subsequent files in the batch.
-
Create a new version of the existing file to create a new version of the file. See Section 43.21, "Viewing and Deleting File Version History."
If the file is already checked out to another user, this selection is disabled.
If you do not have the permissions required to create a new version or overwrite the file, this selection is disabled.
-
Use another name for the uploaded file to display a Name field where you can enter a new name for the file. If you specify a name that matches another existing file, a message notifies you to enter a different name.
-
-
43.8.1.2 Uploading a File with a Content Profile
If the original version of a file is associated with a content profile in Content Server, or if you want to associate a new file with a content profile, you must first select the content profile to open the Content Check In Form, where you will upload the file by itself. You cannot select a profile when uploading multiple files.
Selecting a content profile enforces uniformity by requiring values for certain metadata fields that must be provided before the file can be uploaded. For example, a press release profile might include fields about who to contact, release date, and so on.
Note:
To enable the Upload Profiles selection list, both of the following two requirements must be met:
-
You must access the Spaces application through Oracle HTTP Server (OHS) to expose Content Server and the Spaces application under the same host and port. For information about setting up OHS as the frontend to Spaces, see "Configuring Content Server for WebCenter Portal Applications" in Oracle Fusion Middleware Administrator's Guide for Oracle WebCenter Portal.
-
Spaces must be connected to a Content Server repository, with the
webContextRootparameter set to a Content Server host name. For information on settingwebContextRoot, see "Registering Content Repositories" in Oracle Fusion Middleware Administrator's Guide for Oracle WebCenter Portal. To setwebContextRootthrough WLST, see "createJCRContentServerConnection" and "setJCRContentServerConnection" in Oracle Fusion Middleware WebLogic Scripting Tool Command Reference.
To upload a file associated with a content profile:
-
Select the profile from the Upload Profiles list (Figure 43-72)
The Profile Upload pane displays the Content Check In Form, with metadata fields for the selected content profile (Figure 43-73).
-
In the Primary File field, specify the name of the file to be uploaded.
-
Enter values for other metadata field values to associate with the file.
Note:
Content Server may require certain mandatory metadata field values for a selected content profile to ensure a successful checkin. Mandatory fields are identified in the dialog by an asterisk and red text.
For information about content profile metadata field requirements for Content Server, refer to Oracle Fusion Middleware User's Guide for Oracle Content Server, specifically the chapter "Checking In Files". The fields described in the "Content Check-In Form" section in the appendix are mandatory for Content Server. All content profiles must include them, otherwise the checkin will fail.
In addition to the mandatory metadata field values required by Content Server for specific content profiles, every content profile must include additional metadata fields required by Spaces. For a list and descriptions of the required fields, which should be added to a content profile as hidden fields so that the end user cannot override the values populated by Spaces, see "What You Should Know About Creating Content Profiles in Content Server" in Oracle Fusion Middleware Administrator's Guide for Oracle WebCenter Portal.
-
Click Check In.
The specified file is uploaded and listed in the current folder in your space.
43.8.2 Creating a Wiki Document
In addition to uploading files (see Section 43.8.1, "Uploading Files") to the connected content repository, you can create wiki documents using either of the following two methods:
-
New Wiki Document action through Documents service task flows, as described in Section 49.4.1, "Creating a Wiki Document Using the New Wiki Document Action"
-
Wiki page style, as described in Section 49.4.2, "Creating a Wiki Document Using the Wiki Page Style"
For more information about wiki documents in Spaces, see Chapter 49, "Working with Wiki Documents."
43.9 Opening a Folder
You can open a folder to display its contents in all Documents service task flows except the Recent Documents task flow, which does not display folders.
Note:
Other methods to open folders when the backend content repository is Content Server are:
-
Create a network place to a space, then use Windows Explorer to open folders and files, as described in Section 48.4, "Working with Microsoft Windows Explorer Integration."
-
Use the task pane available through Microsoft Office shared document management functionality to open folders in a space, as described in Section 48.3.3.8, "Managing Folders"
To open a folder to display its contents and make it the top-level folder:
-
On the Documents page or in a Documents service task flow, either:
-
Click the folder name.
-
Or, right-click the folder, and select Open.
-
43.10 Opening a File
With appropriate permissions, you can open files of any type in all Documents service task flows to preview file contents or properties in a read-only view.
The Document Explorer, Document Manager, and Folder Viewer task flows open files in-place in a Document Viewer preview pane; the Document List Viewer and Recent Documents task flows open files in a separate Document Viewer preview window.
Note:
Another method to open files when the backend content repository is Content Server is:
-
Create a network place to a space, then use Windows Explorer to open folders and files, as described in Section 48.4, "Working with Microsoft Windows Explorer Integration."
To open a read-only view of a file:
-
On the Documents page or in a Documents service task flow, click the file name to open the file in a Document Viewer preview pane or window.
Notes:
-
Some file types do not support a preview. An attempt to open such a file displays the properties of the file in the Document Viewer.
-
For files of types that support a preview, the file must also support display in an inline frame to open in the Document Previewer. For example, if an HTML file includes coding that disallows display in an inline frame, it will not display in the Document Previewer, but instead overlays the current window with the HTML file content.
The appearance of the file in the preview pane or window depends on the file type:
-
For files that support PDF format: The file displays either in an in-place PDF viewer (Figure 43-74) or in a slide viewer (Figure 43-75).
Note:
To enable the slide preview functionality, both of the following two requirements must be met:
-
You must access the Spaces application through Oracle HTTP Server (OHS) to expose Content Server and the Spaces application under the same host and port. For information about setting up OHS as the frontend to Spaces, see "Configuring Content Server for WebCenter Portal Applications" in Oracle Fusion Middleware Administrator's Guide for Oracle WebCenter Portal.
-
Spaces must be connected to a Content Server repository, with the
webContextRootparameter set to a Content Server host name. For information on settingwebContextRoot, see "Registering Content Repositories" in Oracle Fusion Middleware Administrator's Guide for Oracle WebCenter Portal. To setwebContextRootthrough WLST, see "createJCRContentServerConnection" and "setJCRContentServerConnection" in Oracle Fusion Middleware WebLogic Scripting Tool Command Reference.
-
-
For HTML, text, image, XML files: In the preview pane or window, click the View menu, and select Open in Browser to open the file in a separate tab in your browser.
-
For any file type for which Content Server is configured to convert to PDF: In the preview pane or window, click the View menu, and select Open as PDF to open a PDF version of the file.
-
To edit files, see Section 43.12, "Editing and Updating a File".
43.11 Using the Rich Text Editor (RTE)
The Rich Text Editor (RTE) is a fully-integrated HTML text editor, which you can use to create and edit wiki documents and blog posts, and edit HTML files. Figure 43-76 shows create mode, and Figure 43-77 shows edit mode.
To use the RTE:
-
Open the RTE either by creating a new wiki document (see Section 43.8.2, "Creating a Wiki Document") or blog post (see Section 50.7.2, "Creating a Blog Post"), or editing a wiki (see Section 49.5, "Editing a Wiki Document", blog post, or HTML file (see Section 43.12.4, "Editing Files In-Place").
-
For a new wiki document or blog post, enter a display name in the Title field.
-
Add, revise, and preview text, formatting, styling, and links in the tabbed panes (see Section 43.11.1, "About the Rich Text Editor Tabbed Panes").
For information about using the toolbar and features in the Rich Text pane, see Section 43.11.2, "About the Rich Text Editor Toolbar", Section 43.11.3, "Working with Tables in the Rich Text Editor", and Section 43.11.4, "Using the Keyboard in the Rich Text Editor."
-
(For wiki documents and HTML files only) Select the Minor Edit? check box if you do not want to notify space members about your changes.
Leaving this check box deselected updates the Activity Stream and sends notifications after you save your changes.
-
In the tabbed panes along the bottom of the RTE, you can add comments, tags, links, and recommendations pertinent to the document or post. For more information, see Section 43.19, "Viewing, Entering, and Deleting Comments on a File," Section 43.20, "Working with Tags," Section 43.24, "Working with Links,", and Section 43.25, "Working with Recommendations."
-
Save your changes:
-
To create and save a new wiki document or blog post, click Create.
-
To save updates to an existing wiki document, blog post, or HTML file, click Save and Close.
-
43.11.1 About the Rich Text Editor Tabbed Panes
The RTE provides four tabbed panes where you can create and edit your wiki and HTML documents, and blog posts:
-
Rich Text. Create and revise content in a WYSIWYG environment using the icons and controls in the RTE toolbar (see Section 43.11.2, "About the Rich Text Editor Toolbar").
-
HTML. Enter HTML manually. This includes entering source code for HTML not handled by the WYSIWYG icons and controls on the Rich Text tab.
Notes:
-
The RTE ignores the following types of tags when entered in HTML because they are irrelevant or redundant within the RTE context:
-
script tags
-
form elements, such as
input,select,textarea, andform -
frame/frameset -
document tags, such as
html,head,body,meta, andtitle -
unknown tags; for example:
<foo></foo>
-
-
Changes to the behavior of the default CSS selectors in a wiki or blog is not supported.
-
-
Preview (wiki documents and blog posts only). Shows a preview of your wiki document or post as it will appear when published.
-
Wiki Markup (wiki documents only). Enter your own wiki markup. For the full set of wiki markup syntax, click the Wiki Markup Help icon (Figure 43-78) and refer to Table 43-7. Any formatting not provided by Wiki Markup uses HTML.
Table 43-7 Wiki Markup Syntax and Examples
Element Syntax Example Output italics
//string////Sales// teamSales team
bold
**string****Sales** teamSales team
bulleted list
*listItem**subitem**subitem*listItem* Managers:** John Smith** Monica Gallo* Contributors:
numbered list
#listItem##subitem##subitem#listItem# Dairy## Milk## Cheese# Bread
web link
[[URL|linkName]][[http://www.oracle.com|Search Oracle]][[http://fmw.vm.oracle.com:8888/webcenter/spaces/Philatelists/page/presidents|Presidents]]Search Oracle
Presidents
Click link to view target in browser window
WebCenter link
[[owc://svcId/rsrcId|linkName]]For a list of valid service IDs, see Table B-19, "Service IDs".
To find the resource ID, view the item properties (right-click and select Details, or see Chapter 44, "Setting Documents Service Task Flow and Document Component Properties.")
[[owc://oracle.webcenter.doclib/dev-ucm#dDocName:OWCSVR01USORAC026779|Results]]Results
Click link to view resource in browser window
Anchor for link target
<<<anchor:anchorName>>><<<anchor:forecast>>>(inserted at section describing sales forecast to act as a target for links)
(Invisible)
In HTML:
<a id="forecast" name="forecast"></a>Line break
\\xxxx\\ xxxxxxxx
xxxx
Horizontal line
----xxxx----xxxxxxxx
____________________
xxxx
Image
(All bowser-supported image types such as JPG, GIF, and PNG)
{{URL/imageFile|linkName}}[[http://www.myco.com/Sales/chart.jpg|Quarterly Sales]]Quarterly Sales
Click link to view image in browser window
Table
|=head|=head|...|=head||value|value|...|value|Repeat for each row of table
|=ID|=Name|=Dept||1356|Bob King|Sales|
43.11.2 About the Rich Text Editor Toolbar
Table 43-8 describes the RTE toolbar icons and controls on the Rich Text tab, where you can create and revise content in a WYSIWYG environment.
To perform an operation assigned to an icon, click the icon once to either immediately perform the action or open a dialog with further configuration options.
Table 43-8 Rich Text Editor Toolbar Icons and Controls on Rich Text Tab
| Control | Description |
|---|---|
|
|
Bold, Italic, Underline, and Strike Through. Select text, and click the desired font style icon; or click an icon, and enter text. Click the icon again to exit the font style. |
|
|
Paragraph Format. Select a format, then enter text; or highlight text, then select a format. |
|
|
Font Name. Select a font, then enter text; or highlight text, then select a font. |
|
|
Font Size. Select a size, then enter text; or highlight text, then select a size. |
|
|
Text Color or Background Color. Select text, and click the desired text or background color icon, then select a color. Or, click an icon and select a color, then enter text. Note: If you are using Internet Explorer 10 as your browser, the dropdown menus do not display. To display the Text Color and Background Color menus, use a different browser. |
|
|
Left Justify, Center Justify, and Right Justify. Select text, and click to apply the desired text alignment; or click an icon, and enter text. |
|
|
Decrease Indent and Increase Indent. Select text, and click the desired indent icon to move text left or right. |
|
|
Numbered List and Bulleted List. Start a new line, click the desired list type icon, and enter text. Or, select lines of text and click an icon. Click the icon again to remove the list formatting. Alternately, end list mode by pressing Enter twice after the last item. |
|
|
Remove Format. Select text, and click this icon to remove all font styling, such as font types, sizes, weights, and colors. Lists and indents are not affected. |
|
|
Select Resource. Select text to link to an existing Spaces resource, then click this icon to open the Select Resource dialog. Select a resource (for example, a document or an announcement in the current space, or a URL) to be linked from the selected text. Clicking the linked text in the document opens the selected resource in the Document Viewer preview pane. New Resource. Select text to link to a new Spaces resource, then click this icon to open the New Resource dialog. Select a resource to be linked from the selected text, then create the resource (for example, a discussion forum topic or note), specify the external location of the resource (for example, a URL), specify a name for the new resource (for example, a wiki document), or upload the resource from your local file system or a connected network drive (for example, a document). Note: If you create a new wiki document in this manner, Spaces creates a placeholder for the new wiki document in the current folder. To add content to the new wiki document, you must navigate to it and open it in the RTE. The links created using Select Resource and New Resource are created as inline links, and are not added to the Links tab associated with the details of the linking resource. For information about links to resources in Spaces, see Chapter 65, "Working with the Links Service." Embed Image. Click to open the Embed Image dialog:
|
|
|
Table. Click to open the Table Properties dialog: See Section 43.11.3, "Working with Tables in the Rich Text Editor." |
|
|
Insert Horizontal Line. Click to insert a horizontal line at the current cursor location. |
|
|
Tools:
Note: If you are using Internet Explorer 10 as your browser, the dropdown menu does not display. To display the Tools menu, use a different browser. |
|
|
Cut, Copy, or Paste. Select text, then right-click to displaya context menu to cut or copy selected text, or paste text in the buffer at the current cursor location. Note: If a browser security warning displays, you can either use keyboard commands (see Section 43.11.4, "Using the Keyboard in the Rich Text Editor") or configure your browser to grant access to the clipboard. For example, for the FireFox browser, see |
43.11.3 Working with Tables in the Rich Text Editor
To create a table in the RTE, click the Table icon in the toolbar (Figure 43-79).
The Table Properties dialog window opens (Figure 43-80), where you can set basic properties for the table, as described in Table 43-9.
Table 43-9 Rich Text Editor: Basic Table Properties
| Property | Description |
|---|---|
|
Rows |
(Required) Enter the number of rows in the table. |
|
Columns |
(Required) Enter the number of columns in the table. |
|
Width |
Enter the width of the table, selecting either pixels or a percent value. Giving the width as a percent value lets you set the proportion of the editing area that the table will occupy. |
|
Height |
Enter the height of the table in pixels. |
|
Headers |
Select the table element to format as headers, which applies special formatting to them. You can apply header formatting to First Row, First Column or Both. |
|
Alignment |
Select the alignment of the table on the page Left, Center, or Right. |
|
Cell spacing |
Enter he space between individual cells as well as cells and table borders, in pixels. |
|
Cell padding |
Enter the space between the cell border and its contents, in pixels. |
|
Caption |
Enter label text to be displayed above the table. |
|
Summary |
Enter a summary of the table contents that is available for assistive devices like screen readers. It is good practice to provide tables with meaningful summary text to make them more accessible to users with disabilities. |
Click the Advanced tab to expose the advanced table properties (Figure 43-81), which you can set as described in Table 43-10.
Table 43-10 Rich Text Editor: Advanced Table Properties
| Property | Description |
|---|---|
|
Id |
Enter a unique identifier for a table element in the document ( |
|
Language Direction |
Select the direction of the text in the table: left to right (LTR) or right to left (RTL) ( |
|
Style |
Enter the CSS style definitions ( |
|
Stylesheet Classes |
Enter the class of the table element ( |
With a table inserted into your document, you can enter values directly in the cells. Additional editing is available through the context menu (Figure 43-82). To open the context menu, right-click the table and select actions as described in Table 43-11.
Table 43-11 Rich Text Editor: Table Context Menu Selections
| Action | Description |
|---|---|
|
Paste |
Pastes the content on the clipboard at the current cursor location |
|
Cell |
See Section 43.11.3.1, "Editing Table Cells in the Rich Text Editor." |
|
Row |
See Section 43.11.3.2, "Editing Table Rows in the Rich Text Editor." |
|
Column |
See Section 43.11.3.3, "Editing Table Columns in the Rich Text Editor." |
|
Delete Table |
Deletes the entire table and its contents. |
|
Table Properties |
Opens the Table Properties dialog, where you can modify properties as described in Table 43-9, "Rich Text Editor: Basic Table Properties" and Table 43-10, "Rich Text Editor: Advanced Table Properties", with the exception of the number of rows and columns. |
43.11.3.1 Editing Table Cells in the Rich Text Editor
To insert, delete, merge, or cells, or modify cell properties, right-click a cell (the current cell) to display the context menu, then select Cell to expand the submenu of cell actions (Figure 43-83), and select actions as described in Table 43-12.
To select multiple cells, drag the mouse over the cell, then right-click to open the context menu.
Table 43-12 Rich Text Editor: Table Cell Menu Selections
| Action | Description |
|---|---|
|
Insert Cell Before |
Inserts a new cell before the current cell(s). |
|
Insert Cell After |
Inserts a new cell after the current cell(s). |
|
Delete Cells |
Deletes the current cell(s). |
|
Merge Cells |
Merges multiple selected cells into one. This option is available only if two or more cells are selected. |
|
Merge Right |
Merges the selected cell with a cell on its right. This option is available only if no more than one cell is selected. |
|
Merge Down |
Merges the selected cell with a cell located below it. This option is available only if no more than one cell is selected. |
|
Split Cell Horizontally |
Splits the selected cell in two, creating a new cell on its right. The content of the cell appears in the original, left cell. This option is available only if no more than one cell is selected. |
|
Split Cell Vertically |
Splits the selected cell in two, creating a new cell below it. The content of the cell appears in the original, upper cell. This option is available only if no more than one cell is selected. |
|
Cell Properties |
Opens the Cell Properties dialog, where you can configure cell size, type, color, and content alignment, as described in Section 43.11.3.1.1, "Editing Table Cell Properties in the Rich Text Editor." |
43.11.3.1.1 Editing Table Cell Properties in the Rich Text Editor
Table cells can be further customized, creating a unique look and feel. From the table context menu, select Cell, then Cell Properties to open the Cell Properties dialog (Figure 43-84) where you can set cel properties for the table, as described in Table 43-13.
Table 43-13 Rich Text Editor: Table Cell Properties
| Action | Description |
|---|---|
|
Width |
Enter the width of the cell, selecting either pixels or a percent value. Giving the width as a percent value lets you set the proportion of the row that the cell (and the column it is located in) will occupy. |
|
Height |
Enter the height of the cell in pixels. |
|
Cell Type |
Select the type of the table cell — either a normal data cell or a header cell with special formatting. |
|
Word Wrap |
Select whether or not to wrap content in the current cell. |
|
Rows Span |
Enter a numeric value to specify the number of rows over which to stretch the cell downward. This value sets the |
|
Columns Span |
Enter a numeric value to specify the number of columns over which to stretch the cell to the right. This value sets the |
|
Horizontal Alignment |
Select the horizontal alignment of table cell contents: Left, Center, or Right. |
|
Vertical Alignment |
Select the vertical alignment of table cell contents: Top, Middle, Bottom, or Baseline. |
|
Background Color Border Color |
Enter the color of the cell background and/or border using any of the following methods:
|
43.11.3.2 Editing Table Rows in the Rich Text Editor
To insert or delete rows in a table, right-click a row (the current row) to display the context menu, then select Row to expand the submenu of row actions (Figure 43-85), and select actions as described in Table 43-13.
To select multiple rows, drag the mouse over the rows, then right-click to open the context menu.
43.11.3.3 Editing Table Columns in the Rich Text Editor
To insert or delete columns in a table, right-click a column (the current column) to display the context menu, then select Column to expand the submenu of column actions (Figure 43-86), and select actions as described in Table 43-15.
To select multiple columns, drag the mouse over the columns, then right-click to open the context menu.
43.11.4 Using the Keyboard in the Rich Text Editor
The Rich Text Editor is compliant with several accessibility standards, including the Web Content Accessibility Guidelines (WCAG), the US Section 508 Amendment to the Rehabilitation Act of 1973, and the IBM Web Accessibility Checklist. To this end, you can use the RTE with the keyboard as well as a screen reader. The currently supported screen reader solution is JAWS.
For more information about accessibility in WebCenter Portal: Spaces, see Section 38.4, "Setting Your Accessibility Options."
Table 43-16 summarizes the keyboard keys and combinations available to you to navigate and edit text in the RTE.
Table 43-16 Rich Text Editor: Keyboard Usage
| Keyboard Keys | Description |
|---|---|
|
Alt+F10 |
Moves to the toolbar. |
|
Tab |
In the toolbar, moves to the next button group. In a dialog, moves to the next element. |
|
Shift+Tab |
In the toolbar, moves to the previous button group. In a dialog, moves to the previous element. |
|
Left Arrow/Right Arrow |
In the toolbar, moves between buttons within a button group. In a dialog, moves within a field. |
|
Enter |
In the toolbar, selects the current button or menu item, or expands a drop-down list or menu. In a dialog, confirms entry at current cursor location. |
|
Down Arrow/ Up Arrow |
Moves between selections in a drop-down list. |
|
Esc |
Closes a menu without executing any command. When inside a submenu, closes the submenu and returns focus to the parent context menu. Press Esc again to close it. (In a dialog, cancels entries and closes dialog (equivalent to clicking Cancel or Close). |
|
In the editing area: |
|
|
Shift+F10 |
Opens the context menu of the current element (use down arrow and up arrow to move between selections in the menu, and Enter to select an action). |
|
Alt+F10 |
Moves to the tab selection in a dialog (use left and right arrow keys to move between tabs, and Enter to move to the fields on a tab). |
|
Ctrl+A |
Selects the entire content in the editing area. |
|
Ctrl+B |
Changes the formatting of the selected text to bold or remove the bold formatting of the selected text. |
|
Ctrl+C |
Copies highlighted selections to the clipboard. |
|
Ctrl+I |
Changes the formatting of the selected text to italics or remove the italics from the selected text. |
|
Ctrl+U |
Underlines the selected text or remove the underline formatting of the selected text. |
|
Ctrl+V or Shift+Insert |
Pastes the content on the clipboard at the current cursor location. |
|
Ctrl+X or Shift+Delete |
Cuts highlighted selections to the clipboard. |
|
Ctrl+Y |
Performs the redo operation. |
|
Ctrl+Z |
Performs the undo operation. |
43.12 Editing and Updating a File
In a Documents service task flow or in the Document Viewer preview pane, you can check a file out, download it to your local file system for editing, edit a file in-place, or upload a new version of an existing file. The actions available to you depend on the file type:
-
For all file types except wiki documents, check the file out to lock it from being updated by other users.
-
For all file types, download the file to your local file system for saving or editing locally.
-
For wiki and HTML documents, edit the file in-place using the Rich Text Editor (RTE).
-
For all file types except wiki documents, upload a new version of the file.
The following sections provide more information:
43.12.1 Checking a File Out
When you want to retain exclusive use of a file—for example, when you're editing it on your local machine, or need to prevent other users from modifying it—you must check the file out. Other Spaces users can view the file, but they cannot upload a file of the same name into the same folder while the file is checked out.
Note:
When you edit a file in-place (see Section 43.12.4, "Editing Files In-Place"), it is automatically checked out of the content repository. When you save it, it is automatically checked back in.
When you're ready to release the file, you can either check the file back in, or cancel file check out. Checking a file back in involves uploading the revised file (see Section 43.12.5, "Uploading a New Version of an Existing File"). Cancelling check out removes the file's checked out status without requiring a file upload (see Section 43.12.2, "Cancelling a Checked Out Status".
Note:
To use the task pane available through the Microsoft Office shared document management functionality to check a Microsoft Word, Excel, or PowerPoint file out or in when the backend content repository is Content Server, see Section 48.3.3.4, "Checking a File Out" and Section 48.3.3.5, "Checking a File In"
To check a file out:
-
On the Documents page or in a Document Explorer, Document Manager, or Folder Viewer task flow, click in the row of the file you want to check out.
Alternatively, you can check out an open file in the Document Viewer preview pane.
Notes:
-
File check out is not available for wiki documents. In-place editing is the optimal way to update wiki documents, as described in Section 43.12.4, "Editing Files In-Place."
-
To check out a file in workflow, the file must be associated with a workflow that contains the step
review the current revision or create new revisionsand you must be an approver for the workflow. See Section 45.1.1, "Understanding Workflow Types."
-
-
Depending on your view, perform one of the following actions:
-
On the Documents page or in a Documents service task flow, click the File menu, and select Check Out, or right-click to display the file's context menu (Figure 43-55) and select Check Out.
-
In the Document Viewer preview pane, click the File menu, and select Check Out.
-
-
On the Documents page or in a Documents service task flow, click the View menu, and select Refresh Content to confirm that the Checked Out (padlock) icon appears in the file's Checked Out column:
-
Roll your mouse pointer over the icon to see details about the user who has checked the file out.
-
Click the icon to expose actions to upload a new version of the file, or cancel the checkout (Figure 43-87).
-
To cancel the checked out status of a file:
-
On the Documents page or in a Document Explorer, Document Manager, or Folder Viewer task flow, click in the row of the file.
Alternatively, you can cancel the checked out status of an open file in the Document Viewer preview pane.
-
Depending on your view, perform one of the following actions:
-
On the Documents page or in a Documents service task flow, click the Checked Out (padlock) icon in the file's row and select Cancel Check Out (Figure 43-87), click the File menu, and select Cancel Check Out, or right-click to display the file's context menu (Figure 43-55) and select Cancel Check Out.
-
In the Document Viewer preview pane, click the Cancel Check Out action.
-
-
On the Documents page or in a Documents service task flow, click the View menu, and select Refresh Content to confirm that the Checked Out (padlock) icon no longer appears in the file's Checked Out column.
43.12.2 Cancelling a Checked Out Status
To cancel the checked out status of a file:
-
On the Documents page or in a Document Explorer, Document Manager, or Folder Viewer task flow, click in the row of the file.
Alternatively, you can cancel the checked out status of an open file in the Document Viewer preview pane.
-
Depending on your view, perform one of the following actions:
-
On the Documents page or in a Documents service task flow, click the Checked Out (padlock) icon in the file's row and select Cancel Check Out (Figure 43-88), click the File menu, and select Cancel Check Out, or right-click to display the file's context menu (Figure 43-55) and select Cancel Check Out.
-
In the Document Viewer preview pane, click the Cancel Check Out action.
-
-
On the Documents page or in a Documents service task flow, click the View menu, and select Refresh Content to confirm that the Checked Out (padlock) icon no longer appears in the file's Checked Out column.
43.12.3 Downloading a File
When you want to save a file to your local file system, you can download it from the content repository.
To download a file:
-
On the Documents page or in a Document Explorer, Document Manager, or Folder Viewer task flow, click in the row of the file you want to download to your local file system.
Alternatively, you can download an open file in the Document Viewer preview pane.
-
Depending on your view and the file type, perform one of the following actions:
-
On the Documents page or in a Documents service task flow, click the Download action, or right-click to display the file's context menu (Figure 43-55) and select Download.
-
In the Document Viewer preview pane, click the Download action.
-
(For any file type for which Content Server is configured to convert to PDF) In the Document Viewer preview pane, click the View menu, and select Download PDF to save a PDF version of the open file to your local file system.
-
-
In the Open/Save dialog, select Save File to open the Save dialog, where you can navigate to the folder in which to save the file.
43.12.4 Editing Files In-Place
With appropriate permissions, end users can directly edit the following types of files in-place:
-
Wiki documents
-
Blog posts
-
HTML files
-
Microsoft Office 2003 or higher files (Word, Excel, PowerPoint)
Note:
If you are using Windows 7 or a 64-bit machine with Firefox 3.6, you may need to install the Java plugin available at
http://support.mozilla.comto edit a Microsoft Office file. This plugin is included in Java 6 Update 15 and above.
In-place editing refers to editing content directly in a Spaces application at runtime, where the editor opens in the document preview pane. When you edit a file in-place, it is automatically checked out of the content repository. When you save it, it is automatically checked back in.
To edit HTML and Site Studio files that display in a Content Presenter task flow, see Section 42.10, "Creating and Editing Files In-Context in a Content Presenter Task Flow."
To edit a file in-place:
-
On the Documents page or in a Document Explorer, Document Manager, or Folder Viewer task flow, click in the row of the file you want to edit, but not on the file name.
Alternatively, you can edit an open file in the Document Viewer preview pane.
-
Depending on your view and the file type, perform one of the following actions:
-
On the Documents page or in a Documents service task flow, click the File menu, and select Edit or Edit with Application, or right-click to display the file's context menu (Figure 43-55) and select Edit or Edit with Application.
-
In the Document Viewer preview pane, click the Edit (Figure 43-89) or Edit with Application (Figure 43-90) action.
Notes:
-
If the file is already checked out by another user, the the Document Viewer specifies the name of the user who has it checked out. See Section 43.12.4.1, "Opening a File Already Checked Out By Another User."
-
To edit a file in workflow, the file must be associated with a workflow that contains the step
review the current revision or create new revisionsand you must be an approver for the workflow. See Section 45.1.1, "Understanding Workflow Types."
The file opens in the appropriate editor:
-
Wiki documents, blog posts, and HTML files open in-place in the Rich Text Editor (RTE). For information about the RTE, see Section 43.11, "Using the Rich Text Editor (RTE)."
-
Microsoft Office (Word, Excel, PowerPoint) files may first display a confirmation prompt, then an authentication dialog. Use the same credentials used to log in to Spaces to open the file in-place in its corresponding application.
Note:
The user name and password must contain only ASCII characters. A user name or password containing multi-byte characters cannot be successfully authenticated.
When the connected content repository is Content Server, you must access the Spaces application through Oracle HTTP Server (OHS) to expose Content Server and the Spaces application under the same host and port to allow for full integration of Microsoft Office with Spaces. For information about setting up OHS as the front-end to Spaces, see "Configuring Content Server for WebCenter Portal Applications" in Oracle Fusion Middleware Administrator's Guide for Oracle WebCenter Portal.
Additionally, your Spaces administrator must modify system properties and server configuration files, and set up a virtual host for your Spaces application. These configuration requirements are described in "Managing Microsoft Office Integration" in Oracle Fusion Middleware Administrator's Guide for Oracle WebCenter Portal.
-
-
When the file opens, it is automatically checked out. In Spaces, click the Refresh icon to show the Checked Out icon for the selected file (Figure 43-91).
-
Make required updates, then save and close the file.
The modified file is automatically checked back in.
43.12.4.1 Opening a File Already Checked Out By Another User
If the file that you attempt to open is already checked out by another user, the Document Viewer specifies the name of the user who has it checked out. (Figure 43-92).
You can download the file to your local system to edit it, but you cannot upload the changed file to the content repository until it is checked in and made available again.
43.12.5 Uploading a New Version of an Existing File
If you have write permissions on a file, you can replace the file with a new version that you have saved on your local file system.
To upload new versions of multiple files at once, which allows you to also specify whether to create new versions of existing files or overwrite existing files, follow the steps in Section 43.8.1, "Uploading Files."
Note:
Spaces does not support uploading a new wiki document or a new version of a wiki document from the file system. If you upload an HTML file, you cannot convert it to a wiki document due to differences in underlying metadata. For information about wiki documents in Spaces, see Chapter 49, "Working with Wiki Documents."
To upload a new version of a single file:
-
On the Documents page or in a Document Explorer, Document Manager, or Folder Viewer task flow, click in the row of the file you want to replace.
Alternatively, you can upload a new version of an open file in the Document Viewer preview pane.
-
Depending on your view and permissions, perform one of the following actions:
Note:
If you do not have write permission on the file, or if the file is already checked out by another user, then the Upload New Version action will not be available to you.
If you have write permissions on the file, and try to upload a new version at the same time it is being checked out by another user, an Information dialog notifies you that the file is not available:
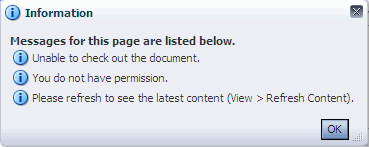
-
On the Documents page or in a Document Explorer, Document Manager, or Folder Viewer task flow, click the Checked Out (padlock) icon in the file's row and select Upload New Version (Figure 43-93), click the File menu, and select Upload New Version (Figure 43-49), or right-click to display the file's context menu (Figure 43-55) and select Upload New Version.
-
In the Document Viewer preview pane, click the Upload New Version action (Figure 43-94).
The Upload New Version pane opens (Figure 43-95).
Note:
if a file is associated with a content profile, it will be uploaded using that content profile. You cannot change a file's content profile by uploading a new version. See Section 43.8.1.2, "Uploading a File with a Content Profile" for information about selecting a content profile when a file is first uploaded.
-
-
Select the file(s) to upload, in either of the following ways:
-
(In FireFox, Chrome, or Safari browsers) Select the file(s) in your local file system and drag them into the Upload New Version pane.
-
Or, click Select files to navigate to and select the file(s) you want to upload.
-
-
In the Upload Document pane, optionally, provide a description of the file in the Description field.
-
Click Upload.
A new version of the file replaces the existing file. For information about viewing versions of a file, see Section 43.21, "Viewing and Deleting File Version History."
43.13 Renaming a Folder or File
In a Documents service task flow, you can rename a folder or file as described in the following sections:
Note:
To use Windows Explorer to rename folders and files in a space when the backend content repository is Content Server, see Section 48.4.2, "Working with Files Using Windows Explorer."
43.13.1 Renaming a Folder or File Using a Menu
To rename a folder or file:
-
On the Documents page or in a Document Explorer, Document Manager, or Folder Viewer task flow, click in the row of the folder or file you want to rename.
-
Click the File menu, and select Rename, or right-click in the folder or file's row to display the context menu (Figure 43-54 and Figure 43-55) and select Rename.
The Rename Folder or Rename Document dialog opens (Figure 43-96).
-
In the Name field, enter a new folder or file name.
Note:
The following characters are not allowed in folder and file names
\ / : [ ] * ' " | ?
Letters, numbers, spaces, and periods (.) are allowed.
-
Click Rename.
43.13.2 Renaming a File and Revising Its Description Through Properties
To rename a file or revise its description through its properties, see Section 43.22, "Viewing and Modifying Folder and File Properties."
43.14 Copying and Pasting Folders and Files
In a Documents service task flow, you can copy and paste folders and files in the following ways:
-
Use menu actions as described in the steps below.
-
Drag and drop into a target folder while pressing the Ctrl key. You can even drag and drop into another Documents service task flow on the same page as long as both task flows are connected to the same content repository.
-
Copy a file to your local file system, as described in Section 43.12.3, "Downloading a File."
To copy one or more folders (including all of its subfolders and files) or files using menu actions:
-
On the Documents page or in a Document Explorer, Document Manager, or Folder Viewer task flow, click in the row of the folder(s) or file(s) you want to copy.
To select multiple folders or files, Ctrl-click in the rows.
-
Click the File menu, and select Copy, or right-click to display the context menu (Figure 43-54 and Figure 43-55) and select Copy.
-
Navigate to the folder where you want to paste the copied folder(s) or file(s).
You can also navigate to a folder in another Documents service task flow on the same or a different page as long as both task flows are connected to the same content repository.
-
Click the File menu, and select Paste, or right-click to display the folder's context menu (Figure 43-54) and select Paste. After pasting, the Paste action becomes inactive in the current folder. You can continue to paste the copied content to other folders as needed.
If you are copying into another Documents service task flow, you may need to refresh the target folder if the Paste menu action is not active (see Section 43.17, "Refreshing Folder Contents").
The selected folder(s) and file(s) are copied to the current folder.
Note:
If a folder or file is deleted at the source location before pasting, it will not be copied to the paste location.
43.15 Moving Folders and Files
In a Documents service task flow, you can move folders and files in the following ways:
-
Use the menu actions as described in the steps below.
-
Drag and drop into a target folder. You can even drag and drop into another Documents service task flow on the same page as long as both task flows are connected to the same content repository.
Note:
To use Windows Explorer to move folders and files in a space when the backend content repository is Content Server, see Section 48.4.2, "Working with Files Using Windows Explorer."
To move one or more folders (including all of its subfolders and files) or files using menu actions:
-
On the Documents page or in a Document Explorer, Document Manager, or Folder Viewer task flow, click in the row of the folder(s) or file(s) you want to move.
To select multiple folders or files, Ctrl-click in the rows.
-
Click the File menu, and select Cut, or right-click to display the context menu (Figure 43-54 and Figure 43-55) and select Cut.
-
Navigate to the folder where you want to move the folder(s) or file(s).
You can also navigate to a folder in another Documents service task flow on the same or a different page as long as both task flows are connected to the same content repository
-
Click the File menu, and select Paste, or right-click to display the folder's context menu (Figure 43-54) and select Paste. After pasting, the Paste action becomes inactive in the current folder.
If you are moving folders or files into another Documents service task flow, you may need to refresh the target folder if the Paste menu action is not active (see Section 43.17, "Refreshing Folder Contents").
The selected folder(s) and file(s) are moved to the current folder.
Note:
If you do not paste the cut folder(s) or file(s), they are restored to the location where they were cut. If a folder or file is deleted at the source location before pasting, it will not be moved to the paste location.
43.16 Deleting Folders and Files
When you delete a folder, all the subfolders and files the folder contains are also deleted in the content repository. When you delete a folder, this action is not reflected in the Activity Stream in the Home space.
Notes:
-
The root folder of the task flow cannot be deleted.
-
To use Windows Explorer to move folders and files in a space when the backend content repository is Content Server, see Section 48.4.2, "Working with Files Using Windows Explorer."
To delete one or more folders or files:
-
On the Documents page or in a Document Explorer, Document Manager, or Folder Viewer task flow, click in the row of the folder(s) or file(s) you want to delete.
To select multiple folders or files, Ctrl-click in the rows.
-
Click the File menu, and select Delete, or right-click to display the context menu (Figure 43-54 and Figure 43-55) and select Delete.
The Delete dialog opens (Figure 43-97).
-
Click Delete to delete your selection from the content repository.
43.17 Refreshing Folder Contents
Refreshing the contents of the current folder retrieves all changes made in the content repository since the last retrieval.
To refresh folder contents:
-
On the Documents page or in a Document Explorer, Document Manager, or Folder Viewer task flow, click the View menu, and select Refresh Content.
-
In the Document List Viewer task flow, click the Refresh icon.
43.18 Hiding and Showing Folders
To hide or show the folders in a listing of folders and files:
-
On the Documents page or in a Document Explorer, Document Manager, or Folder Viewer task flow, click the View menu, and select Hide Folders.
When folders are hidden, a checkmark displays alongside the Hide Folders menu selection.
43.19 Viewing, Entering, and Deleting Comments on a File
You can associate comments with a file to provide additional information that you want to convey to other users about the file. When you enter comment on a file, this action is not reflected in the Activity Stream in the Home space.
Note:
Users viewing a public document are not given the ability to comment on the document.
To view, enter, or delete comments on a file:
-
On the Documents page or in a Document Explorer, Document Manager, or Folder Viewer task flow, click in the row of the file.
Alternatively, you can view comments for an open file in the Document Viewer preview pane or Rich Text Editor (RTE).
-
Depending on your view, perform one of the following actions:
-
On the Documents page or in a Documents service task flow, open the Comments pane in any of the following ways:
-
Click the View menu, and select Details.
-
Right-click to display the file's context menu (Figure 43-55) and select Details.
-
Click the value in the Comments column (Figure 43-98) for the file. This value indicates the number of comments that have been entered for each file.
-
-
In the Document Viewer preview pane, scroll to the bottom of the document and click the Comments tab (Figure 43-99).
-
In the Rich Text Editor, scroll to the bottom of the HTML document, wiki, or blog post, and click the Comments tab (Figure 43-99).
-
-
To add a comment, enter it in the input area, then click Comment to display your comment above the input area. The comment display is limited to 500 characters.
-
To delete a prior comment that you have entered, click the Delete icon beneath the comment (Figure 43-100).
43.20 Working with Tags
Tags specify keywords related to the content of the file. Tags are useful for making a file more widely discoverable in search results.
To work with the tags for a file:
-
On the Documents page or in a Document Explorer, Document Manager, or Folder Viewer task flow, click in the row of the file.
Alternatively, you can view the tags of an open file in the Document Viewer preview pane or Rich Text Editor (RTE).
-
Depending on your view, perform one of the following actions:
-
On the Documents page or in a Documents service task flow, click the View menu, and select Details, or right-click to display the file's context menu (Figure 43-55) and select Details.
-
In the Document Viewer preview pane, scroll to the bottom of the document and click the Tags tab (Figure 43-101).
S -
In the Rich Text Editor, scroll to the bottom of the HTML document, wiki, or blog post, and click the Tags tab (Figure 43-101).
-
-
In the Tags pane, enter new tags, and edit or delete existing tags as your permissions allow, then click Save.
See Also:
For information about tags in Spaces, see Chapter 59, "Working with the Tags Service."
43.21 Viewing and Deleting File Version History
If you edit and save a file, or upload a file with Always create a new version selected in the Upload dialog (Figure 43-102), Spaces creates a new version of the file if it already exists in the current folder. When a file has multiple versions, it has a version history.
Figure 43-102 Upload Document Screen (in FireFox browser)

Description of "Figure 43-102 Upload Document Screen (in FireFox browser)"
This section describes how to view a file's version history to track when a file was last revised, to determine which user revised it, and to delete a particular file version. For wiki documents and blog posts, you can also compare versions.
Note:
To use the the task pane available through Microsoft Office shared document management functionality to work with a Microsoft Word, Excel, or PowerPoint file's version history, see Section 48.3.3.11, "Working with File Version History."
To view or delete versions of a file:
-
On the Documents page or in a Document Explorer, Document Manager, or Folder Viewer task flow, click in the row of the file.
Alternatively, you can view comments for an open file in the Document Viewer preview pane or Rich Text Editor (RTE).
-
Depending on your view, perform one of the following actions:
-
On the Documents page or in a Documents service task flow, click the View menu, and select Details, or right-click to display the file's context menu (Figure 43-55) and select Details.
-
In the Document Viewer preview pane, scroll to the bottom of the document and click the History tab (Figure 43-103).
-
In the Rich Text Editor, scroll to the bottom of the HTML document, wiki, or blog post, and click the History tab (Figure 43-103).
-
-
Select a version of the file to display a preview of that version in the preview pane.
-
To delete a particular version, select it in the History pane, then click Delete (Figure 43-104).
Note:
The Delete icon displays only if you have been granted delete permissions.
-
(For wiki documents and blog posts only) To compare a particular version with the current version of the file, select it in the History pane, then click Compare to open the Compare Versions dialog, showing the differences (Figure 43-105 and Figure 43-106).
43.22 Viewing and Modifying Folder and File Properties
Folder and file properties provide access to informational details. You can use file properties to perform activities such as rename a file, modify a file description, or change file metadata values.
Additionally, both folder and file properties provide read-only information about location, type, and creation and modification dates, and the users who created or last modified the folder or file.
To access folder or file properties, refer to the steps in the following sections:
43.22.1 Working with Folder Properties
To view folder properties:
-
On the Documents page or in a Document Explorer, Document Manager, or Folder Viewer task flow, click in the row of the folder.
-
Click the View menu, and select Details, or right-click to display the folder's context menu (Figure 43-54) and select Details.
The Basic properties pane opens (Figure 43-107). Folder properties are not editable. To change the folder name, see Section 43.13, "Renaming a Folder or File."
43.22.2 Working with File Properties
To view or modify file properties:
-
On the Documents page or in a Document Explorer, Document Manager, or Folder Viewer task flow, click in the row of the file.
Alternatively, you can view properties of an open file in the Document Viewer preview pane.
-
Depending on your view, perform one of the following actions:
-
On the Documents page or in a Documents service task flow, click the View menu, and select Details, or right-click to display the context menu (Figure 43-55) and select Details.
-
In the Document Viewer preview pane:
-
If the file type supports an in-place preview of the file contents, scroll to the bottom of the preview and click the Info tab (Figure 43-108).
-
If the file type does not support a preview (for example,
.mp3music files, video files, or.inifiles), the preview pane displays the file properties (Figure 43-109).
-
-
-
To modify the editable Basic properties, click Edit in the Basic properties area. In the Edit dialog (Figure 43-110), revise the file name and description as desired, then click Save.
Note:
The following characters are not allowed in file names:
\ / : [ ] * ' " | ?
Letters, numbers, spaces, and periods (.) are allowed.
-
To modify the editable Advanced properties, click Edit in the Advanced properties area. In the Edit dialog (Figure 43-111), revise the property values as desired, then click Save.
Note:
To enable Edit functionality on Advanced properties, both of the following two requirements must be met:
-
You must access the Spaces application through Oracle HTTP Server (OHS) to expose Content Server and the Spaces application under the same host and port. For information about setting up OHS as the frontend to Spaces, see "Configuring Content Server for WebCenter Portal Applications" in Oracle Fusion Middleware Administrator's Guide for Oracle WebCenter Portal.
-
Spaces must be connected to a Content Server repository, with the
webContextRootparameter set to a Content Server host name. For information on settingwebContextRoot, see "Registering Content Repositories" in Oracle Fusion Middleware Administrator's Guide for Oracle WebCenter Portal. To setwebContextRootthrough WLST, see "createJCRContentServerConnection" and "setJCRContentServerConnection" in Oracle Fusion Middleware WebLogic Scripting Tool Command Reference.
Note:
Most advanced properties are unique to the content repository (such as Content Server) where the file is stored.
-
43.23 Setting Security Options on a Folder or File
Security can set be on a folder or a file through inheritance from the parent folder, or by setting custom permissions. If set on a folder, the security is propagated to child files and folders that do not already have their own custom permissions defined. A child file or folder (at any depth) that already has custom permissions defined will retain that security definition.
You must have Documents-Administration permission to set security options on a folder or file. For information about roles and permissions, see Section 54.2.1.2, "Understanding Permissions and Permission Models in a Space."
To set security options on a folder or file:
-
Verify that the Spaces administrator has completed the prerequisite steps before setting security options on folder or file, as described in "Configuring Item Level Security between Content Server 11g and Spaces" in Oracle Fusion Middleware Administrator's Guide for Oracle WebCenter Portal.
-
Open the Security Settings dialog (Figure 43-112) in any of the following ways:
-
On the Documents page or in a Document Explorer, Document Manager, or Folder Viewer task flow, click in the row of the folder or file, then click the File menu, and select Security.
-
Right-click in the folder or file's row to display the context menu (Figure 43-54 and Figure 43-55) and select Security.
-
If you are already viewing a file in the Document Viewer preview pane, click the File menu, and select Security.
-
-
Select the Access Method:
-
To specify that the folder or file should inherit access settings from the parent folder, select Inherit Parent Folder Permissions, then click OK to save your changes and exit the dialog.
-
To set custom access on the current folder or file, select Use Custom Permissions, and continue with the next steps.
-
-
To grant access permissions to all authenticated users (that is, to users who are logged in to Spaces), click the Add Authenticated Role for Logged in User Access icon (Figure 43-113).
The role
authenticated-roleis added under Role or User with default Read access to the folder or file, and the option to grant Administer, Delete, and Write permissions (Figure 43-114). -
To grant access permissions to all public users (that is, users who have not logged in to Spaces), click the Add Anonymous Role for Public Access (Figure 43-115).
The role
anonymous-roleis added under Role or User with default Read access to the file (Figure 43-116). -
To grant access permissions to selected members of the space, click Add Users or Add Groups to open the corresponding Search dialog where you can select users or groups to populate the list in the Security Settings dialog. For tips on searching for a user or group in the identity store, see Section 54.3.4.1, "Searching for a User or Group in the Identity Store."
-
For each user, group, or role, grant access by selecting one or more access privileges from the Access columns: Administer, Delete, Write, and Read.
-
Click OK to save your changes and close the Security Settings dialog.
43.24 Working with Links
Links provide a way to view, access, and associate related information by linking a file to a discussion, document, event, note, or URL. For example, you can create a link to associate a project plan document with a list of project issues. To create links, you must be granted the Links-Create Links permission.
Note:
If you create a link using the Select Resource or Add Resource icons in the RTE (see Table 43-8, "Rich Text Editor Toolbar Icons and Controls on Rich Text Tab"), the resulting inline link is not added to the Links tab associated with the details of the linking HTML document, wiki, or blog post. If you require a link to appear on the Links tab, you must add it using the Link to New and Link to Existing menus on the Links tab, as described in the steps below, which also adds a corresponding link on the Links tab for the linked resource.
To work with links associated with a file:
-
On the Documents page or in a Document Explorer, Document Manager, or Folder Viewer task flow, click in the row of the file.
Alternatively, you can view the links of an open file in the Document Viewer preview pane.
-
Depending on your view, perform one of the following actions:
-
On the Documents page or in a Documents service task flow, click the View menu, and select Details, or right-click to display the file's context menu (Figure 43-55) and select Details.
-
In the Document Viewer preview pane, scroll to the bottom of the document and click the Links tab (Figure 43-117).
-
-
On the Links tab, click Link to New and select the required item to create and link to discussion forum topics, events, or notes; upload and link to documents, or enter the URL of a web page to link to (Figure 43-118).
-
Click Link to Existing and select the required item to link to an existing announcement, discussion forum topic, document, or event (Figure 43-119).
The links that you add are listed on the Links tab for the document, and a corresponding link to the document is listed on the Links tab for the linked resource.
See Also:
For more information about creating links in Spaces, see Chapter 65, "Working with the Links Service."
43.25 Working with Recommendations
Note:
The Recommendations pane displays only if the Activity Graph service is configured in your application. For more information, see "Activity Graph Service Prerequisites" in Oracle Fusion Middleware Administrator's Guide for Oracle WebCenter Portal.
The Recommendations pane provides suggestions of other documents you might want to view, based on the current document. This list uses the Similar Items task flow of the Activity Graph service. For more information, see Section 60.2.4, "Working with the Similar Items Task Flow."
To work with the recommendations for a file:
-
On the Documents page or in a Document Explorer, Document Manager, or Folder Viewer task flow, click in the row of the file.
Alternatively, you can view the links of an open file in the Document Viewer preview pane.
-
Depending on your view, perform one of the following actions:
-
On the Documents page or in a Documents service task flow, click the View menu, and select Details, or right-click to display the file's context menu (Figure 43-55) and select Details.
-
In the Document Viewer preview pane, scroll to the bottom of the document and click the Recommendations tab (Figure 43-121).
-
-
Click the Display Options icon (Figure 43-122) to open the Display Options dialog (Figure 43-123), where you can select the items you want to show on the Recommendations tab.
-
In the Recommendations pane:
-
Click the Delete icon to delete the associated recommendation.
-
Click the link text for each recommendation to view that document.
-
Click the Refresh icon to display the most recent recommendations.
-
See Also:
For more information about working with recommendations, see Chapter 60, "Working with the Activity Graph Service."
43.26 Opening or Saving PDF Files
From the Document Viewer preview pane, you can open or save the PDF version of the currently open file to your local file system. This choice is available for any file type for which Content Server is configured to convert to PDF.
Note:
To enable the conversion of wikis and blogs into PDF, your application administrator must configure the WebCenter Conversion component, as described in "Enabling the Conversion of Wikis and Blogs into PDFs" in Oracle Fusion Middleware Administrator's Guide for Oracle WebCenter Portal.
To open or save a file in PDF:
-
In the Document Viewer preview pane, click the View menu, and select:
-
Open as PDF to open the file in a new tab in your browser in Adobe Acrobat Reader's PDF Viewer plug-in.
-
Download PDF to open a browser dialog where you can save the file to your local file system as a PDF file.
-
43.27 Sharing the URL for a Folder or File
With appropriate permissions, users can directly access folders and files by clicking the URL, or entering it in a browser. You can retrieve and share the URL to a folder or file in several ways, as described in the following sections:
43.27.1 Retrieving the URL for a Folder or File
Every folder and file that resides in a connected content repository can be accessed through a direct URL, which you can provide to other users. If they have permissions to access the folder or file, they can click the URL link to open the folder or file directly in a Spaces application, open the file in its default application, or save the file to their local file system.
To retrieve the URL for a folder or file:
-
Open the Get a Link dialog in any of the following ways:
-
On the Documents page or in a Document Explorer, Document Manager, or Folder Viewer task flow, click in the row of the folder or file, then click the View menu, and select Get a Link.
-
Right-click in the folder or file's row to display the context menu (Figure 43-54 and Figure 43-55) and select Get a Link.
-
If you are already viewing a file in the Document Viewer preview pane, click the View menu, and select Get a Link.
The Direct URL provides a direct link to open the folder or file in Spaces application. For files, the Download URL provides a direct link to allow users to open the file in its default application, or choose to save the file to their local file system (Figure 43-124).
-
-
Drag your mouse pointer over the URL to select it, then press Ctrl-c to copy it so that you can paste it wherever you need it.
43.27.2 Mailing the URL for a Folder or File
From the Document Viewer preview pane, you can send a mail message to other users with the body of the message populated with the direct URL to the currently open folder or file. If the folder or file is in a space, the direct URL to the space is also included.
Note:
To use the task pane available through the Microsoft Office shared document management functionality to send a message to any user who has a mail address defined in Spaces, see Section 48.3.3.13, "Sending a Message."
To send the URL to folder or file in a mail message:
-
Open the folder or file in the Document Viewer preview pane in either of the following ways:
-
On the Documents page or in a Document Explorer, Document Manager, or Folder Viewer task flow, click in the row of the folder or file, then click the View menu, and select Details.
-
Right-click in the folder or file's row to display the context menu (Figure 43-54 and Figure 43-55) and select Details.
-
-
In Document Viewer preview pane, click the File menu, and select Send Mail to open the mail message in your default mail application.
-
Modify the mail message as desired, and send it.
43.27.3 Publishing the URL for a File to Activity Streams
You can publish the URL for the currently open file to the Activity Stream on the Home page of the current space, and to the personal Activity Stream in the Home space for all users or groups who have permissions to access to the file.
Note:
To share your personal files and other items with others, see Section 37.3, "Sharing Files, URLs, and Streamed Items with Other Users."
To publish a file's URL to activity streams:
-
Open the Share dialog (Figure 43-125) in any of the following ways:
-
On the Documents page or in a Document Explorer, Document Manager, or Folder Viewer task flow, click in the row of the file, then click the File menu, and select Share.
-
Right-click in the file's row to display the context menu (Figure 43-54 and Figure 43-55) and select Share.
-
If you are already viewing a file in the Document Viewer preview pane, click the File menu, and select Share.
-
-
Optionally, enter a comment to appear with the URL.
-
Click Publish.
The URL to the file is added to the Activity Stream on the Home page of the current space, and to the personal activity streams for all users or groups who have permission to access the file, along with your comments, if any.
43.28 Subscribing to a File
To receive notifications about the activities on a file, you can subscribe to it. Whenever a user comments on, likes, updates, or deletes the file, you will be notified through your selected messaging channel.
See Also:
For more information, see Section 39.2, "Establishing and Managing Your Messaging Channels and Filters."
To subscribe to a file:
-
On the Documents page or in a Document Explorer, Document Manager, or Folder Viewer task flow, click the file to open it in the Document Viewer preview pane.
-
From the File menu, select Subscribe.
-
If you no longer wish to monitor the activities on a file, click the File menu, and select Unsubscribe.
43.29 Liking and Unliking a File
To indicate that a file is of particular interest to you, you can "like" it. Liking a file simply highlights the Like icon for the file to show that you have given it this preference. If a file is already liked, you can "unlike" it if you no longer wish to highlight it in any way. If a number greater than zero displays alongside the Like icon, you can click the number to view a list of other users who have "liked" the file.
See Also:
For more information, see Chapter 37, "Liking, Commenting On, and Sharing Objects."
To like or unlike a file:
-
Click the Like icon for the file in either of the following locations:
-
On the Documents page or in a Document Explorer, Document Manager, or Folder Viewer task flow, click the Like icon in the file's row (Figure 43-126).
-
In the Document Viewer preview pane, click the Like icon in the menu bar (Figure 43-127).
The number alongside the Like icon (Figure 43-128) indicates the number of users that like the file. You can click the number to view a list of other users who have "liked" the file.
-
-
To "unlike" the file if you no longer wish to highlight it in any way, click the Like icon (Figure 43-129).
43.30 Adding a Folder or File to Your Favorites
For quick access to a folder or file (including wki documents and blog posts), you can add it to your personal favorites.
See Also:
For more information, see Chapter 40, "Creating and Managing Your Personal Favorites."
To add a folder file to your personal Spaces favorites:
-
Open the folder or file in the Document Viewer preview pane in either of the following ways:
-
On the Documents page or in a Document Explorer, Document Manager, or Folder Viewer task flow, click in the row of the folder or file, then click the View menu, and select Details.
-
Right-click in the folder or file's row to display the context menu (Figure 43-54 and Figure 43-55) and select Details.
-
-
In Document Viewer preview pane, click the File menu, and select Add To Favorites (Figure 43-130).
43.31 Searching for Documents
In addition to the WebCenter Search service, which searches a particular space or across an entire Spaces application (see Chapter 58, "Working with the Search Service"), the Documents service provides its own search engine for file searches. A Documents service search saves time and increases the relevancy of results by narrowing the scope of a search to files.
In Spaces, the Documents service search searches within a specific space root folder. In a WebCenter Portal: Framework application, the it searches through all files to which you have access.
Note:
When searching for content stored in the connected Content Server repository, full-text search must be enabled in Content Server through either of the following methods:
-
OracleTextSearch (preferred), as described in “Configuring OracleTextSearch for Content Server” in Oracle Fusion Middleware Installation Guide for Oracle Enterprise Content Management Suite
-
DATABASE.FULLTEXT, as described in “Configuring the Full-Text Features in the WebCenter Content Repository” in Oracle Fusion Middleware Installation Guide for Oracle Enterprise Content Management Suite
The Oracle Secure Enterprise Search (SES) adapter does not need to be configured to use the Documents service search.
The Documents service search is exposed in the Document Manager, Document Explorer, and Folder Viewer task flows. It provides two levels of search: Basic and Advanced. To perform Basic and Advanced searches for files, refer to the following sections:
43.31.1 Running a Basic Document Search
A basic document search searches the connected content repository for the specified file name. To include more search criteria, see Section 43.31.2, "Running an Advanced Document Search."
To perform a basic document search:
-
On the Documents page or in a Document Explorer, Document Manager, or Folder Viewer task flow, enter a full or partial file name in the Filter field (Figure 43-131). You can use
*as a wild card character; for example:*.jpg. -
Press the Enter key, or click the Search icon.
The search results pane displays files matching the search string (Figure 43-132).
In the search results pane, the presence of the highlighted area indicates that you're looking at the results of a query, not the contents of a folder. Look in the Location column to determine where a file or folder is located. Alternatively, click the file name to open it from the Search Results pane.
-
In the Search Results pane:
-
Click the Clear action to clear the Filter field and return to the default folder display.
-
Click Edit Search Criteria action to open the Advanced Search dialog, where you can specify additional search criteria, as described in Section 43.31.2, "Running an Advanced Document Search."
-
43.31.2 Running an Advanced Document Search
You can specify more granular search options to search the connected content repository to generate results for a specified file name, keywords, folder, content type, dates, users, or properties that are defined for the selected content profile.
To perform an advanced document search:
-
Open the Advanced Search dialog in either of the following ways:
-
On the Documents page or in a Document Explorer, Document Manager, or Folder Viewer task flow, click Advanced next to the Filter field.
-
Click Edit Search Criteria in the highlighted toolbar area of the Search Results pane (Figure 43-132).
The Advanced Search dialog opens (Figure 43-133).
-
-
Enter search terms in one or more of the fields:
-
File Name: Enter a full or partial file name. You can use
*as a wild card character; for example:*.jpg.. -
Keywords: Enter any keywords related to the content of the file.
-
Look In: Click the Browse icon to open a list of content repository folders, then drill down to the desired folder.
-
Content Type: Select All Content Types to retrieve content items regardless of the content type. Or, select from the list the name of a content type profile defined in the Content Server repository. A content type profile specifies the properties that define a specific type of content (for example, a press release, or a news flash, or an image). The content type IDC:GlobalProfile is the name of a default content profile defined in Content Server that can be applied if no other content profiles are defined.
-
Limit Results: Specify the maximum number of files to be returned by the search.
-
Dates: In the Created and/or Last Modified fields, select a modifier to search for files matching an exact date (is), a following date (is after), a preceding date (is before), or a date between two other dates (is between).
Selecting is between adds an additional date field for entering the end date (Figure 43-134). Enter a beginning date and an end date; the end date is not inclusive.
Click the Select Date icon to select a date in the correct format (
mm/dd/yy), for example11/18/11, or enter a date manually. -
Users: In the Created By and Last Modified By fields, enter a user name to search for files that the user created (uploaded) or last modified. Click the Browse icon to open the Search Users dialog where you can select from a list of users or search for a user name. For tips on searching for a user in the identity store, see Section 54.3.4.1, "Searching for a User or Group in the Identity Store."
Note:
In the Spaces application, when you search in a space, the user selection list and the user search find user names for current members of the space.
-
Additional Query Filters: Not applicable when Content Type is set to All Content Types. For a selected content type profile (prefixed IDC), click the Add icon (Figure 43-135) to list all the properties that are defined for the selected profile. Select one or more properties to refine the query to find files with specific property settings.
-
-
Click Search to execute the advanced search.
Files matching the search criteria display in the Search Results pane.
43.32 Troubleshooting Documents Service Issues
This section includes the following subsections:
-
Section 43.32.1, "Document Permissions Not Working in a Space"
-
Section 43.32.2, "Document Permissions Not Granted When Creating a Space"
43.32.1 Document Permissions Not Working in a Space
If a user cannot perform certain actions on documents, even though they are granted appropriate Document permissions in the space, do one of the following:
Note:
You must be the space moderator or have the Manage Membership permission to grant permissions in the space.
-
Revoke the user's membership to the space, and then add them back to the space. For details, see Section 54.3.8, "Revoking Membership to a Space" and Section 54.3.4, "Adding Members to a Space."
-
Temporarily change the user's role, and then change it back to the required role. For details, see Section 54.3.6, "Approving Requests for Membership of a Space."
If multiple users cannot perform actions on documents, even though they are granted appropriate permissions in the space, try editing the role to which the affected users are assigned:
-
Identify the membership role that the affected users have and note down the current permission set. See Section 54.2.3, "Viewing and Editing Permissions of a Space Role."
-
Deselect all permissions for the role, and click Save.
-
Edit the role again, select all required permissions for the role, and click Save.
43.32.2 Document Permissions Not Granted When Creating a Space
If you see the following error when you create a space based on a template that includes the Documents service, an error occurred while attempting to grant permissions for the new space on the back-end content server:
Granting permissions for Documents failed
Ask your system administrator to review the Spaces application log (at DOMAIN_HOME/servers/WC_Spaces/logs/WC_Spaces-diagnostic.log) to see if any messages indicate the source of the error. If the cause of the error is not clear, try resetting Document permissions on each role in the space:
-
Edit permissions for each role in turn. See Section 54.2.3, "Viewing and Editing Permissions of a Space Role."
-
Deselect any Document permissions set for the role, and click Save.
-
Edit the role again, select the required permissions for the role, and click Save.
-
Repeat for all the roles in the space.
Failures, if any, are logged in the Spaces application log.
