B STA Dialog Box Reference
This section contains reference information for STA dialog boxes relating to user preferences and tables. The following types of dialog boxes are described.
For descriptions of all other STA dialog boxes, see the STA User's Guide.
Preferences Dialog Boxes
General
Description of the illustration ''if_prefgeneral.png''
Description
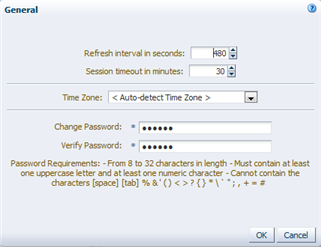
This dialog box allows you to set general screen display preferences and the password for your STA username. This dialog box appears when you select Preferences, then General from the Main Toolbar.
Screen Fields
- Refresh interval in seconds
-
Enter the new refresh rate, in seconds. STA screens will be updated to display new data at the frequency you specify. Your entry must be between 60 (one minute) and 43200 (12 hours). The default is 480 (8 minutes).
- Session timeout in minutes
-
Enter the new timeout interval, in minutes. Login sessions that are idle for longer than this amount of time will be ended automatically. Your entry must be between 10 and 1440 (24 hours). The default is 30.
- Time Zone
-
Select the time zone you want to use for your screen display. Dates and times of events are displayed in this time zone. To have STA automatically detect your local time zone based on your computer's system clock, select <Auto-detect Time Zone>.
- Change Password
-
To change your password, type a new one in this field. The entry is masked as you type. See the STA User's Guide for detailed password requirements.
- Verify Password
-
Type the password again to verify that you have entered it correctly.
Data Handling
Description of the illustration ''if_datahandling.jpg''
Description
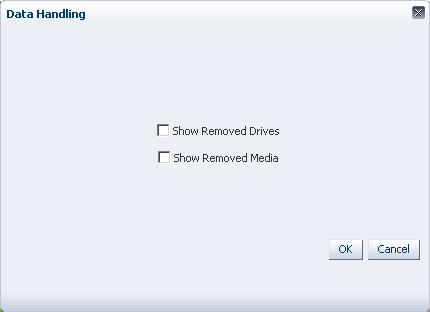
This dialog box allows you to selectively show or hide removed drives and media and their associated data. This dialog box appears when you select Preferences, then Data Handling from the Main Toolbar.
See "Removed Drives and Media Display Options" for complete details about these settings and their impact on individual screens.
Screen Fields
- Show Removed Drives
-
Select this check box to turn on the display of removed drives, as follows:
-
Removed drives are listed on the Drives – Overview screen.
-
Aggregated data for removed drives are included on the Drives – Analysis screen.
-
On all other screens, drive serial numbers of removed drives are active links to the Drives – Overview, Detail View screen.
Deselect this check box to turn off the display of removed drives, as follows:
-
Removed drives are not listed on the Drives – Overview screen.
-
Aggregated data for removed drives are not included on the Drives – Analysis screen.
-
On all other screens, drive serial numbers of removed drives are dimmed and are not active links.
This check box is deselected by default.
-
- Show Removed Media
-
-
Removed media are listed on the Media – Overview screen.
-
Aggregated data for removed media are included on the Media – Analysis screen.
-
On all other screens, volume serial numbers (VSNs or volsers) of removed media are active links to the Media – Overview, Detail View screen.
Deselect this check box to turn off the display of removed media, as follows:
-
Removed media are not listed on the Media – Overview screen.
-
Aggregated data for removed media are not included on the Media – Analysis screen.
-
On all other screens, media serial numbers (VSNs or volsers) of removed media are dimmed and are not active links.
This check box is deselected by default.
-
Accessibility Settings
Description of the illustration ''if_accessset.jpg''
Description
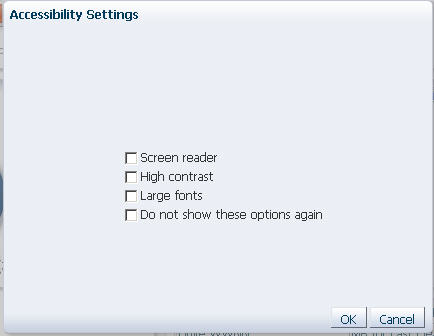
This dialog box allows you to customize the accessibility settings for your STA login session. This dialog box appears when you select Preferences, then Accessibility from the Main Toolbar. It also appears whenever you log in to STA, as long as the "Do not show these options again" check box has not been selected previously.
Screen Fields
- Screen Reader
-
Select this check box to enable screen reader mode for users with low vision, blindness, color blindness, or other visual impairments. This mode causes the screen display to be optimized for use with screen readers such as JAWS. It also allows you to perform all screen actions with the keyboard instead of a mouse.
This check box is deselected by default.
- High Contrast
-
Select this check box to enable high-contrast mode. This mode causes STA screens to be compatible with high-contrast features provided by your browser. For best results, you may also want to enable large fonts mode, described below.
This mode is designed to be used with your browser's high-contrast capabilities (see your browser's documentation for details). You should disable this mode if you are not using these capabilities in your browser.
This check box is deselected by default.
- Large fonts
-
Select this check box to enable large font mode. This mode causes STA screens to be compatible with larger font sizes and zoom capabilities provided by your browser. For best results, you may also want to enable high-contrast mode, described above.
This mode is designed to be used with larger fonts or zoom capabilities in your browser (see your browser's documentation for details). You should disable this mode if you are not using these capabilities in your browser.
This check box is deselected by default.
- Do not show these options again
-
Select this check box to indicate that you do not want this dialog box to be displayed automatically when you log in. If you apply this option, this dialog box will be skipped for all future times that you log in to STA. You can reset this option at any time by manually displaying this dialog box.
This check box is deselected by default.
Confirmations
Description of the illustration ''if_confirmset.jpg''
Description
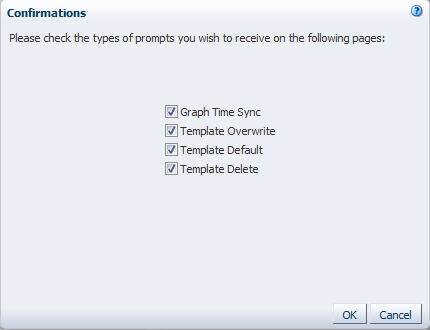
This dialog box allows you to indicate whether you want to display or suppress selected confirmation dialog boxes. This dialog box appears when you select Preferences, then Confirmations from the Main Toolbar.
Screen Fields
- Graph Time Sync
-
Select this check box to indicate you want a confirmation dialog box to appear before you synchronize all graphs on a screen to the same date range.
If you deselect this check box, the confirmation dialog box will be suppressed, and graphs will be synchronized as soon as you click the Synchronize Date Range button in the Graph Pane Toolbar.
This check box is selected by default.
- Template Overwrite
-
Select this check box to indicate you want a confirmation dialog box to appear before you save changes to an existing template.
If you deselect this check box, the confirmation dialog box will be suppressed, and existing templates will be overwritten as soon as you click the Save button in the Save Template dialog box.
This check box is selected by default.
- Template Default
-
Select this check box to indicate you want a confirmation dialog box to appear before you set the current template as the default for the current screen.
If you deselect this check box, the confirmation dialog box will be suppressed, and template defaults will be set as soon as you click Set Default on the Templates toolbar.
Note:
This setting applies only to default templates set from the Templates toolbar. A confirmation dialog box does not appear when you set and clear default templates from the Templates Management screen.The check box is selected by default.
- Template Delete
-
Select this check box to indicate you want a confirmation dialog box to appear before you delete an existing template.
If you deselect this check box, the confirmation dialog box will be suppressed, and templates will be deleted as soon as you click Delete in the Delete Template dialog box.
This check box is selected by default.
Buttons
- OK
-
Click to apply your entries.
- Cancel
-
Click to dismiss this dialog box without applying your entries.
Table Display Dialog Boxes
Show More Columns
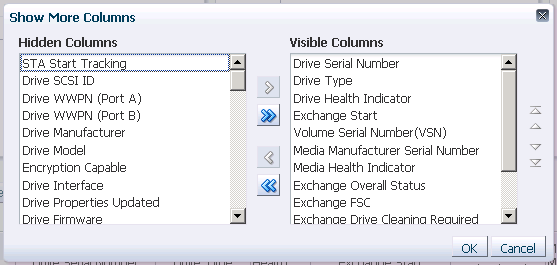
Description of the illustration ''data_colshowmore.png''
Description
This dialog box allows you to indicate which attributes you want to reveal and hide on the current List View table. You can also indicate the order in which you want the revealed attributes to appear in the table. The specific list of attributes included in this dialog box varies, depending on whether the List View table displays libraries, drives, or media.
This dialog box appears when you select View, then Columns, then Show More Columns from the List Table Toolbar.
Screen Fields
- Hidden Columns
-
List of all attributes to be hidden from the List View table. Select one or more attributes you want to move to the Visible Columns list. This field supports multi-select.
- Visible Columns
-
List of all attributes to be revealed in the List View table. Select one or more attributes you want to either move to the Hidden Columns list or re-order in the table display. This field supports multi-select.
Buttons
- Selection arrows
-
Active buttons depend on whether you have selected items in one or both lists.
Arrows Description 
Move the selected item(s) to the indicated list. 
Move all items from one list to the other. - Ordering arrows
-
These buttons are active only if you have selected one or more items in the Visible Columns list.
Arrows Description 
Move the selected item(s) up or down, one place at a time. 
Move the selected item(s) to the top or bottom of the list. - OK
-
Click to apply your entries.
- Cancel
-
Click to dismiss this dialog box without applying your entries.
Advanced Sort
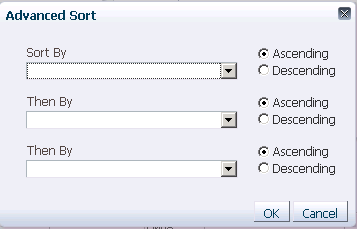
Description of the illustration ''data_advsortblank.png''
Description
This dialog box allows you to specify a nested sort on a List View table, using up to three columns. You can use any available table attributes for the sorts, even if the attributes are hidden from the current table display.
This dialog box appears when you select View, then Sort, then Advanced from the List Table Toolbar.
Screen Fields
- Sort by
-
In the menu, select the attribute you want to use for the primary sort. The menu displays all available attributes for the table, including those that are currently hidden.
- Then by
-
This field appears twice. In the menu, select the attribute(s) you want to use for up to two additional nested sorts.
- Ascending
-
Click to indicate that you want the associated attribute to be sorted in ascending order.
- Descending
-
Click to indicate that you want the associated attribute to be sorted in descending order.
Reorder Columns

Description of the illustration ''data_reordercol.png''
Description
This dialog box allows you to specify the order you want columns to appear in a List View table.
This dialog box appears when you select View, then Reorder Columns from the List Table Toolbar.
Screen Fields
- Visible Columns
-
List of all revealed attributes, in the order they are to appear in the table. Select one or more attributes you want to re-order. This field supports multi-select.
Buttons
- Ordering arrows
-
These buttons are active only if you have selected one or more items in the Visible Columns list.
Arrows Description Move the selected item(s) up or down, one place at a time. Move the selected item(s) to the top or bottom of the list. - OK
-
Click to apply your entries.
- Cancel
-
Click to dismiss this dialog box without applying your entries.
Add/Edit Annotation
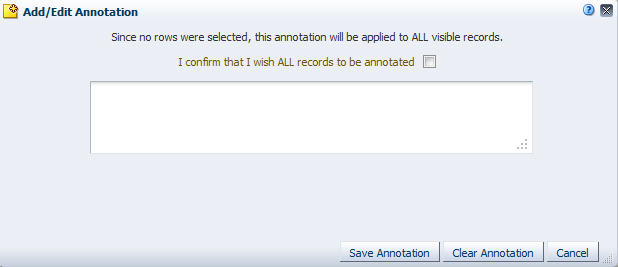
Description of the illustration ''if_annotaddedit.jpg''
Description
This dialog box allows you to create or modify a table record annotation. It appears when you click Add/Edit Annotation on the table toolbar on an Overview or Analysis screen.
Screen Fields
- I confirm that I wish ALL visible records to be annotated
-
This field appears only if you have not selected any records in the table. Select the check box to confirm that you want to annotate all the table records currently displayed. If a filter has been applied, the hidden records will not be annotated. This process could take a significant amount of time if there are many records in the table.
- Annotation text field
-
Type the text you want to apply to the selected records.
You can enter up to 250 characters. The information is displayed as ASCII text only—there are no formatting options, such as boldface or color. Also, spacing options, such as forced line feeds, are not preserved.
Change Attributes
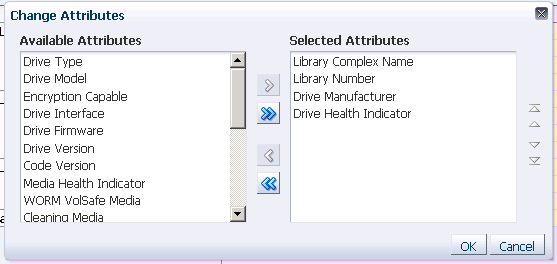
Description of the illustration ''piv_changeattribd.png''
Description
This dialog box allows you to change the attributes displayed in a pivot table and the order in which they are nested.
Note:
Pivot tables can include between two and seven attributes.This dialog box appears when you click Change Attributes on the Pivot Table Toolbar.
Screen Fields
- Available Attributes
-
List of all attributes to be hidden from the pivot table. Select one or more attributes you want to move to the Selected Attributes list. This field supports multi-select.
- Selected Attributes
-
List of all attributes to be included in the pivot table. The last attribute in the list appears on the column edge of the table. The other attribute(s) appear on the row edge, nested in the order they appear in the list; the top attribute is the outer layer.
Select one or more attributes you want to either move to the Available Attributes list or re-order in the nesting. This field supports multi-select.
Note:
This list must contain a minimum of two and a maximum of seven attributes.
Buttons
- Selection arrows
-
Active buttons depend on whether you have selected items in one or both lists.
Arrows Description Move the selected item(s) to the indicated list. Move all items from one list to the other. - Ordering arrows
-
These buttons are active only if you have selected one or more items in the Selected Attributes list.
Arrows Description Move the selected item(s) up or down, one place at a time. Move the selected item(s) to the top or bottom of the list. - OK
-
Click to apply your entries.
- Cancel
-
Click to dismiss this dialog box without applying your entries.