C STA Dialog Box Reference
This section contains reference information for the following types of STA data entry dialog boxes.
For descriptions of dialog boxes relating to user preferences and tables, see the STA Screen Basics Guide.
Login Dialog Box
Login
Description of the illustration ''if_login.jpg''
Description
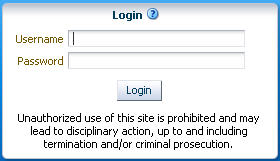
This dialog box appears when you enter the URL of the STA server in your browser. Your STA administrator will provide you with an STA username and password for logging in.
Note:
You have up to five chances to log in successfully. After five unsuccessful login attempts within a five-minute period, you will be locked out of your user account for 30 minutes. For security reasons, your account cannot be reset during the lockout period, even by the STA administrator, so you must wait the full 30-minutes before attempting to log in again.Screen Fields
- Username
-
Required.
Enter the STA username you want to log in with.
- Password
-
Required.
Enter the password assigned to the STA username.
Dashboard Dialog Box
Annotate
Description of the illustration ''if_annotated.png''
Description
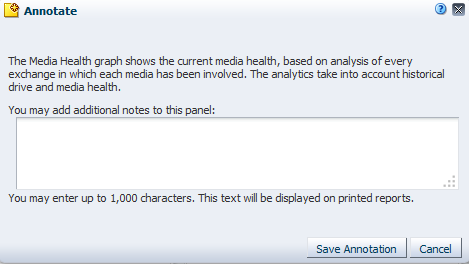
This dialog box allows you to add or modify a Dashboard portlet annotation. It appears when you click Portlet Information on a Dashboard portlet.
Note:
The text you enter is specific to the current Dashboard template. For example, if the Drive Health portlet appears in several Dashboard templates, each instance of the Drive Health portlet can have a different annotation associated with it.Note:
Annotation text is specific to your STA username. For example, annotations entered by one user on the Drive Health portlet do not appear to a user logged in with a different STA username.Screen Fields
- You may add additional notes to this panel:
-
Type the text you want to appear on Executive Reports.
Annotations can be up to 1,000 ASCII characters in length. There are no formatting options, such as boldface or color. Also, spacing options, such as forced line feeds, are not preserved on the Executive Reports.
Filter Dialog Box
Filter Data
Description of the illustration ''if_filterdatad.jpg''
Description
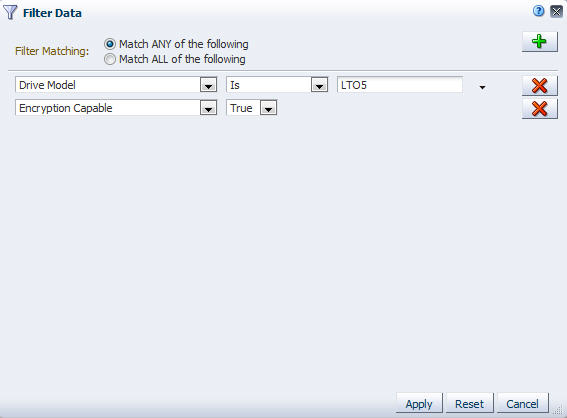
This dialog box allows you to specify the criteria you want to use to filter data in a List View or Pivot table. You can specify any number of criteria.
This dialog box appears when you click Filter Data on a table toolbar.
Screen Fields
- Filter Matching
-
Indicate the type of matching you want to use for the filter. Options are:
-
Match ANY of the following – Selects table records that meet any of the criteria you specify. This is the default.
-
Match ALL of the following – Selects only records that meet all of the criteria you specify.
-
- Filter criteria list
-
Enter the filter criteria you want to apply to the table. You can add as many rows as you want. On each row, you specify the criteria through the following menu selections:
-
Table attribute – All available attributes for the table are listed in the menu.
Note:
If you know the name of the attribute you want to select, you can type the first few letters to quickly move the cursor to that item in the menu. -
Filter operators – Filter operators vary by attribute type.
-
Attribute value – Attribute values vary by attribute.
See "Filter Operators by Attribute Type" for details about the menu selections.
-
Buttons
- Add new filter criteria row
-
Click to add a new row to the list of filter criteria.
- Remove this filter criteria row
-
Click to delete the current row of filter criteria.
- Apply
-
Click to apply your entries. The table is updated to display only those records that meet the selection criteria you have specified.
- Reset
-
Click to reset the dialog box to the default settings.
- Cancel
-
Click to dismiss this dialog box without applying your entries.
Media Validation Overview Dialog Boxes
Cancel Requests
Description of the illustration ''if_mvcanceld.jpg''
Description
This dialog box allows you to cancel a selected media validation request. It appears when you select an in-progress or pending media validation request on the Media Validation Overview screen and then click Cancel.
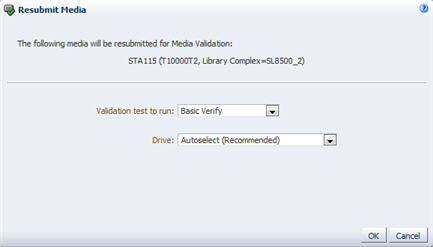
Resubmit Media
Description of the illustration ''if_mvresubmitd.jpg''
Description
This dialog box allows you to resubmit a selected media validation request. It appears when you select a completed media validation request on the Media Validation Overview screen and then click Resubmit Media.
Screen Fields
- Validation test to run
-
Select the media validation test you want to run. The menu lists all verification tests available on T10000C and T10000D drives.
- Perform validations from beginning of tape
-
Appears only if you have selected Complete Verify or Complete Verify Plus. Select this option if you want all selected media to be validated from the beginning of tape (BOT).
- Resume interrupted validations when possible, otherwise start at beginning
-
Appears only if you have selected Complete Verify or Complete Verify Plus. Select this option if you want the selected media to be validated from wherever the previous validations left off, if this can be determined from the media information record (MIR).
- Drive
-
Select the validation drive you want to use. The menu displays all validation drives in the standalone library or library complex.
This option is available only if all media you have selected for validation are in the same standalone library or library complex. If this option is not available, STA automatically selects compatible drives to perform the validations.
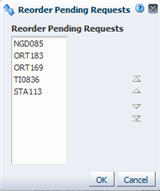
Reorder Pending Requests
Description of the illustration ''if_mvreorderd.jpg''
Description
This dialog box allows you to reorder pending media validation requests. It appears when you click Reorder Pending Requests on the Media Validation Overview screen.
Screen Fields
- Reorder Pending Requests
-
List of all pending media validation requests, in the order they are to be run. Select one or more requests you want to re-order. This field supports multi-select.
Buttons
- Ordering arrows
-
These buttons are active only if you have selected one or more items in the Reorder Pending Requests list.
Arrows Description 
Move the selected item(s) up or down, one place at a time. 
Move the selected item(s) to the top or bottom of the list. - OK
-
Click to apply your updates.
- Cancel
-
Click to dismiss the dialog box without applying your updates.
Logical Groups Dialog Boxes
Logical Groups
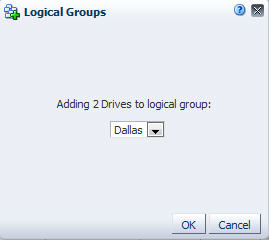
Description of the illustration ''if_logicalgroupsd.jpg''
Description
This dialog box allows you to add drives or media to a manual logical group. It appears when you select one or more drives or media on the Drives – Overview or Media – Overview screen and then click Logical Groups.
Screen Fields
- Adding to Logical Group menu
-
Select the logical group to which you want to add the selected drives or media.
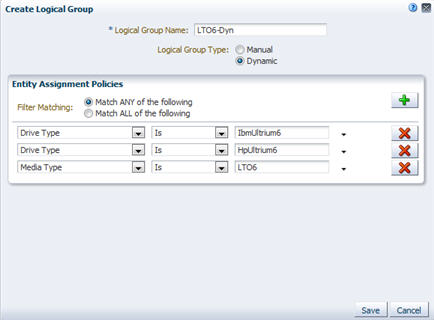
Create or Edit Logical Group
Description of the illustration ''if_lgcreated.jpg''
Description
This dialog box allows you to create manual and dynamic logical groups. For dynamic groups, you use this dialog box to define the matching policy criteria for selecting drives and media for the group.
This dialog box appears when you click Add Logical Group or Edit Logical Group on the Logical Groups screen.
Screen Fields
- Logical Group Name
-
User-assigned name for the logical group. Your entry can be up to 249 alphanumeric characters, and it must be unique.
- Logical Group Type
-
Required field for the Create Logical Group dialog box. Display-only field for the Edit Logical Group dialog box.
Indicate the type of logical group. Options are:
-
Dynamic – Drives and media are automatically selected for this group based on the selection criteria you define.
-
Manual – Drives and media are selected for this group manually.
-
- Filter Matching
-
Note:
This field appears only for dynamic logical groups.Indicate the type of matching you want to use for the selection criteria. Options are:
-
Match ANY of the following – Selects drives and media that meet any of the criteria you specify. This is the default.
-
Match ALL of the following – Selects only drives and media that meet all the criteria you specify.
-
- Selection criteria rows
-
Note:
These fields appear only for dynamic logical groups.Enter the selection criteria you want to use for this group. You can add as many rows as you want. On each row, you specify the criteria through the following menu selections:
-
Drive and media attributes – Selected drive and media attributes are listed in the menu. See "Dynamic Group Selection Criteria" for the complete list.
Note:
If you know the name of the attribute you want to select, you can type the first few letters to quickly move the cursor to that item in the menu. -
Selection operators – Selection operators vary by attribute type. These are similar to the operators in the Filter Data dialog box. See "Filter Operators by Attribute Type" for details.
-
Attribute value – Attribute values vary by attribute.
-
Buttons
- Add new filter criteria row
-
Note:
This button appears only for dynamic logical groups.Click to add a new row to the list of selection criteria.
- Remove this filter criteria row
-
Note:
This button appears only for dynamic logical groups.Click to delete the associated selection criteria row.
- Save
-
Click to save the logical group. If it is a dynamic group, STA begins building the group according to the specified selection criteria.
- Cancel
-
Click to dismiss this dialog box without applying your entries.
Delete Logical Group
Description of the illustration ''if_lgdeleted.jpg''
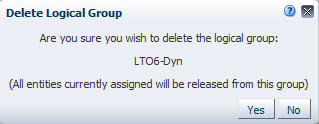
Description
This dialog box allows you to confirm whether you want to delete the selected logical group. It appears when you when you select a logical group on the Logical Groups screen and then click Delete.
Unassign Entities
Description of the illustration ''if_lgunassignd.jpg''
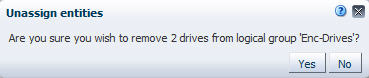
Description
This dialog box allows you to confirm whether you want to remove the selected drives or media from the manual logical group. It appears when you select one or more records in the Drives or Media table on the Logical Groups screen and then click Unassign Entities.
Alerts Policies Dialog Boxes
Alert Policy Wizard
Description of the illustration ''if_alrtreviewd.jpg''
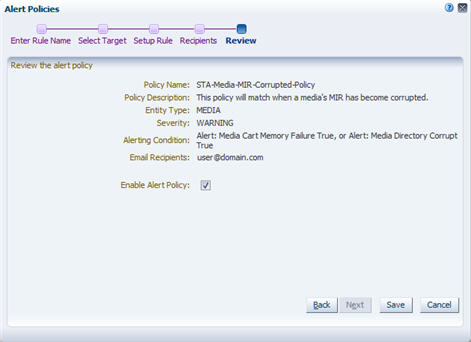
Description
This wizard allows you to define and enable new alert policies. It also allows you to modify information for existing policies.
This wizard appears when you select New Alert Policy or Edit Alert Policy on the Alerts Policies screen.
Screen Fields
Policy Name
- Policy Name
-
User-assigned name for the alert policy. Your entry can be up to 250 alphanumeric characters, and it must be unique.
- Policy Description
-
Optional field. User-assigned description of the alert policy.
Policy Type
- Entity Type
-
Select the type of library system component or event for which this policy may generate alerts.
- Select Severity
-
Select the severity level of the alert policy. Options are:
-
Severe – May generate alerts every hour
-
Warning – May generate alerts every 24 hours
-
Informative – May generate just one alert
-
Alert Criteria
- Filter Matching
-
Indicate the type of matching you want to use for the alert policy criteria. Options are:
-
Match ANY of the following – Triggers an alert when any of the criteria you specify are met. This is the default.
-
Match ALL of the following – Triggers an alert only when all the criteria you specify are met.
-
- Alert criteria rows
-
Enter the criteria you want to use for this alert policy. You can add as many rows as you want. On each row, you specify the criteria through the following menu selections:
-
Attributes – The attributes vary according to the selected Entity Type.
Note:
If you know the name of the attribute you want to select, you can type the first few letters to quickly move the cursor to that item in the menu. -
Selection operators – Selection operators vary by attribute type. These are similar to the operators in the Filter Data dialog box. See "Filter Operators by Attribute Type" for details.
-
Attribute value – Attribute values vary by attribute.
-
Recipients
- Email Recipients
-
Select the check box of each email address to receive emails whenever alerts are generated from this policy.
Review
- Enable Alert Policy
-
Select the check box to create the policy and enable it immediately. De-select the check box to create the policy but leave it disabled for now; you can enable it at a later time.
Buttons
- Breadcrumbs
-
Breadcrumbs are activated for wizard screens you have already visited and for the next immediate screen. Click a link to go directly to the selected screen.
- Back
-
Click to go back to the previous screen in the wizard.
- Next
-
Click to go to the next screen in the wizard.
- Cancel
-
Click to exit the wizard without applying your entries.
- Save
-
Note:
This button appears only on the last screen of the wizard.Click to apply your entries and create or update the alert policy.
Executive Reports Policies Dialog Boxes
Add/Edit Executive Reports Policy

Description of the illustration ''if_execrptd.png''
Description
This dialog box allows you to define or modify an Executive Report definition, including name, source Dashboard template, run frequency, shared status, and email recipients.
This dialog box appears when you click Add or Edit on the Executive Reports Policies screen.
Screen Fields
- Report Name
-
Type the name you want to assign to the report. Your entry can be up to 255 alphanumeric characters.
- Source Dashboard Template
-
The menu lists all Dashboard templates that are available to the current STA username. Select the template you want to use as the basis of the Executive Report. The report will include all information in this template.
- Locale
-
The menu lists all languages in which Executive Reports can be produced. Select English.
- Start Date
-
Specify the date when you want scheduled runs of this report to begin. Reports are run shortly after 00:30 UTC, starting on this date. The default is tomorrow, in which case the report runs for the first time shortly after 00:30 UTC the day after it is defined.
- Run Frequency
-
In the menu, select the frequency at which you want the report to run. Options are:
-
Daily
-
Every 7 days
-
Every 30 days
-
Every 90 days
-
Every 365 days
-
- Shared
-
This field allows you to specify whether this report can be shared with all STA users in the STA user interface. You must select one of the following options:
-
Public – Report is available to all users.
-
Private– Report is available to the current STA username only. This does not affect the email recipients list—copies of the report can be emailed to any addresses that have been defined to STA, as described below.
-
- Email Recipients
-
Specify the email addresses to which you want copies of this report emailed after each report run. An email is sent to each address with a PDF attachment of the report.
The menu lists all email addresses that have been defined to STA. In the menu, select the check box next to each email address you want to receive this report. You can select as many addresses as you want. Select the "All" check box to select all check boxes in the list.
Buttons
- Save
-
Click to apply your entries. The report will be run automatically at the first scheduled date. You can also run the report manually by selecting Setup & Administration, then Executive Reports Policies.
- Save and Run
-
Click to apply your entries and run this report now. This does not affect the report's regular schedule.
- Cancel
-
Click to dismiss this dialog box without applying your entries.
Reports
Description of the illustration ''if_reportsd.jpg''
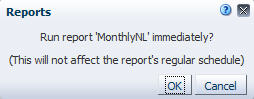
Description
This dialog box allows you to confirm whether you want to run the selected Executive Report. The report is run at the first available opportunity, which could take up to two minutes.
This dialog box appears when you click Run on the Executive Reports Policies screen.
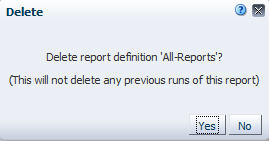
Delete
Description of the illustration ''if_execrptruldeld.jpg''
Description
This dialog box allows you to confirm whether you want to delete the selected Executive Report definition.
This dialog box appears when you click Delete on the Executive Reports Policies screen.
Templates Management Dialog Boxes
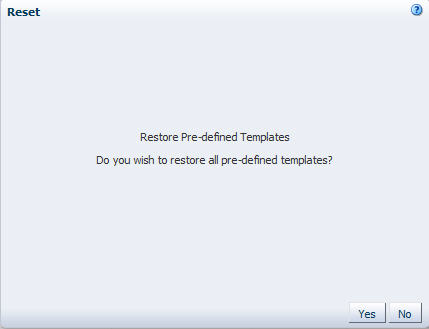
Reset (Templates)
Description of the illustration ''if_resettemplates.jpg''
Description
This dialog box allows you to restore all STA predefined templates that have been deleted. The templates will be restored and made available to all users.
This dialog box appears when you click Restore Predefined Templates on the Templates Management screen.
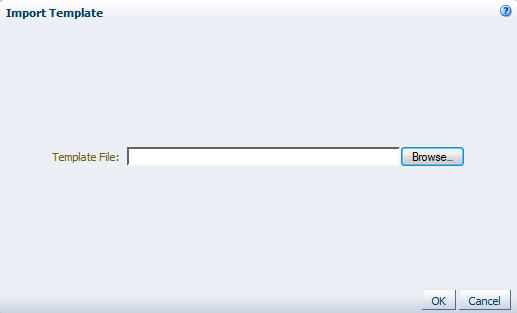
Import Template
Description of the illustration ''if_tmptimportd.jpg''
Description
This dialog box allows you to import a template from your local computer so it is available to your STA username.
Screen Fields
- Template File
-
Click Browse and navigate to the location of the template file you want to import. The file must have a .xml extension.
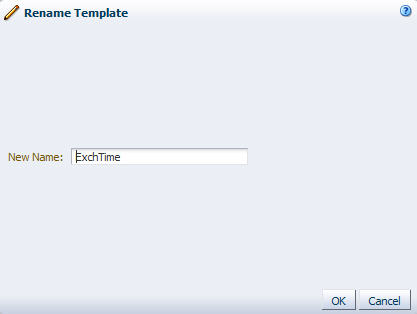
Rename Template
Description of the illustration ''if_tmptrenamed.jpg''
Screen Fields
- New Name
-
Type the name you want to assign. Your entry can be up to 255 alphanumeric characters, and it must be unique.
Delete Template
Description of the illustration ''if_tmptdeleted.jpg''
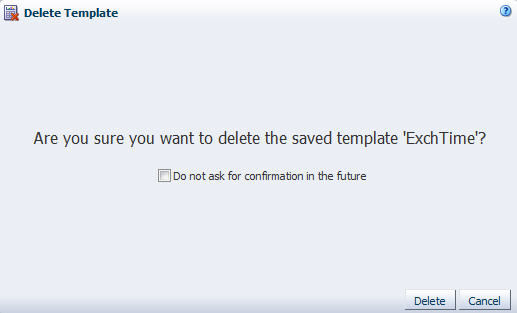
Description
This dialog box allows you to confirm the deletion of a template. It appears when you click Delete on the Templates Management screen and your Confirmation preferences indicate you want to be prompted before deleting a template.
Screen Fields
- Do not ask for confirmation in the future
-
Select this check box to suppress this dialog box for future template deletions.
You can restore the dialog box at any time; see the STA Screen Basics Guide for instructions.
Save Template

Description of the illustration ''if_tmptsaved.jpg''
Description
This dialog box allows you to save the current screen settings as a template. It appears when you click Save Template on the Templates Toolbar.
Screen Fields
- Template Name
-
User-defined name for this template. Your entry can be up to 255 alphanumeric characters in length.
If you type a new name, a new template is created. If you type a name that already exists, the specified template is overwritten with any changes you have made to the screen. Depending on your Confirmation preferences, you may be prompted for a confirmation before overwriting an existing template.
- Shared
-
Indicate whether you want the template to be visible to other STAusernames. Options are:
-
Private – The template is available to the current STAusername only.
-
Public – The template is available to all STAusernames.
-
Save Template (Overwrite)

Description of the illustration ''if_tmptsaveconfd.jpg''
Description
This dialog box allows you to confirm modifications to an existing template. It appears when you are about to overwrite an existing template and your Confirmation preferences indicate you want to be prompted before doing so.
Screen Fields
- Do not ask for confirmation in the future
-
Select this check box to suppress this dialog box for future template modifications.
You can restore the dialog box at any time; see the STA Screen Basics Guide for instructions.
Default Template
Description of the illustration ''if_tmptdefaultd.jpg''
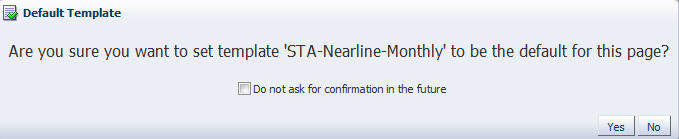
Description
This dialog box allows you to confirm the currently applied template as the default for this screen. It appears when you click Default Template in the Templates toolbar on any screen and your Confirmation preferences indicate you want to be prompted before setting a new default.
Screen Fields
- Do not ask for confirmation in the future
-
Select this check box to suppress this dialog box when you set a default template in the future.
You can restore the dialog box at any time; see the STA Screen Basics Guide for instructions.
Media Validation Policy Wizard and Dialog Boxes
Media Validation Configuration Confirmation
Description of the illustration ''if_mvcfgconf.jpg''
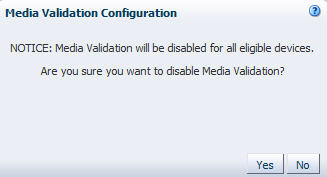
Description
This dialog box allows you to confirm whether you want to enable or disable the media validation feature on STA. This is a global setting and affects media validation operations for your entire tape library system.
This dialog box appears when you select the Enabled or Disabled radio buttons in the Media Validation State field on the Media Validation Configuration screen.
Media Validation Policy Wizard
Description of the illustration ''if_mvreviewd.jpg''
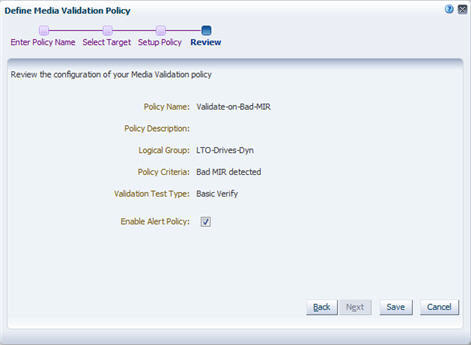
Description
This wizard allows you to define and enable new media validation policies. It also allows you to modify information for existing policies.
This wizard appears when you click New Media Validation Policy, Edit Media Validation Policy, or Copy Media Validation Policy on the Media Validation Policies toolbar.
Screen Fields
Enter Policy Name
- Policy Name
-
User-assigned name for the media validation policy. Your entry can be up to 250 alphanumeric characters, and it must be unique.
- Policy Description
-
Optional field. User-assigned description of the media validation policy.
Select Target
- Select media type and optional library complex
-
Click this button to indicate you want to have media selected for validation based on media type and optional library complex.
- Media Type
-
Select the type of media.
- Library Complex (Optional)
-
Select the library complex.
- Select logical group
-
Click this button to indicate you want to have media selected for validation based on a defined logical group.
- Logical Group
-
Select the logical group.
Set Up Policy
- Policy Criteria
-
Select the criteria for selecting media within the group you have specified on the previous screen. Options are:
-
Random selection – This is the default.
-
Media Health = Action
-
Media Health = Evaluate
-
Media Health = Monitor
-
Extended period of non-use
-
Newly entered
-
Bad MIR detected
-
- Validation Test Type
-
Select the type of validation to be performed by this policy. Options are:
-
Basic Verify
-
Standard Verify
-
Complete Verify
-
Complete Verify Plus
-
Verify Rebuild MIR
-
Review
- Enable Policy
-
Select the check box to create the policy and enable it immediately. De-select the check box to create the policy but leave it disabled for now; you can enable it at a later time.
Buttons
- Breadcrumbs
-
Breadcrumbs are activated for wizard screens you have already visited and for the next immediate screen. Click a link to go directly to the selected screen.
- Back
-
Click to go back to the previous screen in the wizard.
- Next
-
Click to go to the next screen in the wizard.
- Cancel
-
Click to exit the wizard without applying your entries.
- Save
-
Note:
This button appears only on the last screen of the wizard.Click to apply your entries and create or update the alert policy.
Service Log Dialog Boxes
Create New Log Bundle
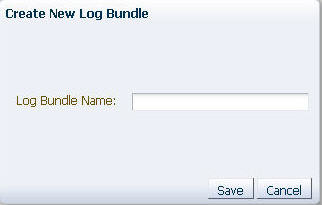
Description of the illustration ''if_logbundle.jpg''
Description
This dialog box allows you to assign a name to a new RDA (Remote Diagnostic Agent) log bundle.
This dialog box appears when you click Create New Log Bundle on the Logs Toolbar.
Screen Fields
- Log Bundle Name
-
Enter a name. Log name requirements are:
-
Maximum of 210 characters
-
Can only contain alphanumeric characters and underscores, but cannot contain four or more consecutive underscores.
-
Spaces are replaced with underscores.
-
Cannot begin with the following uppercase characters:
- COM
- LPT
- PRN
- CON
- AUX
- NUL
-
Log Bundle Run Info
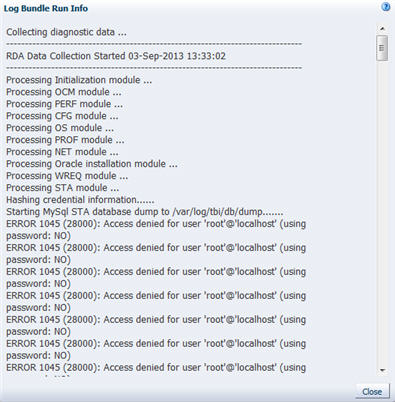
Description of the illustration ''if_logbundleinfo.jpg''
Delete Selected Log Bundle
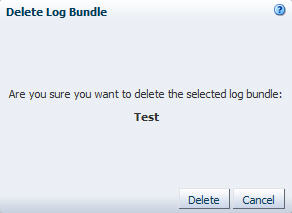
Description of the illustration ''if_logdeleted.jpg''
Description
This dialog box allows you to confirm whether you want to delete the selected log bundle. It appears when you when you select a bundle on the Service – Logs screen and then click Delete. The name of the selected bundle is displayed in the dialog box.
SNMP Connections Dialog Boxes
Define SNMP Client Settings
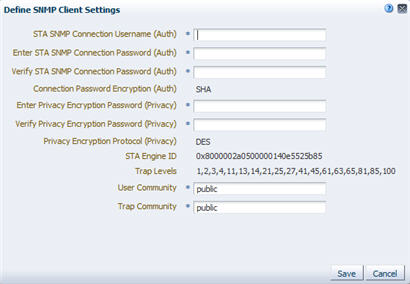
Description of the illustration ''if_snmpclientset.jpg''
Description
This dialog box allows you to define SNMP connection settings for STA so it can receive SNMP data from one or more libraries. You must define settings for both the SNMP v3 and SNMP v2c protocols. The appropriate settings (SNMP v3 or SNMP v2c) will be used with each monitored library, depending on library firmware level and which SNMP protocol the library is configured to use.
You must define all of the following settings:
-
For SNMP v3 connections:
-
User name
-
Connection authorization password
-
Privacy password
-
-
For SNMP v2c connections:
-
User community name
-
Trap recipient name
-
This dialog box appears when you click Edit on the SNMP Client Attributes Toolbar.
Screen Fields
Note:
The following fields define the SNMP v3 connection settings for STA, and all are required. If all monitored libraries use SNMP v2c for STA communications, these entries will be ignored and you can enter any values.- STA SNMP Connection Username (Auth)
-
Required.
Enter the name of the STA SNMP v3 user. This user must also be defined on all monitored libraries that use the SNMP v3 protocol for STA communications.
- Enter STA SNMP Connection Password (Auth)
-
Required.
Enter the connection authorization password for the SNMP v3 user. This password must also be defined on all monitored libraries that use the SNMP v3 protocol for STA communications.
- Verify STA SNMP Connection Password (Auth)
-
Required.
Re-type the connection password to ensure that you have entered it correctly. An error message will be displayed if the two passwords do not match.
- Connection Password Encryption (Auth)
-
Display only.
Encryption technique for storing the connection password. This is always SHA (Secure Hash Algorithm).
- Enter Privacy Encryption Password (Privacy)
-
Required.
Enter the privacy encryption password for the SNMP v3 user. This password must also be defined on all monitored libraries that use the SNMP v3 protocol for STA communications.
- Verify Privacy Encryption Password (Privacy)
-
Required.
Re-type the privacy password to ensure that you have entered it correctly. An error message will be displayed if the two passwords do not match.
- Privacy Encryption Protocol (Privacy)
-
Display only.
Encryption technique for the SNMP privacy mechanism. This is always DES (Data Encryption Standard).
- STA Engine ID
-
Display only.
Globally unique SNMP engine ID for the STA server. This is assigned by STA and is distinct from the library engine ID provided by each library. Both are required to ensure secure communication.
- Trap Levels
-
Display only.
List of all the SNMP traps that STA can process. This does not necessarily mean that these traps have been configured on the monitored libraries; you must verify this on each library.
Note:
The following fields define the SNMP v2c connection settings for STA, and both are required. - User Community
-
Required.
Enter the name of the STA SNMP v2c user. This user must also be defined on all monitored libraries that use the SNMP v2 protocol for STA communications. The default is public.
Note:
If all monitored libraries use SNMP v3 for STA communications, this entry will be ignored and you should leave the value set to public. - Trap Community
-
Required.
Enter the name of the STA SNMP v2c trap recipient. This trap recipient must also be defined on all monitored libraries that use the SNMP v2 protocol for sending traps to STA. The default is public.
Note:
If all monitored libraries use SNMP v3 for sending STA traps, this entry will be ignored and you should leave the value set to public.
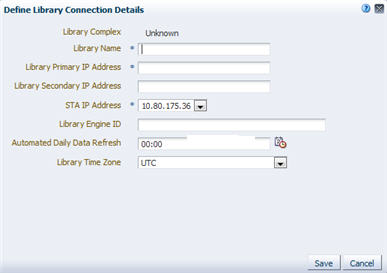
Define Library Connection Details
Description of the illustration ''if_libcxn.jpg''
Description
This dialog box allows you to define connection details for a library that you want to connect to STA.
This dialog box appears when you click Add or Edit on the SNMP Monitored Libraries Toolbar.
Screen Fields
- Library Complex
-
Display only.
Library complex ID. This ID is automatically generated by STA when you successfully retrieve the latest library configuration data.
- Library Name
-
Required.
Enter the name you want to assign to the library. This name will be used to identify the library throughout the STA screens. You may want to use the library host name.
- Library Primary IP Address
-
Required.
Enter the IP address of the public port on the library. For SL150 libraries, this is the Network Port 1 port; for SL500 libraries, it is the 1B port; for SL3000 and SL8500 libraries, it is the 2B port.
Note:
For SL3000 and SL8500 libraries using the Redundant Electronics feature, this is the 2B port on the active controller card. - Library Secondary IP Address
-
This field does not apply to SL150 and SL500 libraries and should be left blank.
For SL3000 and SL8500 libraries, your entry in this field depends on the specific configuration of the library. This entry enables STA to maintain uninterrupted SNMP communications with the library if either a Redundant Electronics switch or a Dual TCP/IP failover occurs.
-
For libraries with the Redundant Electronics feature, enter the IP address of the 2B port on the alternate (standby) controller card
-
For libraries with the Dual TCP/IP feature, enter the IP address of the 2A port on the active controller card.
-
For libraries with both features, you can choose which IP address to enter, depending on which feature you want STA to support without interruption.
-
For libraries with neither of these features, leave this field blank.
-
- STA IP Address
-
Required.
The menu lists all available IP addresses for the STA server. Select the IPv4 address the library should use to send SNMP data to the server. If there is more than one listed and you are not sure which one to use, see your STA administrator for assistance.
- Library Engine ID
-
Unique SNMP engine ID of the library automatically provided by the library whenever a library data collection is performed.
Under normal circumstances, you should not modify this field. However, if you have reason to believe the library engine ID has changed (due to a firmware upgrade, for example), you should blank out this field and STA will detect the new engine ID during the next Check/Test Connection or Get Latest Data operation. This is the only time you should modify this field.
- Automated Daily Data Refresh
-
Enter the time of day when you want STA to collect the latest configuration data from the library. The data will be collected automatically every 24 hours at this time, local to the time zone you specify in the Time Zone field.
The default is 00:00 (12:00 am). Use 24-hour time format for your entry (for example, 13:00 is 1:00 pm).
Note:
It is recommended that you choose a time period when there is typically lighter library usage, so the data collection does not conflict with other significant library activity.Caution:
If you leave this field blank, scheduled automatic library data collections will be disabled. This will cause your STA library configuration data to become out of sync with the library. - Library Time Zone
-
In the menu, select the library's local time zone.
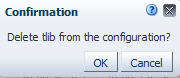
Confirmation (Delete Library Connection)
Description of the illustration ''if_libcxndeleteconf.jpg''
Description
This dialog box allows you to confirm whether you want to delete the selected library connection. It appears when you when you select a monitored library on the Configuration – SNMP Connections screen and then click Delete.
User Management Dialog Boxes
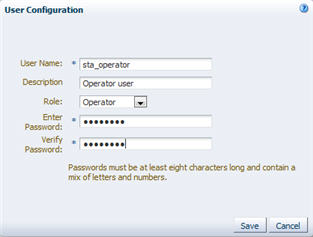
User Configuration
Description of the illustration ''if_userconfigd.jpg''
Description
This dialog box allows you to create or modify an STA username.It appears when you click Create New User or Modify User on the Configuration – Users screen.
Screen Fields
- User Name
-
Note:
This field is active only for Create New User.Type the name you want to assign to this STA user.
STA username requirements are as follows:
-
Must be 1–16 characters in length
-
All usernames must be unique
-
- Description
-
Type a brief description of the STA username.
- Role
-
Select the role you want to assign to this STA username. Options are:
-
Viewer – Can access all Home, Tape System Hardware, and Tape System Activity screens.
-
Operator – Has all privileges of the Viewer role. Also has editing privileges for some Setup & Administration screens and view-only privileges on Configuration screens.
-
Administrator – Has all privileges of the Operator role, plus has full editing privileges for all Setup & Administration screens.
-
- Enter Password
-
Type the password to want to assign to the user. The entry is masked as you type. See "Username and Password Requirements" for detailed requirements.
- Verify Password
-
Type the password again to verify that you have entered it correctly.
Delete User

Description of the illustration ''if_userdeleted.png''
Description
This dialog box allows you to confirm whether you want to delete the selected user. It appears when you select an STA username on the Configuration – Users screen and then click Delete.
Screen Fields
- If this user has private templates or groups, how do you wish to handle them?
-
Indicate what you want to do with any logical groups or private templates owned by this STA username. Options are:
-
Make them public – Keep the templates, Executive Report policies, and logical groups, but make them public and available to all STA usernames. This is the default.
-
Delete them – Delete all private templates, Executive Report policies, and logical groups owned by this STA username.
-
Email Configuration Dialog Boxes
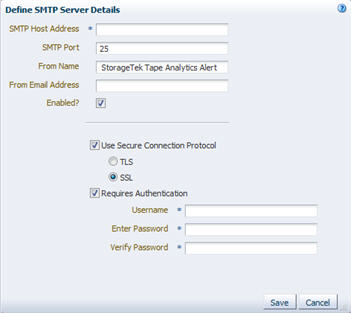
Define SMTP Server Details
Description of the illustration ''if_smtpserver.jpg''
Description
This dialog box allows you to define the email settings for the SMTP server used to send emails from the STA application.
This dialog box appears when you click Edit Selected SMTP Server on the Configuration – Email screen.
Screen Fields
- SMTP Host Address
-
Enter the IP address or fully qualified DNS alias of your SMTP email server.
- SMTP Port
-
Enter the SMTP port number for outgoing mail transport. Typically, this is port 25, but check with your IT system administrator to verify that this is the port used at your site.
- From Name
-
Enter the name you want displayed in the "From" line in email from the server.
- From Email Address
-
Enter the email address from which the email is being sent. If you do not want users to reply to this email, you may want to enter an address in the format:
DoNotReply@Your_Company.com - Enabled?
-
Select this check box to enable the SMTP email server. De-select this check box to disable the email server.
- Use Secure Connection Protocol
-
Select this check box to select the appropriate secure connection protocol. See your IT system administrator to determine which connection is right for you. You must select one of the following options:
-
TLS – Click to select Transport Layer Security.
-
SSL– Click to select Secure Sockets Layer.
-
- Requires Authentication
-
Select this check box to indicate that the SMTP server requires authentication.
- Username
-
Enter a username supported by the SMTP server. Required only if you have selected the Requires Authentication check box.
- Enter Password
-
Enter the password assigned to the user. Required only if you have selected the Requires Authentication check box.
- Verify Password
-
Enter the password again to verify that you have entered it correctly. Required only if you have selected the Requires Authentication check box.
Define Email Details
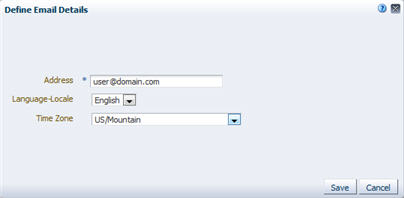
Description of the illustration ''if_emaildetails.jpg''
Description
This dialog box allows you to add an email address eligible to receive emails from STA.
This dialog box appears when you click Add Email or Edit Selected Email on the Email Addresses Toolbar on the Configuration – Email screen.
Screen Fields
- Address
-
Enter a destination to send email to in the form:
your_name@your.company.com - Language-Locale
-
In the menu, select English if it is not already displayed.
- Time Zone
-
In the menu, select the recipient's local time zone.