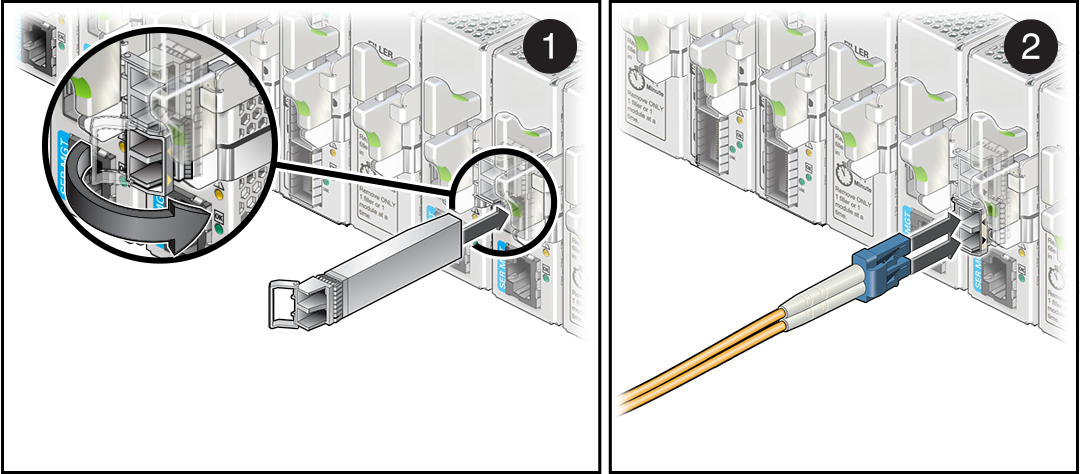
Connect Cables and Transceivers
- Identify the prerequisite and subsequent installation tasks that you must perform in conjunction with this task.
- Attach the cable to the appropriate connector of the node or host.
- Route and bundle the data cables through the physical topology.
- Bring the cable to the location in the rack where the module is installed.
-
Orient the transceiver squarely and horizontally with the selected SFP+ port,
then carefully insert the transceiver into the port on the module until you feel
a detent or click..
Ensure the metal clip on the transceiver is in the closed position.
- Remove the protective cap (if present) from the receptacle on the transceiver and the connector of the cable, and visually inspect the cable connector.
-
Orient the cable connector to the receptacle squarely and horizontally.
Note - Ensure the metal clip on the transceiver is in the closed position prior to connecting the cable to the transceiver.
- Slowly move the connector in, and continue to push the connector in until you feel a click.
- Repeat Step 2 to Step 8 for any other cables and transceivers to be connected.
- If the rack rear door is installed, close and secure it.
- Verify the module installation.