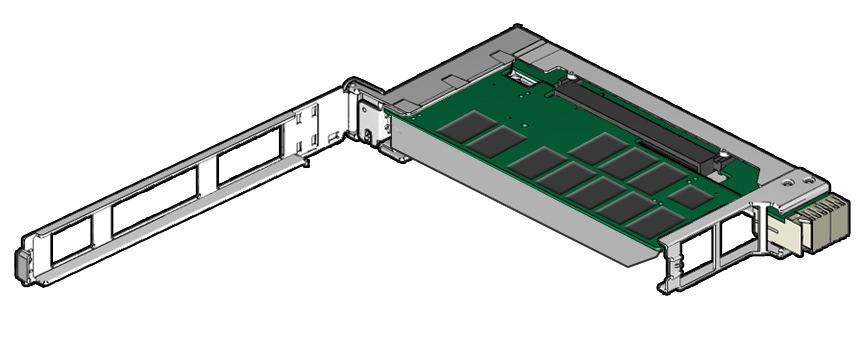
Install a New Oracle F640 Flash Card (Server Power-On)
To install a new Oracle Flash Accelerator F640 PCIe Card in a supported powered-on server when the card is hot-plug inserted into an empty PCIe carrier:
Note - Refer to the server service manual for PCIe card installation instructions.
- Prepare the Oracle F640 Flash Card for installation.
- Back up your data, as required, before changing your server configuration.
-
Identify a supported and available PCIe carrier in the server.
Refer to the server service manual for PCIe carrier and slot locations in the server.
-
Prepare the server for service.
Refer to the server service manual for detailed instructions.
- Remove the domain from active operation, as required.
-
Take antistatic measures.
See ESD Safety Measures.
-
Remove the carrier from the server slot.
Note - Your server chassis might require a PCIe carrier extension for each installed Oracle Flash Accelerator F640 PCIe Card to facilitate airflow. Your server chassis might contain a card carrier or other configuration. Refer to the server service manual for PCIe card installation instructions. -
Record the serial number of Oracle F640 Flash Card and the PCIe slot number
where the card will be installed.
This server slot information can be used at a later time for identifying Oracle F640 Flash Cards from the console. Refer to the server service manual for server slot information.
-
Install Oracle F640 Flash Card in the carrier.

-
Unlatch and swing open the arm of the PCIe card carrier, and insert
the new Oracle F640 Flash Card until the bottom connector is firmly
seated in the carrier's connector.
The card is correctly seated only when the notch at the top of the card bracket fits around a guide post on the carrier.

Caution - Do not twist or turn the PCIe card as you insert it into the carrier. The card's connector must be fully seated in the carrier's slot before you attempt to close the top cover.
Note - If the PCIe card includes a mounting screw, do not use the mounting screw. The carrier does not accept mounting screws. -
Close the top of the carrier.
The green latch should click into place. If the top is difficult to close, verify that the notch of the card bracket or filler panel fits around the guide post.
-
Unlatch and swing open the arm of the PCIe card carrier, and insert
the new Oracle F640 Flash Card until the bottom connector is firmly
seated in the carrier's connector.
-
Insert the carrier into the server chassis.
Refer to the server service manual for detailed instructions.
-
Return the server to service.
Refer to the server service manual for detailed instructions.
-
Configure the server for the new Oracle F640 Flash Card.
Refer to the server documentation library for detailed instructions. Refer to the server administration guide or the operating system documentation detailed NVMe SSD configuration instructions.
- If applicable, perform any required commands for your system to install the device driver for the new Oracle F640 Flash Card.
- If applicable, perform any required commands for your system to recognize the new Oracle F640 Flash Card.
-
Verify successful installation of the Oracle F640 Flash Card through
the server operating system.
When the installation is complete, the Oracle Flash Accelerator F640 PCIe Card is visible to the server operating system.
- Configure the system to maximize flash technology.