Setting Up General Control Data
To set up general control data, use these components:
Change Control Management (PC_CHC).
Issue Priorities (PC_IM_PRIORITY).
Issue Status (PC_IM_STATUS).
Issue Types (PC_IM_TYPE).
Project Category Setup (PGM_CATEGORY_SETUP).
Application Area Setup (PGM_APPLAREA_SETUP).
Application Setup (PGM_APPLICAT_SETUP).
Project Risk Type (PGM_RISK_TYPE).
Release Type (PGM_RELEASE_TYPE).
Release Management (PGM_RELEASE).
Root Cause Area Setup (PGM_RCA_SETUP).
|
Page Name |
Definition Name |
Usage |
|---|---|---|
|
PC_CHC_CFG |
Create or modify a change control template. |
|
|
PC_IM_PRIORITY |
Define priorities that are used to classify activity, project, or program issues. |
|
|
PC_IM_STATUS |
Define statuses that are used to classify activity, project, or program issues. |
|
|
PC_IM_TYPE |
Define issue types that are used to classify activity, project, or program issues. |
|
|
PGM_CATEGORY_SETUP |
Define categories that are used to classify programs, projects, and project requests. |
|
|
PGM_APPLAREA_SETUP |
Define application areas used to group similar applications together. Applications identify a module or specialty within a software product. |
|
|
PGM_APPLICAT_SETUP |
Define applications used to identify a module or specialty within a software product. |
|
|
PGM_RISK_TYPE |
Define risk types and select the risk type status. |
|
|
PGM_RELEASE_TYPE |
Define and maintain release types by SetID. |
|
|
PGM_RELEASE |
Create and edit release information. |
|
|
PGM_RCA_SETUP |
Define root cause areas that you can specify when you enter a project or budget change request. |
Use the Change Control Template page (PC_CHC_CFG) to create or modify a change control template.
Navigation:
This example illustrates the fields and controls on the Change Control Template page. You can find definitions for the fields and controls later on this page.

Use this page to specify which change control attributes are to be monitored and to what extent. Options for the fields on this page are:
Field or Control |
Description |
|---|---|
Off |
Select to disable change control for this attribute. This is the default setting. |
On |
Select to enable change control for this attribute. They system automatically generates the user name, change made, and date for the changes. |
User Input |
Select to enable change control for this attribute and to require users to enter a reason for the change. When you select this option, the Change Control User Input page automatically appears after users save the changes. This option is not available for project transactions or estimate to complete changes. |
Use the Issue Priorities page (PC_IM_PRIORITY) to define priorities that are used to classify activity, project, or program issues.
Navigation:
This example illustrates the fields and controls on the Issue Priorities page. You can find definitions for the fields and controls later on this page.

PeopleSoft Program Management delivers issue priority values of HIGH, MEDIUM, and LOW. Add a new row on this page to inactivate a priority or enter a different priority description.
Select a Description value of High, Medium, or Low for the priority that you are defining. You can select these priorities when you enter or edit an issue using the Issue page.
Issue priorities are represented by these colored visual indicators when issues appear on pagelets:
Field or Control |
Description |
|---|---|
|
The system displays this symbol when the selected priority for an issue is mapped to the high priority level. |
|
The system displays this symbol when the selected priority for an issue is mapped to the medium priority level. |
|
The system displays this symbol when the selected priority for an issue is mapped to the low priority level. |


Use the Issue Status page (PC_IM_STATUS) to define statuses that are used to classify activity, project, or program issues.
Navigation:
This example illustrates the fields and controls on the Issue Status page. You can find definitions for the fields and controls later on this page.
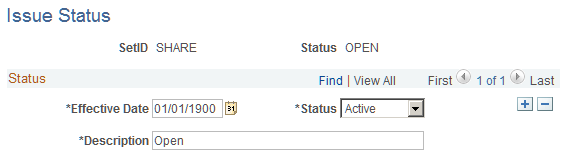
The statuses that you define on this page are available for selection when you enter or edit an issue using the Issue page. You must define issue statuses before you can enter an issue. Enter the effective date, status, and description for the issue status. You can select from only active issue statuses when you create an issue.
Use the Issue Types page (PC_IM_TYPE) to define issue types that are used to classify activity, project, or program issues.
Navigation:
This example illustrates the fields and controls on the Issue Type page. You can find definitions for the fields and controls later on this page.

The issue types that you define on this page are available for selection when you enter or edit an issue using the Issue page. You must define issue types before you can enter an issue. Enter the effective date, status, and description for the issue type. You can select from only active issue types when you create an issue.
Use the Category page (PGM_CATEGORY_SETUP) to define categories that are used to classify programs, projects, and project requests.
Navigation:
This example illustrates the fields and controls on the Category page. You can find definitions for the fields and controls later on this page.
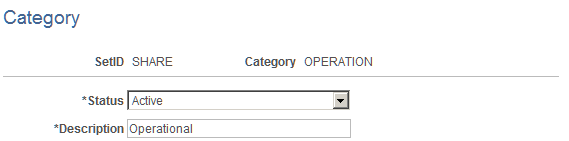
The categories that you define on this page are available for selection when you create or edit a project using the Project Definitions - General Information page. Enter the status and description for the category.
Use the Application Area page (PGM_APPLAREA_SETUP) to define application areas used to group similar applications together.
Applications identify a module or specialty within a software product.
Navigation:
This example illustrates the fields and controls on the Application Area page. You can find definitions for the fields and controls later on this page.
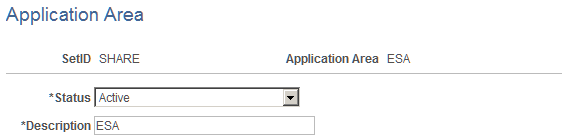
The application areas that you define on this page are available for selection when you create or edit a project using the Project Definitions - General Information page. Specify the status and description for the application area. You can select from only active application areas when you create applications.
Use the Application page (PGM_APPLICAT_SETUP) to define applications used to identify a module or specialty within a software product.
Navigation:
This example illustrates the fields and controls on the Application page. You can find definitions for the fields and controls later on this page.
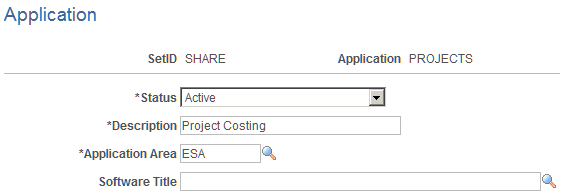
The application that you define on this page are available for selection when you create or edit a project using the Project Definitions - General Information page.
Field or Control |
Description |
|---|---|
Application Area |
Enter the area to which the application belongs. An application can only belong to one application area. You must set up application areas before you can set up applications. |
Field or Control |
Description |
|---|---|
Software Title |
Select the software package to associate with this application. The field appears only if you have PeopleSoft Information Technology Asset Management installed. |
Use the Project Risk Types page (PGM_RISK_TYPE) to define risk types and select the risk type status.
Navigation:
This example illustrates the fields and controls on the Project Risk Types page. You can find definitions for the fields and controls later on this page.
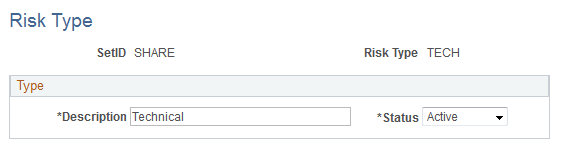
Specify the description and status for the project risk type. You can select from only active project risk types when you create risks.
Use the Release Type page (PGM_RELEASE_TYPE) to define and maintain release types by SetID.
Navigation:
This example illustrates the fields and controls on the Release Type page. You can find definitions for the fields and controls later on this page.

Specify the status and description for the release type. You can select from only active release types when you define a release.
Use the Release page (PGM_RELEASE) to create and edit release information.
Navigation:
This example illustrates the fields and controls on the Release page. You can find definitions for the fields and controls later on this page.

Field or Control |
Description |
|---|---|
Release Manager |
Enter the employee ID of the person responsible for managing this release. |
Release Status |
Select the status of this release from these options:
Note: For all of the online pages containing release information, the system displays only active or pending releases. |
Original Release Date |
Enter the date on which this release is due. If the release date changes, enter the revised release date into the Current Target Release Date field. |
Current Target Release Date |
Enter the revised target release date. For a new release, the default value for this field is the current date. For all of the online pages containing release information, the system displays the current target release date. |
Release Type |
Enter the type of release. You must define release types on the Release Type page before you can select a release type for a release. |
Additional Fields |
Click to access the Release Additional Fields page and enter additional information. The fields on the Release Additional Fields page are user-defined fields for informational purposes only. |
Attachments
Field or Control |
Description |
|---|---|
Add Attachment |
Click to add an attachment. Note: You must have the File Attachment option set on the Installation Options - Project Costing page for attachments to work. See PeopleSoft Asset Lifecycle Management, Enterprise Service Automation, Financial Management, Staffing Front Office, and Supply Chain Management Product-Specific Installation Instructions located on Oracle's PeopleSoft My Oracle Support website. |
File Name |
Displays the name of the file that you upload. |
Added By, Name, and Date/Time Stamp |
Displays information about the user who adds the attachment, and the date and time that the upload occurred. |
Use the Root Cause Area Setup page (PGM_RCA_SETUP) to define root cause areas that you can specify when you enter a project or budget change request.
Navigation:
This example illustrates the fields and controls on the Root Cause Area Setup. You can find definitions for the fields and controls later on this page.
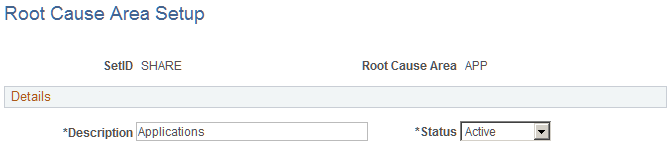
You can specify a root cause area for informational purposes when you enter a project change request or a budget change request. Enter the root cause area description and status.