4 How Do I Schedule a Report for Distribution?
You can schedule reports to be automatically sent to groups or individual users, so that you and those you work with receive necessary information in a timely manner. The type of report that you can schedule is an Oracle Business Intelligence analysis.
During the scheduling of a analysis for distribution, you can specify:
-
How the analysis is generated: does it contain the same data for everyone or data specific to the recipient
-
When the analysis is generated
-
To whom the analysis is sent
-
How is it sent (such as email, mobile device, or dashboard)
How to Schedule a Report for Distribution
The procedure to schedule a analysis for distribution involves:
Selecting the Report to Schedule
-
From the Navigator menu, select Reports and Analytics.
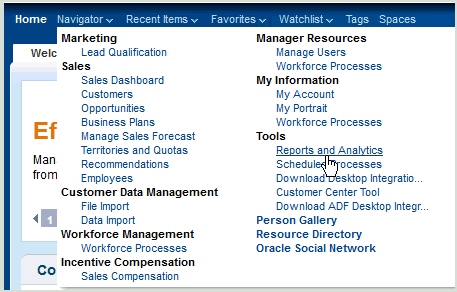
The Reports and Analytics page is displayed.
-
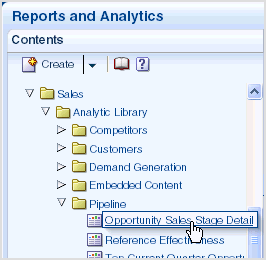
From the Contents pane, select the analysis that you want to schedule for automatic distribution.
-
Select More from the menu.
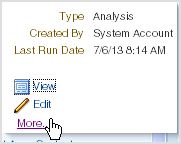
A new browser window or tab is displayed that contains the Oracle BI Presentation Catalog.
-
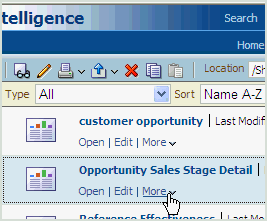
Select the More link below the analysis that you want to schedule for distribution.
-
Select Schedule.
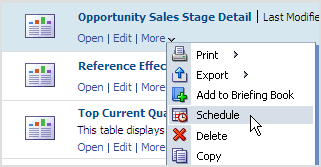
The Agent editor is displayed.
Creating the Scheduled Distribution
Once you've selected the analysis to schedule, you're now ready to create the distribution schedule. During this process, you will create an agent that generates the analysis with the configured options that you specify.
Set General Options
-
In the General tab of the Agent editor, use the Priority option to select the priority for the agent. (Normal is the default and is appropriate for most instances).

-
Specify how the analysis should be generated by selecting one of the following from the Run As option:
-
Recipient: Generates the analysis with data specific to the recipient.
-
Specified User: Generates the analysis with data specific to the specified user. If you select this option, specify the user in the box to the right of the option by clicking the Set User button to display the Select User dialog, where you can select a user.
-
Note:
Selecting Run As is a great way to ensure that multiple users receive a consistent view of data, regardless of the recipient. For example, if you want your users to receive a Pipeline analysis for an entire territory, you would run the analysis as the Territory Manager.
Create Schedule
-
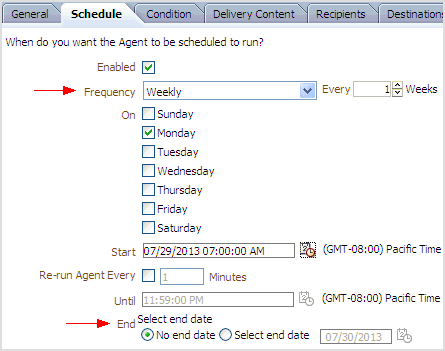
Click the Schedule tab.
-
Select how often you would like to generate the scheduled analysis from the Frequency box.
Note that the available scheduling options depend on the frequency.
-
Specify the length of time that you want the scheduled analysis to run using the End radio buttons:
-
No End Date: Runs the scheduled job perpetually until the agent is disabled or deleted.
-
Select End Date: Allows you to select a specific end date.
-
Specify Conditions
-
Click the Condition tab.

-
Specify whether the agent always delivers the analysis, or conditionally delivers the analysis. This tutorial utilizes the default condition that is created on your behalf, and it is not necessary to configure any additional conditions for this example.
Configure Delivery Content
-
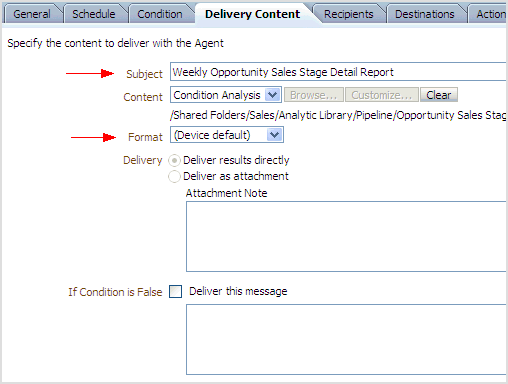
Click the Delivery Content tab.
-
Enter a text description for this agent in the Subject box.
This text, for example, is used as the subject line when your recipients receive an email containing a scheduled analysis.
-
Ensure that (Device Default) is selected from the Format box. This ensures that recipients receive the most appropriate format for their preferred delivery method.
Select Recipients
-
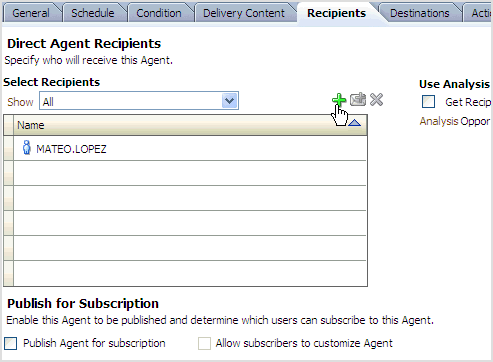
Click the Recipients tab.
-
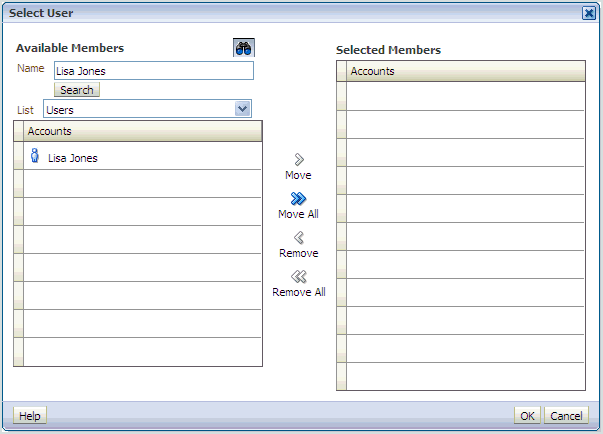
Click the Add Recipient (+) button to add additional users to the automatic distribution. The Select User dialog is displayed.
-
Select what you want to add to the distribution from the List box:
-
Application Roles
-
Catalog Groups
-
Users
-
All
-
-
Enter a user name or email or an application role or catalog group name in the Name field and click the Search button.
-
Select the accounts, roles, or groups that you want to add to the distribution and click the Move or Move All button.
-
Click OK.
Configure Destination
-
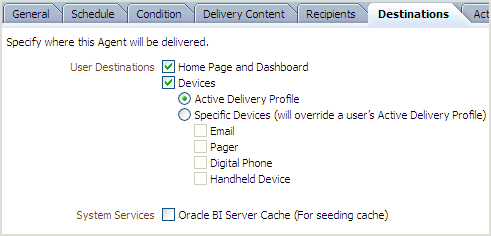
Click the Destinations tab.
-
Specify where the analysis is to be delivered. For most cases, you will use the defaults so that the analysis is delivered to the recipient's dashboard and to the devices specified in the recipient's delivery profile.
Complete Configuration
At this point, you have completed configuring a basic agent to automatically generate and distribute a selected analysis to a specified set of users, groups, or roles.
-
Click the Save button to save the agent.

The agent is now configured and the job is now running and will deliver the selected analysis to the selected users when the next scheduled interval occurs.


