Best Practices for Modeling Decision Logic
This section provides some best practices and recommendations for creating decision models in Oracle Integration. It also illustrates these recommendations using a simple example.
Here’s the list of best practices to make decision models easy to develop, maintain, and interpret.
- Use decision tables where possible; they're the preferred form of logic.
- In decision tables, avoid using the First (F) hit policy. This hit policy makes the decision logic overly reliant on the order of the rules.
- Use functions to apply a decision logic multiple times, for example, to apply a logic to each element of a list.
- Avoid using functions unnecessarily; they make decision models difficult to test and debug.
- Always break down a complex, nested expression into simpler expressions.
- Use boxed expressions instead of FEEL expressions, wherever possible, to improve readability.
- Use nouns or short noun phrases to name each decision and input data (for example, Student Days, Total Days, Person). Do not use verbs in names.
- Provide a description for each decision to indicate what it accomplishes, for example, Calculates total days as sum of other days. Make all descriptions consistent with each other.
Paid Time Off (PTO) Calculator Example
In accordance with the best practices listed previously, let’s develop a decision model to calculate paid time off days for employees in an organization. (Credit for this PTO calculator example goes to Professor Jan Vanthienen, who posed the challenge on the decision modeling community page, dmcommunity.org.)
This example uses the following conditions to arrive at the total paid time off (in days) for an employee:
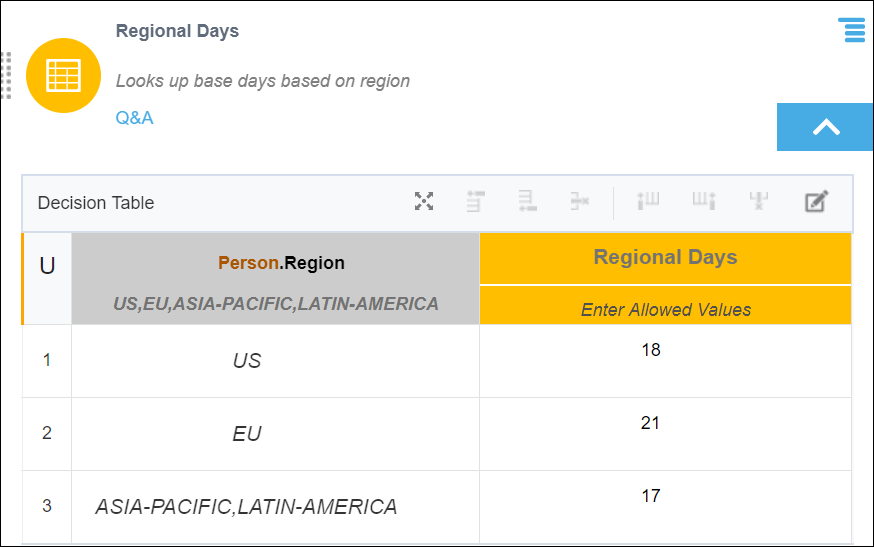
- All employees receive a certain number of base vacation days according to their region. Employees in a US office receive 18 base vacation days, employees in EU receive 21 days, and those in APAC/LATIN-AMERICA receive 17 days.
- Employees younger than 18 or at least 60 years of age or employees with at least 30 years of service receive 5 additional vacation days.
- Employees with at least 30 years of service and also of age 60 or more receive 3 extra vacation days over the possible additional days already granted.
- If an employee has at least 15 but less than 30 years of service, 2 extra days are granted. Employees of age 45 or more also receive these 2 additional days.
- Employees working the second shift (from 4pm - 12am) get 2 extra days, while employees working the third shift (from 12am-8am) get 4 extra days.
- Employees working the weekend schedule get 1 extra day off if their schedule covers one weekend day. Employees with weekend schedule that covers both days of the weekend get 2 extra days off. These vacation days are in addition to the days already granted for their shifts.
- A college student is eligible for 1 extra vacation day, and a veteran is eligible for 2 extra days.
Based on the conditions defined, let’s design the decision model in the following order:
Add Decisions
As a first step, determine the goal of your decision model. In this case, the goal is to calculate the total PTO days for an employee. Generally, the goal translates to the top or final output decision within the model. All other conditions become sub-decisions contributing, either directly or indirectly, towards the output of the top decision.
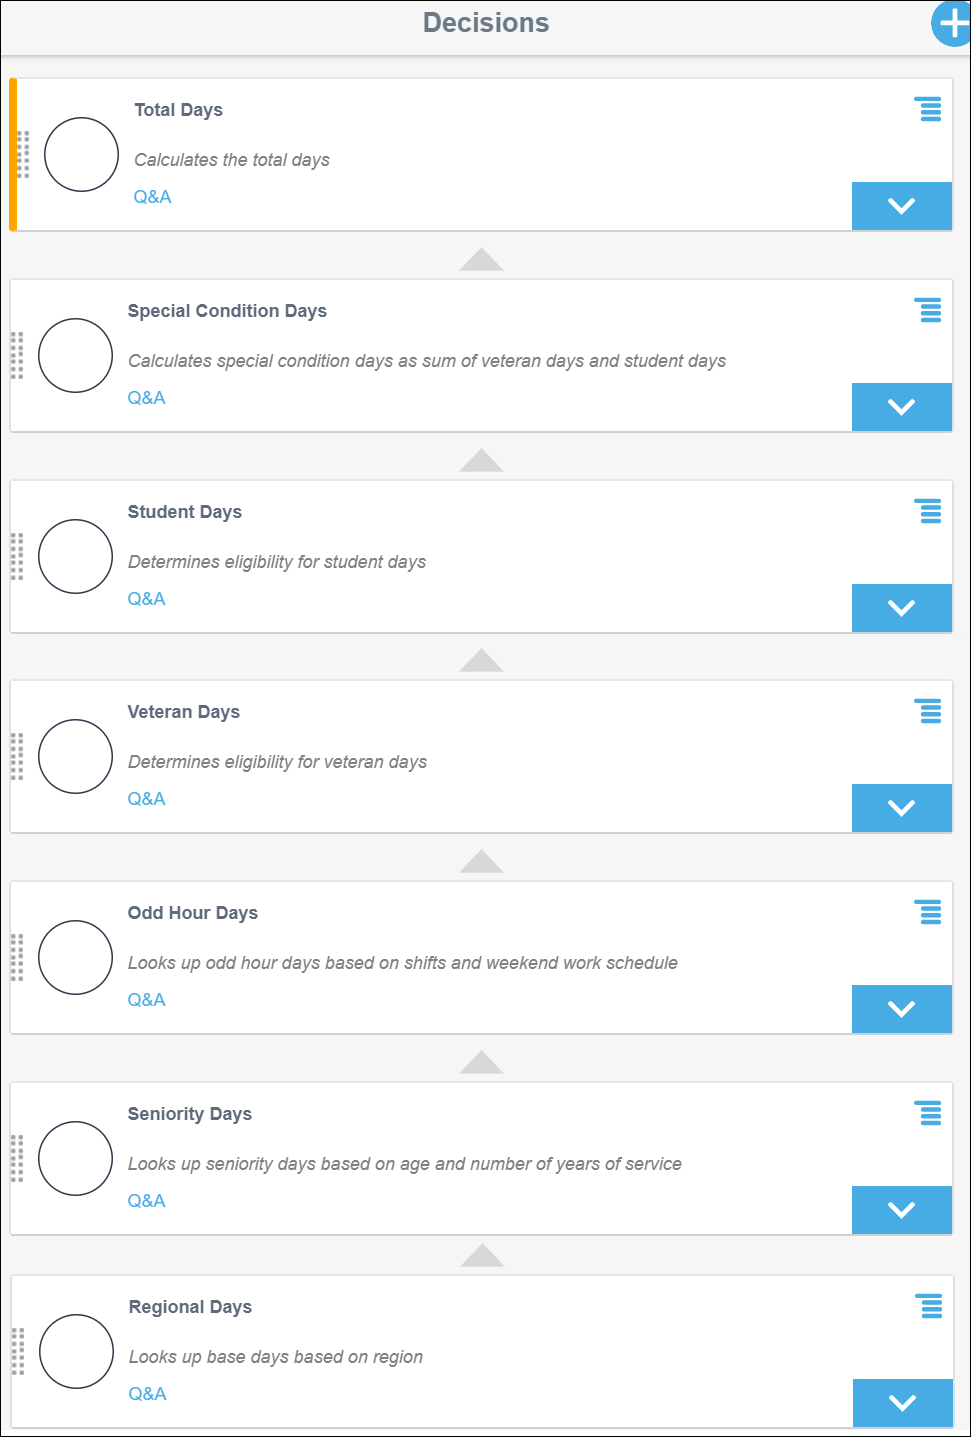
The following figure shows placeholder decisions added for this example. The decision names use nouns or noun phrases, and all decisions have a consistent description.
Define Input
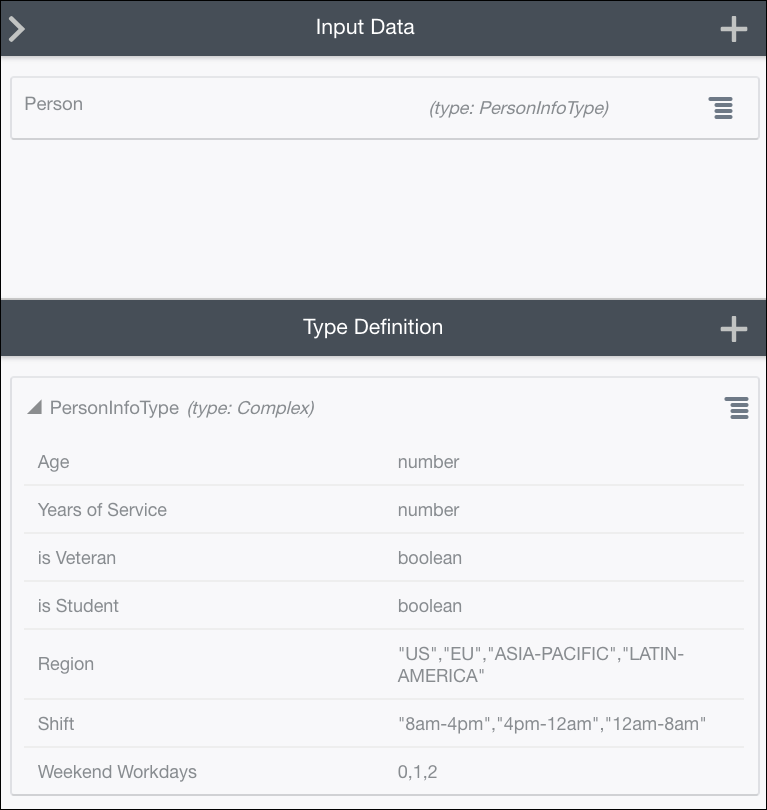
Define input data variables to allow users to supply information for the decision model. You can either use built-in data types (such as string, number, Boolean, or datetime) to create input variables or define custom complex data types according to your requirements. The following figure shows a complex data type, PersonInfoType, defined that contains all the attributes necessary for this example. This custom data type is then used to create an input variable, Person.
As a best practice, define attributes as constraints whenever possible. Constraints are conditions imposed on the attributes of the input data. When defined correctly, constraints help to check the integrity of input data. A constraint can be a range or list of valid values. In this example, the attributes Region, Shift, and Weekend Workdays are defined as a list of valid string and number values.
Model Logic
To model the decision logic for this example, we’ll primarily use decision tables to help us efficiently capture all possible combinations of the conditions specified.
Condition 1
The following decision table, Regional Days, implements Condition 1 listed previously. Because the attribute Region is already defined as a constraint with a list of valid values, choose Auto in the Allowed Values cell of the column, Person.Region. The allowed values for this column are automatically derived from the constraint of the Region attribute of the input data type and populated into this cell.
Conditions 2, 3, and 4
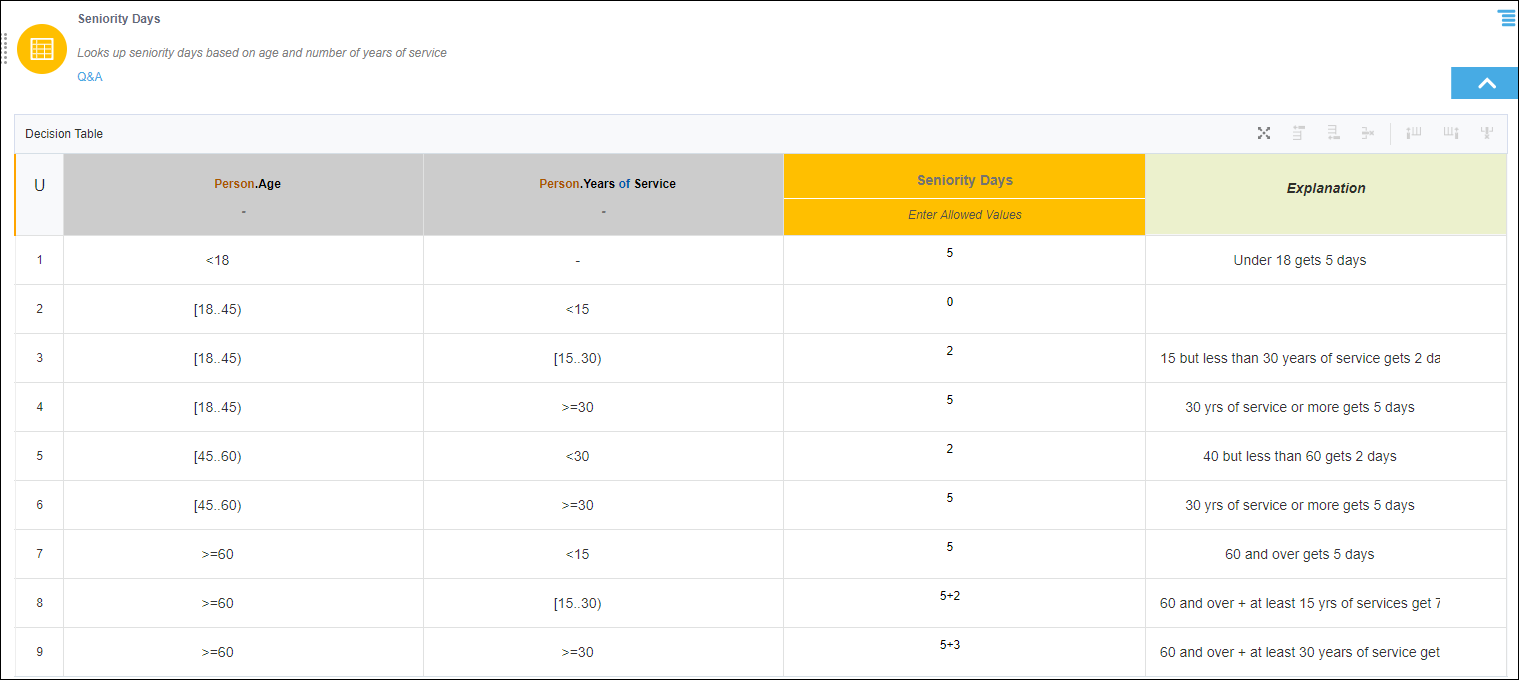
As a best practice, group related conditions into a decision where possible. Here, the decision Seniority Days implements Conditions 2, 3, and 4 of this example as all of these conditions serve to determine the seniority of an employee.
Choose the Unique (U) hit policy to ensure only one rule matches for an employee. This hit policy also helps you validate if the rules are created in a logically consistent manner, without conflicts, gaps, or redundancies. Additionally, you may add an annotation column to further clarify the implementation of each rule.
Conditions 5 and 6
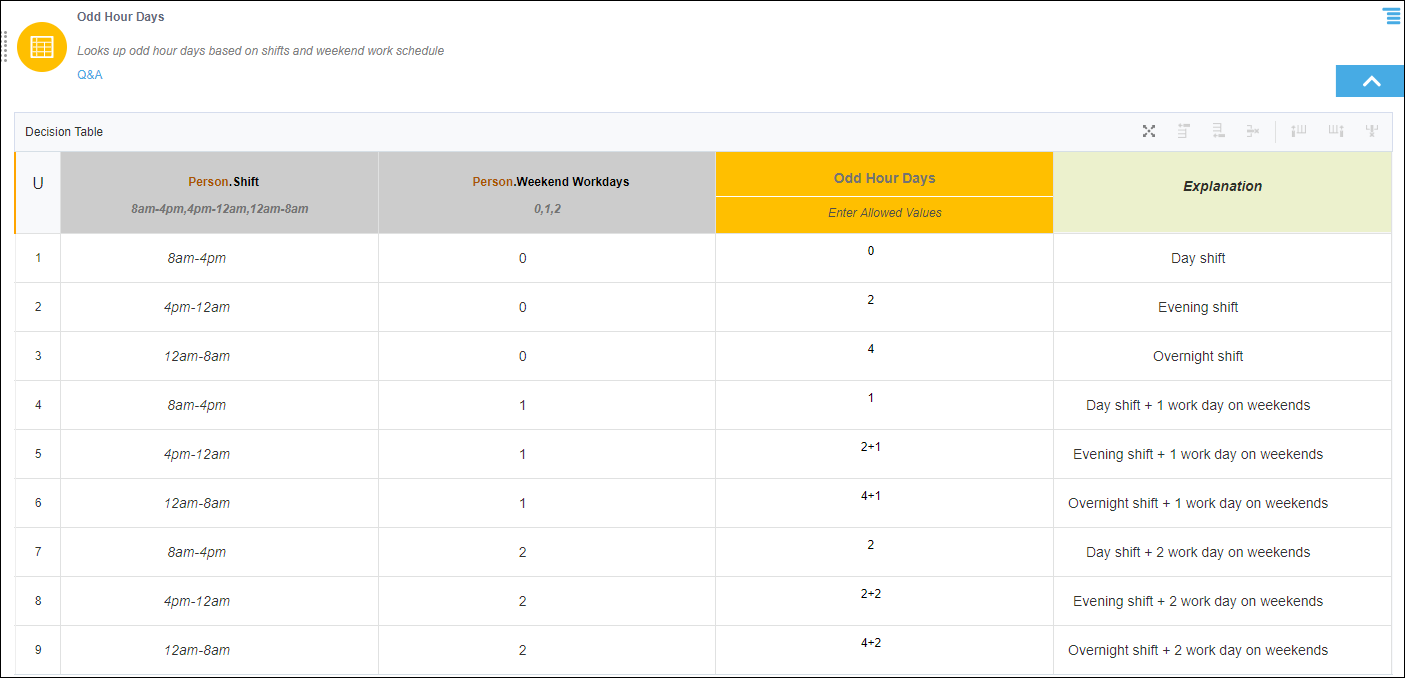
The decision Odd Hour Days implements Conditions 5 and 6, which are related to work schedule of the employees.
Condition 7
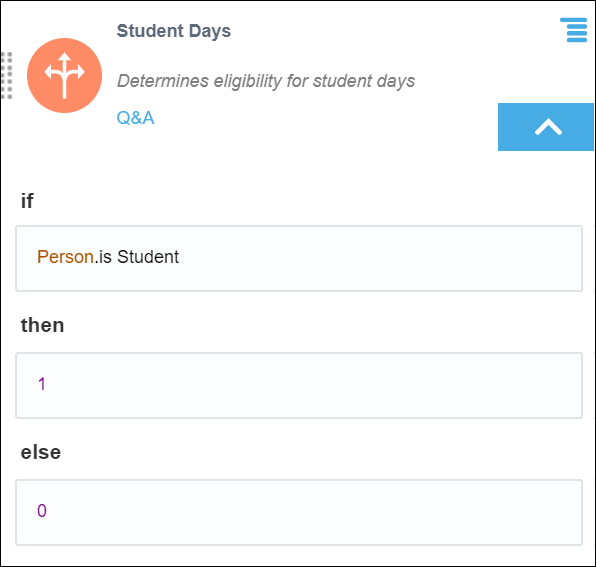
Two decisions, Student Days and Veteran Days, implement Condition 7 after breaking it down to simpler expressions. In addition, these decisions make use of boxed expressions (If-Then-Else) instead of a FEEL expression such as the following:
![]()
Description of the illustration bp-feel-exp.png
Student Days:
Description of the illustration bp-box-exp2.png
Veteran Days:

Description of the illustration bp-box-exp1.png
An additional decision totals these special condition days:
Test Decisions
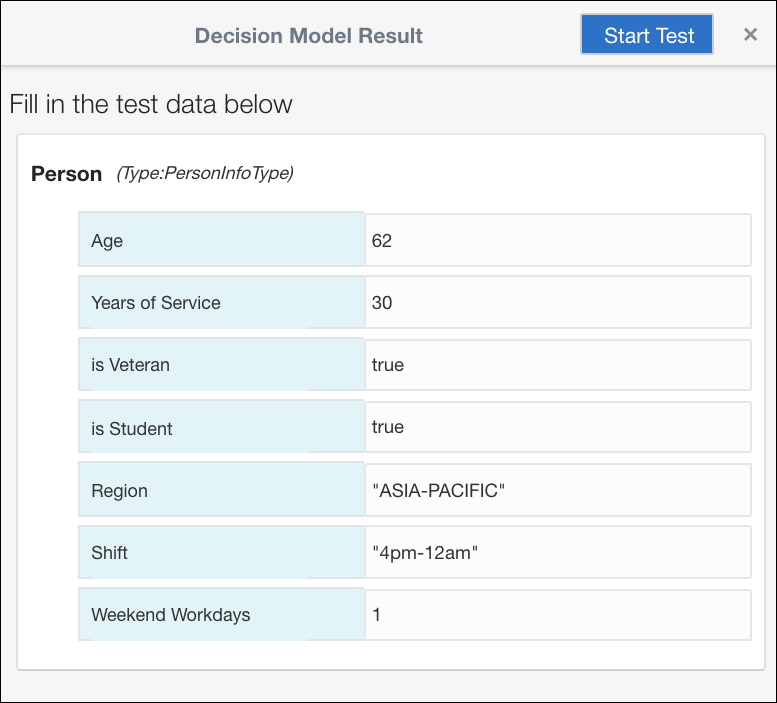
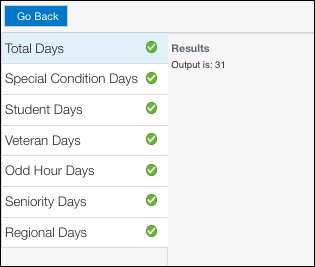
After modeling the logic, test your decision model with different combinations of input data to ensure the model works as expected.
The following figures show a sample data set and its result for this example:
Create Decision Service
Finally, create a decision service in order to use the decision model in Oracle Integration components or external applications. Choose the required output decision and input data for the service. A decision service exposes the output decision as a public REST API.
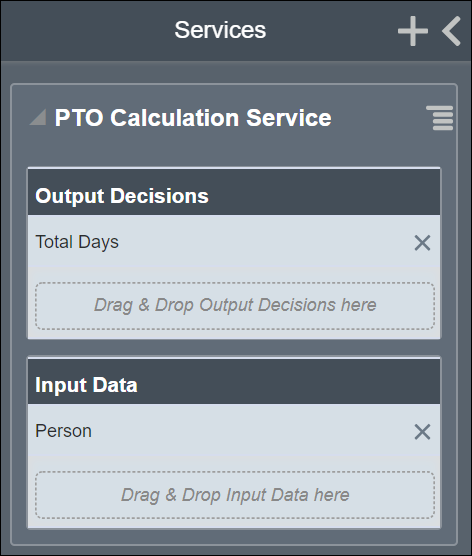
Description of the illustration bp-service.png
After you create the decision service, you can examine the JSON schema of the request and response payloads of the service API.
The following images show the request and response payloads for this example.
Request payload:
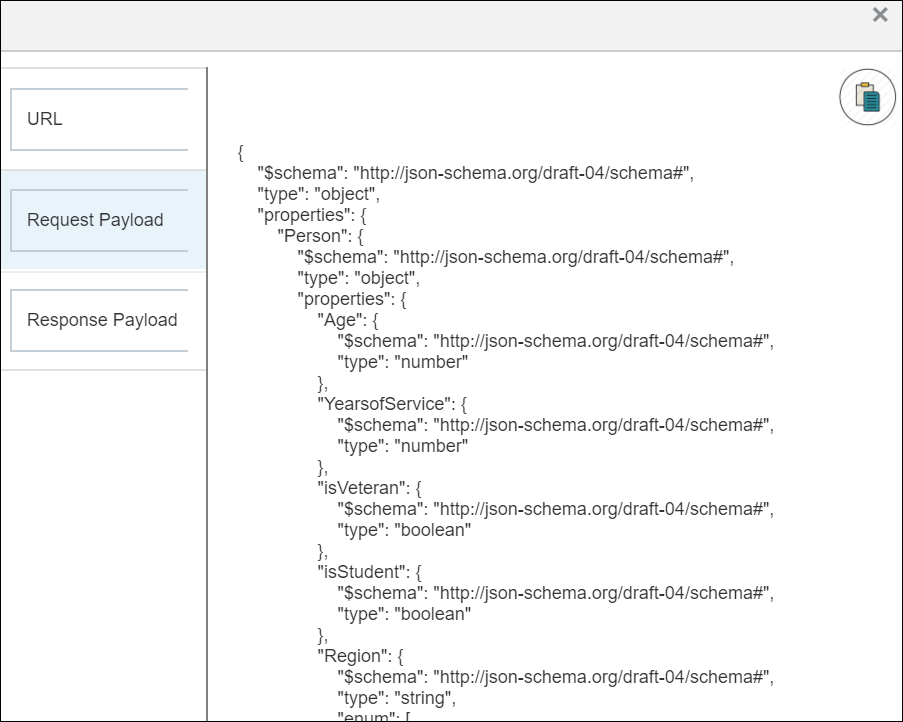
Description of the illustration bp-request.png
Response payload:
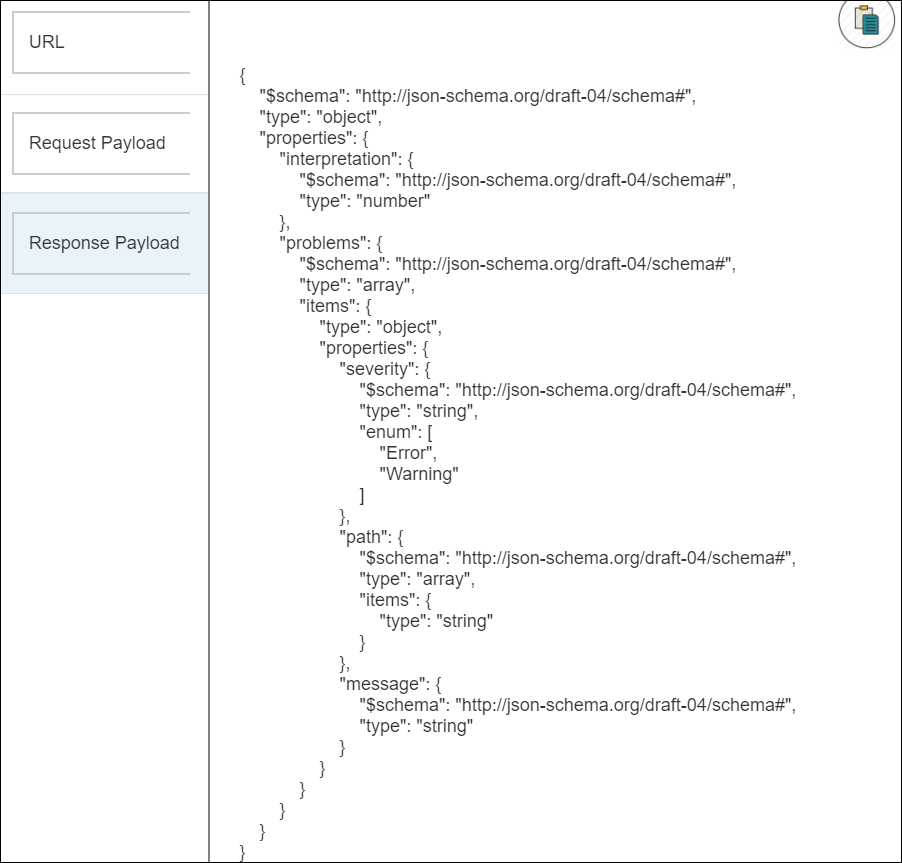
Description of the illustration bp-response.png
To use this decision model in a process application, create a snapshot of the model, activate the same, and, finally, add this snapshot to the application. See Activate a Decision Snapshot and Add Decisions to Applications and Processes.
