Chat with a Customer
If you are the agent selected for a chat request, you will receive a toast notification.
Through chat notification settings, you can also enable sound notification.
By default, the toast notification contains customer information, including the customer’s first and last names, email address, and any incident custom fields that have been configured by your administrator.
- Click Accept on the toast invitation
to accept the chat request and activate the chat session.
An automatic greeting is sent to the customer and displays in the Transcript section.Note: By default, you have fifteen seconds to manually accept or decline an incoming chat request. After fifteen seconds, the toast notification closes and the chat request is returned to the chat queue from which it originated.
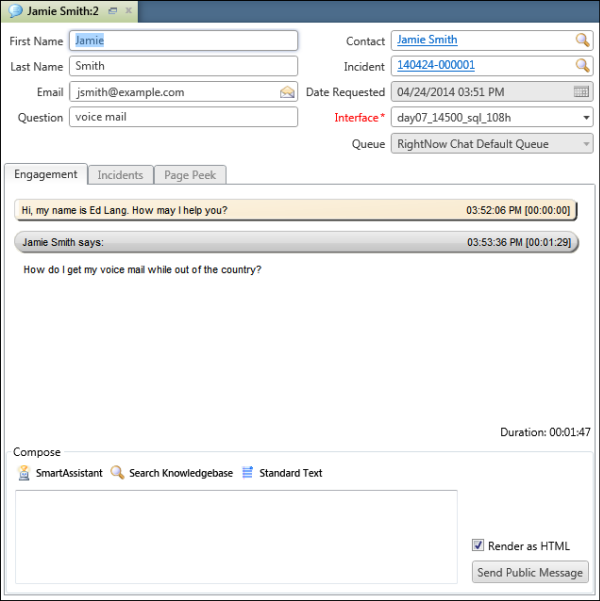
The customer tab is gray until the customer asks a question. After the customer asks a question, the customer tab turns green to notify you that it is your turn to respond. By default, the customer tab will change from green to yellow when a customer has been waiting for a response for thirty seconds. When the tab changes to red, it signifies that a customer has been waiting for sixty seconds. After you respond to the customer, the tab color changes back to gray. The timing of the changes in tab color can be configured by your administrator.Note: If Sneak Preview is enabled, you see the customer’s entry in italics as it is being typed, letting you begin composing a response. After the customer sends the message, the customer’s message changes from italicized to regular font. It is a best practice to wait to respond until the customer has sent the message. If you have multiple active chats, you will only see Sneak Preview for the chat in focus.