Creating segments using the segment builder
Use our segment builder to easily define your own custom segments and further customize your loyalty program experience by providing members with custom activities, rewards, and campaigns.
Segments can be linked to:
The following permissions are required for Control Center users to create segments:
-
Write permissions for Segmentation
-
Read permissions (or greater) for Limits
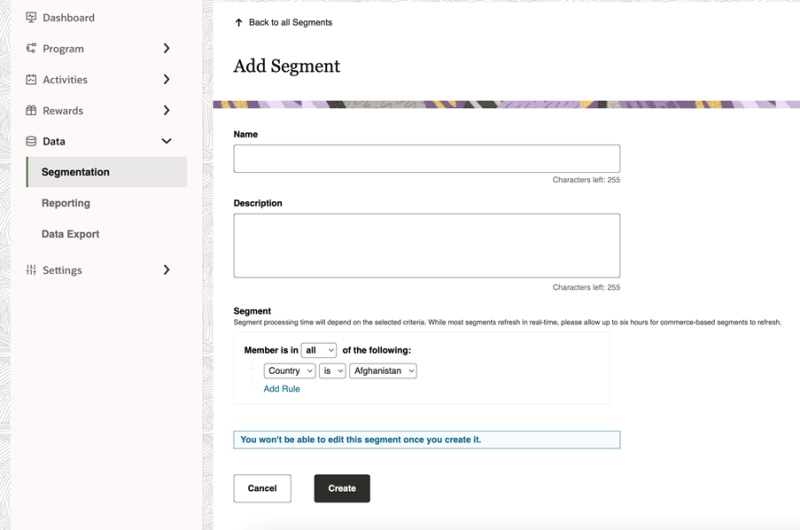
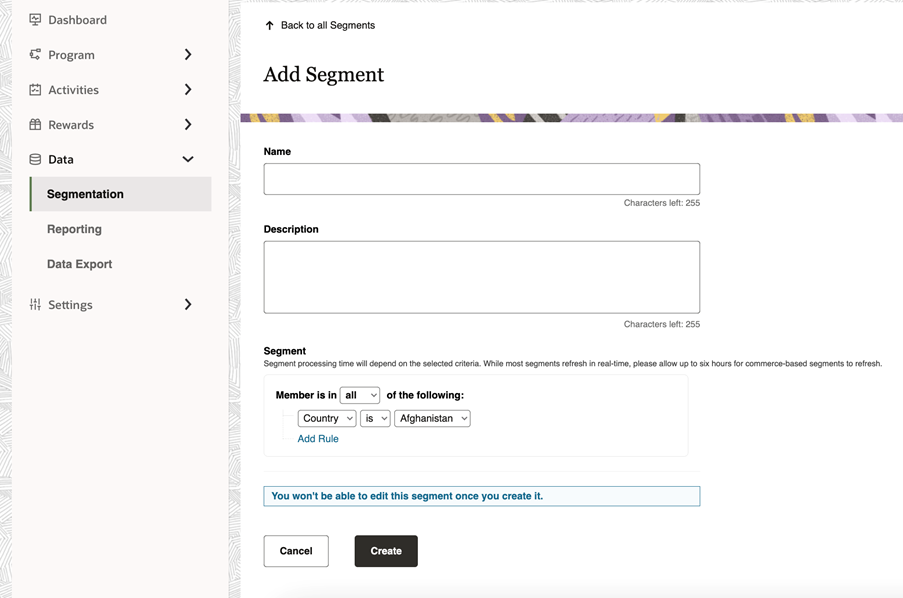
Warning: There is no edit functionality offered with segments. Once a segment is created, it cannot be changed.
Note: You are allowed a maximum of 10 real-time segments. Only active (enabled) segments count against the limit. Contact your account representative to purchase additional segments.
You can segment on member custom data by creating custom attributes.
Operations on both profile-based and member custom data attributes will depend on the data type of the attribute.
- For profile attributes, the data type is set internally based on the attribute.
- For member custom data, the data type is determined by Control Center selections in the self-service tool for the custom data.
To create a segment:
-
In Control Center, navigate to Data > Segmentation.
-
Click Add Segment.
-
Configure the details for the segment:
-
Name: Specify a name for this segment.
-
Description: Add details about the segment.
-
Segment: Build your segment by selecting from the available member attributes and operators. There is no limit on how many attributes you can add. The following segments are available:
Gender
Preferred language
Date of birth
Month of birth
Sign-up date
Last login date
Country
State (US Only)
Average Order Value
Last Purchase Date
Purchase count
Purchased SKUs
Total Spend
Member Custom Attributes (Program specific)
-
-
Click Create.
Note: Once segments have completed processing existing members and are enabled, they will be visible in the Segment selection drop-downs across the platform.
Note: Allow up to 6 hours for commerce-based segments to refresh.