Audience segmentation
Waterfall-based segmentation is a new segmentation strategy within CX Audience that allows you to create and prioritize segments within an audience. Segment data is included when you publish the audience to external systems, such as Responsys. This helps marketers do more relevant targeting within an audience and helps prevent message fatigue.
Overview
In CX Audience, you can segment your audience into smaller groups, based on logic you have already defined in other audiences and filters. When you calculate the segmentation, CX Audience performs a waterfall-based calculation to sort profiles in the audience into either a segment group, the hold out group, or the uncategorized group if they do not meet any of the criteria.
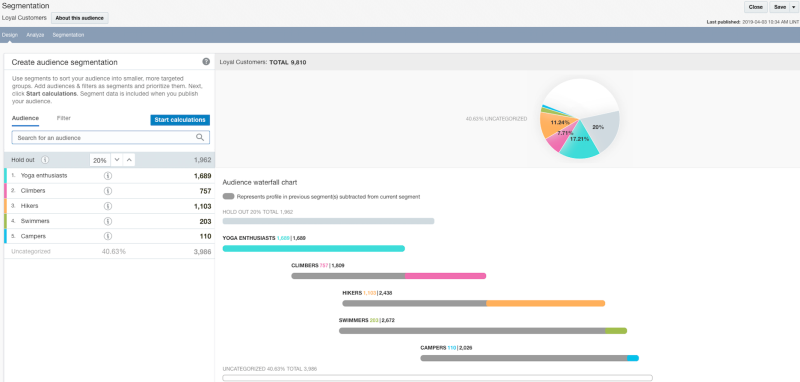
The following image shows a completed audience segmentation. The audience waterfall chart reflects the prioritization and shows how many profiles belong to the segment, and the pie chart shows each segment as a percentage of the total audience. See the Calculating audience segments topic to learn more about how to use the audience waterfall chart.
Why use audience segmentation?
You can use the waterfall-based segmentation in CX Audience to:
- Prioritize segments based on product preferences. For example, if you have customers who are interested in more than one product category, you can send them messages for only one product category. Because you can prioritize the segments based on business importance, each customer receives the message that best matches their interests and best suits your business needs.
Example: A sporting goods retailer produces campaigns for each product preference, but they don't want to send multiple mailings to customers who are in more than one preference category. In the image shown above, they have created an audience segmentation based on product preferences, and they have prioritized segments based on business importance. In this case, their first priority is to reach Yoga Enthusiasts, and then Climbers, and so on. If the retailer has a customer who is in both the Yoga Enthusiasts and Climbers groups, the waterfall segmentation puts the customer in the Yoga Enthusiasts group, because it is higher up on the segments list. The customer will receive the campaign only for Yoga Enthusiasts.
- Help marketers to better personalize and target campaigns. When marketers have smaller, prioritized segments, they can more easily create and send messages that are meaningful to customers. They can choose personalized quality over batch-and-blast quantity, leading to better customer engagement.
- Create hold out groups for testing and comparison. CX Audience automatically defines a hold out group for you, and pins it to the top spot in the waterfall, so that you get a truly random segment calculated first. The hold out group serves as a control group, so that you can compare how your waterfall segments perform against the hold out segment. You can change the percentage of your hold out group to suit your audience size, and you can omit a hold out group if desired.
- Analyze performance by segment. You can analyze the performance of the audience, broken down by waterfall segment. See the Audience Insight topic to learn more about using analytics in CX Audience.
Tasks
This section shows how to define your audience segments, calculate the segments, and how to publish the segments to Responsys.
Before you begin
- Create, publish, and run the audience you want to use for segmentation. If you plan to publish your audience to Responsys, it must be created from the list associated with the Responsys profile list, so that you can use segment data in campaigns and programs. This audience must also have a count greater than zero.
- Prepare the filters and other audiences that you will use to segment the audience. CX Audience uses the logic defined in filters and audiences to create segments of the target audience. Although CX Audience will help you find filters and audiences when it's time to choose one for your segment, we recommend making a list of filters and audiences that you plan to use.
Tip: See Audiences for more information about how to create, publish, and run audiences, and Creating filters for more information about creating filters.
Creating segmentation
To create audience segmentation:
- Click
 .
. - Select Manage Audiences from the Audiences menu. The Manage Audiences page is displayed.
- Click the audience name. The audience opens in Audience Designer.
- Click the Segmentation tab. If the audience is ready for segmentation, the Create audience segmentation page is displayed.
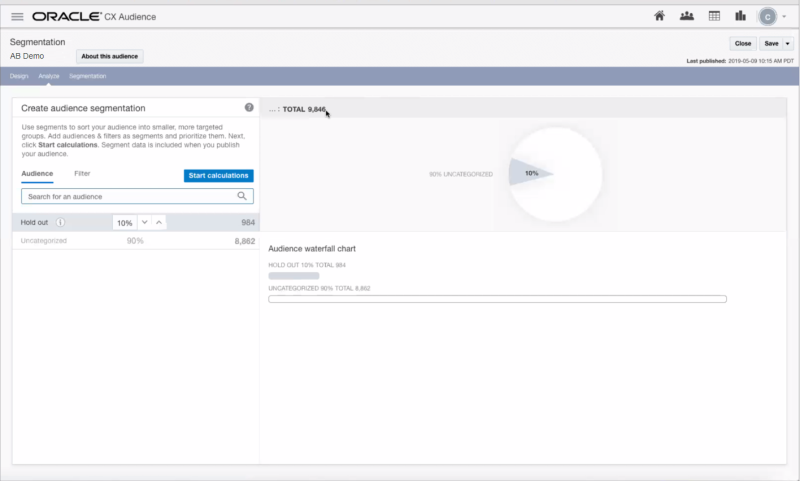
Note that at the start, audience segmentation reserves a Hold out group, 10% by default, from the audience. The remaining 90% of your audience is in the Uncategorized group. These are reflected in the pie chart and in the Audience waterfall chart below it.
- Optionally, change the Hold out percentage. Hold out groups can help you test and compare performance of your segments with a control group. However, you can change it to 0% if you do not need a hold out group.
Tip: Depending on how large your audience is, you may want to adjust the Hold out up or down. For example, if you have a small audience, you may need to increase it to get more meaningful results. If you have a larger audience (in the millions for example), you may want to adjust the percentage lower.
- In the Create audience segmentation section, add audiences and filters as segments. You can add up to 10 segments.
- To add an audience: Ensure that Audience is selected, and click in the search box. You can either browse the list, or start typing the name of the audience you want to use. When you find the audience, select it. The audience is added to the bottom of the segment list.
- To add a filter: Click Filter, and then click in the search box. You can either browse the list, or start typing the name of the filter you want to use. When you find the filter, select it. The filter is added to the bottom of the segment list.
- Change the priority of your segments by either dragging and dropping them in the list, or using the up and down arrows to move them. The waterfall segmentation will be calculated from top to bottom. The Hold out segment is always at the top, so that you get a truly random group for testing and comparison.
- Click Start calculations. This process could take a while, depending on how many segments you added and the size of the audience. You can leave the page and return later without affecting the calculation process.
Changing segmentation
If your audience segmentation does not give the results you were expecting - for example, one of the segments does not result in any profiles - you can change it and calculate the segmentation again. You can also edit segment names, so that the segment names are more meaningful to marketers.
To change audience segmentation:
- Edit the segments as desired. For example, you may want to move segments up and down in the list to change their priority, or you may want to add or remove segments.
- Click Start calculations. This process could take a while, depending on how many segments you added and the size of the audience. You can leave the page and return later without affecting the calculation process.
To recalculate individual segments:
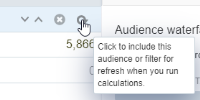
- Move your mouse cursor over the segment that you want to refresh, and then click the Refreshbutton. (To deselect it for refresh, click the Refresh button again.) Learn more about the trade off between faster calculations and data freshness.
- Click Start calculations. This process could take a while, depending on how many segments selected to refresh and the size of the audience. You can leave the page and return later without affecting the calculation process.
To rename a segment:
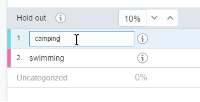
- Move your mouse cursor over the segment that you want to rename and click its name. An editing field is displayed.
- Type the new name in the field and press Enter.
Note: Ensure that the name you enter is the one you want to save. The system saves the value automatically, so closing the audience without saving will not cancel the rename.
Using segment data in your marketing systems
To use segment data in your marketing systems, you must publish the audience to Responsys or to an SFTP server after you have completed your audience segmentation. When you publish externally, all the segments are sent as values of a special supporting profile attribute called WATERFALL_ATTRIBUTE. Marketers can use this attribute to personalize content in their campaigns or to route recipients to different paths in a program.
See Publishing audiences for more details about publishing to Responsys or to an SFTP server.


