Step 5: Adding contacts to an authenticated microsite
Note: We're updating our help center to reflect the new Redwood experience. During the transition, some content reflects the previous version of the UI.
In order to receive your secure communications, contacts need to be added to your authenticated microsite.
There are several methods of adding contacts to your authenticated microsite:
- Adding a single contact at a time
- Adding multiple contacts using the Contact Upload Wizard
- Adding multiple contacts using Data Import
- Adding contacts using program canvas
After you add contacts, you can view and export a list of contacts you added to the authenticated microsite. Learn more.
To add a single contact to an authenticated microsite:
- Navigate to Audience
 , then click Contacts.
 - Select an existing contact or create a new one.
- Open the Preferences tab. Subscribe the contact to your secure email group using the toggle option.
- Open the Authenticated Access tab. Check the Access Enabled option for your authenticated microsite.
- Click Save to update the contact record.
Learn more about creating contacts.
To add multiple contacts to an authenticated microsite using the Contact Upload Wizard:
- Navigate to Audience , then click Contacts.
- Click Upload.
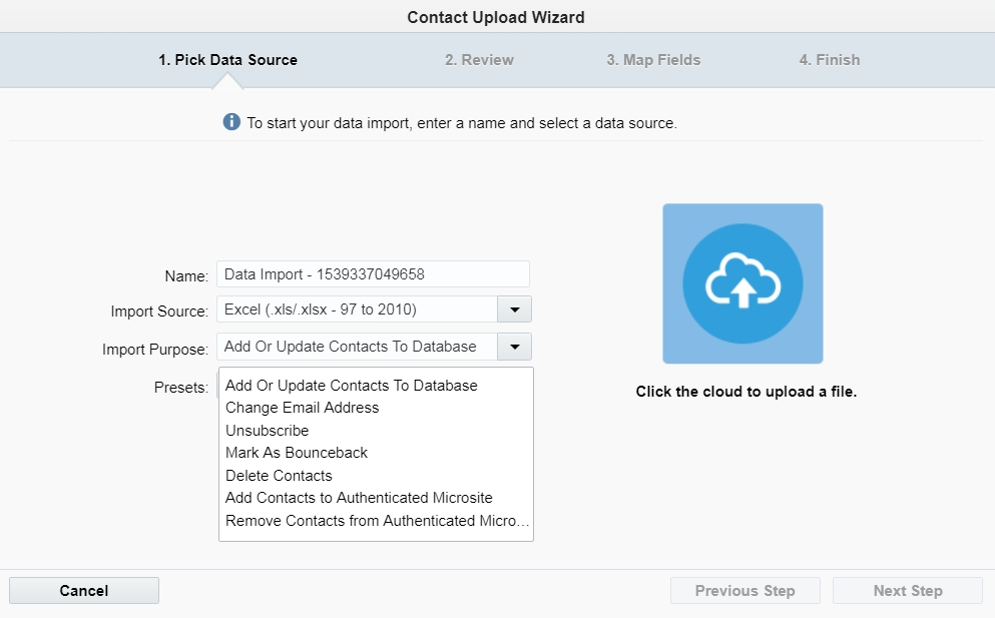
- Complete the information about the upload. From the Import Purpose drop-down, select Add Contacts to Authenticated Microsite.
Tip: The Contact Upload Wizard can also be used to remove contacts by selecting Remove Contacts from Authenticated Microsite.
- Click
 and browse to the upload file.
 - Proceed through the upload wizard steps.
- Click Finish.
Learn more about uploading contacts.
To add multiple contacts to an authenticated microsite using Data Import:
- Navigate to Audience > Tools, then click Data Export and Import.
- On the Data Import tab, click Add
 , then click New Contact Import.
 - On the Import Settings tab, configure the settings.
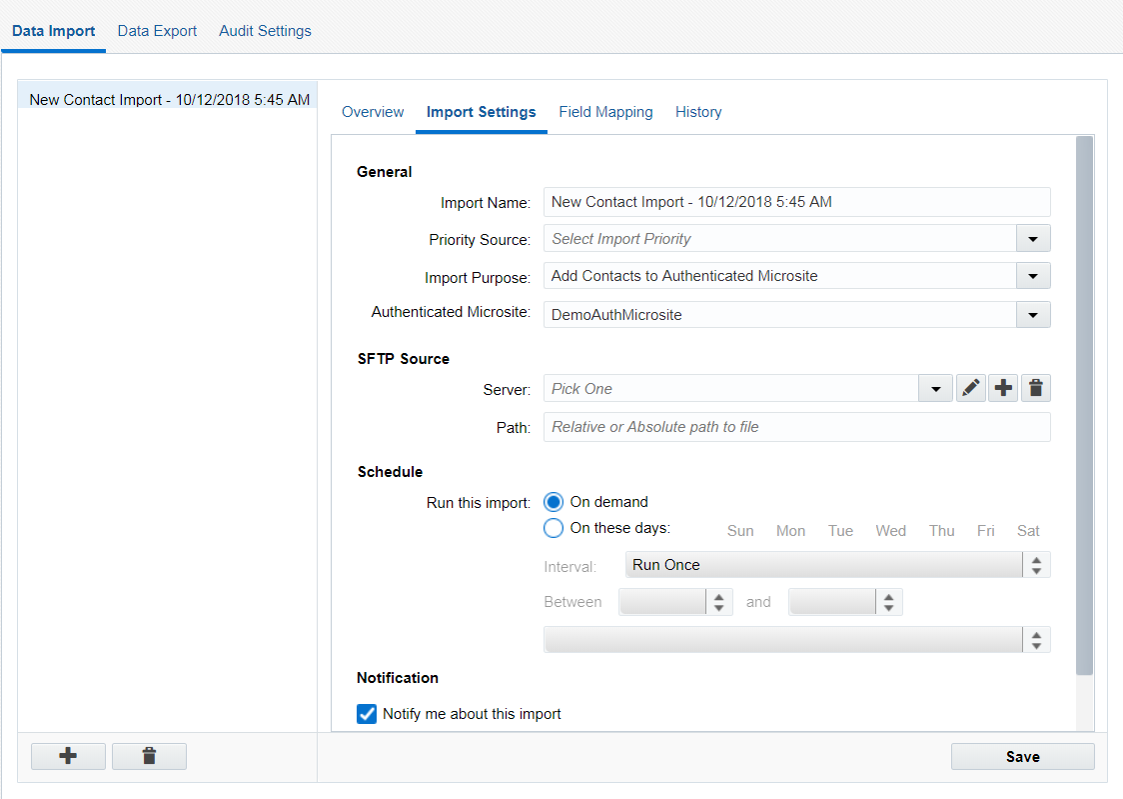
- To change the priority of the upload use the Priority Source drop-down list. Data priority specifies the order in which Oracle Eloqua evaluates sources of contact data and determines whether to update contact data in the database. See this knowledge base article for more information.
- Click the purpose of the import from the Import Purpose drop-down list. Select Add Contacts to Authenticated Microsite.
- Click the server from the Server drop-down list or click Add to add the SFTP server information. Complete the information about the server:
- Name: A descriptive name for your SFTP server.
- Server URL: The fully qualified URL for your SFTP server.
- Username: The user name to log on to the SFTP server and access the import file. This user must have administrative access.
- Authentication Method: The authentication method for the user, either Password or SSH key. If you want to use SSH keys, you must set them up first.
- Click Test Connection to ensure the information you entered is correct.
- Specify where the import file is on the SFTP server in the Path text box (either a relative path or absolute path).
- To run the import on demand, click the On demand option.
- To schedule the import to run on a regular basis, click On these days and specify the schedule.
- To receive an email notification about the success or failure of the import, click the Notify me about this import and configure the notification settings. If you do not set up a notification email, you can use the History tab to view the results of the import.
-
Click the Field Mapping tab to map the columns in the import file to contact or account fields. If you need to update a mapping, double-click the row.
- Make sure you map all the data in your upload file to the applicable contact or account field.
- Also, make sure that you select when you want the fields to update using the All Fields Update Type drop-down list. For example, update the field if it is blank or not blank. Using Set to default will use the default configuration for each field. If a specific field should be updated differently than the rest, you can double-click the field and configure the update type for that specific field.
- Click Save.
Learn more about importing contacts.
Tip: You can export all contacts of a security domain from the security domain view in a microsite.
To add contacts to an authenticated microsite using program canvas:
- Navigate to Orchestration
 , then click Programs.
 - Open a program or create a new one.
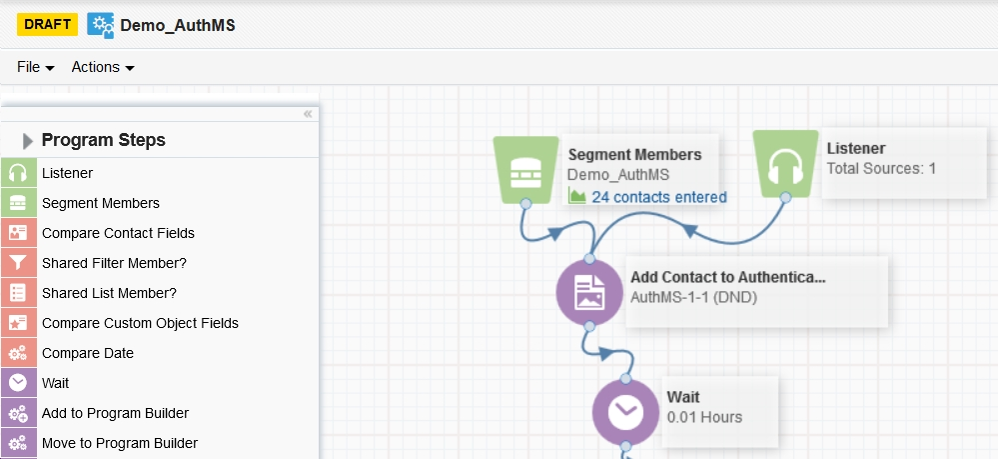
- Add the data source steps to the canvas:
- To subscribe to data using a listener step, double-click
 Listener Step. For more information, see Subscribing to data sources using a listener step.
 - To push data to a listener step from other areas of Oracle Eloqua, double-click Listener Step. For more information, see Data sources for listeners
Note: You can only push data to a listener step if the program is active.
- To add contacts to the program using a segment, double-click
 Segment Members.
 Note: Once you configure the segment, it is evaluated on a regular basis based on your configuration. The minimum time between evaluations is 1 day.
- To subscribe to data using a listener step, double-click
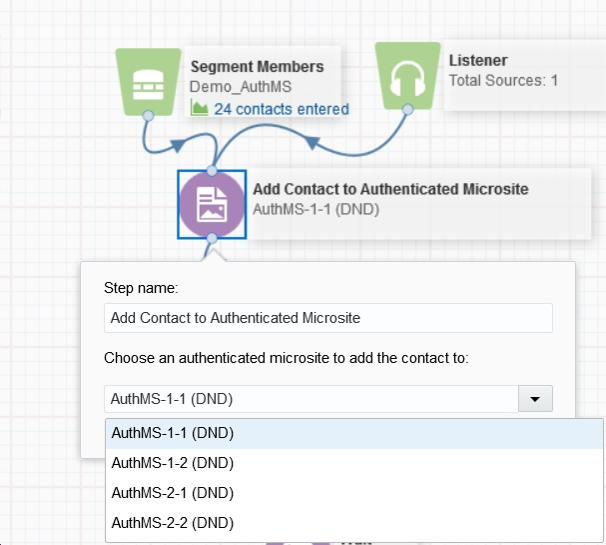
- Add the Add Contact to Authenticated Microsite decision step to the canvas.
Tip: You can also remove contacts by selecting Remove Contacts from Authenticated Microsite decision step.
- Double-click the Add Contact to Authenticated Microsite step to configure it. Select an authenticated microsite from the drop-down list. Your contacts will be added to this microsite.
- Continue building your program and connect the steps on the canvas together to form a program path.
Tip: Add notes to your program to help you remember where you left off while working and alert colleagues as to the purpose of your program. Learn about adding notes.
- Click Save.
- Activate your program.
Learn more about creating programs.
Viewing contacts with authenticated access
You can view a list of contacts added to an authenticated microsite. You can export this list for use elsewhere in Oracle Eloqua or external systems.
To view and export contacts with authenticated access:
- Navigate to Assets
 > Website Setup, then click Microsites to view the Microsite Setup page.
 - Click the authenticated microsite from the list.
- Click the Authentication tab and then click View Contacts.
On the Microsite tab, you can view the contacts with authenticated access to the selected microsite. On the Security Domain tab, you can view the contacts with access to the microsites security domain.
-
To export the contacts, click Export.
authenticate, microsite, contact management, contacts
Next step
Step 6: Configuring a secure inbox