Sending a tracked email
Use Oracle Eloqua Sales Tools for Microsoft Outlook to send a tracked email directly through Microsoft Outlook. Eloqua is called so that sent messages are created and displayed in Engage's sent list for sales users to review and track. Email activity is created for each recipient.
Prerequisites
- Oracle Eloqua Sales Tools for Microsoft Outlook must be installed.
- You must have the Eloqua Engage and the Eloqua Sales Tools for Microsoft Outlook licenses. To access Profiler from the Microsoft Outlook add-in, you must also have the Profiler license.
Note: Tracking is enabled by default when the add-in is installed. Your organization may desire tracking on all new emails to be off by default. For example, you may want a sales representative to deliberately choose to track specific emails and require them to check the tracking box. You can configure whether this option is enabled by default or not via a Microsoft Windows Group Policy or Microsoft System Center Configuration Manager (SCCM) deployment. For more details, log in to My Oracle Support and create a service request.
To send a tracked email using Oracle Eloqua Sales Tools for Microsoft Outlook:
- Open a new email in Microsoft Outlook. When tracking is enabled, the Tracking On box is checked and Track Email option in the ribbon is selected. Users can toggle tracking on or off for individual email messages. When the Tracking On box is cleared, the message is sent as a personal email and is not tracked.
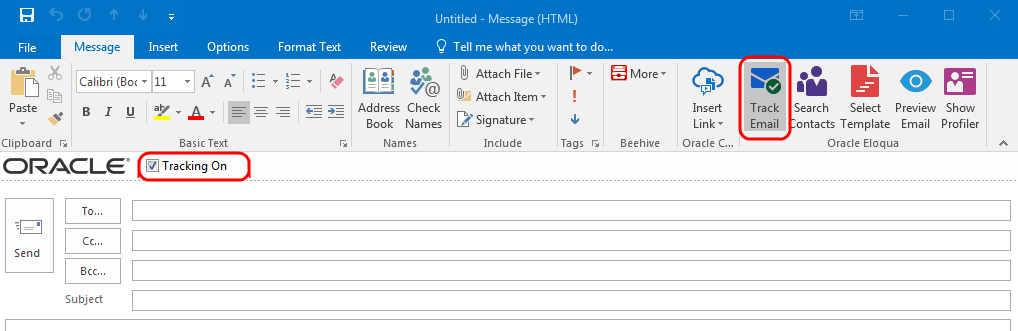
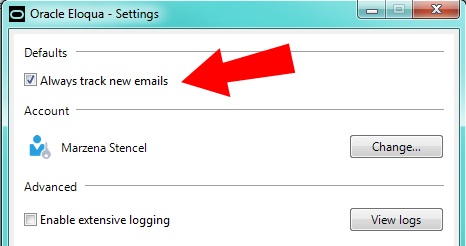
Tip: To automatically enable tracking for all new emails, in the main ribbon, navigate to Options > Settings and check Always track new emails.
- Add your recipients by manually entering email addresses or searching Oracle Eloqua contacts.
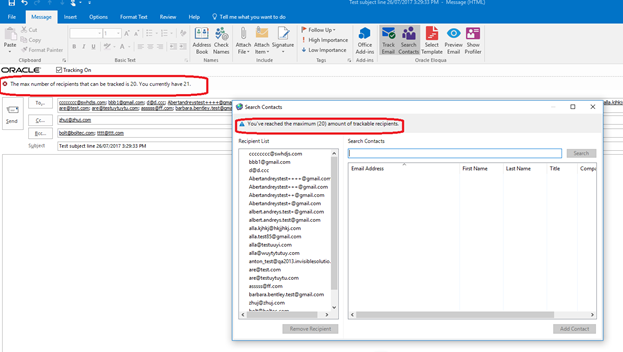
Important: The maximum number of recipients that can be tracked is 100.
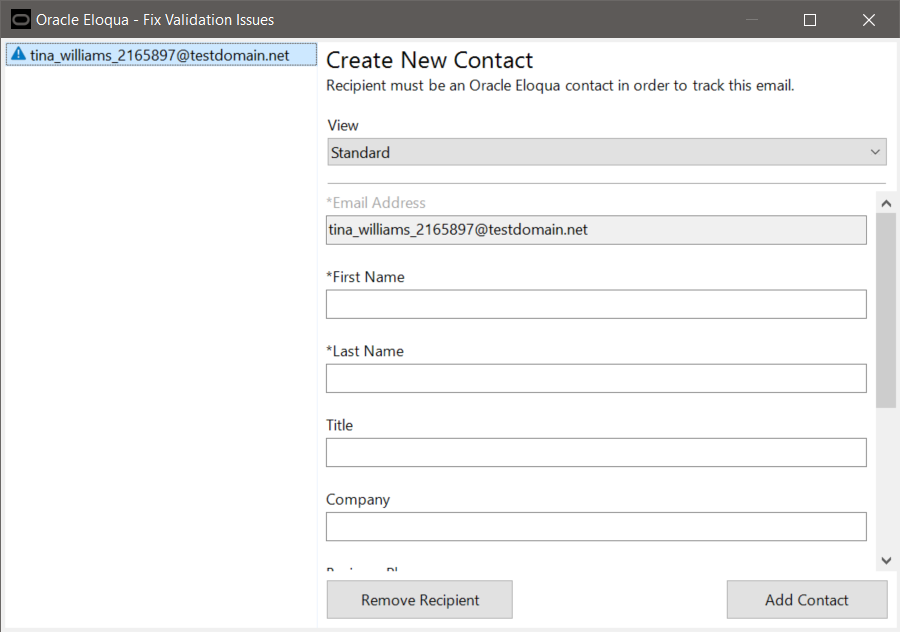
- The add-in automatically verifies if manually entered recipients are Oracle Eloqua contacts. If they are not contacts, a Fix Validation Issues link is displayed. Click the link to add them as contacts before sending the email. You can also remove the recipients if you do not want to add them as contacts.
- To search for Oracle Eloqua contacts, click Search Contacts in the ribbon.

Search contacts by name, email address or title. Using Microsoft Outlook's standard contact search (by clicking To... or Cc...) will not search Oracle Eloqua contacts. Click Add Contact to add them to your recipient list. At least 3 characters must be specified to search.
Important: Contact match and search is based on the contacts you have access to based on your Oracle Eloqua user permissions.
- The add-in automatically verifies if manually entered recipients are Oracle Eloqua contacts. If they are not contacts, a Fix Validation Issues link is displayed. Click the link to add them as contacts before sending the email. You can also remove the recipients if you do not want to add them as contacts.
- Write a personal email or select an Oracle Eloqua template.
- To select a template, click Select Template in the email ribbon. You can search templates by its name. At least three characters must be specified to search. Narrow the search by selecting specific email groups. Sort templates by name, creation date, or modified date. Click Apply to use the selected template in your email and override the current subject and body content (if any) of your email.
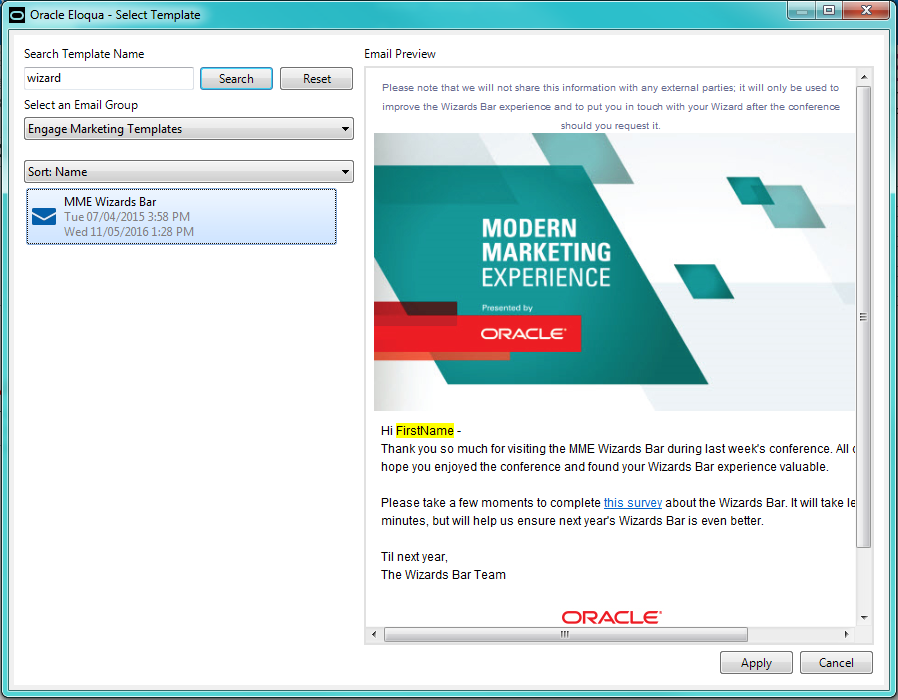
- Templates with cloud content cannot be used but they are still searchable. The Apply button will be disabled when these templates are selected.
- Microsoft Outlook does not support locked regions within an email. Once you select a template, all sections will be editable.
- After a template is selected, the contacts are validated to check if they have the required field merges. If not, you will be prompted to add the missing field merges before sending the email.
You cannot use any files (pictures, documents, and so on) as Microsoft Outlook email attachments because they are not accessible from the add-in. However, you can add attachments to the email from your machine. These attachments are not tracked.
- To select a template, click Select Template in the email ribbon. You can search templates by its name. At least three characters must be specified to search. Narrow the search by selecting specific email groups. Sort templates by name, creation date, or modified date. Click Apply to use the selected template in your email and override the current subject and body content (if any) of your email.
- Click Preview Email. The preview allows you to take a peek at how the email will look like for the first recipient in the list, including any field merges. In order to preview the email, the first recipient must be validated and the subject cannot be empty. Close the preview and make any necessary edits.
- Click Send. Oracle Eloqua Sales Tools for Microsoft Outlook validates recipients to check for any problems and will prompt you to fix any issues that are found.
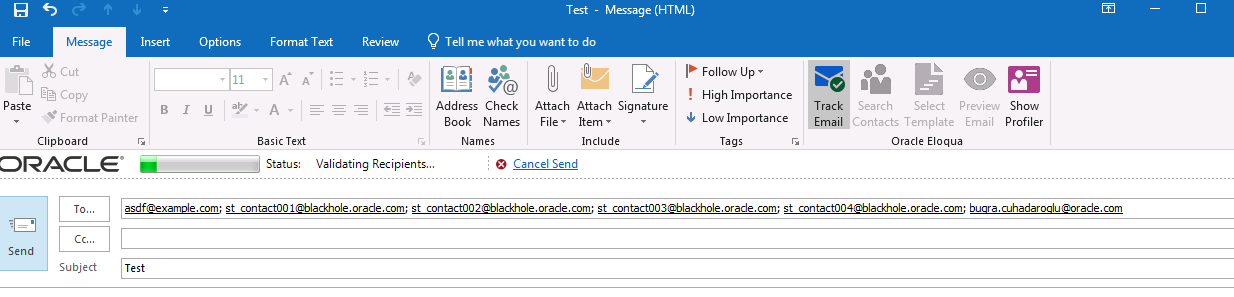
- After validation is complete, tracking parameters are added to the email. Click the Cancel Sending link if you want to stop the email from being sent during this process. As an email is sent to each contact, they are removed from the To line.

Your email is sent to your recipients and appears in your Microsoft Outlook Sent Items folder. It is automatically assigned a Tracked by Eloqua category. Email sent metrics are also displayed. Learn about sent email metrics.
Important: The sent message includes a tracking pixel. Once the message is in the Sent folder, Sales Tools for Microsoft Outlook removes its tracking pixel to avoid any artificial inflation of metrics due to opening a message in your Sent folder. However, Microsoft Outlook caches the first message in the Sent folder for approximately five minutes or until you perform another action in Outlook such as opening a new Compose window.
Viewing email performance using Microsoft Outlook
Oracle Eloqua Sales Tools for Microsoft Outlook