Return with Receipt
Also called a validated return, return with receipt is a feature that you can use to authenticate the original purchase before issuing a refund. The cashier validates the return against an NSPOS transaction by scanning the receipt or looking up the sale by date, customer information, or other criteria. Validated returns can reduce fraud and mistakes.
The cashier can find the original purchase whether it was made from an NSPOS register or through another application using a NetSuite ERP Invoice record or Cash Sale record.
Some retailers require refunds to be in the same tender type as the original transaction. This means refunding credit cards purchases back to the original card and refunding cash with cash.
Other retailers prefer to avoid credit card payment-gateway transaction fees for a zero-sum sale by only providing refunds in cash or gift cards/certificates. Refunding as store credit isn't an option in NSPOS.
Administrators can limit the defaults for a cashier's transaction searches, such as search this store only or search all stores. NSPOS can also search for transactions posted to NetSuite ERP Invoice or Cash Sale records. See Configure Return Settings.
To find the transaction number needed to accept the return, the cashier can scan the bar code on the customer's receipt, enter the bar code numbers manually if the receipt is damaged, or search for the transaction at the register.
Because sales transactions take about five minutes to replicate to other registers, a transaction made on one register may not be immediately eligible for return on another register.
If a shopper is returning items from more than one transaction (has two or more receipts), you should do a separate return for each transaction/receipt.
Also see:
-
Considerations on Returning BOGO and other Promotional Items
-
Considerations for Returns after Tax Adjustments to Discounts
To make a validated return, the cashier can scan the bar code on the customer's receipt, enter the bar code number manually if the receipt is damaged, or they can search for the transaction through the register.
To make a validated return in NSPOS:
-
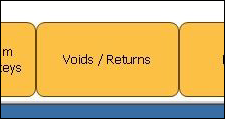
In Sales Mode, tap Voids/Returns.
-
On the sidebar, tap Return Receipt Search.
-
If you have the receipt, scan it or enter it manually.
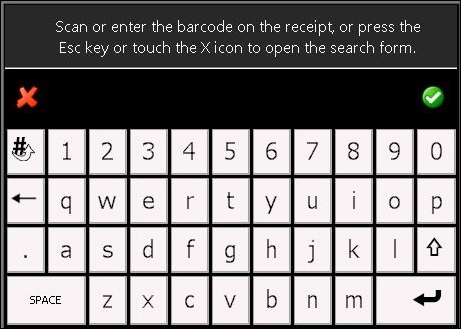
Otherwise, tap the red
 to search for the transaction.
See Validated Return Transaction Lookup for details on the different criteria available for searches.
 Note:
Note:Searching for items purchased at another location or through NetSuite ERP might take a few moments to display.
-
Tap the items to return or tap Return All to refund the entire purchase.
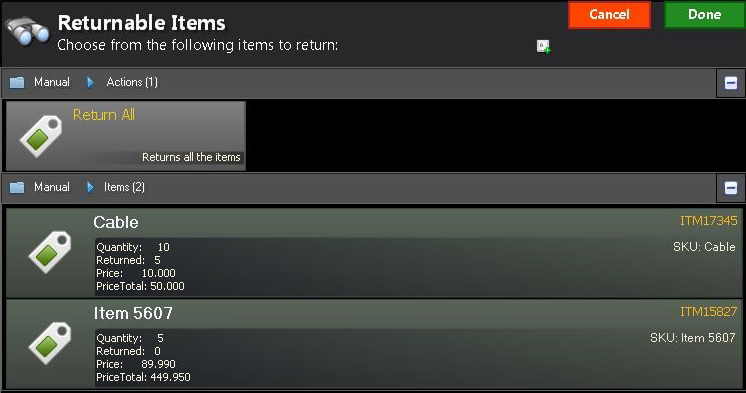
The form displays the following for each item:
-
Quantity - How many items were purchased.
-
Returned - How many items from this transaction were previously returned.
Important:If an entire item quantity was previously returned, that item won't appear in the list.
-
Price - Price at which each item was sold, after any discounts or promotions. See Considerations on Returning BOGO and other Promotional Items.
-
Price Total - Total paid for the item quantity, after any discounts or promotions.
The total is reduced by any items previously returned.
-
SKU - The retailer stock keeping unit (SKU) identifier. This is your internal saleable item number or code.
-
-
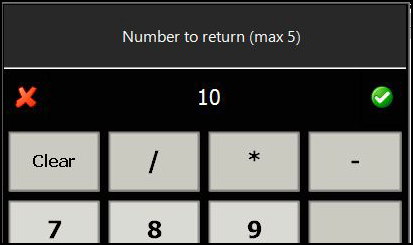
Tap the item and enter the Number to return (quantity). NSPOS lists the maximum number of eligible items.
 Note:
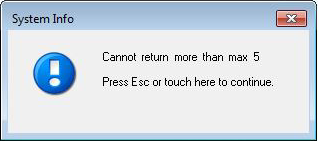
Note:You can't accept a return of more items than the maximum shown.
-
Repeat for other items to return as needed. Tap Done.
-
Select a Reason Code and tap Done. Select the code that most closely matches the customer's reason for the return.
 Note:
Note:Your administrator can create custom Reason Codes to fit your business processes. See Reason Codes in the NSPOS Administrator's guide.
-
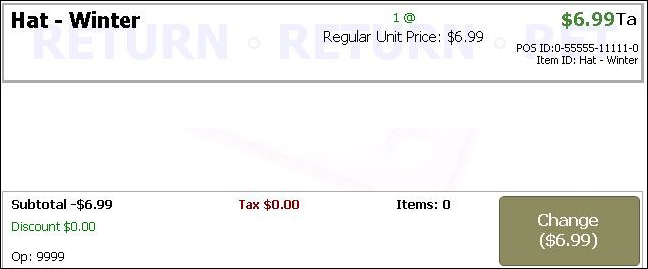
Verify that the item appears in the Journal and you see:
-
The item line displays a RETURN watermark.
-
The transaction shows Change due to the customer instead of Amt Due.
-
-
Tap Change and select the payment option for the refund.
-
Refund the change due to the customer or the customer's card.
-
Provide the return receipt to the customer.
If the return receipt includes a copy with a signature line, ask the customer to complete all required information. Place the completed receipt in your cash drawer and hand the customer their copy.
Note:Searching for the transaction again will display any items still eligible for return, including the number of those items that were previously returned. If all quantities of an item were returned, that item won't appear in the list.
Considerations on Returning BOGO and other Promotional Items
The NSPOS Returnable Items form shows the price at which each item was purchased. It doesn't show any promotions or discounts used to calculate that purchase price. It also doesn't show if a promotion or discount is still valid for current purchases, such as exchanges.
Cashiers should watch for returns that might have been part of a Buy One, Get One (BOGO) promotion. BOGOs often include a free or heavily-discounted 'reward' item for purchasing a 'trigger' item at the regular price. A customer might try to return the regular-priced trigger item and keep the reward item. The Returnable Items form will show the purchase price for BOGO reward items as zero or a value lower than would be considered normal.
Returns for promotional or discounted items should be covered by company policies and watched for by the cashier. NSPOS doesn't monitor trigger and reward item pricing for returns.
Watch for free or heavily-discounted items that might identify BOGO item returns.
Considerations for Returns after Tax Adjustments to Discounts
Usually, the tax rate for a discount is the same as the tax rate for the items sold. However, an administrator can adjust the tax rates associated with different parts of a transaction.
If a shopper returns an item purchased at a discount, and the tax for the discount was changed after the purchase, the refund amount will show the original taxes paid. This difference between the original and current discount tax rate could cause a mismatch between what's logged in NSPOS and what's listed in NetSuite ERP.
Because NetSuite ERP doesn't prevent an administrator from making tax changes, the NetSuite customer is responsible for discrepancies in refund amounts caused by changing the tax rate applied to discounts.
The NetSuite customer is responsible for discrepancies in refund amounts caused by changing the tax rate applied to discounts.
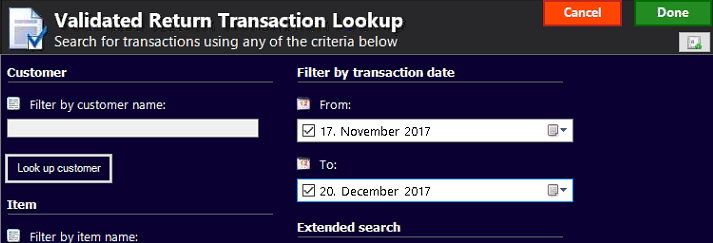
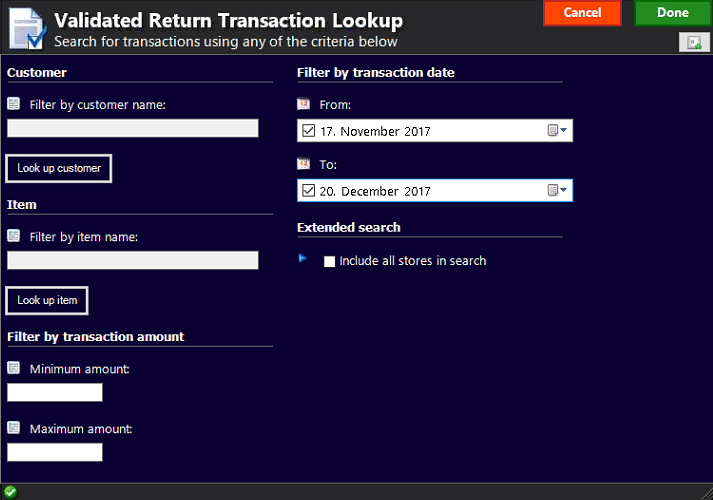
Validated Return Transaction Lookup
If there's no receipt, use the transaction lookup form to find transactions that validate the return. By default, the search includes all stores in your subsidiary and all sales processed through NetSuite ERP.
Administrators can limit transaction searches to the original store or exclude sales made through NetSuite ERP. See Configure Return Settings.
-
Tap Voids/Returns and then Return Receipt Search.
-
Tap the red
.
-
Complete one or more search fields. Entering criteria in multiple fields will narrow your search.
-
Tap Done to perform the search.
-
Customer - Enter a portion of the customer's name or tap Look up customer.
-
Item - Enter a portion of the item name or tap Look up item.
-
Transaction amount - Enter a Minimum amount or a Maximum amount to locate the transaction by how much the customer paid. For example, if the transaction is estimated to have been over $30.00, enter 30.00 as the minimum amount. You can enter amounts in both fields to search within a range.
Note:This form doesn't use decimal assumption to automatically add decimal places to an amount.
-
Transaction date - To locate the transaction by the purchase date, enter a From or To date and check the box to the left of that date.
Enter and check both dates to search within a range.
-
Extended search > Include all stores in search - Leave checked to search all stores within your subsidiary. Clear the box to limit the search to your store.
-
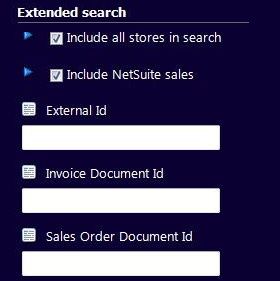
Optional Extended search criteria: This criteria appears if enabled by your administrator. See Set Extended Search defaults for Validated Return Transaction Lookups.
-
Extended search > Include NetSuite sales - Leaved checked to search for transactions from applications that post to NetSuite ERP Invoice or Cash Sale records. Clear the box to limit the search to store purchases.
-
Extended search > External ID - The ID used in the transaction that is sent from NSPOS to NetSuite ERP. The External ID is a hidden field on the Invoice record.
-
Extended search > Invoice Document ID - The Document Number shown on the NetSuite ERP Invoice record.
OR
-
Extended search > Sales Order Document ID - Similar to the Invoice Document ID, but because the ID is associated with a sales order, it will include all invoices linked to that order.
-
-