Configure a Prompt for Receipt (2020.1)
Applies to NetSuite Point of Sale (NSPOS) 2020.1.X.
You can set up an NSPOS prompt that asks the cashier if the customer wants a receipt at the end of a transaction. You determine the content of the prompt and whether appears on all workstations, selected workstation groups only, or selected workstations only.
First you enter the receipt flag identifier and prompt text, and then you configure which workstations will use the prompt.
To configure the Receipt Prompt flag and text:
-
Sign in to any NetSuite POS register as an administrator (9090 level operator).
-
Press Ctrl+F12.
-
Search for and tap Configure Receipts.
-
Search for Retail.
-
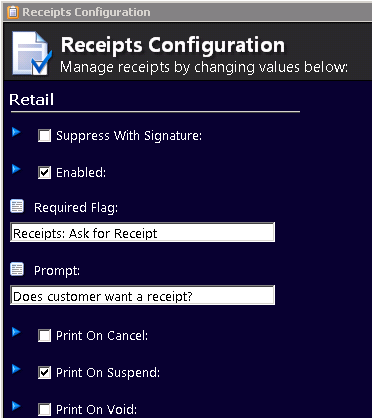
If not done, check Enabled.
-
For Required Flag, enter:
Receipts: Ask for ReceiptTip:Enter or copy/paste the flag text exactly as it appears here.
-
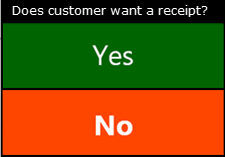
For Prompt, enter the desired text. For example:
Does customer want a receipt?orPrint receipt? -
Tap Done.
To configure all workstations to display the receipt prompt, sign into any workstation. If you only want to configure a single workstation group or individual workstation, you will need to sign into a workstation within that group or into the desired workstation.
After configuring the Required Flag option, any register that doesn't have Ask for Receipt checked won't print a receipt.
Use the following procedure to set up the receipt prompt option for registers that should print a receipt.
To configure where the Receipt Prompt appears:
-
Sign in to the applicable NetSuite POS register as an administrator (9090 level operator).
-
Press Ctrl+F10 to open the Universal Settings.
-
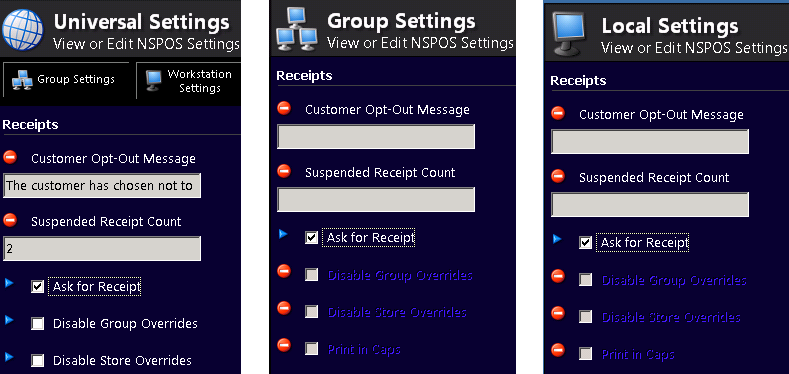
Choose the area to display the prompt:
-
For all workstations, stay on the Universal Settings page.
-
For the current workstation group, tap Group Settings.
-
For the current workstation only, tap Workstation Settings.
Note:Workstation Settings displays 'Local Settings.'
-
-
Search for Receipts.
-
Check Ask for Receipt.
If needed, tap the red blocked icon
 to allow editing.
 -
Tap Done.
If you chose Group Settings or Workstation Settings, configure the receipt settings flag for each workstation group or individual workstation you want.