Using Buttons for Navigation
To use a button for navigation, use a button to transition from a first state to a second state that contains a Go To Page or Go To Record action. The Go To Page or Go To Record action redirects the user from the current record in the workflow to another page, list, or record. The destination depends on the type of action used in the second state.
Use the following example to create a workflow with two states, State 1 and State 2. A transition in State 1 executes and transitions to State 2 from a button added with the Add Button action. A Go To Record action in State 2 redirects the user to a new Customer Deposit record.
To create and use a button for navigation:
-
Create a workflow with the following properties:
Property
Value
Record Type
Transaction
Sub Types
Sales Order
Initiation
Event Based
On Create
checked
On Update
checked
Trigger Type
Before Record Load
For more information, see Creating a Workflow.
Note:Use the Before Record Load trigger because of the Add Button action to add a button in this state. See Before Record Load Trigger and Add Button Action.
-
Save the workflow definition.
-
In the diagrammer, click New State twice to create two states: State 1 and State 2.
-
Select State 1 in the diagrammer, click New Action in the context panel, and create an action with the following properties:
Property
Value
New Action window
Add Button
Trigger On
Before Record Load
Label (under Parameters)
Create Deposit
-
Click Save.
-
Select State 2 in the diagrammer, click New Action in the context panel, and create an action with the following properties:
Property
Value
New Action window
Go To Record
Trigger On
Entry
Record Type (under Parameters)
Customer Deposit
Note:Since the Customer Deposit record does not yet exist, the Go To Record action creates it. See Go To Record Action.
-
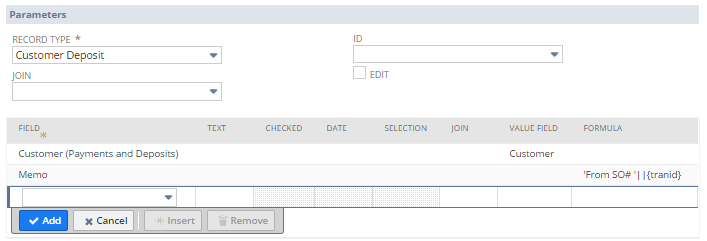
On the Go To Record action, under Parameters, enter each of the following fields and click Add:
Field
Value Field
Customer (Payments and Deposits)
Customer
Memo
'From SO# '||{tranid}
-
Click Save.
-
In the diagrammer, hover over the bottom of the State 1. The cursor becomes a filled half-circle.
Drag the icon to State 2 and release the mouse to create the transition.
-
Select the transition in the diagrammer and click the Edit icon on the Transition tab in the context panel.
-
In the Workflow Transition window, leave the Trigger On field blank and choose Create Deposit in the Button dropdown list. Click Save.
To test this workflow, create and save a new sales order. On the sales order, click the Create Deposit button to create a deposit record associated with the customer for the sales order. NetSuite creates the deposit record and redirects the user to the new record.