Email Marketing Templates
Email marketing templates are HTML files you use to create campaign emails. You can create these templates in an HTML editor outside of NetSuite, or you can use the Rich Text Editor on the template record.
If you create your marketing template outside of NetSuite, you must include the following HTML elements in your template:
-
<html>and</html>tags -
<body>and</body>tags at the beginning and end of the message -
All end tags, such as
</p>and</li>
You can store images in your template in your NetSuite file cabinet. When you use an image file in a template, ensure the Available Without Login box is checked on the File record.
To insert images from the file cabinet into email templates:
-
Go to Documents > Files > File Cabinet and open the folder containing the required image.
-
Click Edit next to the image you want to use in the email template.
-
Copy the URL of the image file. If there is more than one listed, copy the one that begins https://system.
-
On the Email Template (Scriptable) form, position where you want the image to appear using the WYSIWYG editor.
-
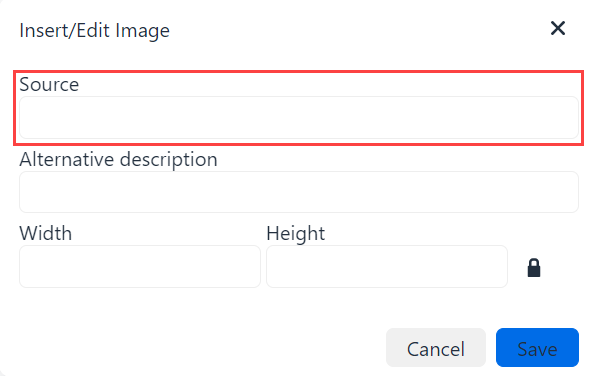
Click the Picture icon on the editor.
-
In the Image Properties window, paste the URL of the image into the URL field.
-
Click OK to insert the image into the template.
-
When you finish formatting your template, click Save.
Scriptable templates enable you to insert personalized information in the body of your email templates through the use of FreeMarker code. For more information, see Scriptable Templates.
The following is an example of a campaign email template that uses FreeMarker code.
          <b>Dear <#if Customer.companyName != "">${Customer.companyName}<#else>Customer</#if>,</b> <p>Now you have unique opportunity to get your favorite items with 20% discount!</p> <p>All you need to do is to use the following coupon code when you place an order on our site: ${CampaignEvent.couponCode}!</p> <#assign printedOutItems = 0>
<#list Customer.correlatedItems as itemLine> <#if 33 < itemLine.correlation> <img src="${itemLine.upsellItem.imageURL}" alt="${itemLine.upsellItem.displayName}" height="128" width="128"/><br/> </#if> <#assign printedOutItems = printedOutItems + 1> <#if printedOutItems = 3><#break></#if>
</#list> <#if 3 < printedOutItems> <#list Customer.relatedItems as itemLine> <img src="${itemLine.upsellItem.imageURL}" alt="${itemLine.upsellItem.displayName}" height="128" width="128"/><br/> <#assign printedOutItems = printedOutItems + 1> <#if printedOutItems = 3><#break></#if> </#list>
</#if> <p> Best regards,<br/> <br/> ${preferences.MESSAGE_SIGNATURE}
</p>
If you compose your email template using NetSuite Rich Text Editor, you can choose fields from the Insert Field list.
Campaign email templates are HTML documents that you attach to email marketing campaign events. On the delivery date for the campaign event, NetSuite uses the campaign email template to generate the email you send to the target group.
With campaign email templates, you can:
-
Generate auto-reply email sent to people who submit online forms
-
Create campaign email templates outside of NetSuite and then upload them into your NetSuite File Cabinet
-
Personalize your email templates with FreeMarker code that uses information from NetSuite records
For example, you might want to include your customers' names in the greeting of your monthly newsletter.
When you create a campaign email template, the fields you use need to match the record type of your target group members. NetSuite does not enter fields in the message that don't refer to a field in the recipient's record. For example, if you create a campaign email template for customers and add a Salutation field, the salutation won't appear because the customer record doesn't have that field.
Records referenced in a campaign email template must match the group you are targeting with your marketing campaign. If not, the group does not appear in the group column of campaign records.
HTML documents uploaded to your file cabinet must include appropriate end tags to be recognized as an HTML files.
If you send more than 10,000 email per marketing campaign or email merge operation, you must set up a campaign domain and DKIM. For more information, see Campaign Email Domains and DomainKeys Identified Mail (DKIM).
Before you create an email template, you must create campaign email address records. You can use only validated email addresses in your email marketing campaigns. For more information, see Creating a Campaign Email Address Record.
To create a marketing email template:
-
Go to Documents > Templates > Marketing Templates > New.
-
On the Select Type page, click Campaign.
-
Select the template layout you want to use for your template.
-
On the New Campaign Email Template page, enter a name for this template.
-
Enter a description of this template.
-
To send a preview of the email template, check the Send Email Preview box, and enter the email address to which you want to send a preview.
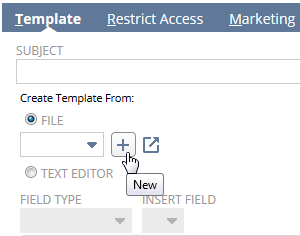
Template Subtab
On the Template subtab, upload a file you prepared outside of NetSuite. You can also create the template with the text editing options in the Template field.
-
In the Subject field, enter a subject for the email you send with this template.
-
Do one of the following:
-
Choose File if you created the template beforehand, and then select the template file in the list. You can also click New if you have not already uploaded your template file to your file cabinet.
-
Select Text Editor if you have not yet created your template, and then compose your template in the rich text field.
To insert a field in the template, select the record type in the Field Type list. Then, select a field in the Insert Field list.
-
If you use the UK Edition, NetSuite complies with UK law. NetSuite includes your business address and VAT number in the footer of all email you send to those outside of your company.
Restrict Access Subtab
-
Check the Private box if you do not want others in your company to use this template.
-
If you want you want this template to be used only by members of a specific group, select that group in the Restrict to Group field.
Marketing Subtab
The features enabled in your account determine the fields shown on the Marketing subtab.
-
In the From Name field, enter the name you want to appear in the From field on email messages you send with this template.
-
In the From Email address field, select a validated email address to appear in the From field of your marketing email.
-
In the Reply to Email address field, select a validated email address to receive responses to your marketing email.
You can create and validate email address records at Setup > Campaign Email Addresses > New.
-
Check the Email as Sales Rep box if you want replies to the email to be sent to the sales rep assigned to customer recipients.
When checked, each campaign email shows the nickname and From email address entered by the rep. The rep enters this information at Home > Set Preferences > General, under the User Profile heading. If the rep does not have a profile set up, NetSuite uses the marketing email address and From name entered on the template record.
Note:This setting overrides the reply to email address set in the Reply To Email Address field.
-
In the Campaign Domain field, select the campaign domain you want to use for this template.
For more information, see Campaign Email Domains.
-
In the Subscription field, select the category of campaign subscription that this email template is used for.
When you select this template for an email merge or a marketing campaign, NetSuite chooses this campaign subscription, by default. For more information, see Campaign Subscription Categories.
-
To track statistics related to how often this email message is opened or clicked through, check the Track Outgoing Email box.
When checked, whenever a recipient of your marketing email opens or clicks through a message, a request is sent to the NetSuite server. Some of your marketing email recipients may have concerns about this process that you may want to address in your company's privacy policy.
Note:Only links to pages in NetSuite are tracked as having been clicked for campaign response reporting. For example, a link to a page in your NetSuite website or an online customer form would be tracked. However, a link to a third-party site would not be tracked.
NetSuite includes these tracking statistics in reports such as the Campaign Statistics Summary and Detail.
Categories Subtab
This subtab appears only if you use the CRM Template Categories feature. Template categories enable you to organize templates. You can create new categories at Documents > Templates > Template Categories > New..
-
Click the Categories subtab.
-
In the Template Category column, select the category you want to organize this template into.
-
Click Add.
-
Repeat these steps for each category you want to organize this template into. A template can be in any number of categories.
-
Click Save.
Now, you can select this campaign email template on campaign records. For more information about creating email campaigns, read Creating an Email Marketing Campaign.