Sending Payment Notifications
You can notify payees such as, vendors, employees, partners and customers that payment files have been created to process fund transfers to and from their bank accounts. You can also send notifications to notify payees that the payments made for them encountered errors.
To send a payment notification to an email address other than the default email address on the payee's entity record, you can enter multiple addresses in the Email Address for Payment Notification field on the main tab of vendor, employee, partner and customer records. To send a payment notification to additional recipients, enter multiple email addresses in this field separated by semicolons.

If the Email Address for Payment Notification field is blank, email payment notifications are sent to the default email address specified on the entity record.
For information about using payment notification templates, see the following topics:
To send email notifications:
-
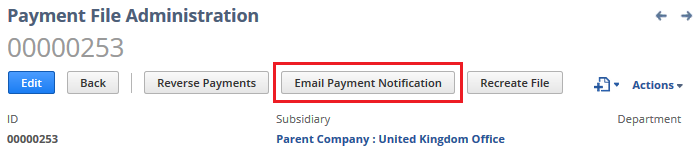
Go to Payments > Payment Processing > Payments File Administration.
-
Click the View link next to the payment file for which you want to send email notifications.
-
Click Email Payment Notification.
-
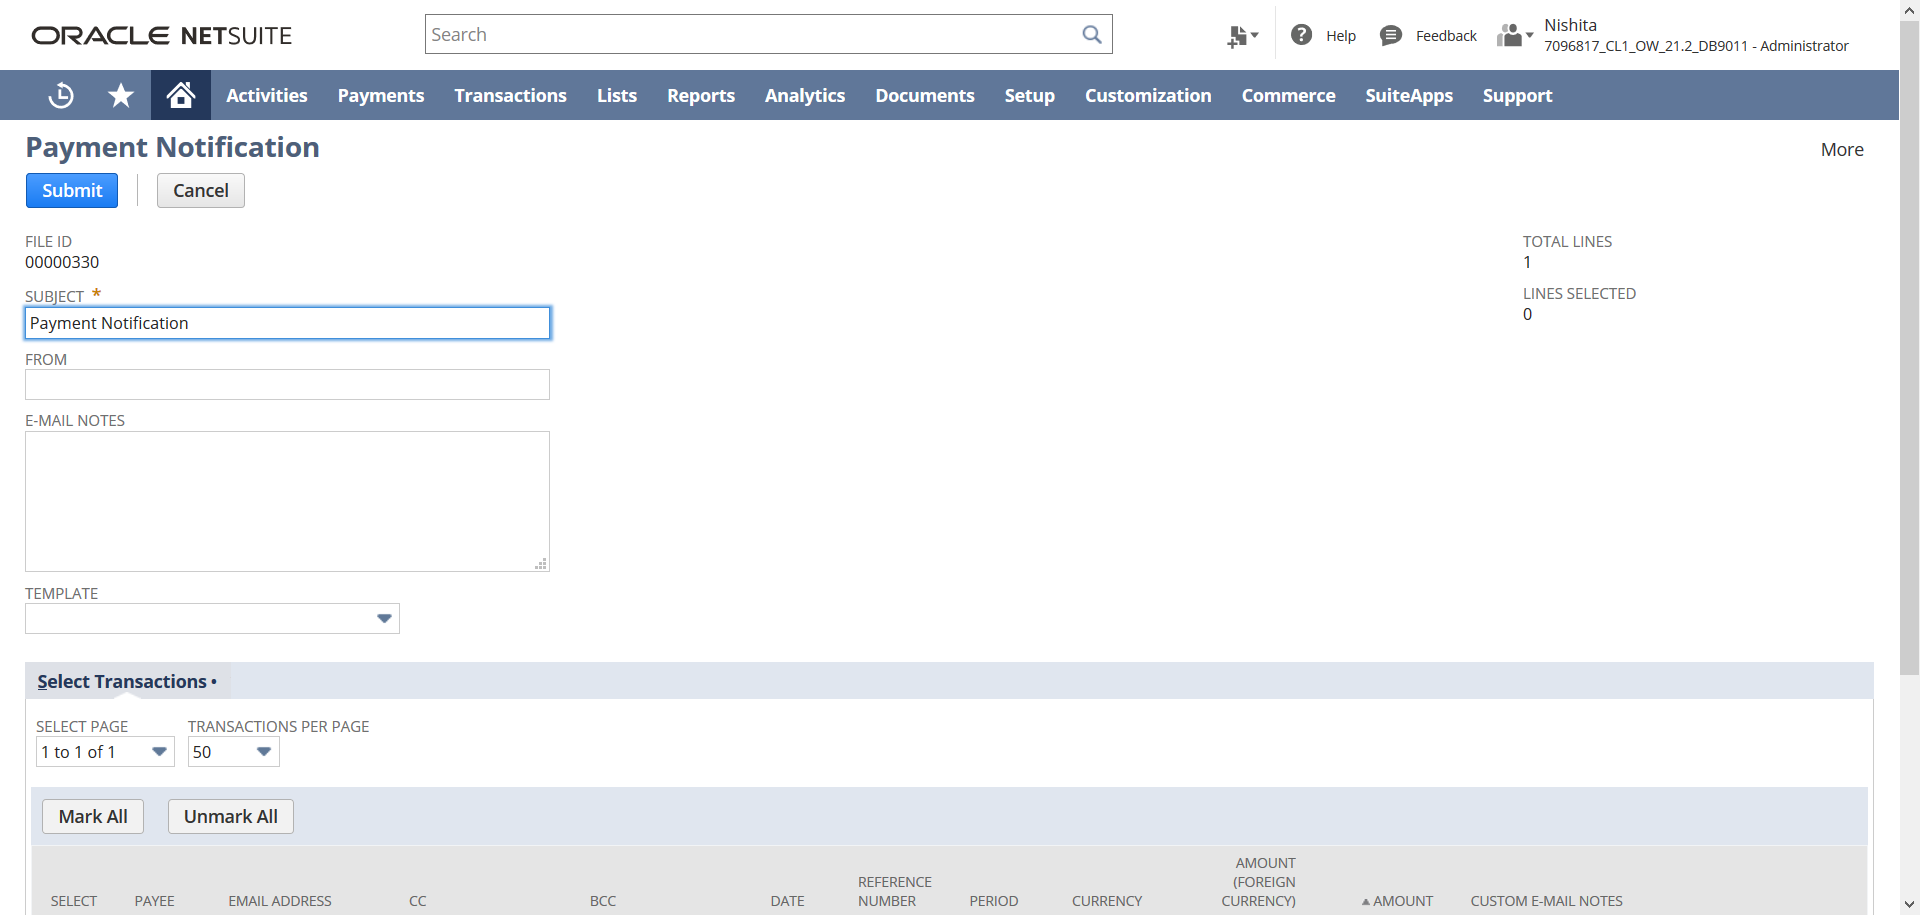
In the Subject field of the Payment Notification form, change or accept the text for the Subject line of the email notification.
-
In the From field, enter a from email address that displays in the payment notification email sent to the customers. The From field value overrides the default From Email Address field value set in the Set Preferences page.
The From field is optional and if left blank, the default email address is considered from the From Email Address field in the Set Preferences page. If the default email address is not set, then the email address from which you logged into your account will be used.
-
Next, do one of the following:
-
Type a message in the Email Notes field to create a custom email message and include a PDF of the transaction in your email, or
-
Select an email template. Note that you must enable the Advanced PDF/HTML Templates feature for this option, and a PDF transaction is not included in the email notification.
Note:This message is sent to all the payees that you select on the Select Transactions subtab.
-
-
In the Select column on the Select Transactions subtab, check the box next to each payee to whom you want to send an email notification.
Tip:Click Mark All or Unmark All to select or clear boxes, respectively, for all payees in the list.
-
In the Email Address field, verify the email address or enter an email address if one doesn't exist. You can enter multiple email addresses separated by semi colon. Don't include spaces in this field.
-
(Optional) In the CC and BCC columns, enter the email addresses to copy and blind copy other recipients. You can enter multiple email addresses separated by semi colon. Don't include spaces in this field.
-
In the Custom Email Notes column, write the email message for the transaction. The text you enter here is sent only to recipients listed in the Email Address, CC and BCC fields on that transaction.
Note:Text entered in the Custom Email Notes field replaces the message written in the Email Notes field or the Email Template selected for that particular Payee.
-
Click Submit.
Using Electronic Bank Payment Notification Templates
There are two standard email templates that you can use for sending payment notifications:
-
Standard Vendor Payment - Use this template when sending notifications to vendors for bill payments,
-
Standard Customer Payment - Use this template when sending notifications to customers for direct debits, and to customers for refunds.
To select the template to use for payment notifications:
-
Go to Payments > Setup > Electronic Payments Preferences.
-
Click the General Preference subtab.
-
Click Edit.
-
In the Email Template for Vendor Payments field, select the template to use for payment notifications to vendors,
-
In the Email Template for Customer Payments field, select the template to use for payment notifications to customers.
-
Click Save.
You can also use custom email templates. There are two ways to customize email templates:
-
Download a standard template and customize it.
-
Customize an existing Advanced PDF/HTML template
To customize a standard template:
-
Go to Documents > Files > File Cabinet > SuiteBundles, and then look for the Templates folder under the bundle number of the Electronic Bank Payments SuiteApp installed in your account.

To see the latest bundle number in your account, go to Customization > SuiteBundler > Search & Install Bundles > List. On the Installed Bundles page, look for the bundle number of the Electronic Bank Payments SuiteApp in the Bundle ID column.
-
Click Download next to the template you want to customize.
-
Download the standard template and save it on your computer.
-
Customize the template using Notepad or Notepad ++.
-
Upload your customized template in the Templates folder of the File Cabinet.
For instructions on adding files to the File Cabinet, see Uploading Files to the File Cabinet.
To customize an existing Advanced PDF/HTML template:
-
Using the template editor, review and change the layout. For more information, see Advanced Templates Customization in the Template Editor.
-
When you have modified the layout to your specifications, click Source.
-
Copy and paste the source XML code to a Notepad or Notepad++ file, and then save it on your computer.
-
Upload the new template in the Templates folder of the File Cabinet.
To locate the Templates folder, see Step 1 of To customize a standard template. For instructions on adding files to the File Cabinet, see Uploading Files to the File Cabinet.
Adding Subsidiary Information to an Electronic Bank Payment Notification Template
The standard payment notification templates provided by Electronic Bank Payments don't include subsidiary information, such as the name and address of the subsidiary. If you want to include subsidiary information about the payment notifications that you send out, you need to customize an email template to add the relevant subsidiary fields.
To add subsidiary information to a payment notification template:
-
Go to Documents > Files > File Cabinet > SuiteBundles, and then look for the Templates folder under the bundle number of the Electronic Bank Payments SuiteApp installed in your account.
To see the latest bundle number in your account, go to Customization > SuiteBundler > Search & Install Bundles > List. On the Installed Bundles page, look for the bundle number of the Electronic Bank Payments SuiteApp in the Bundle ID column.
-
Click the name of the email template that you want to customize.
-
Copy the contents of the template and paste them into a new file using a text editor, such as Notepad++.
-
Add the subsidiary information to the appropriate location on the new template using the following format:
${subsidiary.[field id]}Note:To find the internal ID of a field, see Finding Internal IDs of Record Fields
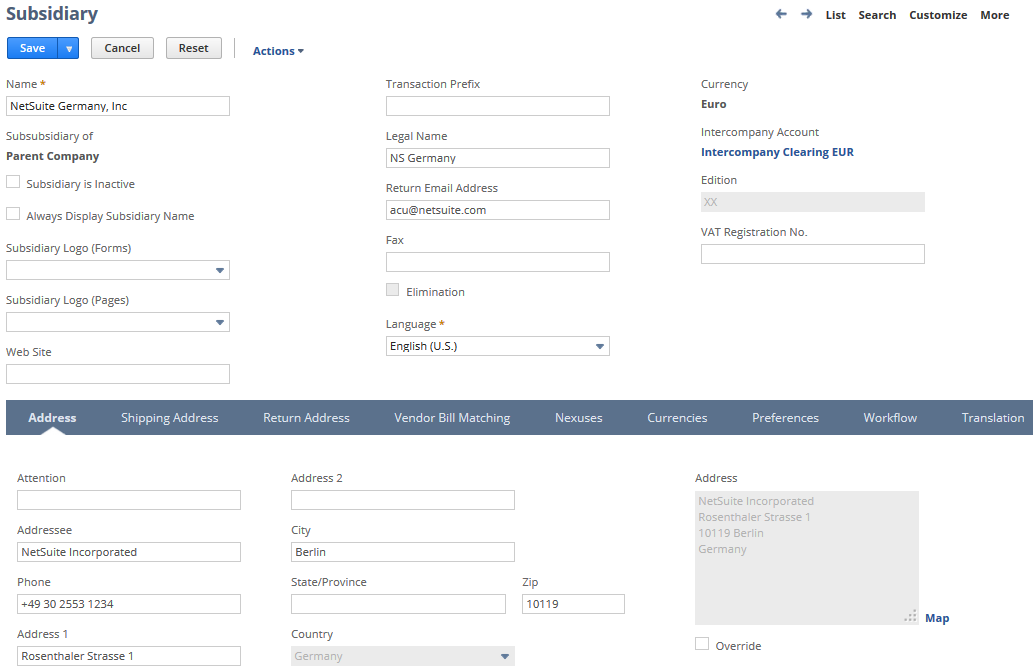
In the following example, the information to be added is the subsidiary address. The field ID of the Address field on the subsidiary record is addrtext.
Example:
${subsidiary.addrtext} -
Save the file with a new template name.
-
Upload the file in the Templates folder of the File Cabinet.
For instructions on adding files to the File Cabinet, see Uploading Files to the File Cabinet.
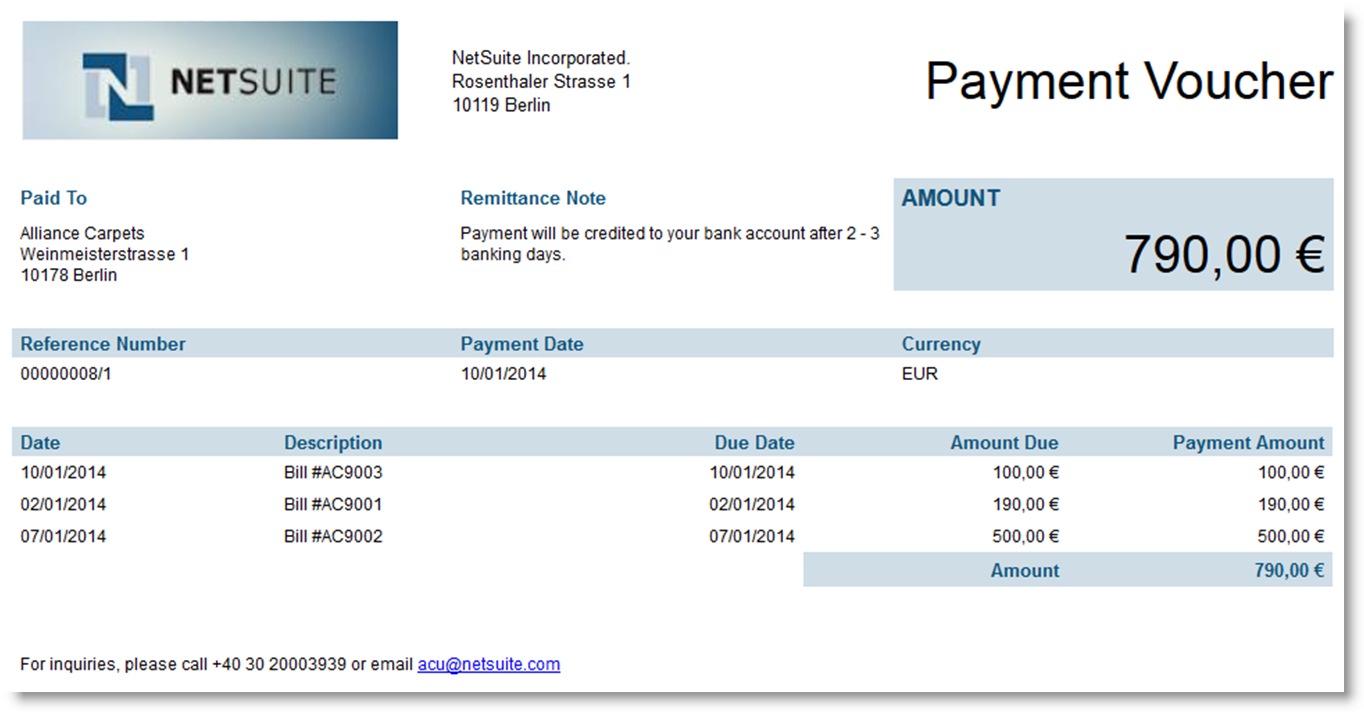
When you use the new email template, the subsidiary address from the subsidiary record appears on the payment notifications.
Customize Return Email Preferences
You can use the Return Email Address field on the Payment Notification page to receive responses for the email notifications sent to the payment recipients.
You can customize return email preferences on the Electronic Payments Preferences page.
To customize return email preferences:
-
Go to Payments > Setup > Electronic Payment Preference.
-
From the Return Email Address list, select one of the following options:
-
Subsidiary Return Email Address - This option retrieves the return email address set at the subsidiary level of the processed PFA
-
Company Return Email Address - This option retrieves the return email address set on the Company Information page.
-
Custom Return Email Address - This option retrieves the custom email return email address value set at the Electronic Payments Preferences page
When you select Custom Return Email Address, the Custom Return Email field is enabled.
-
If you don't select any option, then the Return Email Address field value is blank. The responses are received to the user who triggers the payment notifications.
Note:A corresponding email address is automatically entered in the Return Email Address field on the Payment Notification page based on the option selected in the Return Email Address list on the Electronic Payments Preference page.
-
-
Click Save.
Related Topics:
- Managing Electronic Bank Payments
- Setting Up Multiple Script Queues or Processors to Generate Payment File Formats
- Setting Up Multi-Currency Payments Processing
- Viewing Electronic Bank Payment Details
- Reversing Payments
- Rollback
- Reprocessing Payments
- Recreating a Payment File
- Verifying Issued Checks with Positive Pay
- Setting Schedules for Payment Batches
- Changing the Priority of a Queued Payment File