Creating Knowledge Base Solutions
Solutions are answers to customer issues. They can include instructions, FAQ, or information about a product or service.
You should create topics and subtopics before adding solutions. To create topics and subtopics, go to Cases > Customer Service > Topics > New.
For more information about publishing your topics and solutions, see Publishing a Knowledge Base.
You can attach solutions to multiple topics and subtopics to build knowledge bases. You can also attach solutions to support cases for a quick response to customer issues. For information about attaching solutions to cases, see Attaching Knowledge Base Solutions to Cases.
Knowledge Base must be enabled in Company > Setup > CRM > Support before you can create solutions.
To create a solution:
-
Go to Lists > Support > Solutions > New.
-
Under Primary Information:
-
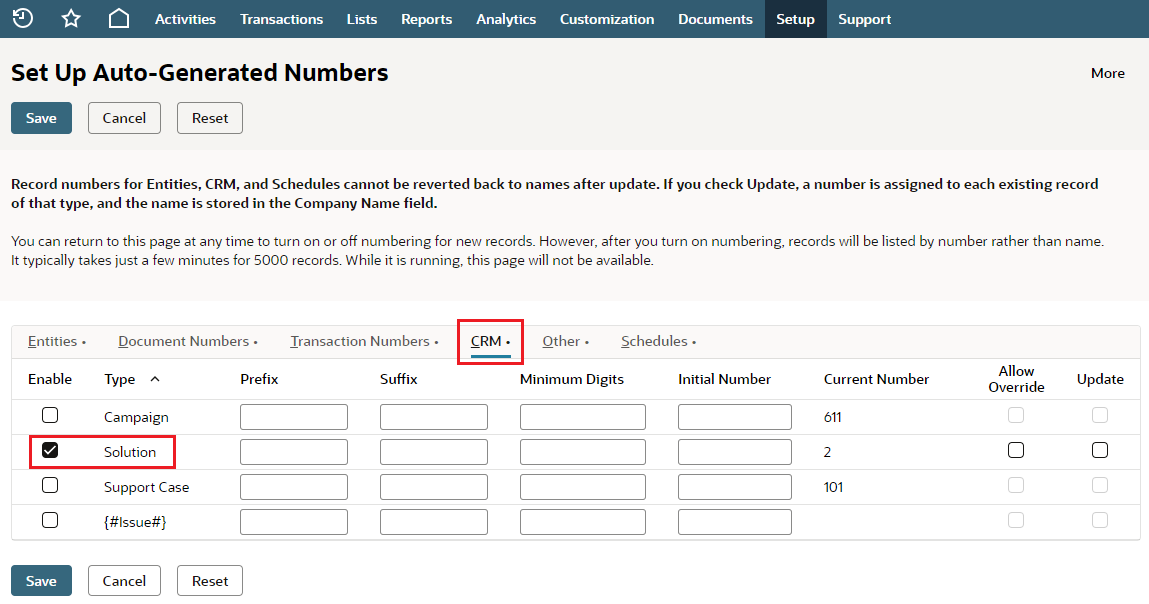
Enter or edit a reference code/number in the code field. This field is already filled if auto-numbering is enabled.
Note:Administrators can enable auto-numbering for solutions at Setup > Company > Auto-Generated Numbers.
-
In the Title field, enter a title or name for this solution.
This title shows on the Solutions list and in a published knowledge base. When you attach solutions to cases or place them in topics, you can search by code or title.
-
In the Assigned To field, select the employee this solution is assigned to.
This could be the person who maintains the content of this solution or the one who approves it.
-
In the Status field, select one of the following:
-
Approved - This solution has been reviewed by a supervisor and is ready for publishing.
-
Unapproved - This solution has been created but not reviewed. Unapproved is selected by default.
Unapproved solutions can't be published.
Note:You can allow only Approved solutions and those marked Display Online to be attached to case records. Go to Setup > Support > Support Preferences and check the Only Link Approved Solutions to Cases box.
-
-
Check the Display Online box to show this solution on your website.
-
-
Under Solution Information:
-
In the Abstract field, enter a brief description of the problem this solution fixes. The abstract appears next to the title.
-
In the Description field, enter the solution. You can include HTML and JavaScript.
-
Optionally, you can get writing help for the Abstract and Description fields from our generative AI service, NetSuite Text Enhance. Click the Enhance Text button to use the available options. For more information about using this capability, see Text Enhance.
-
-
On the Topics subtab, select a topic or subtopic you want to categorize this solution under for publishing.
-
Click Add.
-
Repeat these steps for each topic or subtopic you want to place this solution under.
-
On the Related Records subtab, do one of the following to attach a related solution to the one you are creating:
-
Enter part of the solution's name, and press Tab.
-
Click List to select a related solution from the solution list.
-
Click the New icon to create a new related solution.
-
-
Click Add.
-
Repeat these steps for each related solution you want to add.
-
Click the Communication subtab to add notes about this solution. Optionally, you can get writing help for the Note and Memo fields from our generative AI service, NetSuite Text Enhance. Click the Enhance Text button to use the available options. For more information about using this capability, see Text Enhance.
-
Click the System Information subtab and check the Inactive box if you want to inactivate the solution
Note:After the solution is created, Date Created and Last Modified timestamps are added to the System Information subtab.
-
Click Save.
After you create solutions and attach them to topics and cases, you can publish your knowledge base. Go to Cases > Customer Service > Knowledge Base > New.
You can also create a solution from your reply to a support case. To do this, click New Solution on the case record on the Communication subtab. A new solution record opens with the text from the Reply field in the Description field. For more information, see Attaching Knowledge Base Solutions to Cases.
You can quickly update your solutions from the Solutions list using the inline editing feature ![]() . To edit solutions from the list, click the Edit link at the top of the list. If you want to change which fields show in the columns on the list, click Customize View. For example, you can add the Date Created and Last Modified date to the list view for quick reference. For more information, see Using a Saved Search as a View.
. To edit solutions from the list, click the Edit link at the top of the list. If you want to change which fields show in the columns on the list, click Customize View. For example, you can add the Date Created and Last Modified date to the list view for quick reference. For more information, see Using a Saved Search as a View.
New solutions and updates to existing solutions are indexed nightly, so search results won't reflect your changes until the next day.