Step 1 Define Workflow Basic Information
This step shows you how to use the Workflow Manager to create a workflow and define the workflow properties, including workflow name, workflow base record, owner, and release status, on the workflow definition page.
To create a workflow and define the basic properties:
-
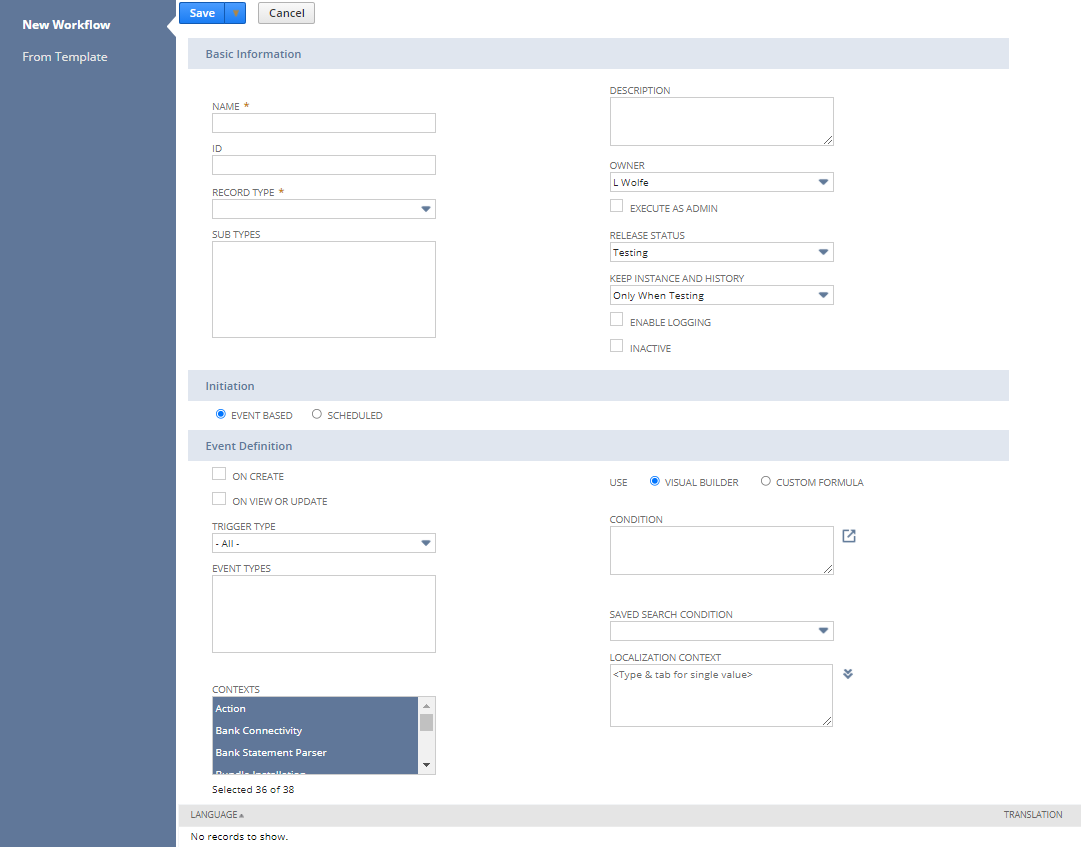
To create a new workflow, go to Customization > Workflow > Workflows > New. The workflow definition page opens with the following default settings:
-
Owner: Make sure your name appears here
-
Release Status: Testing
-
Keep Instance and History: Only When Testing
-
Event Based: Selected
-
Visual Builder: Selected
-
Trigger Type: All
-
Contexts: All selected
The following screenshot shows the workflow definition page and the default settings:
-
-
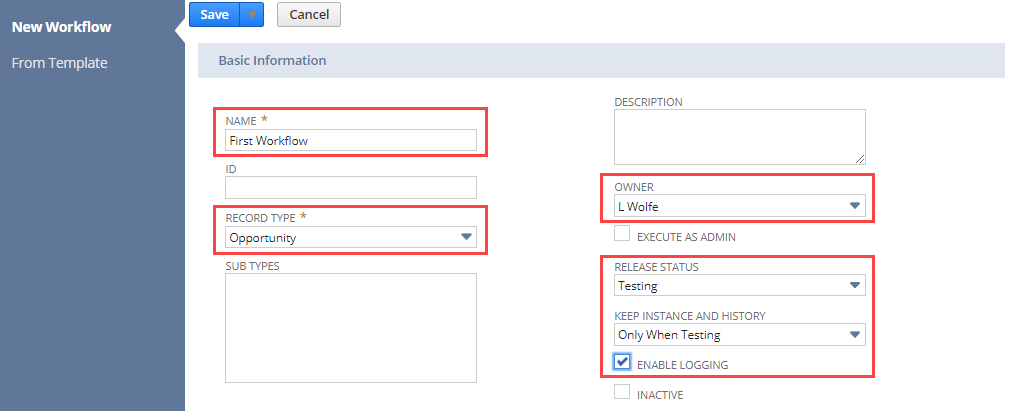
Under Basic Information, enter the following properties:
Property
Value
Name
First Workflow
Record Type
Opportunity
Owner
Verify that your name appears
Release Status
Testing
Keep Instance and History
Only When Testing
Enable Logging
Checked
Make sure that the workflow properties match the following screenshot:
-
To continue with the tutorial, continue to Step 2 Define Workflow Initiation.
Record sub types are not available for an Opportunity record and the Sub Types field is only available for Item, Transaction, and Customer record types. For more information about record sub types, see Workflow Base Record.