Editing an Employee Record
After viewing an employee record you may decide that some of the information must be changed, or you may want to enter additional information in some fields. You must enter the editing mode to make any changes to the record.
-
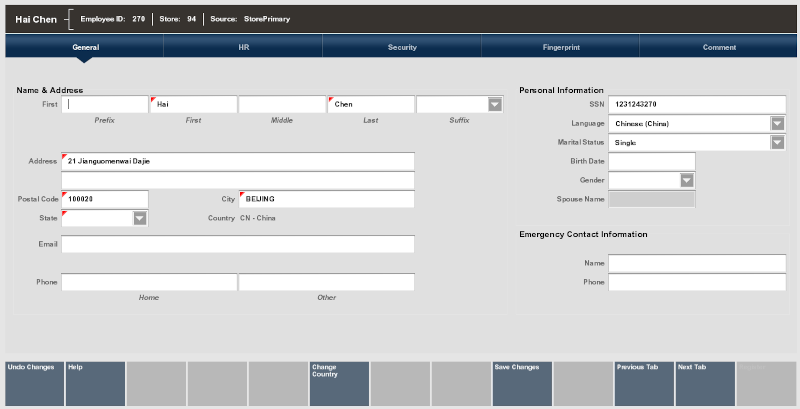
With the employee record displayed, select the Edit Employee option to go into an editing mode. The fields are no longer grayed out.
-
Use the Next Tab and Previous Tab menu options to navigate to the tab you want.
-
To make changes to any of the fields, select the field you want to change, and replace the old entry by typing over it with the new information.
-
Any fields that require entries are marked with a red triangle in the upper left corner of the field.
-
Any fields that have lists attached display a down arrow on the right side of the field.
Figure 4-6 Employee Record in Edit Mode
-
-
Save any changes you made before exiting from the Employee Maintenance screen.
Select the Save Changes option to keep your changes. If you decide not to keep the changes you made, select the Undo Changes option.
Note:
If you select Undo Changes you are prompted to confirm that you want to exit edit mode without saving any changes that you made. When the prompt “Are you sure you want to lose changes?" displays, and you select Yes, your changes are discarded.
Changing an Employee's Password
This option allows you to change a password for an employee. Passwords for new employees are created when a new employee's record is added to the database. You must have security privileges in the system to change a password.
Note:
This option allows you to change a password for an employee. Passwords for new employees are created when a new employee's record is added to the database. You must have security privileges in the system to change a password.
-
Open the employee record for the user whose password you want to change.
-
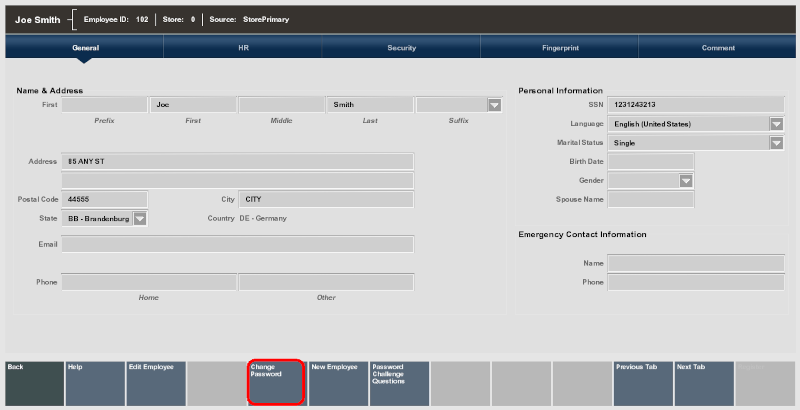
Select the Change Password option.
Note:
You may also change a password from both the Register Login screen and the Back Office Login screen see Changing Your Password.
Figure 4-7 Change Password Menu Option
-
Oracle Retail Xstore Point of Service may prompt to verify your identity. If prompted, enter your own employee ID and password to verify that you have security privileges to change an employee's password. If you enter this information incorrectly, the system displays the message “The password entered was incorrect." Select OK to continue and re-enter the information.
-
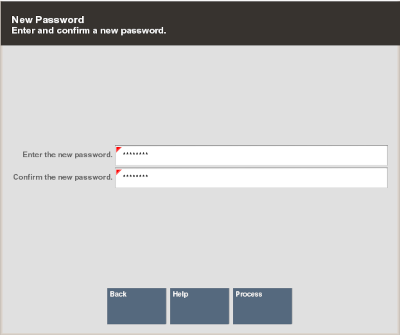
Oracle Retail Xstore Point of Service prompts you to enter a new password for the employee. Type the new password for the employee and retype the same new password on the line below to confirm it.
Figure 4-8 Prompt for New Employee Password and Confirmation
Note:
Passwords may be case sensitive, so notice whether the Caps Lock key is on or off when you enter and confirm the new password.
-
Select Process to verify the new password. If the system accepts the password, a confirmation message indicates that the password was changed.
Note:
The system may enforce certain rules regarding passwords such as the minimum number of characters required or whether you can reuse an old password. If the new password does not meet the requirements, the system displays a message. If prompted, follow the instructions to correct any errors.
Establish Password Challenge Questions
This configurable function allows your associates to reset their own password after answering several questions. Your store may not have this option available.
To establish password challenge questions:
-
Open the employee record for the user whose challenge questions you want to maintain.
-
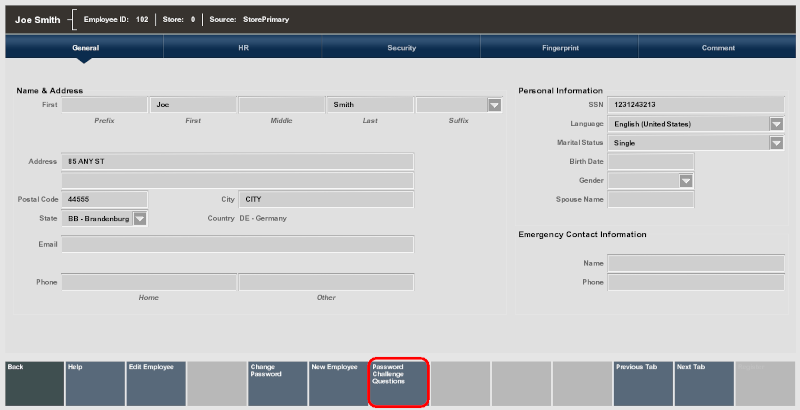
Select the Password Challenge Questions menu option.
Figure 4-9 Password Challenge Questions Menu Option
-
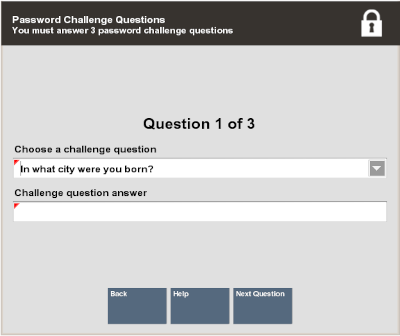
Select a Challenge Question from the drop-down menu and type the answer in the Challenge question answer field.
-
Select Next Question.
Figure 4-10 Password Challenge Questions Maintenance
-
Repeat steps 3-4 until the confirmation prompt displays. Press Enter.
Figure 4-11 Challenge Questions Saved

Note:
The number of challenge questions is configured by your store, up to ten.
Setting Up an Employee Fingerprint Record
If you use a biometric device for employee ID verification, use the Fingerprint tab to enroll the employee's fingerprints.
-
With the employee record displayed, select the Fingerprint tab. Use the Previous Tab and Next Tab menu options to navigate from one tab to another.
Note:
The first screen that displays depends upon the current view mode:
-
If you are in view-only mode, the Fingerprint Enrollment Status screen displays. See Setting Up an Employee Fingerprint Record.
You must select Edit Employee to enter in to edit mode.
-
If you are already in edit mode, the Fingerprint Scans screen displays. See Setting Up an Employee Fingerprint Record.
-
-
If you are in view-only mode, the Fingerprint Enrollment Status screen displays the employee's current fingerprint enrollment status in the Finger Selected panel of the screen.
In the following example, the employee has no fingerprint records on file (currently Enrolled Count=0).
-
Select the Edit Employee menu option to begin the enrollment process.
Note:
On the hand image, a green finger represents the finger selected for enrollment.
-
Select a finger from the Fingerprint Enrollment list.
-
In edit mode, begin the fingerprint scan by following the on-screen prompts.
Note:
Selecting the Save Changes menu option at the Fingerprint Scans screen returns to the Fingerprint Enrollment Status screen.
For example, if you change your mind and want to select a different finger for enrollment, select Save Changes to return to the Fingerprint Enrollment Status screen where you can select a different finger. See step 3.
-
Instruct the employee to place a finger on the biometric device. This process must be repeated 4 times to enroll the finger. An image of the fingerprint is shown in the Fingerprints Scans panel during the enrollment process.
-
When the scan is complete, select OK. The system returns to the Fingerprint Scans screen where the employee can enroll another finger or you can select Save Changes to complete the employee fingerprint enrollment process.
Note:
To remove an employee's fingerprint record from the system, select the Clear Fingerprints option from the menu. When prompted for confirmation, select Yes. This removes the entire fingerprint record (all fingers).
To choose a different finger to enroll, select the Select Different Finger menu option and select a finger from the Fingerprint Enrollment list.
Adding a Comment
Xstore Classic allows you to add a text comment to an employee's record. The comment can be viewed on the Comment tab window and printed.
Note:
If you are creating a new employee record, select Save Changes first and then open the Comment Tab to create a comment.
-
Select the Comment tab.
-
Select the Add Comment option. Xstore Classic displays a text form where you can enter a comment.
-
Select OK to save the comment with the employee's record.
Adding a New Employee
Although some employee records may be downloaded from the home office automatically, you may need to create a new employee record at the store level.
-
You must first log in to the Employee Maintenance Menu. Refer to Accessing Back Office Employee Maintenance Functions.
-
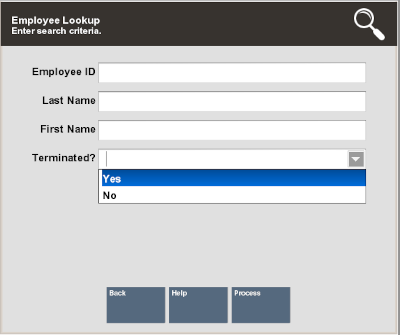
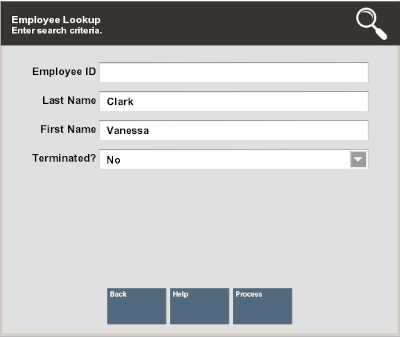
Check to see if the employee record already exists by entering the new associate's name in the Employee Lookup form.
Note:
You may search by partial names if needed.
Figure 4-12 Employee Lookup Form
-
Select Process to continue.
-
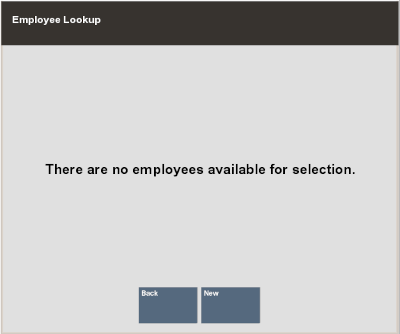
If your search for an employee name did not return a valid employee record, the system displays the message shown below. Select the New option to create a new employee record.
Figure 4-13 No Employee Record Found Message
Note:
After you finish adding the new employee and you have saved the new record, you can add an additional new employee record by selecting the New Employee option from the Employee Maintenance screen.
-
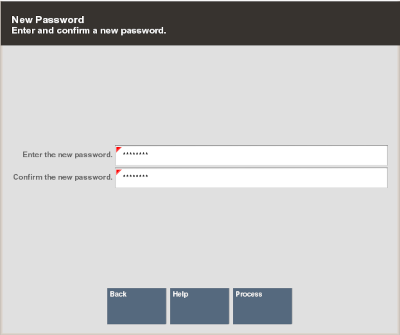
The system prompts you to create a password for the new associate by entering and confirming it in the New Password form.
Figure 4-14 New Password Form
Note:
The system may enforce certain rules regarding passwords such as the minimum number of characters required, or whether you can reuse a previous password.
-
Select Process to continue. The system displays a blank form with the five tab sections.
Note:
Any information you entered in the fields on the Employee Lookup form automatically populates the associated fields on the Employee Maintenance General tab.
-
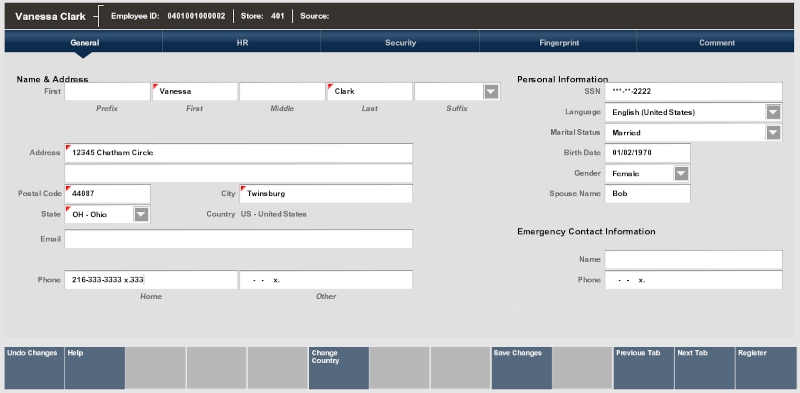
Enter the new employee's information on the appropriate tabs. For more details about the type of information on each tab, refer to Employee Maintenance Tabs Overview.
Figure 4-15 Employee Maintenance General Tab
-
After completing all of the data entry, select Save Changes to store the new employee record in the database.
Voiding (Terminating) an Employee Record
The employee Status field specifies whether an employee is actively employed or terminated. The Status field is found on the Human Resources (HR) tab of the employee record.
-
Open the record of the employee that you want to terminate.
-
Navigate to the Human Resources (HR) tab; the system displays the HR information.
-
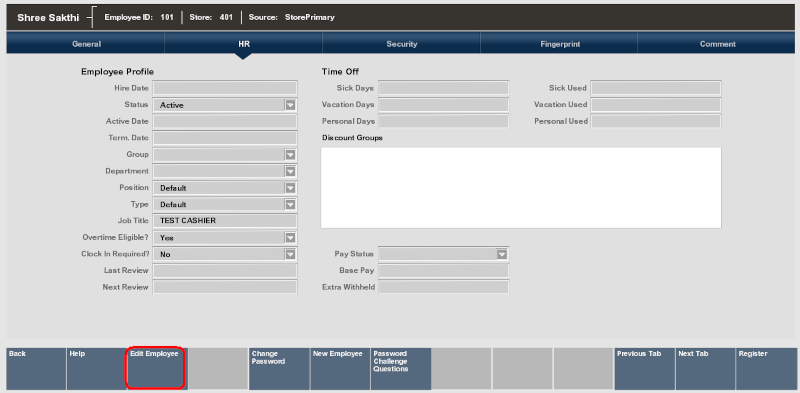
Select Edit Employee.
Figure 4-16 HR Tab
-
Select the drop-down arrow on the Status field to list the available options.
-
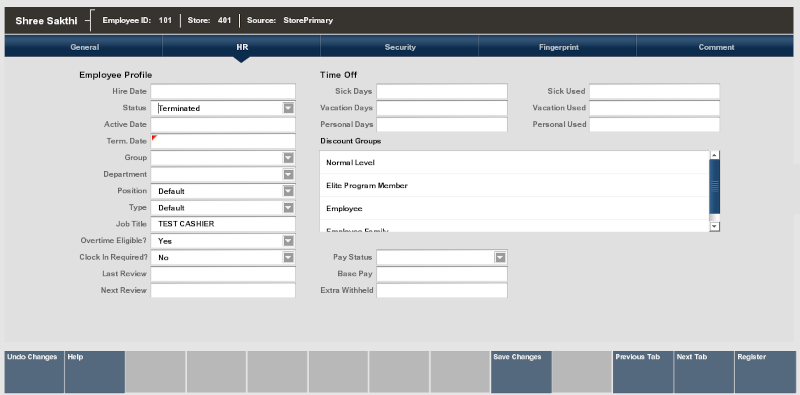
Select the Terminated option from the list.
-
The Termination Date field is now a required entry as indicated by the red triangle in the field. Enter the employee's termination date.
Figure 4-17 HR Tab - Changing Employee Status
-
Select the Save Changes option to complete the termination process. The employee's record is now marked as voided (terminated). The employee's security privileges are also terminated.
Note:
The employee record is still in the system and can be viewed by selecting Yes in the Terminated field on the Employee Lookup form.
