Deploying Configuration Changes
Note:
See Appendix: About Deploymentsfor more information about deployments.
-
To begin the deployment process, from the Oracle Retail Xstore Office menu, select Config Manager - Configurator, or click the Configurator link in the Configuration Manager panel.
-
Select the configuration scope for the deployment:
Figure 5-56 Configuration Scope Options Page

-
Select Global Configurations to deploy the global configuration layer which affects all locations. Continue with step 3 below.
<OR>
-
Select Configuration Overrides to deploy configurations that will override the global layer for specific locations.
-
Select a Profile Group from the list.
-
Select an Element from the list.
-
Click Next.
-
Continue with step 3 below.
<OR>
-
-
Select Store Specific Overrides to change configurations that will override the global layer for a specific store based on the user's scope.
-
Type the store number or begin typing a store number or name in the Store # field.
-
Select the store from the store list.
-
Click Next.
-
Continue with step 3 below.
-
-
-
At the Configuration Action page, select the Deploy option.
-
If you try to schedule a deployment for a profile element that has no changes, you will see the following message:
There are no changes to deploy for this profile element.
-
If you see this message, return to the Configure screen and make your changes before scheduling a deployment.
-
-
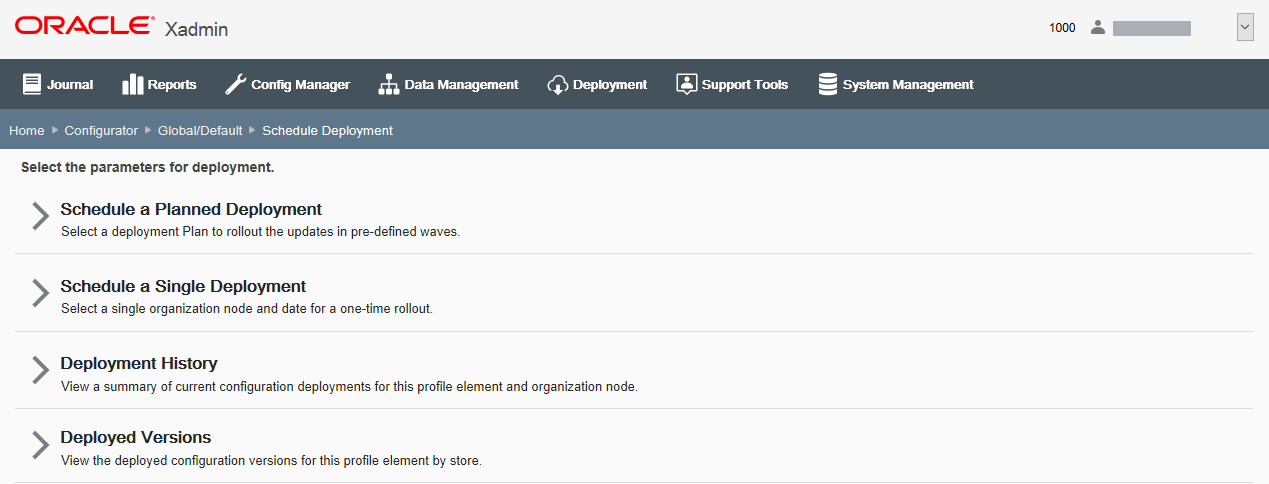
At the Schedule Deployment page, select a deployment type:
Figure 5-57 Schedule Deployment Page - Global Scope Example

-
Select Schedule a Planned Deployment to roll out the updates in pre-defined waves. Continue with Scheduling a Planned Deployment.
Note:
The Planned Deployment option is not available for Store Specific Overrides.
<OR>
-
Select Schedule a Single Deployment to set up a one-time rollout. Continue with Scheduling a Single Deployment.
-
To view deployment history for this profile element and organization node, select Deployment History. See Deployment History for more information about this option.
-
To view the deployed configuration versions for this profile element by store, select Deployed Versions. See Deployed Versions.
-
-
Scheduling a Planned Deployment
Note:
You must create deployment plans before using this option. Refer to Deployment Management, Creating a Deployment Plan for more information about setting up deployment plans.
-
Complete the following fields to roll out the updates in pre-defined waves:
-
Deployment Name -Accept the default name or enter a name for this deployment.
-
Deployment Plan - Select a deployment plan from the list.
-
Target Date - Select the date the changes will be sent to the store.
-
-
Click Next.
-
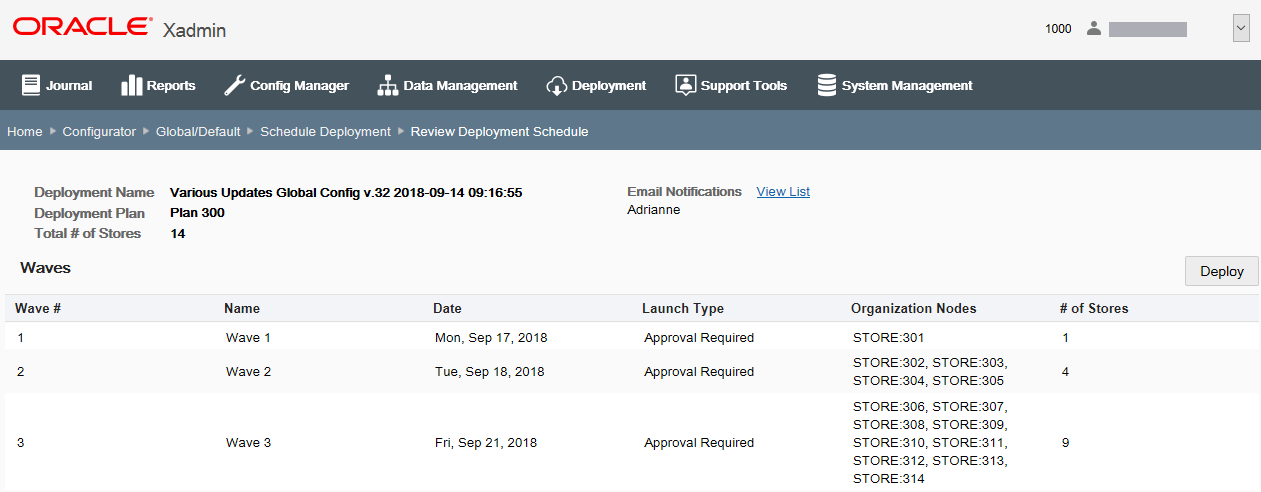
Review the deployment schedule.
Figure 5-58 Review Deployment Schedule Page

-
Verify the Email Notification List is correct. If needed, click the View List link to see more detail about the email recipients.
-
Review the deployment information:
-
The "v.x" value in the Deployment Name is the configuration version for this deployment.
Figure 5-59 Example Deployment Name

-
-
If the deployment information is correct, click Deploy.
-
If a deployment has already been scheduled with an earlier version of configurations, you will be prompted to change the deployment date. Use the breadcrumbs to return to the Schedule Deployment page and change the date for deployment.
-
If the deployment information is not correct, use the breadcrumbs to navigate back to the previous page where you can make changes, and go to step 1 on page 67.
-
-
When prompted, click Yes to confirm you want to schedule deployment.
-
Click OK to close the Deployment was scheduled successfully window. The configuration version is now "locked" for this set of configurations.
Scheduling a Single Deployment
-
Complete the following fields for a one-time rollout:
-
Deployment Name - Accept the default name or enter a name for this deployment.
-
Organization Node - Select the organization target for the configuration changes.
-
Target Date - Select the date the changes will be sent to the store.
-
Download Priority - Select the download priority:
-
Immediate - Download the configuration changes now.
-
Store Close - Download the configuration changes at end-of-day.
-
-
-
Click Next.
-
Review the deployment schedule.
Figure 5-60 Review Deployment Schedule Page

-
Review the deployment information:
-
The "v.x" value in the Deployment Name is the configuration version for this deployment.
-
-
If the deployment information is correct, click Deploy.
-
If a deployment has already been scheduled with an earlier version of configurations, you will be prompted to change the deployment date. Use the breadcrumbs to return to the Schedule Deployment page and change the date for deployment.
-
If the deployment information is not correct, use the breadcrumbs to navigate back to the previous page where you can make changes, and go to step 1 on page 67.
-
-
When prompted, click Yes to confirm you want to schedule the deployment.
-
Click OK to close the Deployment was scheduled successfully window. The configuration version is now "locked" for this set of configurations.