Using the BIOS Configuration Utility to Create a Bootable Logical Drive (x86)
This section describes how to use the BIOS Configuration Utility to create a logical drive on an x86 system. You can then define the logical drive as bootable, and install an operating system onto that logical drive. Follow the procedures in this section if you have set your system BIOS to Legacy Boot Mode. If you have set your system BIOS to UEFI Boot Mode, do not perform the procedures in this section. Instead, go to Using the LSI MegaRAID Configuration Utility Menu to Create a Bootable Logical Drive (x86).
Before performing the steps in this section, verify the firmware level on the HBA and perform any firmware updates, as necessary. For information about updating firmware, see HBA Software Installation.
Perform the following procedures, in the order listed, to create a logical drive on an x86 system:
-
To Verify the Drives Available for Logical Drive Creation (x86)
-
To Define the Newly Created Logical Drive as the Boot Device (x86)
To Verify the Drives Available for Logical Drive Creation (x86)
This procedure helps you identify drives to be used in a logical drive configuration.
- Access the system console from the Oracle Integrated Lights Out Manager (ILOM) software or Video Graphics Array (VGA) video port.
-
Initiate a system boot.
During the boot process, the BIOS initialization banner lists information about the discovered SAS adapters and devices that are attached to the discovered HBAs in the system.
- Type CTRL+R during the boot process to launch the BIOS Configuration Utility.
-
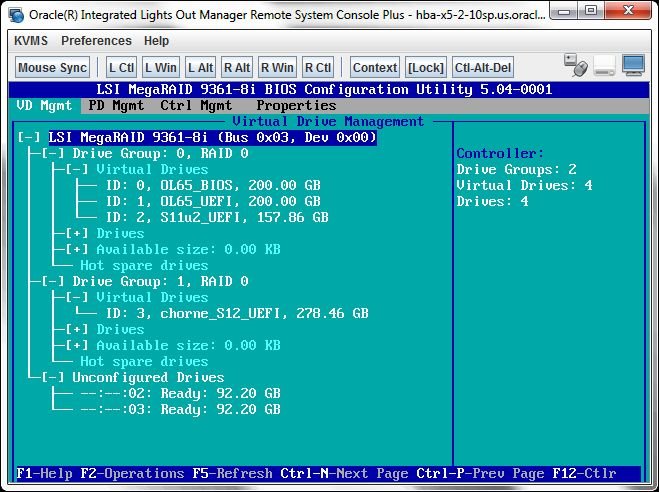
Upon accessing the main page of the utility, review the drives that
are listed in the utility to determine which drives are available for
logical drive creation.
Note in the following example, there are two unconfigured drives, drives 02 and 03, that can be used to create a virtual drive.
To Create a Virtual Drive (x86)
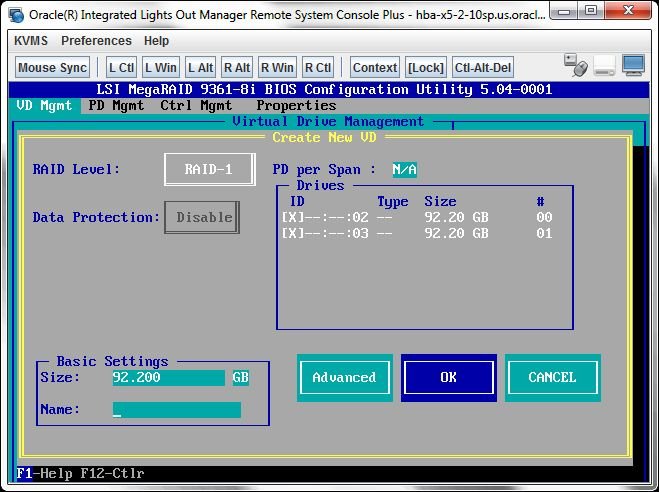
After you have verified which drives are available for logical drive configuration, as described in To Verify the Drives Available for Logical Drive Creation (x86), you can use those drives to create a logical drive. In the following procedure, drives 2 and 3 (02, 03) are being used to create a RAID 1 volume.
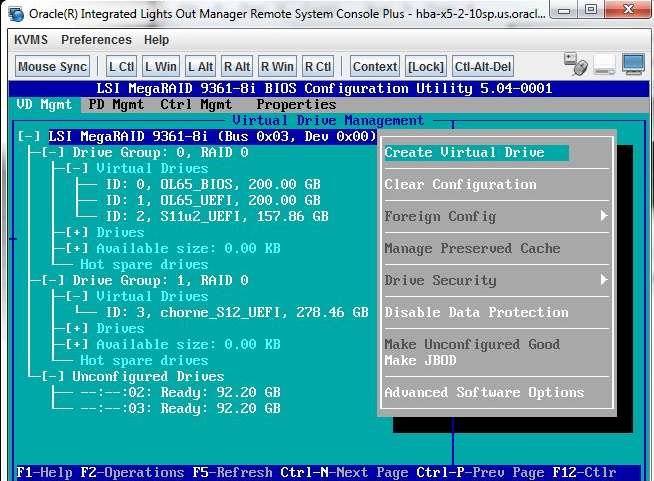
- In the BIOS Configuration Utility, use the arrow keys to navigate to the HBA, and press F2 to view the Operations menu.
-
Use the arrow keys to navigate to the Create Virtual Drive menu
option, and press Enter.
-
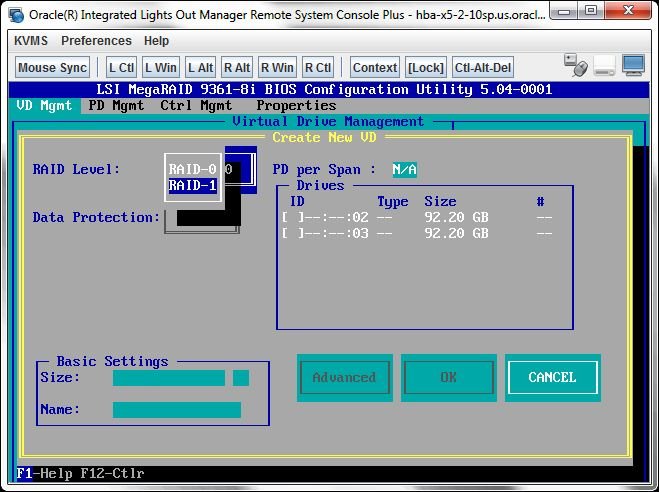
From the page that is displayed, press Enter on the RAID Level field,
and, from the popup window that is displayed, use the arrow keys to
select the RAID level that you want, based on your requirements, and
press Enter to exit the popup window.
-
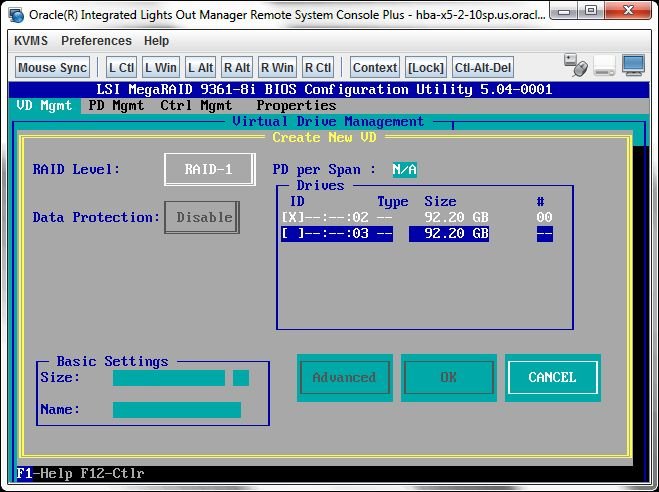
Use the arrow keys to navigate to the Drives box.
Only drives that are available to be configured in a logical drive are displayed in the Drives box.
-
For each drive that you want in the logical drive, navigate to the
drive and press Enter in its ID field to produce an X in the
field.
This selects the drive to be included in the logical drive configuration.
-
After you select all the drives that you want included in the logical
drive, use the arrow keys to navigate to the OK button, and press
Enter.
-
At the next page that is displayed, use the arrow key to move to the
OK button, and press Enter.
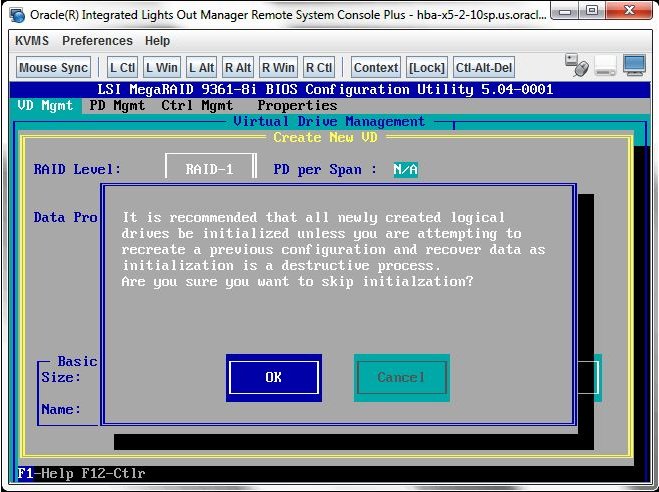
The logical drive is now created.
-
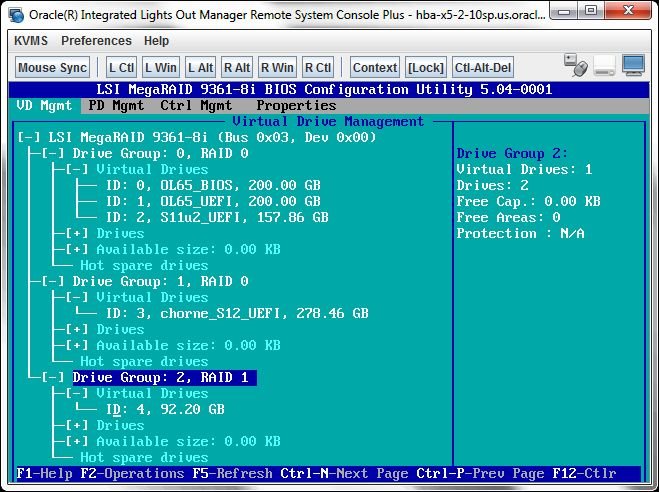
To verify the logical drive creation, review the drive groups on the
main page of the BIOS Configuration Utility and note the new drive group
that is now displayed on the page.
In this example, Drive Group 2, RAID 1 is created.
To Define the Newly Created Logical Drive as the Boot Device (x86)
If you want to install an operating system (OS) onto the newly created logical drive and boot from that drive, perform the steps in this section to define the new logical drive as the boot device for your system.
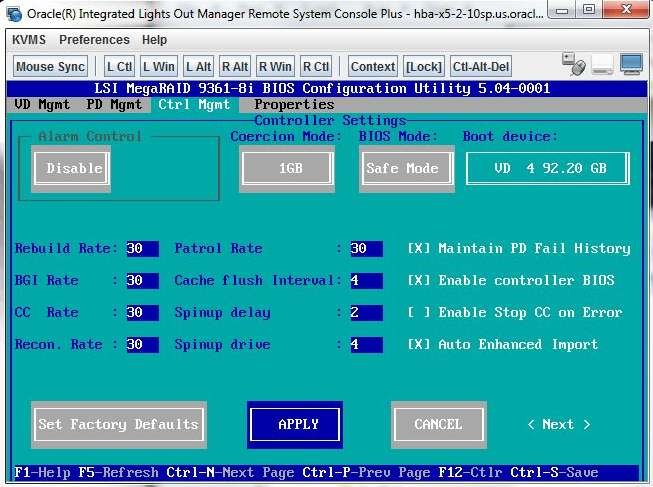
- From the BIOS Configuration Utility, type CTRL+N to navigate to the Ctrl Mgmt tab.
-
From the Ctrl Mgmt page, use the arrow keys to navigate to the Boot
device field, and press Enter.
A boot device popup window is displayed.
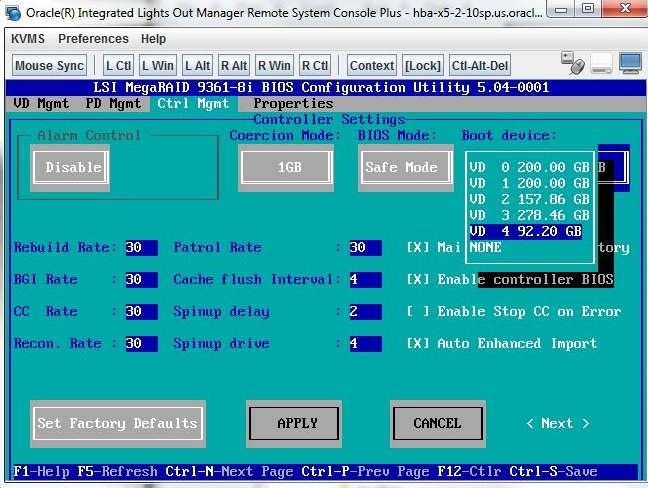
- Use the arrow keys to navigate to the newly created logical drive, and press Enter.
-
Use the arrow keys to navigate to the Apply button, and press
Enter.
-
Type CTRL+S to save the configuration.
The creation of a bootable logical drive is complete. To validate the label of the logical drive, see To Verify That the Label of a Logical Drive Is Valid.