

|
|
|
|
|
|
Creating and Managing Promotional Campaigns
This topic contains step-by-step information for defining a new campaign or modifying existing campaigns within the BEA E-Business Control Center. It does not contain conceptual descriptions of a campaign, nor an explanation about the business applications of campaigns. It is therefore highly recommended that before proceeding, you read and understand the concepts explained in Roadmap for Creating Promotional Campaigns.
This topic includes the following sections:
Creating a New Promotional Campaign
Note: Before you can create a new promotional campaign, you must connect the E-Business Control Center to a server. For more information on connecting to a server, see Connecting the BEA E-Business Control Center to a Server.
To create a new promotional campaign, follow these steps:
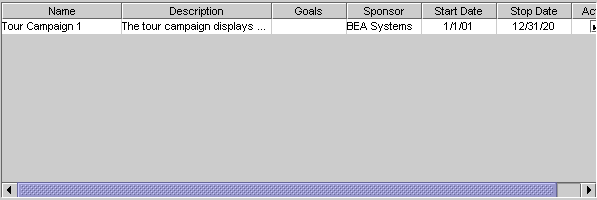
Figure 11-1 Campaign Editor Window
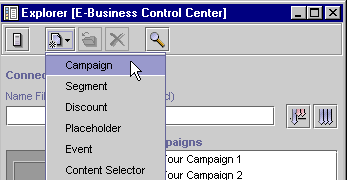
Tip: You can also click the New icon in the Explorer window and then select Campaign to open the Campaign Editor window, as shown in Figure 11-2. Figure 11-2 New Icon, Campaign Selection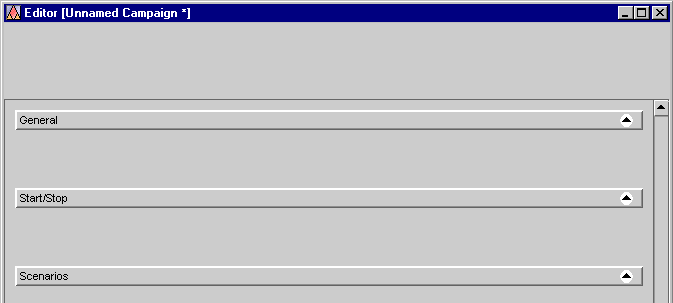
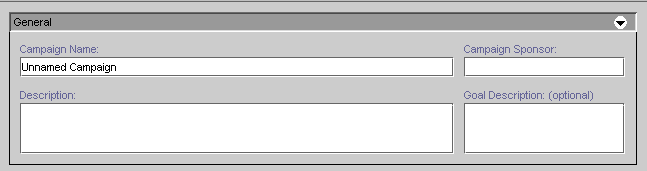
Specify General Campaign Information
Figure 11-3 General Campaign Information Pane
Enter the Campaign Duration and End Criteria
Figure 11-4 Campaign Duration and End Criteria Pane
Tip: For the start and stop date, you can either type in the date, or click the drop-down list to select the date from a calendar, as shown in Figure 11-5. Just click the date to select it. Figure 11-5 Start/Stop Date Calendar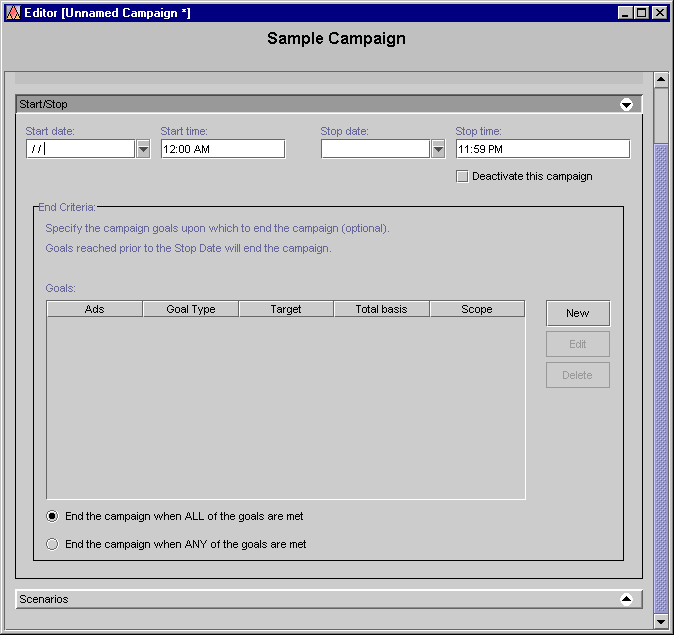
Note: For more information about ad actions, see Designing Scenario Actions.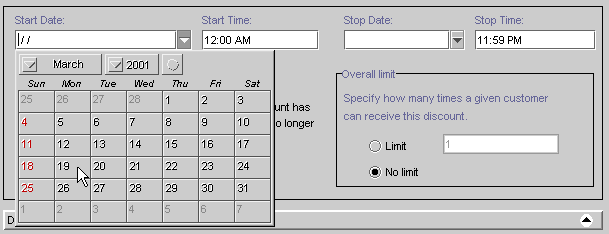
Specifying Campaign End Criteria
If you plan on using ad actions in your scenarios and want to end your campaign when certain ad-related goals are reached, you may want to supply some campaign end criteria. If the campaign end criteria are met, the campaign will be terminated even if the date on which this occurs is prior to the stop date you specified.
Note: To improve performance, your Commerce Business Engineer (CBE) may create a cache that limits the number of times a campaign checks with the database to determine whether it has achieved its goal. By default, a campaign updates the cache every 5 minutes. If the cache contains stale data, then it may be possible for a campaign to exceed its goal. For more technical information about this performance-related topic, refer to "Campaign Service Properties" in the Deployment Guide documentation.
You can specify campaign end criteria based on the number of impressions (views) associated with the ad, on the number of ad clickthroughs, or a combination of both.
To specify campaign end criteria, follow these steps:
Figure 11-6 End Criteria Detail Window
Note: The ad identifier is a unique name of the ad, with the relative path. In the Tour Campaign 1, for example, the ad identifier used is: Ads/wlcscm_ads/tourBannerFixup.jpg. However, the details of exactly what constitutes an ad identifier may vary from one content management system to another. Be sure to check with your Commerce Business Engineer (CBE) for details. Note: If you make a mistake and want to remove an ad identifier from the list, click the ad identifier in the list to select it, then click Remove. Choosing to count the ads across multiple campaigns means that if a visitor in another campaign views/clicks the ad, the impression/clickthrough would still be counted as an increment in this campaign toward meeting the goal. Figure 11-7 Goals List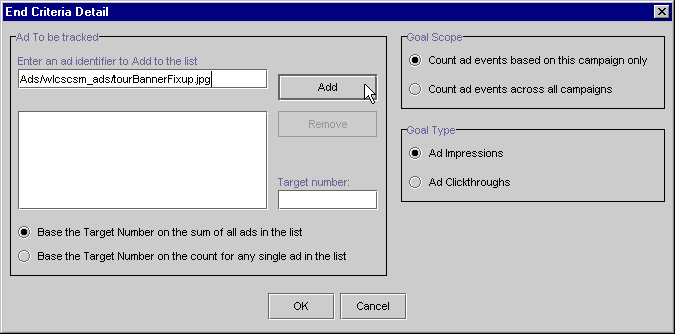
Note: If you make a mistake and want to remove a goal from the Goal list, click the goal in the list to highlight it, then click Delete. Or, you can click Edit to modify the information you specified for that goal in the End Criteria Detail window.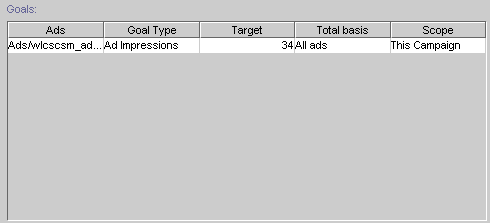
Add Scenarios to the Campaign
Because campaigns are groups of scenarios that are associated with a business goal, scenarios are at the very heart of your campaign. In scenarios, you will specify one or more actions to take place on your Web site when certain conditions are met.
To add scenarios to the campaign, follow these steps:
Figure 11-8 Scenarios Pane
Note: For a description of each scenario template, see Using Scenario Templates. Tip: If you would rather start with a copy of an existing scenario, click an existing scenario name in the Scenarios list to select it and then click Duplicate. A copy of the scenario appears in the Scenarios list. You can then click Edit to modify the scenario as appropriate. Tip: To start with a blank scenario, choose Default. Figure 11-9 Scenario Properties Window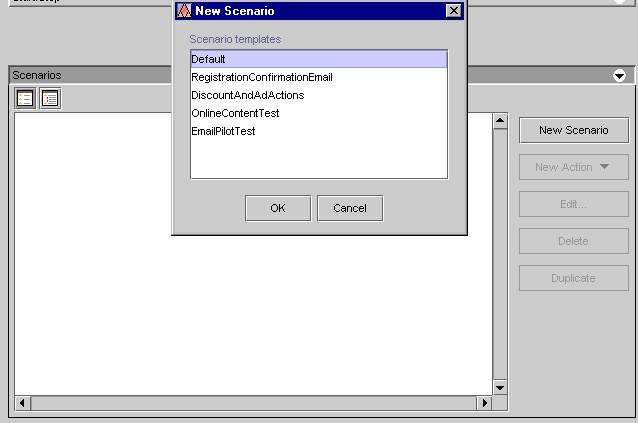
Note: For an explanation of why you might want to select customer segments at the scenario level and how this is different from selecting segments at the scenario action level, see Customer Segments in Scenarios and Actions. Tip: If you do not want to see this message again, click the Do Not Show This Message again check box. Note: If you selected customer segments in step 5, these appear in addition to the scenario name in the Scenarios list.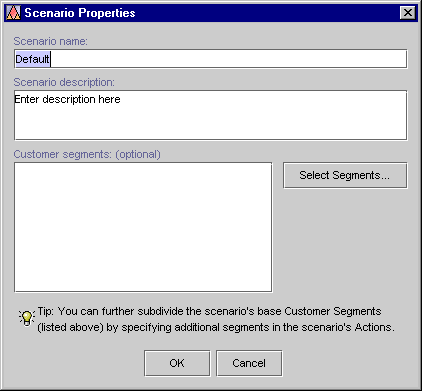
Selecting Customer Segments
Notes: Customer segments defined within a scenario apply to the entire scenario. You can also select customer segments when you are adding specific actions to your scenario. Specifying segments here, at the scenario level, produces a different effect from when you specify segments at the scenario action level. Depending on your situation, you may also want to specify segments at both levels. For more information about these issues, see Customer Segments in Scenarios and Actions.
To select customer segments, you must have previously created them. For information on creating customer segments, see Using Customer Segments to Target High-Value Markets.
Figure 11-10 Select Customer Segments Window
Note: If you make a mistake, click a customer segment name shown in the Selected Segments list to select it, then click Remove.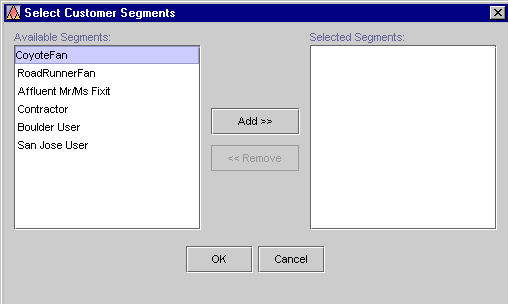
Add Actions to Your Scenarios
Now that you have defined your scenario, you must add actions to it. There are three types of actions you can add to a scenario:
Ad Actions
Note: When you specify an ad action, you are essentially defining criteria that will be used to select an appropriate ad for your online customer from a number of ads that are stored in your organization's content management system. Be sure that you have already developed these ads and that the ads exist within your content management system. For more information, see Authoring Ads or Describing Ads in Your Content Management System.
To add ad actions to your scenario, follow these steps:
Figure 11-11 New Ad Action Window
Note: You must add at least one condition, or you will not be able to save the scenario action. For an explanation of the possible conditions, see Listing of the Available Conditions. Tip: You can use conditions in ways that always evaluate to true. For example, you can select the It Is after a Given Date condition and then specify the date as January 1, 1970. For example, if you selected the Date Is condition as shown in Figure 11-11, you must specify a value for the hyperlinked [date] text in the Date Is [Date] condition statement, shown in the Action portion of the New Ad Action window. To specify values for bracketed hyperlinked text, just click the text. Depending upon the condition and the hyperlink, a window or a dialog box opens. Table 11-1 provides a consolidated listing of the conditions and indicates where to look if you need detailed instructions for any of the corresponding windows/dialog boxes. Note: Table 11-1 shows all the conditions that may be used within the E-Business Control Center. Therefore, not all conditions shown here may apply.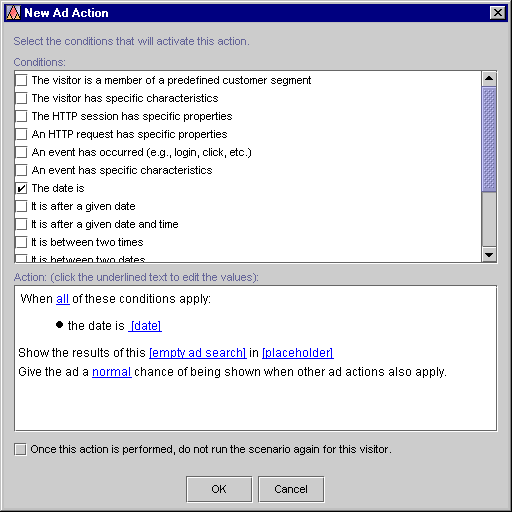
Note: The Any/All link acts as a toggle. Clicking on Any will change it to All, and visa versa.
Note: To select placeholders, you must have previously created them. For information on creating placeholders, see Creating Ad Placeholders.
Figure 11-12 Select Placeholders Window
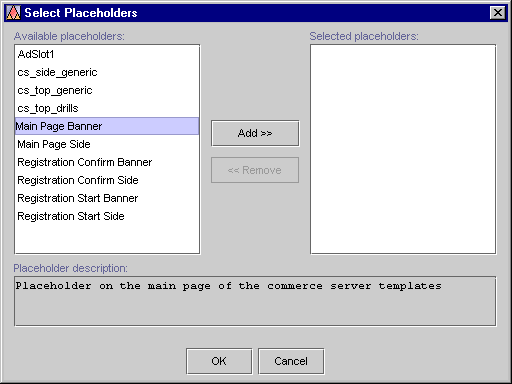
Note: If you make a mistake, click a placeholder name shown in the Selected Placeholders list of the Select Placeholders window to select it, then click Remove.
Figure 11-13 Select Display Priority Dialog Box
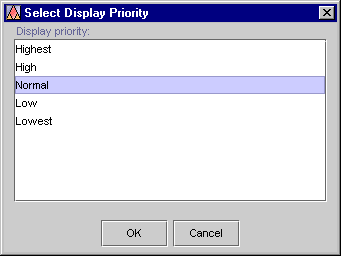
Note: For more information on ad display priorities, see Authoring Ads.
Note: You may add different types of scenario actions to your scenario. For example, you may now want to add a discount or e-mail action to the same scenario where you just added the ad action. You may also choose to add another ad action to the same scenario. (Whether you do so or not depends upon whether you want to target the same segments that are specified in this scenario.)
Tip: If you would like to start with a copy of an existing scenario action, click an existing scenario action in the Scenarios list to select it and then click Duplicate. A copy of the scenario action appears in the Scenarios list. You can then click Edit to modify the scenario action as appropriate.
Discount Actions
Note: As part of specifying a discount action, you will need to select from a list of predefined discounts. Be sure that you have already defined some discounts, as explained in Defining a New Discount.
To add discount actions to your scenario, follow these steps:
Figure 11-14 New Discount Action Window
Note: You must add at least one condition, or you will not be able to save the scenario action. For an explanation of the possible conditions, see Listing of the Available Conditions. Tip: You can use conditions in ways that always evaluate to true. For example, you can select the It Is after a Given Date condition and then specify the date as January 1, 1970. For example, if you selected The Date Is condition as shown in Figure 11-14, you must specify a value for the hyperlinked [date] text in The Date Is [Date] condition statement, shown in the Action portion of the New Discount Action window. To specify values for bracketed hyperlinked text, just click the text. Depending upon the condition and the hyperlink, a window or a dialog box opens. Table 11-2 provides a consolidated listing of the conditions and indicates where to look if you need detailed instructions for any of the corresponding windows/dialog boxes. Note: Table 11-2 shows all the conditions that may be used within the E-Business Control Center. Therefore, not all conditions shown here may apply.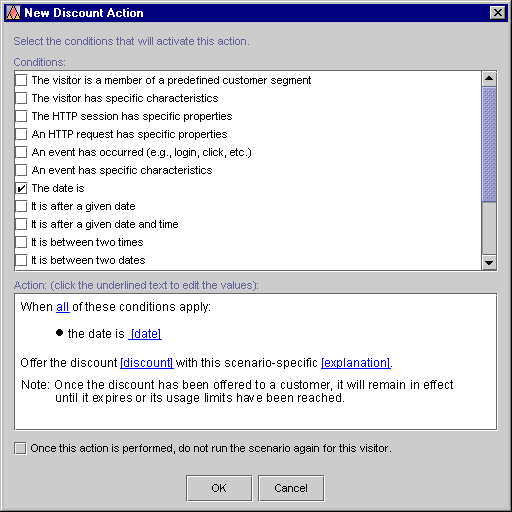
Note: The Any/All link acts as a toggle. Clicking on Any will change it to All, and visa versa.
Figure 11-15 Select Discount Window
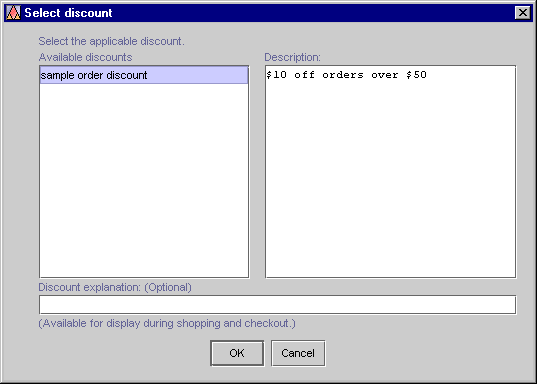
Note: The discount explanation may be displayed to customers receiving the discount, if your technical staff chooses to use it. For more information about discount explanations, see Uses of Discounts.
Note: You may add different types of scenario actions to your scenario. For example, you may now want to add an ad or e-mail action to the same scenario where you just added the discount action. You may also choose to add another discount action to the same scenario. (Whether you do so or not depends upon whether you want to target the same segments that are specified in this scenario.)
Tip: If you would like to start with a copy of an existing scenario action, click an existing scenario action in the Scenarios list to select it and then click Duplicate. A copy of the scenario action appears in the Scenarios list. You can then click Edit to modify the scenario action as appropriate.
E-mail Actions
Notes: As part of specifying an e-mail action, you will need to reference a previously developed e-mail message. Be sure that you have already developed some e-mail messages, as explained in Authoring E-mails.
When you specify e-mail actions, remember that e-mails will only be sent to those customers who visit your Web site, meet the conditions you specify for the action, and have not chosen to opt out of receiving e-mails.
To add e-mail actions to your scenario, follow these steps:
Figure 11-16 New E-mail Action Window
Note: You must add at least one condition, or you will not be able to save the scenario action. For an explanation of the possible conditions, see Listing of the Available Conditions. Tip: You can use conditions in ways that always evaluate to true. For example, you can select the It Is after a Given Date condition and then specify the date as January 1, 1970. For example, if you selected The Date Is condition as shown in Figure 11-16, you must specify a value for the hyperlinked [date] text in The Date Is [Date] condition statement, shown in the Action portion of the New E-mail Action window. To specify values for bracketed hyperlinked text, just click the text. Depending upon the condition and the hyperlink, a window or a dialog box opens. Table 11-3 provides a consolidated listing of the conditions and indicates where to look if you need detailed instructions for any of the corresponding windows/dialog boxes. Note: Table 11-3 shows all the conditions that may be used within the E-Business Control Center. Therefore, not all conditions shown here may apply.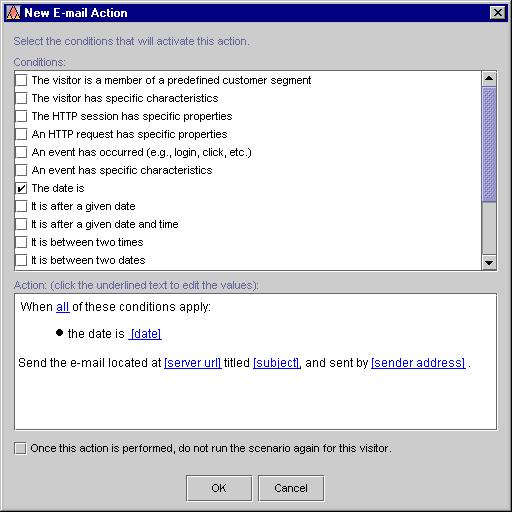
Note: The Any/All link acts as a toggle. Clicking on Any will change it to All, and visa versa.
Figure 11-17 Enter E-mail Information Dialog Box
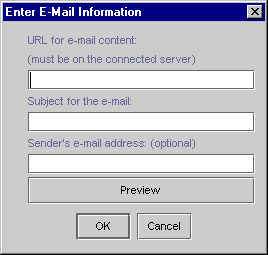
For example, if you wanted a given customer to receive only one e-mail, regardless of how many times that customer entered the site or matched the relevant conditions, you would check this option.
Note: You may add different types of scenario actions to your scenario. For example, you may now want to add an ad or discount action to the same scenario where you just added the e-mail action. You may also choose to add another e-mail action to the same scenario. (Whether you do so or not depends upon whether you want to target the same segments that are specified in this scenario.)
Tip: If you would like to start with a copy of an existing scenario action, click an existing scenario action in the Scenarios list to select it and then click Duplicate. A copy of the scenario action appears in the Scenarios list. You can then click Edit to modify the scenario action as appropriate.
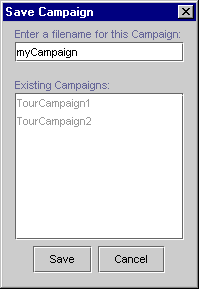
Save Your Promotional Campaign
Note: If you have specified all the required information for your campaign, saving the campaign will make that campaign active on the server to which you are connected. (In other words, that campaign will be ready to run between the start/stop times you specified and when the appropriate conditions are met.) If you have not specified all the required information, you will receive a notice indicating that the campaign will not do anything, but you will still be able to save it and return to it later.
If you have just created a new campaign and want to save it, follow these steps:
Figure 11-18 Save Campaign Dialog Box
Locating Existing Campaigns
If you have defined many campaigns, it can be time consuming to locate a particular campaign simply by looking in the Campaigns list. Therefore, the E-Business Control Center provides you with a mechanism that allows you to filter existing campaigns by name, and a search function that allows you to locate campaigns using information you provided during the campaign creation process. Additionally, scenario views can help you quickly locate particular scenarios and scenario actions within your campaigns.
This section includes the following information:
Using the Name Filter to Locate Campaigns
To locate an existing campaign using the name filter, follow these steps:
 (located on the left side of the Explorer window) to enable the
Campaigns view. A list of campaigns appears in the Campaigns list.
(located on the left side of the Explorer window) to enable the
Campaigns view. A list of campaigns appears in the Campaigns list.
Figure 11-19 Name Filter Field
Note: You can type full or partial names into the Name Filter field. Campaign names are case sensitive. Therefore, filtering based on the text "Sale" will not locate campaigns with names that start with "sale."
 ) to filter the campaigns shown in the Campaigns list.
The campaigns that have names beginning with the text you entered appear in the
Campaigns list.
) to filter the campaigns shown in the Campaigns list.
The campaigns that have names beginning with the text you entered appear in the
Campaigns list.
Note: To return to the full list of campaigns, click the Show All Objects icon ( ).
).
Searching for Promotional Campaigns
To locate an existing campaign using the search function, follow these steps:
 ) shown in the Explorer toolbar. The Campaign Search
window opens, as shown in Figure 11-20.
) shown in the Explorer toolbar. The Campaign Search
window opens, as shown in Figure 11-20.
Figure 11-20 Campaign Search Window
Note: The Search function only works to locate campaigns. It does not allow you to search for other objects, such as customer segments or discounts. Note: Remember that an active campaign is ready to run, but will only run between the start/stop times you specified and when the appropriate conditions are met. Therefore, searching for an active campaign may not necessarily mean you are searching for a campaign that is running. Figure 11-21 Expanded Campaign Search Window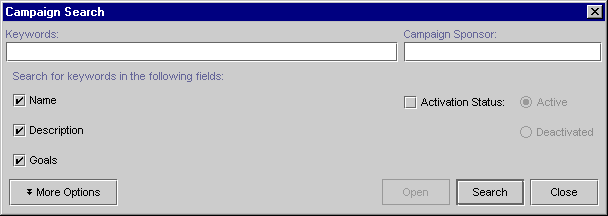
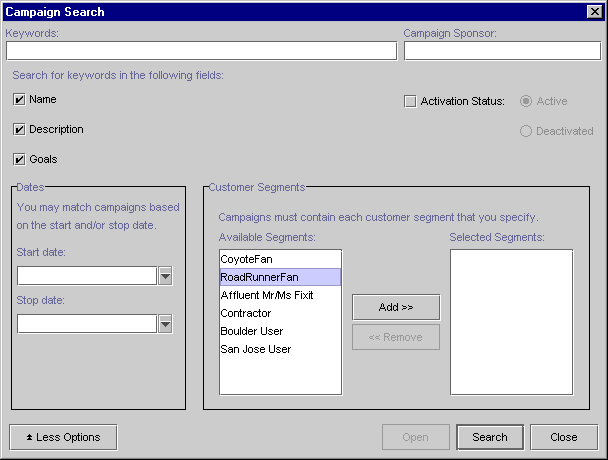
Notes: If you specify customer segments as part of the search criteria, the search function will locate only campaigns that have those segments specified at the scenario level. If a campaign has the segments specified at the scenario action level instead, the campaign will not be retrieved as a match. For more information about the differences between specifying customer segments at the scenario and scenario action levels, see Customer Segments in Scenarios and Actions.
If you make a mistake and want to remove the customer segment, click the segment shown in the Selected Segments list to select it, then click Remove.
Figure 11-22 Campaign Search Results
Switching Between Scenario Views
After you define the scenarios within your campaign, you may want to vary the amount of information displayed in the Scenarios pane. To do this, you can use the icons on the Scenarios pane to change the view from detailed to summary, and visa versa.
Once you have added actions to your scenarios, the scenario is displayed in the detail view. The detail view displays the name of your scenarios, and all of their associated conditions and actions. Figure 11-23 shows a scenario in detail view.
Figure 11-23 Detail View
To view the details of your scenarios in the Scenarios pane, click the Detail View icon ( If you have many scenarios within your campaign, you may want to display just a summary of those scenarios, using the summary view. The summary view displays just the name of your scenarios. Figure 11-24 shows the same scenario as Figure 11-23, but in a summary view. Figure 11-24 Summary View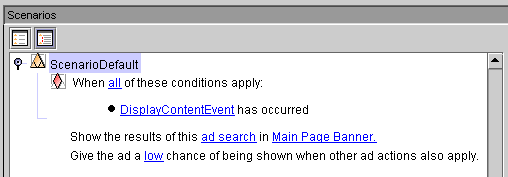
 ) .
) .
To view a summary of your scenarios in the Scenarios pane, click the Summary View icon (
 ) .
) .
Modifying Existing Campaigns
The E-Business Control Center also allows you to view and modify existing campaigns.
To open an existing campaign for modification, follow these steps:
(located on the
left side of the Explorer window) to enable the Campaigns view. A list of
campaigns appears in the Campaigns list.
Tip: If there is a long list of campaign names, you might want to use the name filter or the search function to locate the campaign you want to modify. For more information about these options, see Locating Existing Campaigns.
 ) shown on the Explorer toolbar. The Campaign
Editor window opens.
) shown on the Explorer toolbar. The Campaign
Editor window opens.
Tip: You can also open the campaign by double-clicking on the campaign name.
Tip: You can also click the Save icon ( ) shown on the BEA E-Business Control Center toolbar to save the campaign.
Warning: If the campaign you modify is in an active state, saving modifications to the campaign may immediately affect your Web site. Be certain that the modifications you make are in line with your e-marketing strategy and that you entered the modifications correctly in the E-Business Control Center.
Deactivating and Reactivating Campaigns
Once campaigns are saved, they are considered active. (In other words, the campaign will be ready to run between the start/stop times you specified and when the appropriate conditions are met.) If for some reason you want to disqualify an active campaign from running or stop a running campaign prior to the specified stop date (or before end goals are reached, if your campaign contains them), check the Deactivate This Campaign check box located in the Start/Stop pane. The next time you save the campaign, it will be deactivated. In the Campaign list of the Explorer window, deactivated campaigns are displayed in a lighter color.
If at any time you want to reactivate a campaign, simply return to the Start/Stop pane and check the Deactivate This Campaign check box again to remove the check mark. The next time you save the campaign, it will be reactivated. A campaign that is reactivated is once again ready to run between the start/stop times you specified and when the appropriate conditions are met.
Deleting Existing Campaigns
You can also delete existing campaigns using the E-Business Control Center.
Warning: As with any deletion you make, be absolutely certain that you select the correct campaign and that you are sure you want to delete it. Deleted campaigns cannot be retrieved.
To delete an existing campaign, follow these steps:
(located on the
left side of the Explorer window) to enable the Campaigns view. A list of
campaigns appears in the Campaigns list.
Tip: If there is a long list of campaign names, you might want to use the name filter or the search function to locate the campaign you want to delete. For more information about these options, see Locating Existing Campaigns.
 ) on the Explorer toolbar.

|

|
|
|
|
Copyright © 2001 BEA Systems, Inc. All rights reserved.
|