


|

|
|
|
|
Understanding Workflow Objects and Properties
In this section, we continue our tutorial by exploring the Order Processing Trigger workflow. After an overview that describes the workflow, we take a close look at the workflow's objects to help you gain a better understanding of:
Finally, to gain practice with using some of the Studio features, we will:
This section of the tutorial assumes that you have done the following:
About the Order Processing Trigger Workflow
The Order Processing Trigger workflow simulates the process by which the Order Processing workflow would normally be triggered. In a real-world application, this would most likely be accomplished by a servlet that sends an XML document to a JMS queue. The arrival of the XML message on the queue would trigger the start of the Order Processing workflow, as depicted in the following figure.
Figure 3-1 Simulated Order Processing Start
For the purposes of this tutorial, we will simulate this process by having a Worklist user start the process of posting the XML document. A detailed view of the Order Processing Trigger workflow is shown in the following figure. The numbered steps in the figure are described in a table after the figure, which maps the real-world process and implementation to the actual implementation in the sample workflow. Figure 3-2 Order Processing Trigger Workflow: Detailed View
Note: This workflow does not contain a done node, which means that it loops interminably. As you will see later in the tutorial, when you run the workflows, this mechanism allows the workflow to be started from within the task list window. 
Understanding Template Definition Properties
To view template definition properties, with the Order Processing template definition open, right-click the template definition in the folder tree, or anywhere in the workflow design window, and from the pop-up menu that appears, select Properties. The Template Definition Order Processing dialog box appears.
Figure 3-3 Template Definition Order Processing Trigger Dialog Box
Although multiple template definitions can have the same effective and expiry dates, each active definition must have unique dates or times. At run time, if there are multiple template definitions for a workflow, the processing engine selects the most current active template definition according to its effective and expiry dates and times. Because we activated the Order Processing Trigger template definition during the import process, the dialog box shows it as already active. This template definition workflow has been effective since May 2, 2001, and it never expires. We have not used a template definition ID as a label for this workflow.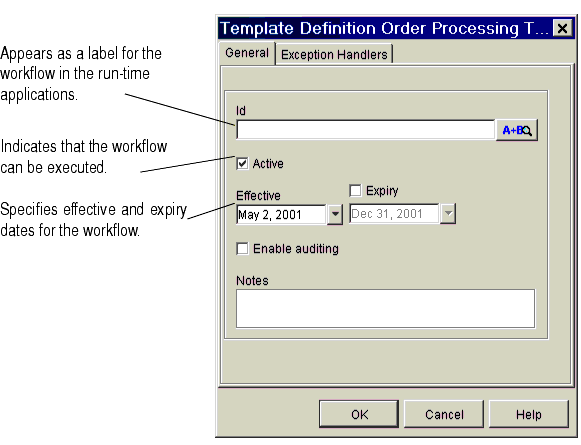
Understanding Variable Properties: Viewing the OrderID Variable
To view variable properties, go to the folder tree, and under the Variables folder, double-click the variable OrderID. The Variable Properties dialog box appears.
Figure 3-4 OrderID Variable: Variable Properties Dialog Box
Variables can be passed as parameters to other template definitions, XML documents, and EJB and Java class methods. In this case, the variable is marked as an input parameter, meaning that it is passed to another workflow. Because the OrderID variable is used to track the number of the order for each instance of the workflow, it is passed to both the Order Processing and Order Fulfilment workflows. Variables are global in scope, meaning that they apply to an entire workflow. You can view a summary of the nodes and actions in which variables are used for the current workflow. To view the usage for the OrderID variable, go to the folder tree, and under the Variables folder, right-click the variable OrderID, and from the pop-up menu that appears, select Usage. The Variable Usage window appears. Figure 3-5 OrderID Variable: Variable Usage Window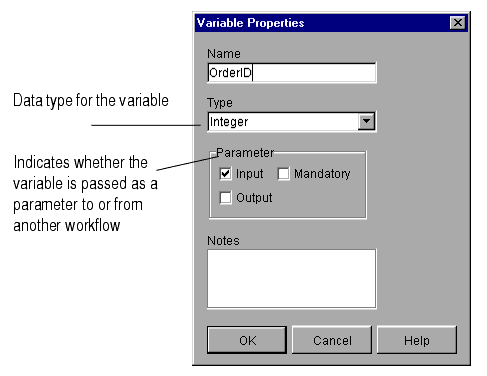
As you can see, the OrderID variable is used in the Set Workflow Variable action of the Start Order Processing task. This action is described in more detail in Understanding Workflow Expressions: Viewing the Set Workflow Variable and Assign Task to User Actions. You will create a variable in Adding a Workflow Label and throughout Defining Workflow Nodes.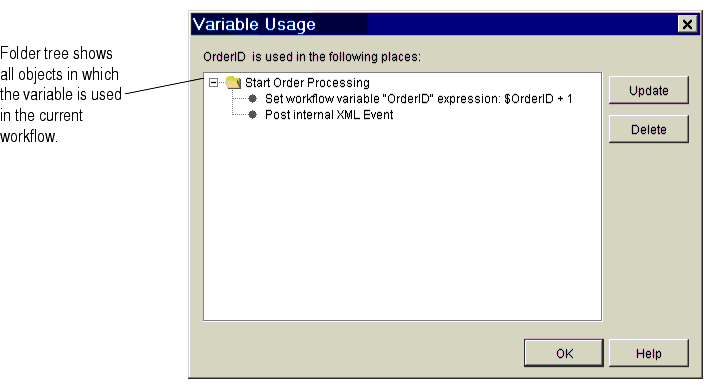
Understanding Start Node Properties
Because the Order Processing Trigger contains a single start node, the start node is not named. However, you can also define workflows that contain multiple start nodes, to specify multiple processing paths that run in parallel.
To view start node properties, go to the workflow design window and double-click the Start node. The Start Properties dialog box appears.
Figure 3-6 Start Properties Dialog Box
As you see in the dialog box, there are four ways to start a workflow:
Understanding Task Node Properties: Viewing the Start Order Processing Task Node
To view task node properties, go to the workflow design window, and double-click on the Start Order Processing task node. The Task Properties dialog box appears.
Figure 3-7 Start Order Processing Task: Task Properties Dialog Box
Note that under the Next tab the successor to this task is itself (indicated in the workflow design window by the looping arrow), and that there is no Done node in the list. This means that the workflow never actually terminates; every time the Start Order Processing task is executed, it creates another instance of itself. You will see this process in action when we run the workflows in Executing and Monitoring the Example Workflows. About Task States and Actions The tabs on the left side of the dialog box indicate four different run-time states. Actions placed on each state-specific tab for a given task are performed when the designated state is reached. The four states are: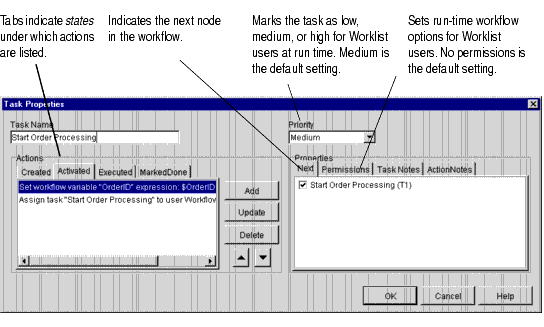
See "Defining Tasks" in Working with Workflow Components in Using the BEA WebLogic Process Integrator Studio for a more thorough discussion of task states.
BEA WebLogic Process Integrator ships with 28 actions, grouped into the following categories:
As you can see in the Task Properties dialog box (or in the folder tree), the Start Order Processing task contains the following actions:
We look more closely at how to define actions in Defining Workflow Nodes.
About Task Permissions
Finally, the Permissions tab lets you set the types of actions a Worklist user can perform for this task. The default setting is none. For this scenario, we have left the default setting, as shown in the following figure.
Figure 3-8 Start Order Processing Task: Permissions
For more information about task permissions, see "Defining Tasks" in Working with Workflow Components in Using the BEA WebLogic Process Integrator Studio and Working with Tasks in Using the BEA WebLogic Process Integrator Worklist.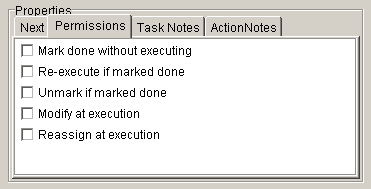
Understanding Workflow Expressions: Viewing the Set Workflow Variable and Assign Task to User Actions
Use the scroll bar at the bottom of the Actions list of the Task Properties dialog box to view the complete action definitions under the Activated tab. As you can see, they are defined as follows:
To get more information about each of these actions, double-click an action. The properties dialog box for that action is displayed.
Figure 3-9 Set Workflow Variable Dialog Box
Figure 3-10 Assign Task to User Dialog Box
As you can see, both of these actions are defined by expressions. If you think of nodes as the building blocks of workflows, and actions as the building blocks of nodes, then you can think of expressions as the building blocks of actions. Expressions are placeholders for values that will be supplied at run time. They can combine variables, constants, literals, operators, and predefined functions. One of the most common types of expressions you will define uses the XPath function to extract values from XML documents. Some basic rules of the BEA WebLogic Process Integrator expression language that you should know are: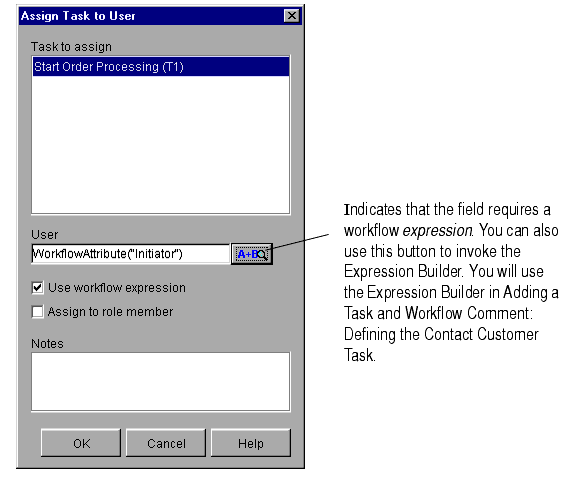
Thus, the expression for the first action specifies that the value for the OrderID variable should be incremented by 1 every time the workflow runs. You will see this in action when we run the workflows in Executing and Monitoring the Example Workflows.
The expression for the second action uses a built-in function to specify that the Start Order Processing task should be assigned to the same Worklist user who initiates the workflow.
We create expressions using the Expression Builder and the XPath Wizard in Defining Workflow Nodes.
For detailed information about the WebLogic Process Integrator expression language and functions, see Using Expressions and Conditions in Using the BEA WebLogic Process Integrator Studio.
Posting an Internal XML Event: Editing the Neworder XML Document
To view the Post Internal XML Event action:
Figure 3-11 Post XML Event Dialog Box
When you post an XML event, you can specify various options, including the following:
In our example, we use the default settings. In a production environment, you will probably also want to take advantage of the various JMS messaging and addressing options offered for posting XML events. For more information on all Post XML Event action options, see "Post XML Event" in Defining Actions in Using the BEA WebLogic Process Integrator Studio.
Editing the XML Document Structure
The XML document that is posted by this action simulates an XML document that would be sent by a servlet to the WebLogic Process Integrator application. It contains information about the order and has the structure shown below.
Listing 3-1 Neworder XML Document
<neworder>
   <id>$OrderID</id>
   <shiptostate>KK</shiptostate>
   <status>new</status>
   <customer>
       <id>6831</id>
       <name>John Doe</name>
       <address>3126 Blue Street Anytown CA 96822</address>
       <phone>408 534 9567</phone>
       <email>jdoe@bea.com</email>
   </customer>
   <item>
       <id>236</id>
       <name>CD storage rack</name>
	<quantity>2</quantity>
   </item>
</neworder>
The element values in this XML document will be extracted and stored in workflow variables by the Start node of the Order Processing workflow. Values will then be used throughout the Order Processing and Order Fulfillment workflows as indicated in the following table, which lists the variables, their uses in the workflow, and the XML elements to which they correspond.
Default values have been entered for each element. Note that the <shiptostate> element contains incorrect data, with the state abbreviation KK. This is used to simulate the possibility of invalid data being passed to the POBean EJB in the Order Fulfillment workflow, so that a custom exception handler can be triggered. (For more information, see Using a Custom Exception Handler.)
In Sending an E-mail Message: Defining the Confirm Order Fulfillment Task, you can define an action to send an e-mail. In the action definition, the e-mail address will be taken from the value provided in the XML document sent out by this Post XML Event action. If you would like to receive the e-mail sent to confirm the order at the end of the process when you run the workflows in Executing and Monitoring the Example Workflows, you can edit the XML document to specify your own real-world information.
Note: For this procedure to work at run time, your e-mail server must be appropriately configured in your WebLogic Process Integrator server installation. For more information, see Installing and Configuring BEA WebLogic Process Integrator.
To edit the XML document:
Figure 3-12 Neworder XML Document Structure
Note: Be sure to enter a valid e-mail address if you intend to specify the Send E-mail action in Sending an E-mail Message: Defining the Confirm Order Fulfillment Task. Note: Do not edit the erroneous data in the shiptostate element value field. This value will be used at run time to invoke the exception handler in the Order Fulfillment workflow.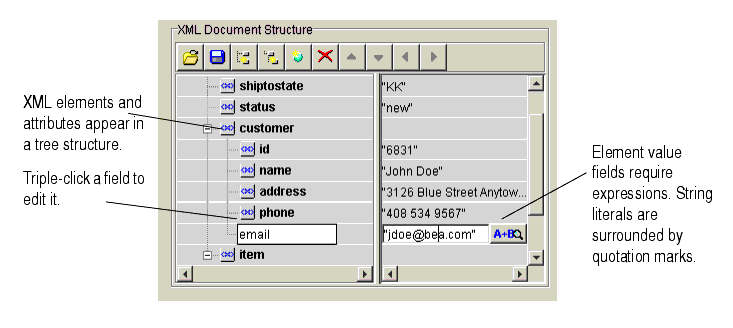
Using the XML Repository: Exporting the Neworder XML Document
When you create or edit an XML document in the Studio, you can save it to a file on disk, or export it to the XML repository. The repository stores XML documents, DTDs, schemas, style sheets, and other entities for later access, and offers you a convenient way to export and import previously-defined XML documents for reuse by other nodes, workflows or even organizations.
Because the Order Processing workflow will reference the data stored in the XML document of our Start Order Processing task, storing the XML document in the repository will greatly simplify our task of defining XPath expressions to extract the data from the document in Defining XPath Statements.
To save the document to the repository:
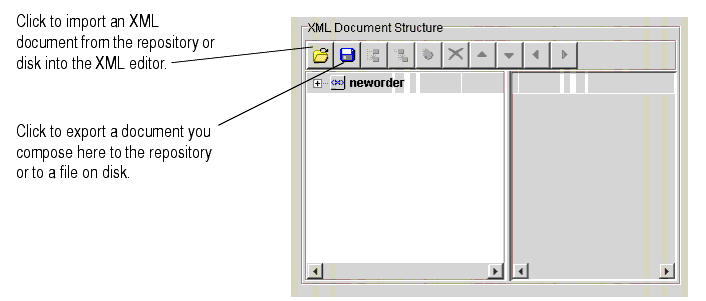
 . The XML Finder dialog box
appears.
Figure 3-13 XML Finder Dialog Box
Figure 3-14 XML Finder: Add Folder Dialog Box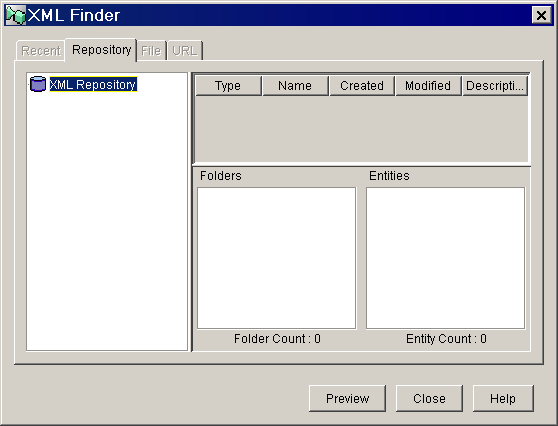
Figure 3-15 XML Finder: Add Entity Dialog Box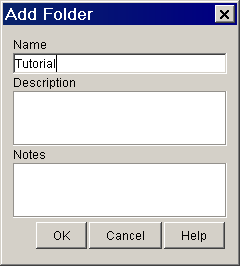
Figure 3-16 XML Finder Dialog Box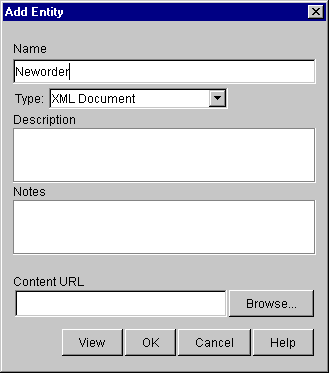

Saving a Template Definition
You may notice that when you make changes to a template definition, its label in the folder tree and in the title bar of the workflow design window is preceded by an asterisk. This means that the template definition contains unsaved changes.
To save the workflow:
You are now ready to create and define the Order Processing workflow, as described in the following sections of the tutorial.

|

|

|
|
|
|
Copyright © 2001 BEA Systems, Inc. All rights reserved.
|