


|

|
|
|
|
Defining Actions
The following sections introduce and explain how to use BEA WebLogic Process Integrator actions:
Working with Actions
An action is a basic unit of work that is performed by BEA WebLogic Process Integrator. An action can be as simple as assigning a task to a user or as complicated as sending XML messages or invoking Enterprise JavaBean (EJB) methods. Actions are, in a sense, the primitive building blocks of a workflow because they define the actual behavior of the workflow.
Action Categories
Actions are organized into the following categories.
Synchronous and Asynchronous Actions
Most actions as synchronous, which means that the workflow does not proceed to the next action until the current action has completed.
Some actions, however, are asynchronous, which means that the workflow proceeds to the next action without waiting for the current action to complete. The following are asynchronous actions:
There are, however, a couple of exceptions to the asynchronous behavior of these actions.
If you add subactions to the Send XML to Client action (as described in the following section), this action waits for a reply from the client application before it executes the subactions.
Similarly, if you add subactions to the Start Workflow action, this action waits until the called workflow completes before it executes the subactions.
Action Placement and Subactions
You can place actions in any node in a workflow, except a Join node. The most common place is in a Task node.
You can also place actions within other actions. Such actions are executed when the conditions specific to that action are met. The following actions can have subactions defined within them:
Adding or Updating an Action
You add and update actions in the Task Properties, Decision Properties, Event Properties, and Start Properties dialog boxes. Each dialog box has an area specific to action maintenance.
To add or update an action:
Figure 7-1 Add Action Dialog Box
Note: If a plug-in is defined for actions, this dialog box contains the new action. For more information about plug-ins, see Working with Plug-Ins. A dialog box specific to the selected action is displayed. The action is updated or added to the Properties dialog box for the node you selected.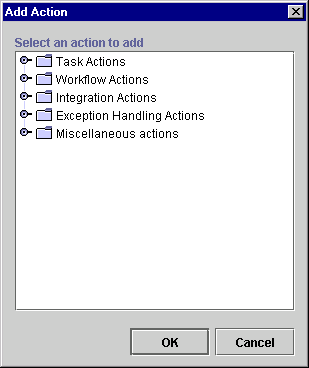
Deleting an Action
To delete an action:
Figure 7-2 Delete Action Dialog Box
When an action is deleted, all references to the action are removed. The action is removed from all instances of the workflow, including those currently running.
Changing the Sequence of Actions
Actions are displayed in the sequence that they will be executed. To re sequence actions, select an action from the list in the Properties dialog box and press the up or down arrow to move its position in the list.
Figure 7-3 Up and Down Arrows
Using Task Actions
This section defines and describes how to use the following task actions to specify and control tasks:
Mark Task as Done
Use this action to explicitly mark a task as done. This action activates the MarkedDone state of a task., and performs all the actions listed in the MarkedDone tab of the Task Properties dialog box. For details about task states, see Defining Tasks.
When a task is marked as done, the task is no longer listed as an Active task in the Worklist application. By marking a task done, the task is prevented from being executed again, unless the task properties allow it. When a task is marked as done, all successor nodes are activated (as defined in the Task Properties dialog box).
Figure 7-4 Mark Task as Done Dialog Box
View or enter information in the Mark Task as Done dialog box.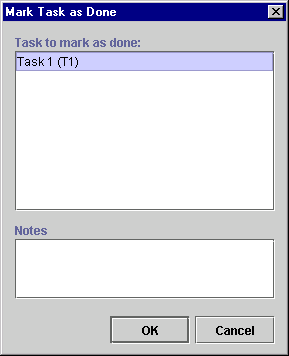
Unmark Task Done
This action marks the task as not done. Use this action when a condition arises that prevents the task from continuing in a successfully completed state. A task that is assigned this action becomes Active on the Worklist and can be executed again.
Note: A task that is marked not done does not have its activated state triggered again. To trigger the activated state for the task, the workflow must initiate the task again. For details about task states, see Defining Tasks.
Figure 7-5 Unmark Task Done Dialog Box
View or enter information in the Unmark Task Done dialog box.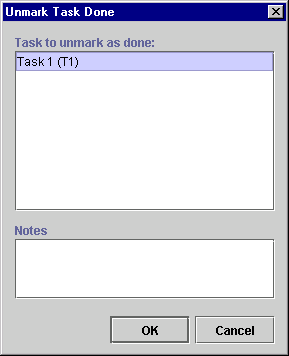
Set Task Due Date
This action sets the due date for a specified task by the task must be executed. You can express the due date in minutes, hours, days, weeks, or months, or it can be the result of an expression. You can also specify subactions that are performed when the task becomes overdue.
Figure 7-6 Set Task Due Date Dialog Box
View or enter information in the Set Task Due Date dialog box: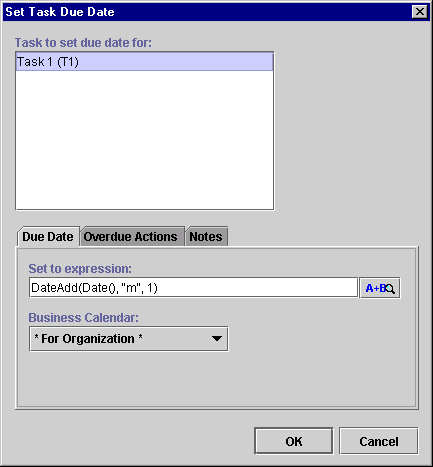
Note: Expressions are built using WebLogic Process Integrator expression syntax and typically use the syntax of XPath function to extract values out of XML documents. If you know the syntax of the expression you want to use, you can type the expression directly in the field. Alternatively, click the A+B button to display the Expression Builder dialog box. The Expression Builder helps you construct an expression, which is made up of functions, operators, literals, and variables. For more information on constructing expressions, see Using Expressions and Conditions.
Assign Task to User
Use this action to assign a specified task to an individual user or to a user in a role. The user or role can be specified as a constant or taken from a workflow variable at run time. In the case of a user in a role, the system attempts to perform simple workload balancing in its selection of the assignee; the system determines which user defined to the role has the least number of pending tasks, then assigns the task to that user. Assigning a task to a user causes a notification to be sent to the user. The user views the task from the Worklist application.
Figure 7-7 Assign Task to User Dialog Box
View or enter information in the Assign Task to User dialog box.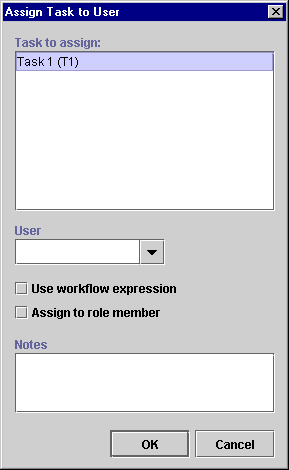
Note: Expressions are built using WebLogic Process Integrator expression syntax and typically use the syntax of XPath function to extract values out of XML documents. If you know the syntax of the expression you want to use, you can type the expression directly in the field. Alternatively, click the A+B button to display the Expression Builder dialog box. The Expression Builder helps you construct an expression, which is made up of functions, operators, literals, and variables. For more information on constructing expressions, see Using Expressions and Conditions.
Assign Task to Role
Use this action to assign a task to a role, either directly to a constant role or by taking the value of a workflow expression at run time. It is not always desirable to assign a task to a specific user. When you assign a task to a role, any user that is defined as a member of the role has access to the worklist of the role. When a task is assigned to a role, there is no workflow notification of a new task. Assign a task to a role when the task can be performed by anyone who is a member of that role and has a certain skill level.
Figure 7-8 Assign Task to Role Dialog Box
View or enter information in the Assign Task to Role dialog box.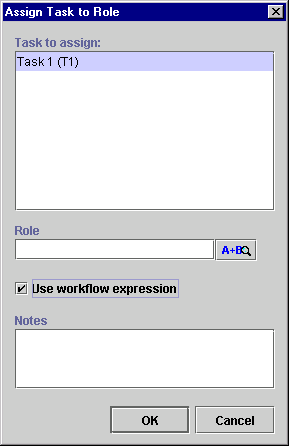
Note: Expressions are built using WebLogic Process Integrator expression syntax and typically use the syntax of XPath function to extract values out of XML documents. If you know the syntax of the expression you want to use, you can type the expression directly in the field. Alternatively, click the A+B button to display the Expression Builder dialog box. The Expression Builder helps you construct an expression, which is made up of functions, operators, literals, and variables. For more information on constructing expressions, see Using Expressions and Conditions.
Assign Task Using Routing Table
Assign a task to a user or role depending on a set of conditions. A routing table consists of a sequence of one or more routing conditions. A routing condition specifies a potential assignee (user or role) for the task, together with a specification of the conditions under which the assignment should be made. When the action is executed at run time, the system evaluates each condition in sequence until it encounters one that yields a True result. If such a condition is encountered, the task is assigned to the corresponding user or role, and any subsequent conditions are ignored.
Note: If no routing condition is satisfied, a run-time exception occurs.
Figure 7-9 Assign Task Using Routing Table Dialog Box
View or enter information in the Assign Task Using Routing Table dialog box.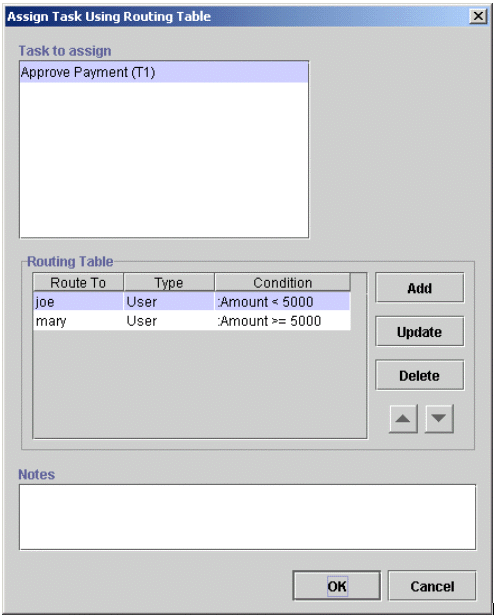
Clicking Add or Update displays the Define Routing Condition dialog box.
Figure 7-10 Define Routing Condition Dialog Box
The Define Routing Condition dialog box contains the following: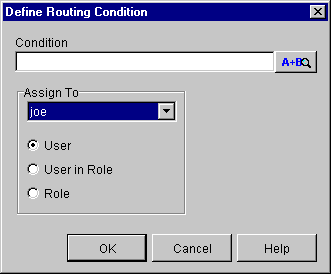
Note: Expressions are built using WebLogic Process Integrator expression syntax and typically use the syntax of XPath function to extract values out of XML documents. If you know the syntax of the expression you want to use, you can type the expression directly in the field. Alternatively, click the A+B button to display the Expression Builder dialog box. The Expression Builder helps you construct an expression, which is made up of functions, operators, literals, and variables. For more information on constructing expressions, see Using Expressions and Conditions.
Unassign Task
Remove the current task assignment. The task is no longer assigned to the user or role.
Figure 7-11 Unassign Task Dialog Box
View or enter information in the Unassign Task dialog box.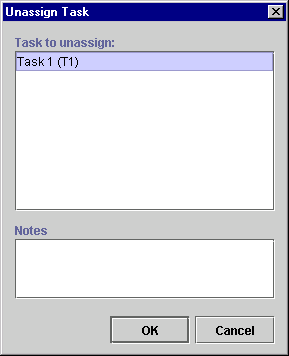
Set Task Comment
Display a free-form text message to the user at run time when the action is executed. The text is typically explanatory or requests the user to perform manual action(s) for which the workflow does not provide further automated support. When the action is executed, the system displays a text message in the comment column of the Worklist application.
Figure 7-12 Set Task Comment Dialog Box
View or enter information in the Set Task Comment dialog box.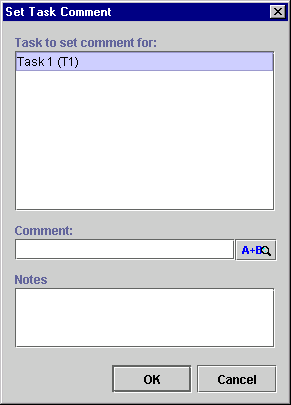
Note: Expressions are built using WebLogic Process Integrator expression syntax and typically use the syntax of XPath function to extract values out of XML documents. If you know the syntax of the expression you want to use, you can type the expression directly in the field. Alternatively, click the A+B button to display the Expression Builder dialog box. The Expression Builder helps you construct an expression, which is made up of functions, operators, literals, and variables. For more information on constructing expressions, see Using Expressions and Conditions.
Set Task Priority
Set a task priority to Low, Medium, or High.
Figure 7-13 Set Task Priority Dialog Box
View or enter information in the Set Task Priority dialog box.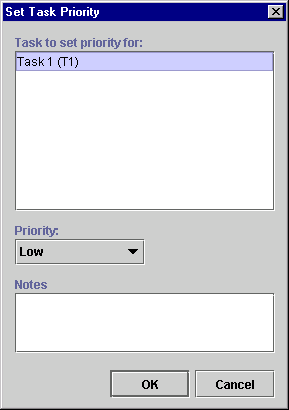
Execute Task
Use this action to execute a task explicitly. This action activates the executed state of a task, and performs all the actions listed in the Executed tab of the Task Properties dialog box. For details about task states, see Defining Tasks.
Figure 7-14 Execute Task Dialog Box
View or enter information in the Execute Task dialog box.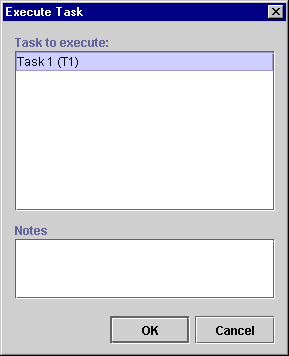
Using Workflow Actions
This section defines and describes how to use the following workflow actions to manage workflows:
Mark Workflow as Done
This action marks the workflow as done and serves the same purpose as a workflow reaching a Done node.
Figure 7-15 Mark Workflow as Done
Enter notes about the action in the free-form text box, and click OK. Abort Workflow Abort the current workflow. Abort Workflow permanently stops a workflow that is currently in process. This action enables the system to handle a situation in which there is no reason to continue a given workflow. The BEA WebLogic Process Integrator Workflow Monitoring facility differentiates between a workflow that has aborted upon the execution of this action and a workflow that has completed by reaching a Done node. A workflow that is aborted will be deleted from the server. Figure 7-16 Abort Workflow Dialog Box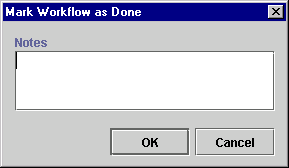
View or enter information in the Abort Workflow dialog box.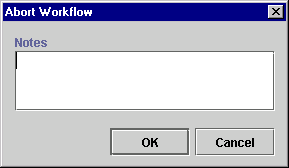
Start Workflow
Use this action to start another workflow from the current one. The workflow being started is sometimes referred to as a subworkflow or a called workflow. The workflow that starts the subworkflow is called the calling workflow.
The started workflow can be tracked with a variable reference, and when it completes, you can perform an optional set of subactions.
Figure 7-17 Start Workflow Dialog Box
View or enter information in the Start Workflow dialog box.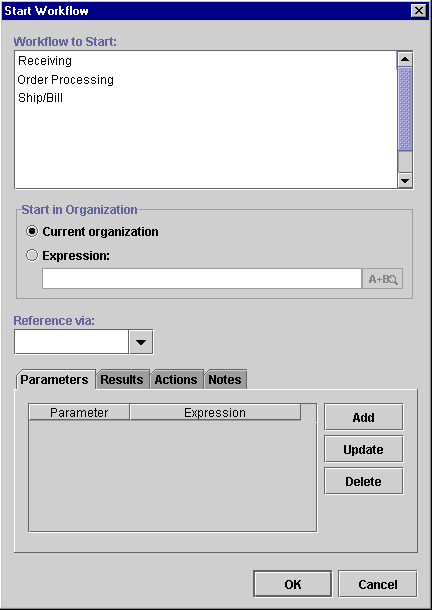
Note: Expressions are built using WebLogic Process Integrator expression syntax and typically use the syntax of XPath function to extract values out of XML documents. If you know the syntax of the expression you want to use, you can type the expression directly in the field. Alternatively, click the A+B button to display the Expression Builder dialog box. The Expression Builder helps you construct an expression, which is made up of functions, operators, literals, and variables. For more information on constructing expressions, see Using Expressions and Conditions.
The calling workflow can then use the instance ID in expressions using the WorkflowVariable function to retrieve variables from the called subworkflow. For details about using the instance ID in the WorkflowVariable function, see Functions.
Use the following tabs to select additional information for the action:
Set Workflow Variable
Use this action to assign a value to an existing workflow variable you defined using the Variable Properties dialog box. For details about defining variables, see Defining Variables.
The value you assign to the variable can be an expression or a literal. This action evaluates the expression or literal, and assigns the result to a workflow variable when the action is executed.
If you assign a value to an XML type variable, you can use this action to compose an XML document and store the content in the XML type variable. You can then send the XML type variable as an internal or external XML message using the Post XML Event action (see Post XML Event).
Figure 7-18 Set Workflow Variable Dialog Box
The Set Workflow Variable dialog box contains the following: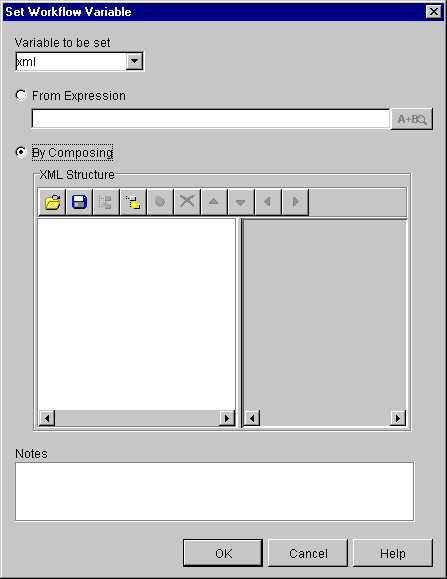
Note: Expressions are built using WebLogic Process Integrator expression syntax and typically use the syntax of XPath function to extract values out of XML documents. If you know the syntax of the expression you want to use, you can type the expression directly in the field. Alternatively, click the A+B button to display the Expression Builder dialog box. The Expression Builder helps you construct an expression, which is made up of functions, operators, literals, and variables. For more information on constructing expressions, see Using Expressions and Conditions.
Note: An XML document that is stored in a string type variable will first be converted to a string.
To compose an XML document, perform the actions listed in the following table. The XML document you define is stored in the workflow template definition.
Set Workflow Comment
Set the comment for a workflow instance. Use this action to specify a valid workflow expression to be displayed to the user at run time when the action is executed. The text is typically informative or requests the user to perform manual action(s) for which the workflow does not provide further automated support.
Figure 7-19 Set Workflow Comment Dialog Box
View or enter information in the Set Workflow Comment dialog box.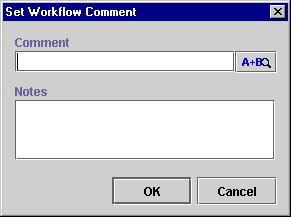
Note: Expressions are built using WebLogic Process Integrator expression syntax and typically use the syntax of XPath function to extract values out of XML documents. If you know the syntax of the expression you want to use, you can type the expression directly in the field. Alternatively, click the A+B button to display the Expression Builder dialog box. The Expression Builder helps you construct an expression, which is made up of functions, operators, literals, and variables. For more information on constructing expressions, see Using Expressions and Conditions.
Using Integration Actions
To integrate a workflow with software components (such as EJBs, Java classes, and executable programs), external applications (such as the Worklist client application or an executable program), and WebLogic Server functionality (such as the XSL transformation engine), BEA WebLogic Process Integrator provides the following actions:
The following sections describe how to use these actions.
Post XML Event
This action sends an XML message to a specified destination to trigger an event. This action can trigger two kinds of events:
To post an XML event:
Figure 7-20 Add Action Dialog Box
Note: If a plug-in is defined for actions, this dialog box contains the new action. For more information about plug-ins, see Working with Plug-Ins. Figure 7-21 Post XML Event Dialog Box
If the XML document is stored in an XML type variable, select the variable from the From XML Variable drop-down list. For details about XML type variables, see Understanding Variables. If you want to compose the XML message, you can do so by performing the following actions: Figure 7-22 Destination Tab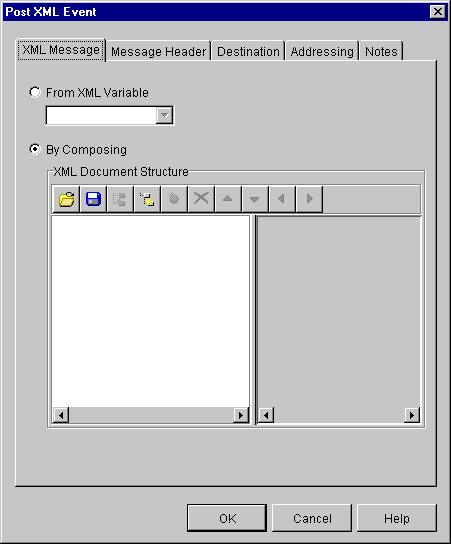
If the destination is internal, the XML message is sent to an internal JMS queue maintained by BEA WebLogic Process Integrator. The JNDI name of the internal JMS queue is com.bea.wlpi.EventQueue. If the destination is external, specify the JNDI name of the JMS topic or JMS queue to which you want to post the message. For an external destination, you can enter the JNDI name of the JMS topic or JMS queue directly into the expression field, or you can define an expression that is evaluated at run time to produce the JNDI name. Note: Expressions are built using WebLogic Process Integrator expression syntax and typically use the syntax of XPath function to extract values out of XML documents. If you know the syntax of the expression you want to use, you can type the expression directly in the field. Alternatively, click the A+B button to display the Expression Builder dialog box. The Expression Builder helps you construct an expression, which is made up of functions, operators, literals, and variables. For more information on constructing expressions, see Using Expressions and Conditions. If the XML message is part of a transaction, you can send the message immediately, or only if the transaction completes successfully. Select one of the following: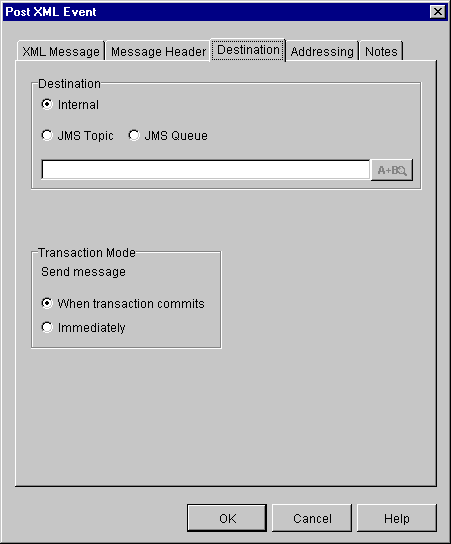
Figure 7-23 Message Header Tab
JMS messages contain a standard set of header fields that are always transmitted with the message. JMS messages also include property fields in which you can specify application-specific information. For example, you can use the property field to specify information in the message that is not appropriate for the body of the message. The receiving workflow then uses the EventAttribute function in an event key expression to retrieve the information you specified in the property field. For details about the EventAttribute function, see Using Expression Components. JMS message properties are name-value pairs. The name can be almost any string that is a valid identifier in the Java language. The value can be any one of the following types: boolean, byte, short, int, long, float, double, or string. To define JMS message properties, click Add to display the Set JMS Properties dialog box. In the dialog box, specify the following: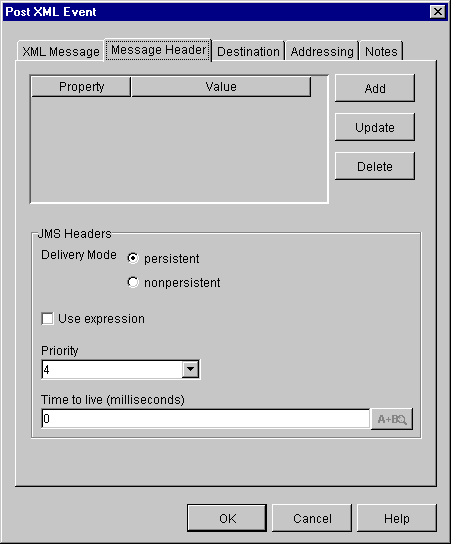
You can also specify values for the following standard JMS headers:
Persistent messages are not lost even if the JMS server fails. The message is delivered again after the server recovers.
Nonpersistent messages can be lost if the JMS server fails. The message is not delivered again after the server recovers.
You can select a value from the drop-down list, or you can define an expression that is evaluated at run time to produce the value. To use the Expression Builder to define an expression, select the Use Expression check box first.
You can enter the value directly, or you can define an expression that is evaluated at run time to produce the value. To use the Expression Builder to define an expression, select the Use Expression check box first.
Figure 7-24 Addressing Tab
Note: If you specify a Time to live in the Message Header area, the message persists only for the time you specified.
If you want to persist the message for more than one workflow instance, separate the IDs with commas.
An order key must be an integer value, and the value must be the same for each event that you want processed in the order in which it is received. For example, if two events are posted at the same time, and you want them processed in the order in which they are received, enter the same order key value, such as the integer value of 8, for each event.
Enter the order key directly, or enter an expression that is evaluated at run time to produce the order key.
Send XML to Client
Use this action to communicate between a workflow and a client application by sending an XML document to the client. The client application must be programmed to identify the XML document, perform the appropriate action, and return an XML document in response to the workflow.
For examples of using this action with the Worklist client application, see Using the Send XML to Client Action with the Worklist Application.
To send an XML document to a client:
Figure 7-25 Add Action Dialog Box
Note: If a plug-in is defined for actions, this dialog box contains the new action. For more information about plug-ins, see Working with Plug-Ins. Figure 7-26 Send XML to Client Dialog Box
Note: The system-generated actionid element and its value are used at run time to identify the Send XML to Client action. The actionid element must be the first child element of the root element. Do not move, delete or edit the actionid element, and do not add any subelements to it. If you change, move, or delete the actionid element, a warning message is displayed when you click OK in the Send XML to Client dialog box. The Studio then resets the actionid element and its value to the system-generated value and location. Clicking Add displays the Workflow Variable Assignment dialog box. The variables in the pull-down list are those defined in the Variables Properties dialog box. (For details, see Defining Variables.) The XML expression can be the name of an element in the XML message returned by the client the value of which you want to assign to the selected variable, or it is an XPath function that extracts a value from the XML message from the client, and then assigns that value to the selected variable. Figure 7-27 Workflow Variable Assignment Dialog Box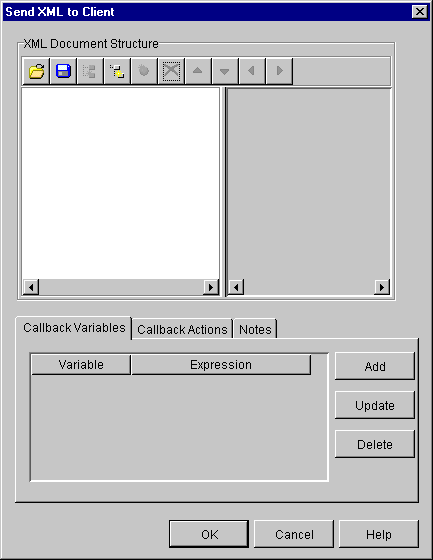
Clicking Add opens the Add Action dialog box where you can select the actions you want to specify. Typically, you would specify the Mark Task as Done action. The Mark Task as Done action indicates that the client has returned a response, and control can return to the Send XML to Client action.
Using the Send XML to Client Action with the Worklist Application
The Worklist client application is designed to perform some action when it receives an XML document that conforms to a predefined DTD file. The predefined DTD files are shipped with BEA WebLogic Process Integrator, and are in the following directory where BEA WebLogic Process Integrator is installed:
...docs\javadocs\com\bea\wlpi\common\doc-files
There are four pairs of predefined DTD files. Each pair has one DTD file for a request to the Worklist client, and another DTD file for a response from the Worklist client. The root element of the DTD file indicates the action the Worklist client performs when it receives a request XML document.
The following table lists the predefined DTD files, and the actions performed by the Worklist application when it receives an XML document that conforms to one of the request DTD files.
This following sections show you how to define XML documents that cause the Worklist client application to display two types of dialog boxes:
Defining a Prompt Dialog Box
To define a prompt dialog box, the entries in the Send XML to Client dialog box should look like those shown in the following figure.
Figure 7-28 Send XML to Client Dialog Box
The XML document structure shown in the dialog box conforms to the ClientSetVarsReq.dtd file. The contents of the DTD file are shown below. Listing 7-1 Contents of the ClientSetVarsReq.dtd File To define the prompt dialog box: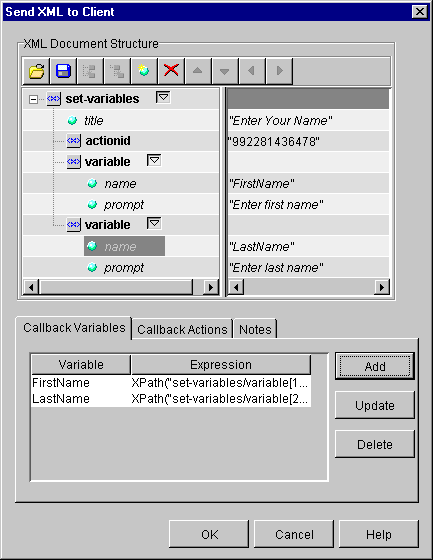
<!ELEMENT set-variables (actionid, variable+)>
<!ATTLIST set-variables title CDATA #IMPLIED>
<!ELEMENT actionid (#PCDATA)>
<!ELEMENT variable (#PCDATA)>
<!ATTLIST variable name NMTOKEN #REQUIRED
                   prompt NMTOKEN #IMPLIED>
Note: The system-generated actionid element and its value are used at run time to identify the Send XML to Client action. The actionid element must be the first child element of the root element. Do not move, delete or edit the actionid element, and do not add any subelements to it.
If you change, move, or delete the actionid element, a warning message is displayed when you click OK in the Send XML to Client dialog box. The Studio then resets the actionid element and its value to the system-generated value and location.
Name
Prompt
The following table shows the Callback variables and the XPath statements you can use. You can create the XPath statements by typing them manually, or you can use the XPath wizard to create them from the ClientSetVarsResp.dtd file.
Note: To access the XPath wizard, click Add in the Send XML to Client dialog box. From the Workflow Variable Assignment dialog box, click the A+B button to open the Expression Builder, then click XPath Wizard. For details about using the XPath wizard, see Creating XPath Expressions and Functions Using the XPath Wizard in Using Expressions and Conditions.
Table 7-2 Callback Variables and XPath Statements
Callback Variable
XPath Statement
FirstName
XPath("/set-variables/variable[1]/text()")
LastName
XPath("/set-variables/variable[2]/text()")
When the the Worklist client receives an XML document with this structure, it displays the following dialog box to the user.
Figure 7-29 Enter Your Name Dialog Box
After the user enters the values for the first name and last name, the Worklist client returns the values in an XML document that conforms to the ClientSetVarsResp.dtd file. The XPath statements you defined are used by the workflow to extract the first and last name from the XML document, and to put those values into the Callback variables. The workflow can then use the values in the Callback variables for further processing. Defining a Message Dialog Box To define a prompt dialog box, the entries in the Send XML to Client dialog box should look like those shown in the following figure. Figure 7-30 Send XML to Client Dialog Box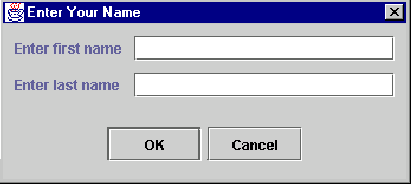
The XML document structure shown in the dialog box conforms to the ClientMsgBoxReq.dtd file. The contents of the DTD file are shown below. Listing 7-2 Contents of the ClientMsgBoxReq.dtd File To define the message box: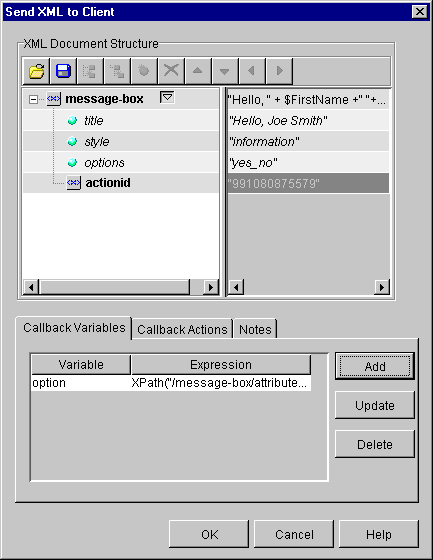
<!ELEMENT message-box (#PCDATA, actionid)>
<!ATTLIST message-box title CDATA #IMPLIED
      style (plain|information|question|warning|error) "plain"
      options (ok|ok_cancel|yes_no|yes_no_cancel) "ok">
<!ELEMENT actionid (#PCDATA)>
Note: The system-generated actionid element and its value are used at run time to identify the Send XML to Client action. The actionid element must be the first child element of the root element. Do not move, delete or edit the actionid element, and do not add any subelements to it.
If you change, move, or delete the actionid element, a warning message is displayed when you click OK in the Send XML to Client dialog box. The Studio then resets the actionid element and its value to the system-generated value and location.
The following table shows the Callback variable and the XPath statement you can use. You can create the XPath statement by typing it manually, or you can use the XPath wizard to create them from the ClientMsgBoxResp.dtd file.
Note: To access the XPath wizard, click Add in the Send XML to Client dialog box. From the Workflow Variable Assignment dialog box, click the A+B button to open the Expression Builder, then click XPath Wizard. For details about using the XPath wizard, see Creating XPath Expressions and Functions Using the XPath Wizard in Using Expressions and Conditions.
Table 7-3 Callback Variable and XPath Statement
Callback Variable
XPath Statement
option
XPath("message-box/attribute::option")
When the the Worklist client receives an XML document with this structure, it displays the following dialog box to the user.
Figure 7-31 Example Message-Box
After the user responds, the Worklist client returns the answer in an XML document that conforms to the ClientMsgBoxResp.dtd file. The XPath statement you defined is use by the workflow to extract the user's answer from the XML document, and to put the value into the Callback variable. The workflow can then use the value in the Callback variable for further processing. Call Program Use this action to call an executable program on the workflow server. Figure 7-32 Call Program Dialog Box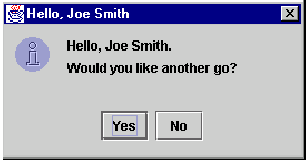
View or enter information in the Call Program dialog box.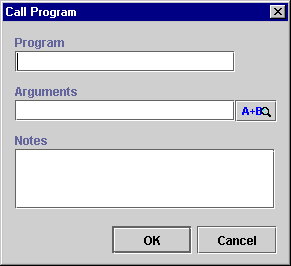
Note: Expressions are built using WebLogic Process Integrator expression syntax and typically use the syntax of XPath function to extract values out of XML documents. If you know the syntax of the expression you want to use, you can type the expression directly in the field. Alternatively, click the A+B button to display the Expression Builder dialog box. The Expression Builder helps you construct an expression, which is made up of functions, operators, literals, and variables. For more information on constructing expressions, see Using Expressions and Conditions.
This action is executed asynchronously, meaning that any actions following this action in the action list are executed immediately, without waiting for the called program to complete.
Perform Business Operation
Use this action to invoke a software component, such as an EJB or Java class, to perform a business activity.
The business operation you want to invoke must already be defined. Additionally, any Java Object, Session EJB, and Entity EJB variables referenced by the business operation must also be defined. Ideally, technical personnel with detailed knowledge about the software components define the business operation, and they can assist you in making the correct selections for this action.
For details about defining business operations, see Understanding Business Operations. For details about defining variables, see Defining Variables.
Figure 7-33 Perform Business Operation Dialog Box
View or enter the following information in the Perform Business Operation dialog box.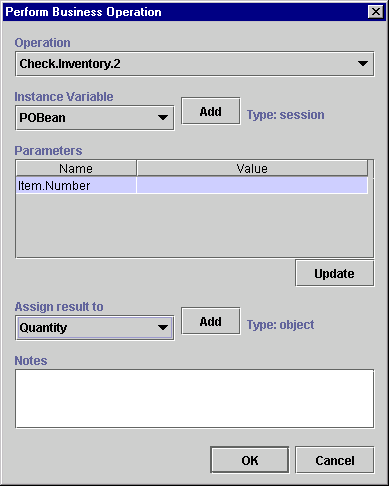
For these types of methods, the instance variable drop-down list displays the following types of variables: Java Object, Session EJB, and Entity EJB.
XSL Transform
XSLT is a specialized XML language that defines rules for translating an XML document into another XML or non-XML document. An XSL template document specifies which elements in the input XML document are to be transformed, and how they are to be transformed.
The XSL Transform action provides a way for you to specify an input XML document that is to be transformed, the XSL template document that specifies the details of the transformation, and a output variable that will contain the transformed document.
The actual transformation occurs at run time, and is performed by the XSL transformation engine bundled with WebLogic Server.
The input document can contain workflow expressions. If it does, BEA WebLogic Process Integrator resolves the expressions, and replaces the expression with the result before the transformation occurs.
Similarly, the XSL template document can contain references to workflow variables. If it does, BEA WebLogic Process Integrator resolves the references, and replaces the reference with the appropriate value before the transformation occurs.
To define the XSL Transform action:
Figure 7-34 XSL Transform Dialog Box
Note: Expressions are built using WebLogic Process Integrator expression syntax. If you know the syntax of the expression you want to use, you can type the expression directly in the field. Alternatively, click the A+B button to display the Expression Builder dialog box. The Expression Builder helps you construct an expression, which is made up of functions, operators, literals, and variables. For more information on constructing expressions, see Using Expressions and Conditions. 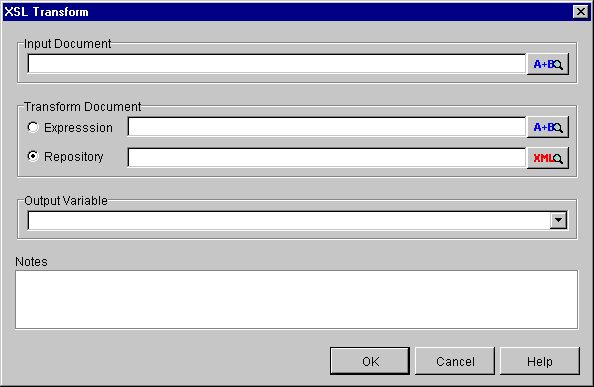
The XML Finder dialog box helps you find XML objects stored in the XML repository, the local file system, or at a URL. For more information about using the XML Finder, see Locating XML Entities Using the XML Finder.
Using Exception Handling Actions
For instructions on using exception handling actions, see Using Exception Handling Actions.
Using Miscellaneous Actions
This section defines and describes how to use the following miscellaneous actions:
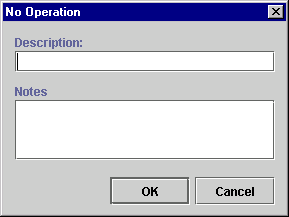
No Operation
The No Operation action has no function; it simply acts as a placeholder to remind an analyst to add an action at a later time.
Figure 7-35 No Operation Dialog Box
View or enter information in the No Operation dialog box.
Send E-Mail Message
Send an e-mail message to a user of the BEA WebLogic Process Integrator system or even to an outside party. Internet standard SMTP protocol is used to transmit the message.
Note: This action requires configuration in the config.xml file. For details, see Installing and Configuring BEA WebLogic Process Integrator.
Figure 7-36 Send E-Mail Message Dialog Box
View or enter information in the Send E-Mail Message dialog box.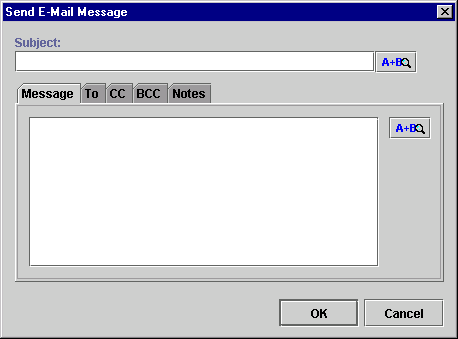
Note: Expressions are built using WebLogic Process Integrator expression syntax and typically use the syntax of XPath function to extract values out of XML documents. If you know the syntax of the expression you want to use, you can type the expression directly in the field. Alternatively, click the A+B button to display the Expression Builder dialog box. The Expression Builder helps you construct an expression, which is made up of functions, operators, literals, and variables. For more information on constructing expressions, see Using Expressions and Conditions.
Click OK to display the Mail Recipient dialog box.
Figure 7-37 Mail Recipient Dialog Box
Note: Expressions are built using WebLogic Process Integrator expression syntax and typically use the syntax of XPath function to extract values out of XML documents. If you know the syntax of the expression you want to use, you can type the expression directly in the field. Alternatively, click the A+B button to display the Expression Builder dialog box. The Expression Builder helps you construct an expression, which is made up of functions, operators, literals, and variables. For more information on constructing expressions, see Using Expressions and Conditions.
Evaluate Condition
Evaluate a conditional expression at run time and perform alternative sequences of subactions depending on the result. If the condition evaluates to True, one sequence of actions is performed, and if it is False, a different sequence of actions is performed instead. For example, a manager may be authorized to make purchases with a total value that is less than a specified amount, requiring higher approval if the amount exceeds this threshold. When a manager starts a purchase requisition workflow, the workflow can use an Evaluate Condition action to check whether this threshold would be exceeded, and to assign the task of approving the requisition either to the authorized person or to the manager.
Figure 7-38 Evaluate Condition Dialog Box
View or enter information in the Evaluate Condition dialog box.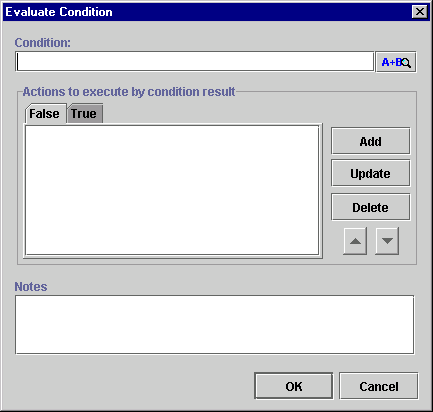
Note: Expressions are built using WebLogic Process Integrator expression syntax and typically use the syntax of XPath function to extract values out of XML documents. If you know the syntax of the expression you want to use, you can type the expression directly in the field. Alternatively, click the A+B button to display the Expression Builder dialog box. The Expression Builder helps you construct an expression, which is made up of functions, operators, literals, and variables. For more information on constructing expressions, see Using Expressions and Conditions.
Timed Event
Create a timed even that will be triggered at an exact time and date according to a specified execution schedule.
Figure 7-39 Timed Event: Trigger Event Tab
View or enter information in the Trigger Event tab.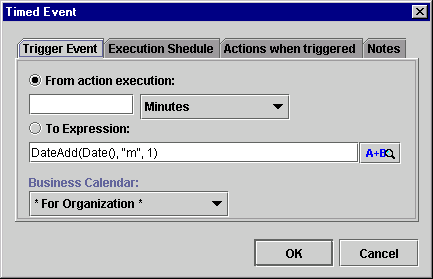
Note: Expressions are built using WebLogic Process Integrator expression syntax and typically use the syntax of XPath function to extract values out of XML documents. If you know the syntax of the expression you want to use, you can type the expression directly in the field. Alternatively, click the A+B button to display the Expression Builder dialog box. The Expression Builder helps you construct an expression, which is made up of functions, operators, literals, and variables. For more information on constructing expressions, see Using Expressions and Conditions.
The Execution Schedule tab of the Timed Event dialog box allows you to specify that the event will be repeated according to a specified unit of time until the task is marked done or the workflow template definition is done.
Figure 7-40 Timed Event: Execution Schedule Tab
View or enter information in the Execution Schedule tab.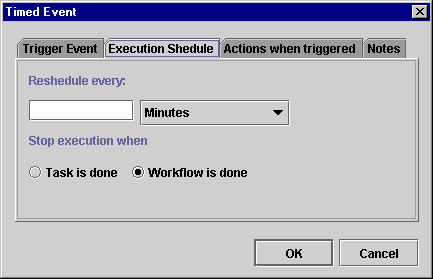
View or enter information in the Actions when triggered tab.
Figure 7-42 Timed Event: Notes Tab
Use the Notes tab of the Timed Event dialog box to make notes about the action.
Cancel Workflow Event
This action cancels an event that has been defined within a workflow.
Figure 7-43 Cancel Workflow Event Dialog Box
View or enter information in the Cancel Workflow Event dialog box.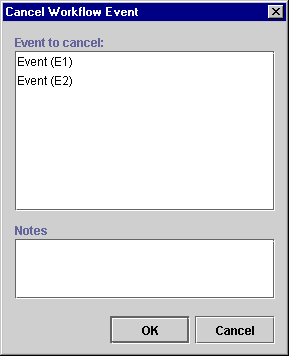
Make Audit Entry
This action allows you to specify an additional audit entry expression. This audit entry will be published to a Java Message Service (JMS) topic for further retrieval. The audit entry can be an expression built with functions and workflow variables, but it can also be a string of text.
Note: The JMS topic is specified in the Template Definition Properties dialog box. For further information, refer to Creating a New Workflow Template Definition.
BEA WebLogic Process Integrator provides a default audit facility whereby all major user interactions and changes are published to the JMS topic. The Make Audit Entry action allows you to add an additional specific audit entry; such an audit entry might be used, for example, to track the value of a variable.
Figure 7-44 Make Audit Entry Dialog Box
The Make Audit Entry dialog box contains the following: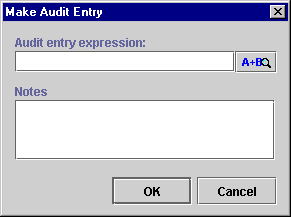
Note: Expressions are built using WebLogic Process Integrator expression syntax and typically use the syntax of XPath function to extract values out of XML documents. If you know the syntax of the expression you want to use, you can type the expression directly in the field. Alternatively, click the A+B button to display the Expression Builder dialog box. The Expression Builder helps you construct an expression, which is made up of functions, operators, literals, and variables. For more information on constructing expressions, see Using Expressions and Conditions.

|

|

|
|
|
|
Copyright © 2001 BEA Systems, Inc. All rights reserved.
|