


|

|
|
|
|
Using the E-Business Control Center Portal Tool
The E-Business Control Center enables you to define the design, functionality and visitor attributes of portals and portlets with limited coding knowledge of Java, JavaServer Pages (JSPs) or HTML. Once you have defined the components of a portal or portlet, the definitions are communicated to a server and the new portal is available to visitors or to an administrator who may define its runtime components using the WebLogic Portal Administration Tools.
Components that can be defined via the E-Business Control Center include:
Includes assigning skins and layouts to portals.
Includes assigning Web applications, Webflow mechanisms, and portlets.
Includes defining entitlement definitions and user profiles.
Note: To use the portal design functionality in the E-Business Control Center, you must purchase the full WebLogic Portal License.
This topic includes the following sections:
What you should know in order to make the best use of this application.
Basic concepts you should be familiar with when using the E-Business Control Center portal functionality.
How to get started using the E-Business Control Center.
How to open a newly created portal Web application in the E-Business Control Center.
How to associate available Web components, such as skins, layouts, and the portlets and entitlements you have created in earlier sections, for the creation of a new portal.
Step by step procedure for creating a new portlet.
How to access the entitlement segment definition tool.
Using the E-Business Control Center
To effectively utilize the portal definition tools in the E-Business Control Center, you should have some knowledge of the fundamentals of building a Web portal, including a high-level understanding of JavaServer Pages (JSPs), page flows, servlets, and portlets. It is also helpful, but not necessary, to be familiar with the Portal framework, Webflow, and the WebLogic Portal Administration Tools.
E-Business Control Center Portal Concepts
The following terms are concepts often used in this document and in the E-Business Control Center.
A portal Web application is a group of server-side Web resources that make up an interactive online portal application. The Web resources include Java servlets, JSPs, static documents (such as HTML documents), and applets that can be deployed in a client Web browser.
A Portal is the framework for the Web portal or application. Using the E-Business Control Center, you define what possible layouts, skins, pages, and portlets that will be available for the portals. Once these definitions are synchronized with the server, the new portal can be accessed by a visitor or can be edited by a designated user of the WebLogic Portal Administration Tools.
A portlet is a Web component, often a small software application, that resides within a portal. It can be something as simple as a JSP include statement containing text, or as robust as a Web application, such as e-mail or a stock ticker. A well-designed portlet can be reused in different portals.
When you define portal attributes, you set defaults to determine which of your selections will be seen initially at the front end. These defaults can also be set, or the EBCC defaults can be reset, using the WebLogic Portal Administration Tools portal at runtime.
An entitlement segment is a visitor group based on common characteristics that allow a member of the group to view certain aspects of a portal. For example, if you create a portal that provides information about upcoming city council elections in Los Angeles, you might want to define an entitlement group for that portlet that consists of visitors who live in Los Angeles county and are of voting age.
Meeting an entitlement segment's criteria may also give the user certain privileges in a portal. In the above example, any visitor that lives in Los Angeles county and is of voting age might be given the ability to edit the presentation or color scheme of their portal.
You use the E-Business Control Center to create entitlement segment definitions. These segments are associated with pages and portals in the WebLogic Portal Administration Tools.
Once you have defined the portal attributes and defaults, you use the synchronization functionality to post this information to a server. Once you synchronize, the portal is generated or updated and becomes available to visitors and designated users of the WebLogic Portal Administration Tools. While other tools in the E-Business Control Center require a server connection, you can use the Portal tool offline until you are ready to synchronize to the server. See "Synchronizing Application Data" in the Deployment Guide for more information.
Webflow allows the user to create a flow of actions and pages for a Web application. You use the E-Business Control Center to assign Webflow mechanisms to portals and portlets. For general information about Webflow and Pipeline, see the Guide to Managing Presentation and Business Logic: Using Webflow and Pipeline documentation. For information specific to portal Webflow, see the Webflow topics in "Customizing Portals and Portlets."
Once you have determined the desired Web components for the portal, the actual instance of the portal can be configured using the WebLogic Portal Administration Tools. For more information, see the Getting Started with Portals and Portlets documentation.
Note: You cannot edit or delete the default Administrator and everyone groups in the WebLogic Portal Administration Tools.
Getting Started
To start the E-Business Control Center:
Windows: Selecting Start
UNIX/Linux: Run $ EBCC_HOME/bin/ebcc.sh
If you don't see the Explorer window along the left side of the E-Business Control Center, click the Open Explorer button in the main toolbar, as shown in Figure 13-1.
Figure 13-1 Explorer Window
Portal Web Applications
A portal Web application is a group of Web resources or components that are used in a portal application. The Web resources include Java servlets, JSPs, static documents (such as HTML documents), and applets that can be deployed in a client Web browser. Before you create a new portal, make sure resources exist on the WebLogic Portal server.
For information about creating a new Web application, see the Getting Started with Portals and Portlets documentation.
Importing Data for a New Portal Web Application
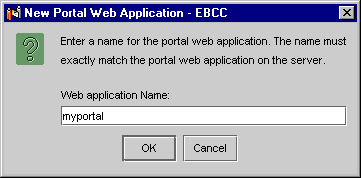
Use the following procedure to create a new portal Web application that exists on a server.
The New Portal Web Application window appears (Figure 13-2).
Figure 13-2 New Portal Web Application Window
Portals
When you create a new portal definition, you associate metadata for elements such as skins, portlets, pages, layouts, and Webflow mechanisms. This section covers the following information:
Designating a New Portal
The first step in creating a new portal is selecting the design elements, including banners, skins, headers, content, layout, as well as user profile information.
Defining General Portal Elements
To define general portal elements, use the following procedure:
The Select Web Application window appears.
The Portal Editor appears (Figure 13-3).
Figure 13-3 Portal Editor
Figure 13-4 General Portal Pane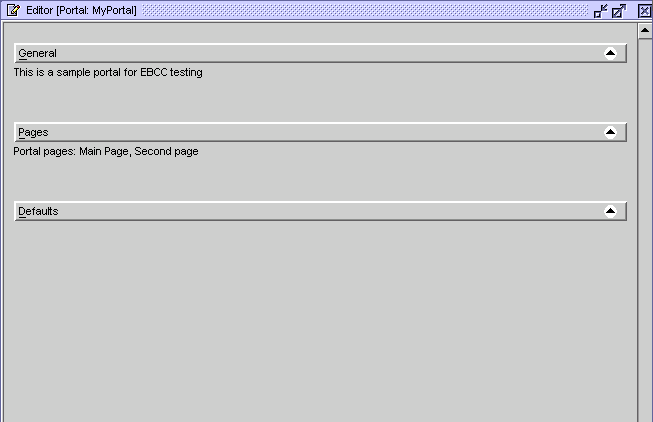
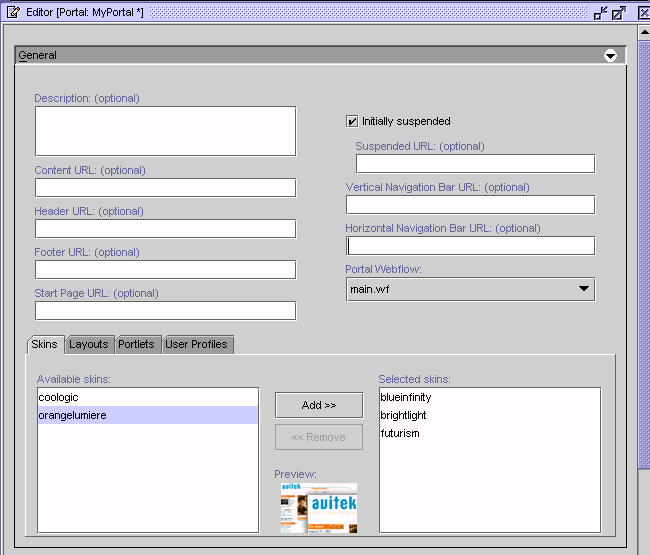
Note: The URLs should be the file system directory path to the JSPs that are located on the WebLogic Portal server. When you synchronize this data, the appropriate JSP is inserted as an include to the portlet. The location of these directories are determined by your organization.
Note: When you select skins and layouts for your portal, you select from a library of metadata representing selected portal components. The E-Business Control Center ships with an existing library which can be modified or supplemented. For information about editing or adding skins and layouts, see "Developing Portals and Portlets" in the Getting Started with Portals and Portlets documentation.
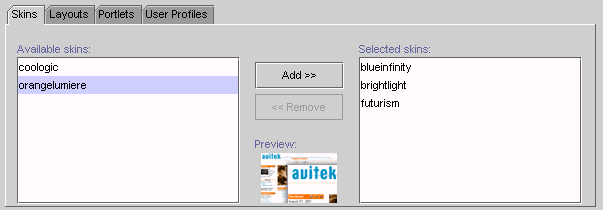
Figure 13-5 Selecting Skins
Use the Add and Remove buttons to select the desired skins. A thumbnail image will appear when you select a skin. You can select one to many skins. Use the Add/Remove buttons to select the desired layout(s); The preview thumbnail allows you to view the selected layout. You can select one to many layouts. Use the Add/Remove buttons to select the desired portlets. If you select multiple portlets for your portal, visitors can select from these layouts when personalizing their portal. Use the Add/Remove buttons to select the desired user profiles. A user profile is a collection of information that is gathered, saved, and updated as customers visit your Web site, or is collected from other offline sources. When you select a user profile, you determine which information can be used or collected. These user profiles are defined in the Entitlement section of the E-Business Control Center. For more information, see "Using Customer Segments to Target High Value" in the Guide to Using the E-Business Control Center.
Creating Portal Pages
When you create portal pages, you create or associate each page that can or will be used in the portal flow.
Figure 13-6 Creating Portal Pages
The Page Definition editor displays (Figure 13-7). Figure 13-7 Page Definition Editor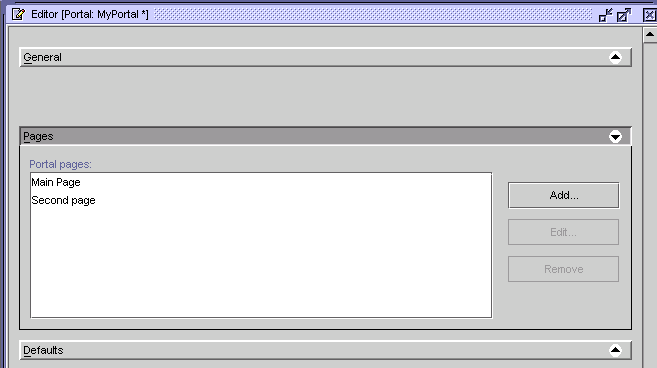
Pages draw from the portal's layout and portlet lists to get their available lists. This means that the layouts in this window are limited to layouts that have been added to the portal. To make more layouts available for your pages, see Designating a New Portal. The new page appears in the Portal Pages window.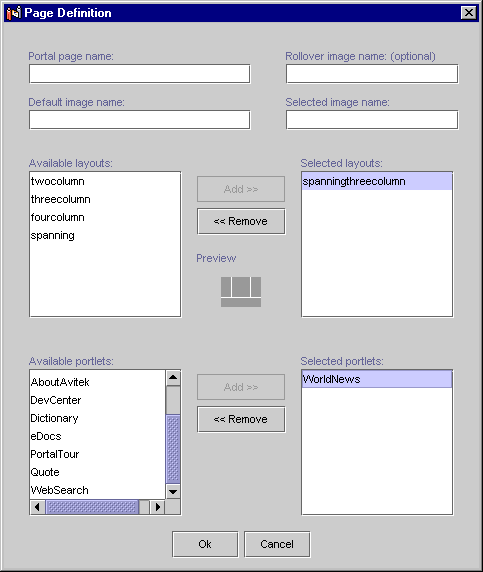
Setting Portal Defaults
Before synchronizing your new portal definition to the server, you must set defaults. Setting defaults for your portal ensures that appropriate pages are displayed until an administrator has enabled the applications.
Figure 13-8 Setting Portal Defaults
Figure 13-9 Setting Portal Page Defaults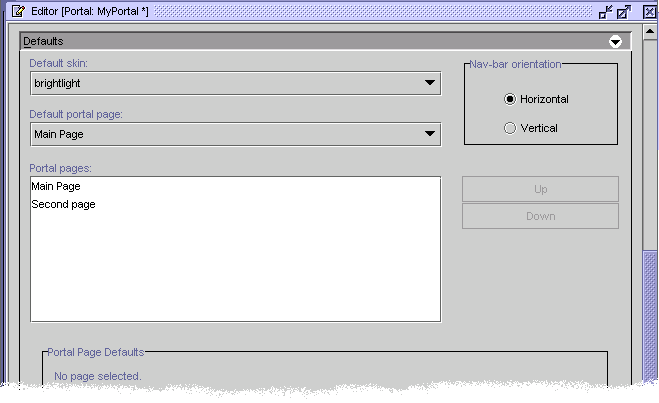
To add a portlet to the layout template, highlight the desired portlet, click the radio button in the desired section, then click the Add button. The portlet will be added to the desired section of the layout.
To remove a portlet from the layout template, click on the desired portlet in the template, then click the Remove button. The portlet will be removed from the template and added back to the portlet list.
To move a portlet, click on the desired portlet in the template, then click the Up or Down buttons.
When you have finished arranging your portlets in the template, click OK.
Editing a Portal
A list of existing portals will appear.
The Portal Editor will display the information for that portlet.
Deleting a Portal
A list of existing portals appears.
The portal is removed from the explorer window.
Portlets
Portlets reside within a portal application and can be anything from a robust Web application (such as e-mail) to a simple data view (for example, a link to a weather page). You can define portlets and add them to a portal at any time during or after the portal development process.
When you create a new portlet definition, you associate metadata for elements such as title bars, headers, helpfiles, and Webflow mechanisms. This section covers the following information:
Defining a New Portlet
Use the following procedure to create a new portlet definition.
The Portlet Editor appears (Figure 13-10).
Figure 13-10 Portlet Editor
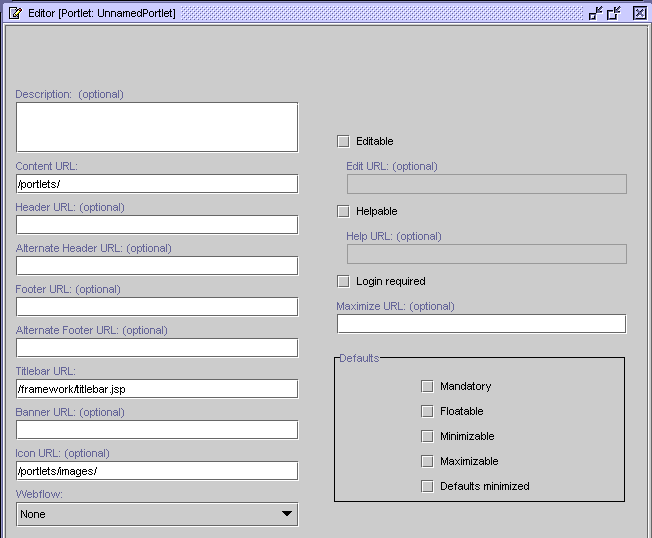
Note: The URLs should be the file system directory path to the JSPs that are located on the WebLogic Portal server. When you synchronize this data, the appropriate JSP is inserted as an include to the portlet. The location of these directories are determined by your organization.
Note: Portlet defaults can be set differently via the portal editor and override the original defaults for that instance of the portlet. For more information, see Setting Portal Defaults.
Editing a Portlet
To edit a portlet:
A list of existing portlets appears in the E-Business Control Center Explorer window.
The Portlet Editor displays the information for that portlet.
Deleting a Portlet
A list of existing portlets appears.
The portal is removed from the Explorer window.
Entitlement Segments
The E-Business Control Center Portal Tools allow you to create multiple entitlement segment definitions with multiple conditions and values. You use the E-Business Control Center to create entitlement segment definitions. These segments are associated with pages and portals in the WebLogic Portal Administration Tools.
Accessing the Entitlement Segment Definition Tool
In the main toolbar, select File
The Entitlement Editor appears (Figure 13-11). Defining entitlement rules involves setting up conditions and queries. See "Building Conditions and Queries in the BEA E-Business Control Center" in the Guide to Using the E-Business Control Center.
Figure 13-11 Entitlement Editor

|

|
|
|
|
Copyright © 2001 BEA Systems, Inc. All rights reserved.
|