Configuring Fibre Channel Boot Devices on x86 Platform
You can set up an x86 server to boot from an FC device, which can be accessed during Oracle Solaris installation as an internal boot device. You can choose one of the FC devices to install the OS. For more information about Oracle Solaris installation, see Installing Oracle Solaris 11.3 Systems.
After the OS installation and before rebooting, you must gather the configuration information by issuing the fcinfo command on the newly installed LUN. The fcinfo command output provides a map from OS device name (c#t#d) to the World Wide Name (WWN) of the target port and LUN. You must record the HBA port WWN, target port WWN, and LUN information.
During the reboot after the installation, you must change the x86 BIOS and FC HBA BIOS setup to identify the FC initiator that must be used to boot the OS. Use the WWN and LUN to set the HBA BIOS for each HBA port, which can be used for booting. Change the system BIOS to perform booting from a disk.
If you are using a custom disk, do not remove the overlap (s2) partition. The x86 installer has a dependency on this partition.
Note - Console access is required to perform HBA and system BIOS changes.
How to Perform OS Installation on FC Devices on x86 Platform
This procedure describes how to perform a DVD installation or a network-based installation of the Oracle Solaris OS on an x86 based system for FC devices. For more information, see Installing Oracle Solaris 11.3 Systems.
-
Install the Oracle Solaris OS by selecting one of the following methods:
-
Automatic installation – You must choose network boot option from the BIOS of the x86 based system to start the automated installation.
-
Text installation – You must choose the following option from the GRUB menu when booted from media or when booted from an installation server to start the text installation.
Oracle Solaris 11.3 Text Installer and command line
For more information, see Installing Oracle Solaris 11.3 Systems.
-
-
After the installation is complete, prepare to configure your devices before the system reboots.
-
Automatic installation – By default, a system is not rebooted after the installation because of the following manifest keywords in the/usr/share/auto_install/default.xml file.
	<auto_install>
	  <ai_instance name="default">
.
.
.
Therefore, you can configure your devices before the system reboots. If a previous installation had the following keyword value to true, change this value to false so that you can configure your devices before the system reboots.
	<auto_install>
	  <ai_instance name="default" auto_reboot="true">
.
.
.
-
Text installation – When the installation is complete, select the Quit option to exit the installer to configure your devices.
-
-
Before rebooting after the installation completes, issue the fcinfo lu command on the logical unit that was selected during installation.
# fcinfo lu /dev/rdsk/c0t600015D0002028000000000000001142d0s2
You can use the sample output in the figure to map the OS device name to the HBA WWN and array WWN as follows:
-
OS Device Name = c0t600015d00020280000000000000001142d0
-
Array WWN = 201600A0B811BF96, LUN 0
-
HBA WWNs = 210000E08B8300CE
-
-
Reboot the system.
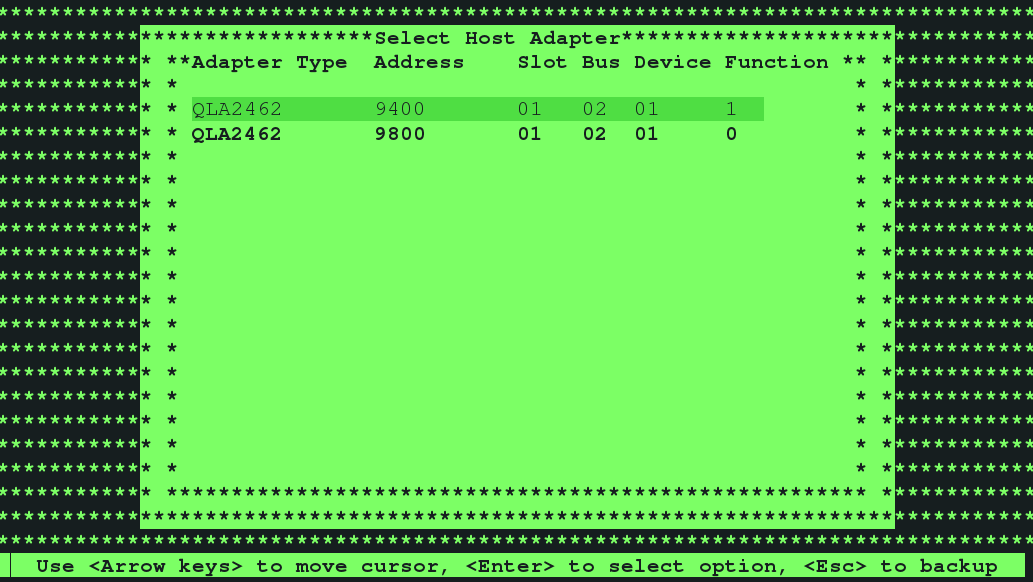
During the reboot process, enter the HBA #1 BIOS screen and specify the boot device to be the FC LUN on which you have just installed the Oracle Solaris OS.
Follow this step for each HBA to be used for multipathing, and specify the boot device to be the FC LUN on which you have installed the Oracle Solaris OS.
-
For the QLogic HBA BIOS:
- During host rebooting, press Control-Q to display the HBA BIOS screen.
-
Select the HBA that you want to enable as the boot device and enable boot.

-
Configure the boot device.
-
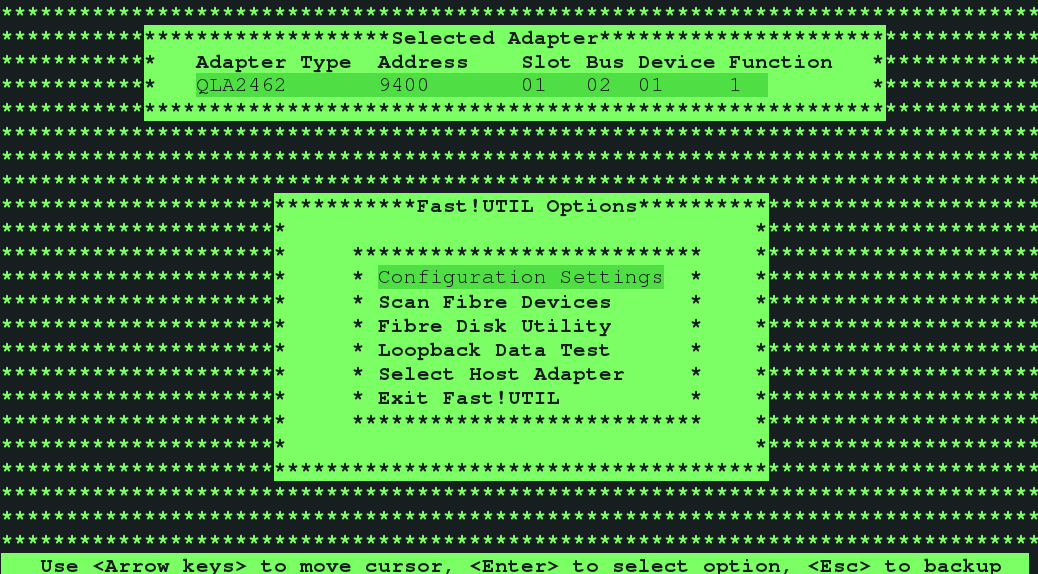
Select Configuration Settings.

-
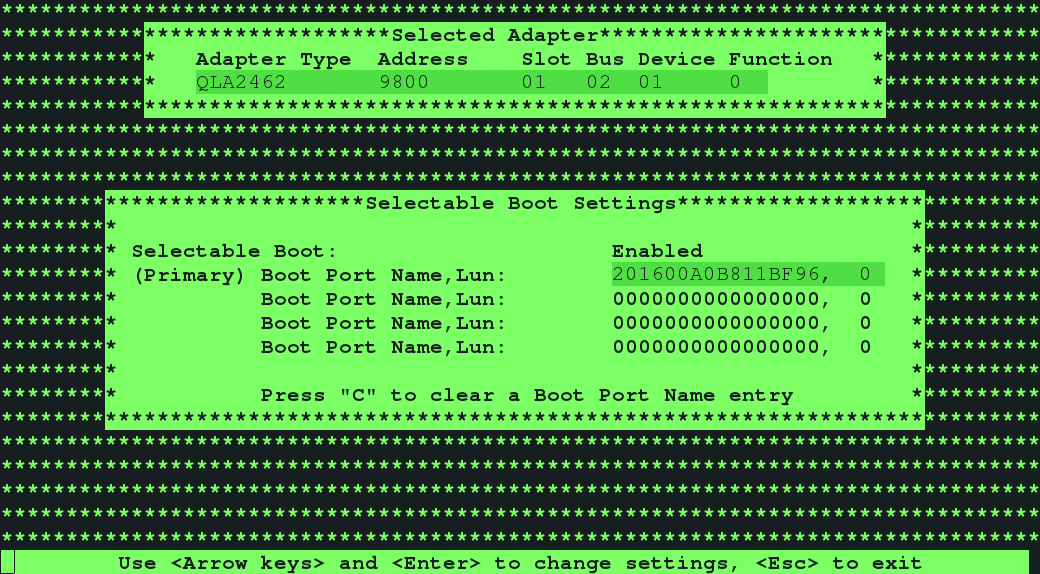
Choose Selectable Boot Settings.

-
Make sure that Selectable Boot is set to enable.
In this menu, you can select the boot device or LUN by selecting the array WWPN.
- Save and then exit the HBA BIOS screen.
-
Select Configuration Settings.
-
For the Emulex HBA BIOS:
- During host rebooting, press Alt-E to display the HBA BIOS screen.
- Select the HBA that you want to enable as the boot device and enable boot.
- Select Configure Boot Devices.
- Select a boot entry.
- Select the WWPN of the desired boot device.
- Type the LUN number.
- Select the boot LUN.
- Select Boot Device with the Array WWPN.
-
Save and exit the HBA BIOS screen.


The figure shows the following modifications:
-
Selectable boot = Enabled
-
ARRAY WWN = 201600A0B811BF96
-
ARRAY LUN = 0
-
HBA WWN = 210000E08B8300CE
-
For the QLogic HBA BIOS:
- Repeat the appropriate modifications for all HBAs and all LUNs.
- Provide the system BIOS as per the access method of the vendor and specify the boot device to be the FC LUN on which you have installed the Oracle Solaris OS.
- Reboot to the newly installed Oracle Solaris OS by using the FC LUN specified in the system BIOS.