Assigning Communications
This section discusses how to:
Assign a communication.
Review or update variable data.
Add or delete enclosures.
View the communication generated by the Communication Generation process.
Identify recipients for an organization.
|
Page Name |
Definition Name |
Navigation |
Usage |
|---|---|---|---|
|
Person Communication |
COMM_MGMT1 |
|
Assign communications to individuals. |
|
Organization Communication |
ORG_COMM_MGMT1 |
|
Assign communications to organizations. |
|
Variable Data |
VAR_XXXX_SEC (where XXXX is the administrative code) |
|
Review or edit variable data for an individual or organization. |
|
Communication Enclosure |
ENCL_TBL_SEC |
|
Review, add, or delete enclosures when assigning a communication. |
|
View Communication |
SCC_CG_ATTREL |
Click the View Generated Communication link that appears on the Person Communication or Communication Recipient Data pages or on the Organization Comm Recipients page when a communication is generated by the Communication Generation process. |
Launch a new window displaying the final outputs, including softcopy enclosures, generated by the Communication Generation process. |
|
Organization Comm Recipients |
ORG_COMM_MGMT2 |
|
Identify the contacts, departments or locations at the organization who should receive the communication. |
Access the Person Communication page () or the Organization Communication page ().
Image: Person Communication page (1 of 2)
This example illustrates the fields and controls on the Person Communication page (1 of 2). You can find definitions for the fields and controls later on this page.
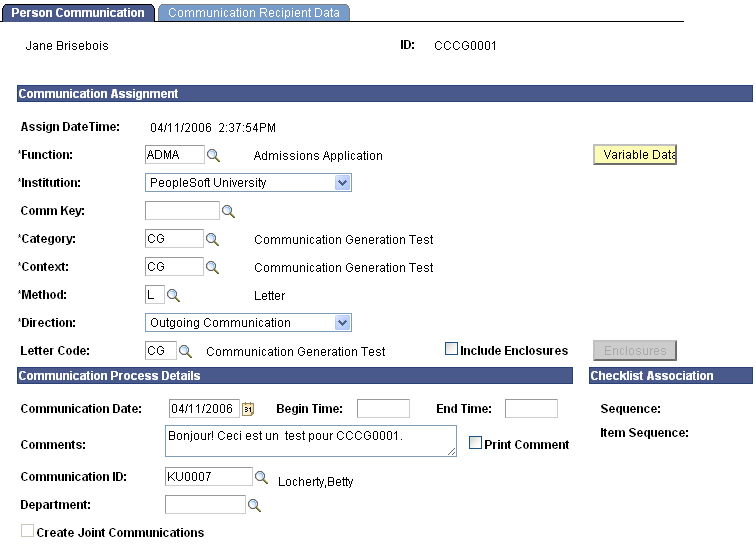
Image: Person Communication page (2 of 2)
This example illustrates the fields and controls on the Person Communication page (2 of 2). You can find definitions for the fields and controls later on this page.
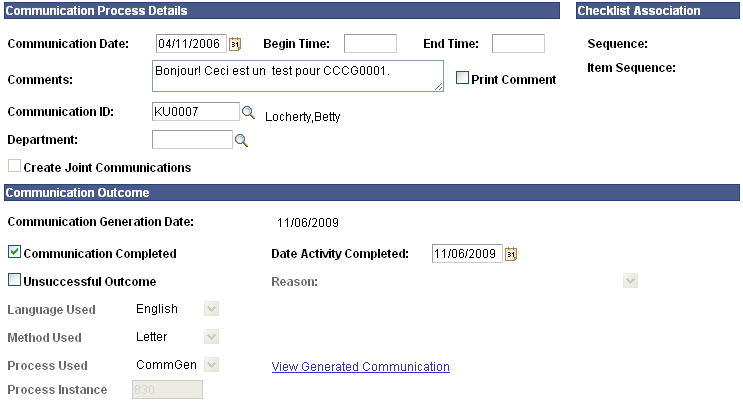
Image: Organization Communication page (1 of 2)
This example illustrates the fields and controls on the Organization Communication page (1 of 2). You can find definitions for the fields and controls later on this page.
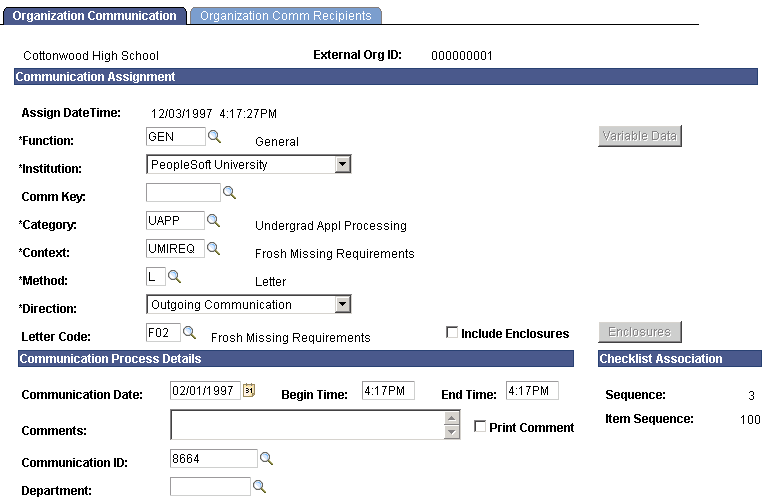
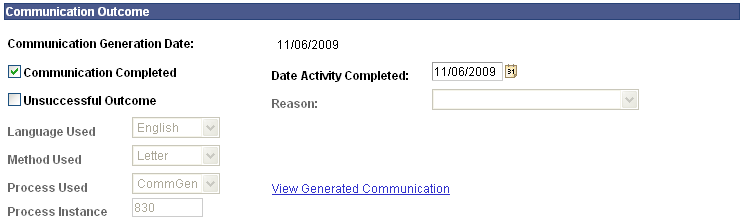
Image: Organization Communication page (2 of 2)
This example illustrates the fields and controls on the Organization Communication page (2 of 2). You can find definitions for the fields and controls later on this page.
Note: If you transferred to this page by clicking the Communication button on another page, the administrative function of the functional area of the first page, along with the academic institution and all the variable data associated with the administrative function, transfers here. If you did not transfer here from a functional area, you must enter the function, institution, and variable data.
Communication Assignment
|
Field or Control |
Definition |
|---|---|
| Function |
Enter the code for the functional area that includes this communication. Available function codes are from the Administrative Functions page. |
| Variable Data |
Click this button to access the Variable Data page, where you can view or enter the required variable data associated with the specified function. |
| Institution |
Specify the institution responsible for this communication. |
| Comm Key (communication speed key) |
Enter the name of the communication speed key that contains the communication category, communication context, method, direction, and letter code for this communication. When you select a communication speed key that is valid in your user preferences, the system displays all the values for you. If you do not use a valid communication speed key, you must enter the category, context, method, direction, and letter code values manually. |
| Category |
Enter the category code for this communication. Available category codes are from the Communication Categories page. |
| Context |
Enter the context code for this communication. Available context codes are from the Communication Contexts page. |
| Method |
Enter the method for this communication. Only the methods associated with the specific context on the Communication Contexts page are available. Note: The method selected on the Communication Generation process run control component overrides the method that you enter on the assignment component. |
| Direction |
Select the direction for this communication. Only the directions associated with the specific context on the Communication Contexts page are available from the prompt list. |
| Letter Code |
The code, from the Standard Letter Table CS component, for this communication. The letter codes available are those associated with the context and function selected for this communication. |
| Include Enclosures |
If the selected letter code represents a letter that is set up to include enclosures, the system automatically selects this check box for you. You can then click the Enclosures button to review, add, or delete the set enclosures. If the letter is not set up to include enclosures, you can manually select this check box to include enclosures and click the Enclosures button to add the desired enclosures. |
| Enclosures |
This button is available when the Include Enclosures check box is selected. Click to access the Communication Enclosure page, where you can review, add, or delete enclosures. |
Communication Process Details
|
Field or Control |
Definition |
|---|---|
| Communication Date |
The default communication date is the system's current date. You can override this date. Enter the date on which the communication should be processed. For example, you might assign a communication today, but want the communication to be processed two weeks from today. Override the default date and enter the date two weeks from now. The extract processes for both Letter Generation and Communication Generation look at this date to know when to generate the communication. |
| Begin Time and End Time |
Enter the times when the communication begins and ends. These times are helpful for telephone or in person communications. |
| Comments |
Enter comments to further identify or describe the communication for this individual. If comments are associated with the communication speed key, the system automatically displays them here. You can change these comments or delete them. |
| Print Comment |
Select this check box to print comments on the communication. |
| Communication ID |
Enter the ID of the staff person who communicated with or is initiating this communication with the individual. |
| Department |
(Optional) Enter the department within your institution that is responsible for assigning this communication. Available departments are from the Department Profile page. |
| Create Joint Communications |
This check box is available only if the individual to whom you are assigning the communication has a joint relationship on the Relationships component and if the letter code on the Standard Letters page is set to allow joint communications. When available, select this check box to address the communication jointly to this individual and the related individual identified on the Relationships page. |
Checklist Association
The system automatically populates the fields in this group box only when the communication is created as part of a checklist.
|
Field or Control |
Definition |
|---|---|
| Sequence |
The checklist sequence, from the Checklists page. |
| Item Sequence |
The checklist item sequence number, from the Checklists page, that created this communication. |
Communication Outcome
When you run either the Letter Generation process or the Communication Generation process, the system automatically completes the fields in this group box to indicate the outcome of the communication, at which point the fields become uneditable.
If you do not use either of the processes and you want to track the communication outcome, you must manually enter the appropriate values in the fields.
|
Field or Control |
Definition |
|---|---|
| Communication Generated Date |
The system displays the date and time when the process generated the communication. For the Letter Generation process this is the Update Communication Letter Printed Date With from the run control page. For the Communication Generation process this is the Update Communication Generation Date With from the run control page. |
| Communication Completed |
Select the check box to indicate that the communication was generated. For example, the communication is complete if the phone call was made or if the letter was generated. The Letter Generation and Communication Generation processes automatically mark the communication complete so that the process will not select the ID again for the same communication. On the run control pages for both processes, you can set the process to not mark the communication complete if the ID is missing critical data. Administrative users can add the missing critical data (for example, a missing address) and the process will select the ID again for processing. See Using the Letter Generation Process. See Using the Communication Generation Process. If you are using a communication speed key, the system might select this check box for you, depending on information associated with that Comm Key. |
| Date Activity Completed |
Enter the date when completing the communication. Letter Generation and Communication generation processes populates this date with the Update Communication Completed Date With date from their respective run control page. You can manually override this date. Note: When you update the status of a communication that is related to a checklist item, the system displays a message reminding you to also update the status of the checklist item. |
| Unsuccessful Outcome |
Select this check box to indicate that the communication was unsuccessful. For example, if no one answered the phone or the letter was returned as undeliverable. If the Letter Generation or Communication Generation process was used, the process selects this check box to indicate that the process was unable to successfully extract data for this communication. The Communication Generation process also selects this check box if the ID was set to receive an email but no email address was found, and if no organization recipient was found when generating an organization communication. If you are using a communication speed key, the system might select this check box for you, depending on information associated with that Comm Key. |
| Reason |
Available when the Unsuccessful Outcome check box is selected. Indicates the reason that the communication was unsuccessful. For example, if a letter that you sent was returned, you might select Returned Mail as the reason that the communication was unsuccessful. The Letter Generation or the Communication Generation processes select Missing Critical Data to indicate that the absence of critical data prevented the extract process from completing for this communication. Values for this field are delivered with the system as translate values. Do not modify the values of Missing Critical Data, Invalid Email Address, and No Org Recipients Found. |
| Language Used and Method Used |
Displays the values used by the generating process. The Letter Generation process uses the base language that was set for your institution at installation and the method of Letter, which is the only method that the process supports. The Communication Generation process uses the language and method specified on the Communication Generation run control component. Also, for communications with individuals, if your institution supports preferences and the Communication Generation process is set to use them, the preferences takes priority over your institution's base language and the method selected during communication assignment. For example, assume that your institution's base language is English and the assigned method isLetter, but an ID's preferred language is French and her preferred method is email. The Communication Generation process is set to use the preferences and upon completion of the process, the outcome Language Used would be French, and the Method Used would be Email. For communications with organizations, the Language Used is your institution's base language, and the Method Used is determined by your selection on the Communication Generation Run Control parameters page. Note: Communication preferences are not supported for organization recipients. |
| Process Used |
Displays the name of the process used to generate the communication: Letter Gen, Comm Gen, or Manual if you manually completed the communication. |
| Process Instance |
Appears only when the communication for the ID is marked Completed by the Letter Generation, Communication Generation, or Envelope and Label Generation process. You cannot change the number. The process instance number is a reference to the communication data used by the process to generate and complete the communication. The process instance number from the Communication Generation process retrieves the data extracted for the letter to ensure data consistency when envelopes and labels are generated by the Envelope and Label process. The process uses the Communication Generation process instance number (on the Envelope and Label Generation Selection Parameters page) to capture the same data. |
| View Generated Communication |
This link appears only when a communication is generated by the Communication Generation process and the Letter Printed Data field in the Standard Letter Table CS component for the letter code used, is set to All or Name/Address Only. If recipients are set for the ID on the Relationships component, this link appears on the Communication Recipient Data page for each recipient for whom the communication was generated. The process uses the language and method assigned to the main ID for the ID's recipients. For organization communications, the link appears on the Organization Comm Recipients page for each recipient for whom the communication was generated. Click to access the View Communication page where you can view the final outputs of the generated communications, including softcopy enclosures. This is useful for history purposes and for reprinting a letter or re-sending an email. Note: The View Generated Communication link appears only for the Communication Generation process. The Letter Generation process saves extracted data inside the Communication Letter Data page for each ID. |
Access the Variable Data page. (For individuals, click the Variable Data button on the Person Communication page. For organizations, click the Variable Data button on the Organization Communication page.)
Image: Variable Data page
This example illustrates the fields and controls on the Variable Data page. You can find definitions for the fields and controls later on this page.
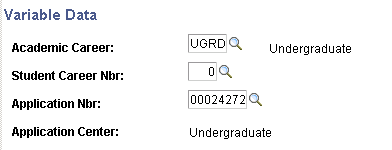
Different fields and data appear on this page based on the administrative function selected on the Person Communication page.
Access the Communication Enclosure page. (For individuals, click the Enclosures button on the Person Communication page. For organizations, click the Enclosures button on the Organization Communication page.)
Image: Communication Enclosure page
This example illustrates the fields and controls on the Communication Enclosure page. You can find definitions for the fields and controls later on this page.
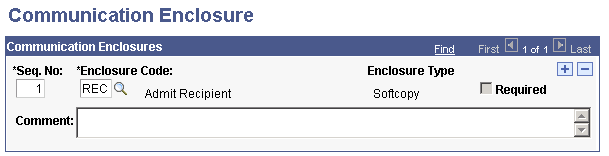
Note: When an enclosure is set as required for a letter on the Standard Letters page, information for that enclosure is visible but not available on the Communication Enclosure page. Thus, users are prevented from deleting an enclosure that your institution has decided is required.
|
Field or Control |
Definition |
|---|---|
| Seq. No (sequence number) |
The system automatically enters the next sequential number, up to 10, for each enclosure that you add. You can override the numbers manually to reorder the list of enclosures for this communication. When you run the letter generation data extract process, the process lists, in the order identified here, up to 10 maximum enclosures on the main letter. |
| Enclosure Code |
Enter the code for the letter that is to be included as an enclosure for this communication. The letter codes available are those associated with the same function that you select for the main letter code. For example, if you select the function ADMA for the main letter code, the Enclosure Code field prompt list displays the letter codes that exist and are associated with the function ADMA on the Standard Letters page. |
| Enclosure Type |
The system automatically displays the type of output (Hardcopy or Softcopy) associated with the selected enclosure letter code. |
| Required |
Select this check box to indicate that the specific enclosure must accompany this communication at all times. |
Access the View Communication page (click the View Generated Communication link that appears on the Person Communication or Communication Recipient Data pages or on the Organization Comm Recipients page when a communication is generated by the Communication Generation process).
Image: View Communication page
This example illustrates the fields and controls on the View Communication page. You can find definitions for the fields and controls later on this page.
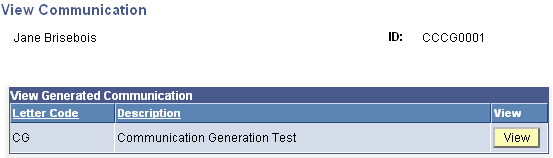
Image: Example view of a generated letter output
This example illustrates the fields and controls on the Example view of a generated letter output. You can find definitions for the fields and controls later on this page.
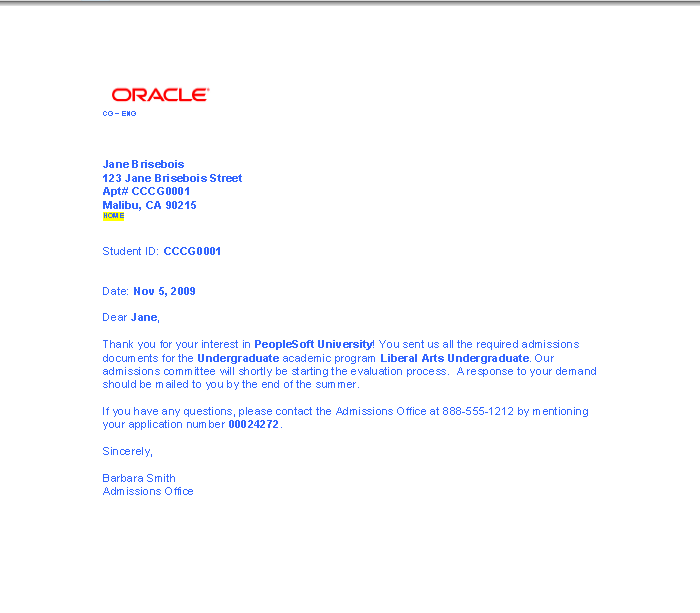
Image: Example view of a generated envelope output
This example illustrates the fields and controls on the Example view of a generated envelope output. You can find definitions for the fields and controls later on this page.
|
Field or Control |
Definition |
|---|---|
| View |
Click to open a new window displaying the .pdf or .rtf file containing the generated letter or email output. Note: The first letter code in the View Generated Communication list is the main letter code of the generated communication. The other letter codes, if any, are the enclosures letter codes. |
| View Envelope |
Appears only when the Create Envelopes output option is selected on the Process Parameters page in the Communication Generation component. Click the link to open a new window displaying the .pdf file containing the generated output for the envelope. Viewing the envelope data can help you gather all information necessary to resend a communication. Note: You can view only the generated envelope, not the label. However you can use the envelope data to recreate the label if necessary. |
Access the Organization Comm Recipients page ().
Image: Organization Comm Recipients page
This example illustrates the fields and controls on the Organization Comm Recipients page. You can find definitions for the fields and controls later on this page.
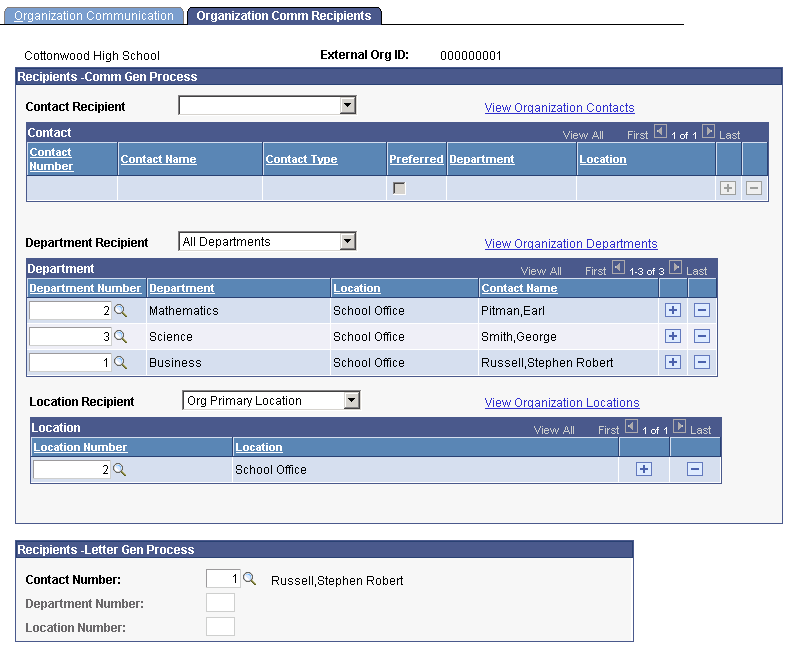
If the letter code used to assign the communication has Communication Generation parameters defined on the Standard Letters Table page, then both the Recipients - Comm Gen Process and Recipients - Letter Gen Process group boxes appear. If, when you assign the communication, you do not know which process will be used to generate the communication, you can either define recipients for both processes, or you can leave the fields blank in which case, the process evaluates default usages to select the recipients.
Recipients - Comm Gen Process
The Communication Generation process will extract data for multiple recipients including contacts, departments, locations or any combination of those.
The system displays values in the Contact, Department, and Recipient group boxes based on the Contact Recipient, Department Recipient, and Location Recipient values that you enter.
The fields are enterable only when Custom List is selected. If you do not know who should receive the communication for an organization, do not select any recipients. The Communication Generation process will evaluate the value entered in the Org Communication Usage group box in the run control component. If the process does not find recipients based on the usage, it selects the Unsuccessful Outcome check box and displays the reason No Org Recip Found (no organization recipient found).
After the Communication Generation process runs, each group box becomes unavailable and lists who in that group was set to receive the communication. The system displays a View generated communication link next to each recipient for whom the output was generated. Click to access the Communication View page where you can launch a window displaying the final output as it was addressed to that recipient.
If you select All Departments, the system displays all the departments for the organization in the Recipients - Comm Gen Process group box as of that date. For example, if you run the process 2 weeks later and 3 more departments were added, the process extracts data for all departments including those 3 and the group box lists 3 more department names than before.
|
Field or Control |
Definition |
|---|---|
| Contact Recipient |
Enter the type of contact that should receive this communication. The available values are: (Blank), All Contacts, Custom List, Org Preferred Contact, and Org Primary Contact. These are translate values and should not be modified. |
| View Organization Contacts |
Click to access the Organization Contacts Summary page, where you can view all the contacts for this organization by contact type to determine which contacts should receive this communication. |
| Contact Number and Preferred |
Enter the number of the specific recipient contact. The system displays the contact's name, type, location, and department. If the contact is set as the preferred contact on the Contact Summary page for the organization, the system selects the Preferred check box. See Creating Organization Records, “Active Contacts.” |
| Department Recipient |
Enter the departments whose contacts should receive this communication. The available values are: (Blank), All Departments, Custom List, and Org Primary Department. These are translate values and should not be modified. |
| View Organization Departments |
Click to access the Organization Department Summary page, where you can view all the departments and their contacts for this organization to determine which contacts should receive this communication. |
| Department Number |
Enter the number of the specific recipient department. The system displays the department and location names from the Organization Departments page See Creating Organization Records, “Active Departments.” |
| Location Recipient |
Enter the location whose contacts should receive this communication. The available values are: (Blank), All Locations, Custom List, and Org Primary Location.These are translate values and should not be modified. |
| View Organization Locations |
Click to access the Organization Location Summary page, where you can view locations for this organization to determine which contacts to select as recipients for this communication. |
| Location Number |
Enter the number of the specific recipient location. The location information comes from the Location Summary page for the organization. See Creating Organization Records, “Active Locations.” |
Recipients - Letter Gen Process
For the Letter Generation process, you can identify the recipient for the organization if you know it, or you can leave the fields blank, in which case the process evaluates default usages to select the recipient for you.
|
Field or Control |
Definition |
|---|---|
| Contact Number |
Enter the contact number of the person at the organization who should receive this communication. Available IDs are from the Organization Contacts page. |
| Department Number |
Enter the number of the department at the organization whose contact should receive this communication. Available departments are from the Organization Departments page. |
| Location Number |
Enter the number of the location to use for this organization. Available locations are from the Organization Locations page. |