To install the Corente Gateway Software on Windows Server 2012 R2 Hyper-V, complete the following steps:
Begin by downloading the new Corente Virtual Services Gateway’s configuration file to your computer’s hard drive via App Net Manager. Copy the
org.xmlfile to a virtual floppy image. This can be done using WinImage or another similar tool.Next, open Hyper-V Manager and create a new Virtual Machine. This will open a wizard that will guide you through the steps of creating a new VM. After specifying the name and location of your new Corente Virtual Services Gateway VM, complete the next screens as follows:
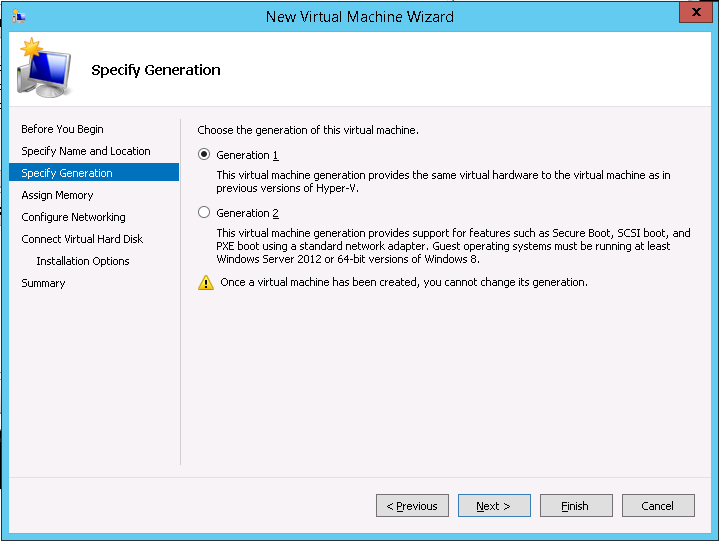
Specify Generation: Select Generation 1 and click Next.
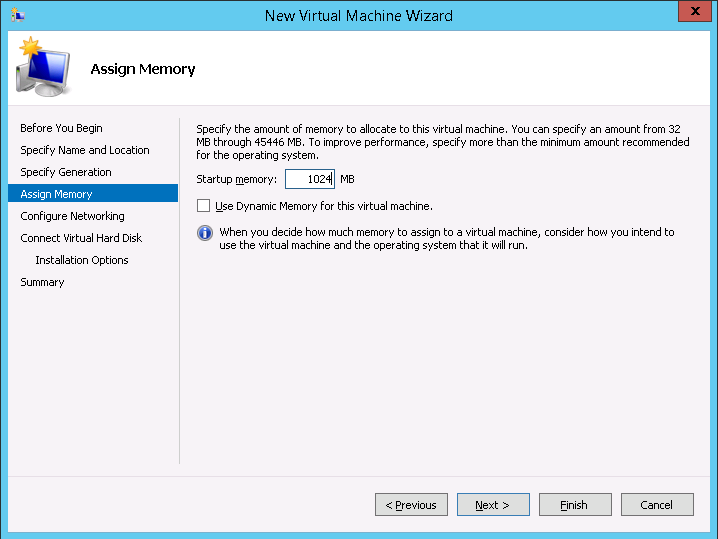
Assign Memory: Allocate 1 GB for the VM’s memory and click Next.
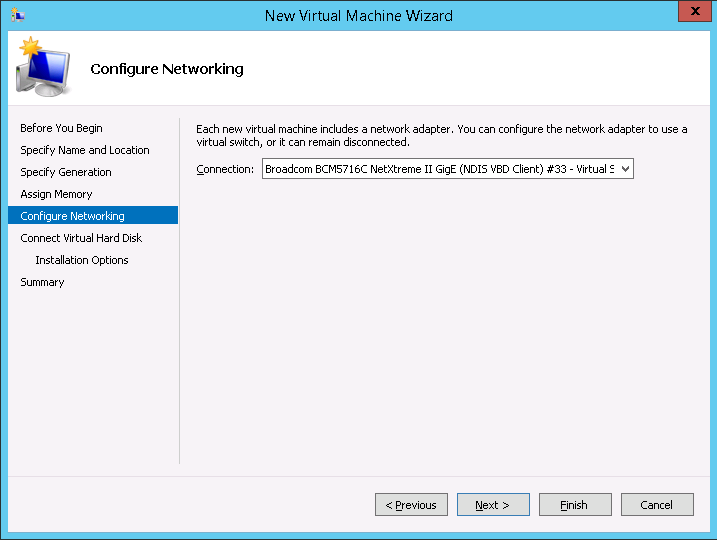
Configure Networking: Select appropiate network adapter/s and click Next.
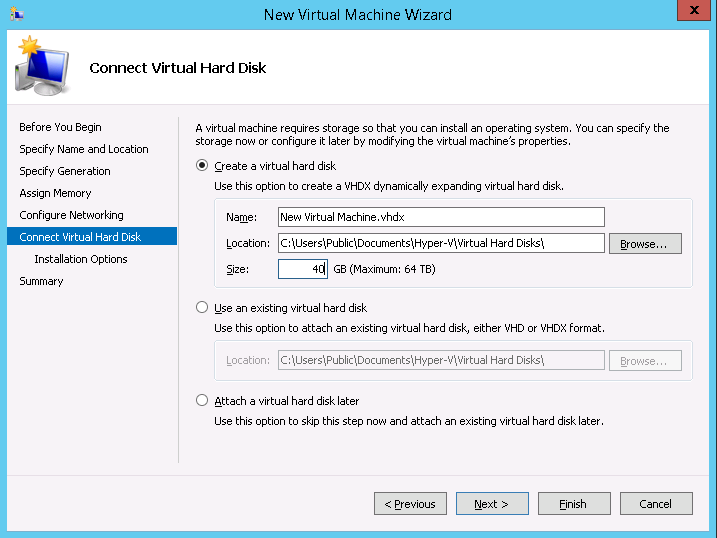
Connect Virtual Hard Disk: Select Create a Virtual Hard Disk and provide it with a name. If you would like, change the default path where the disk will be stored. Allocate 40 GB to the hard disk and click Next.
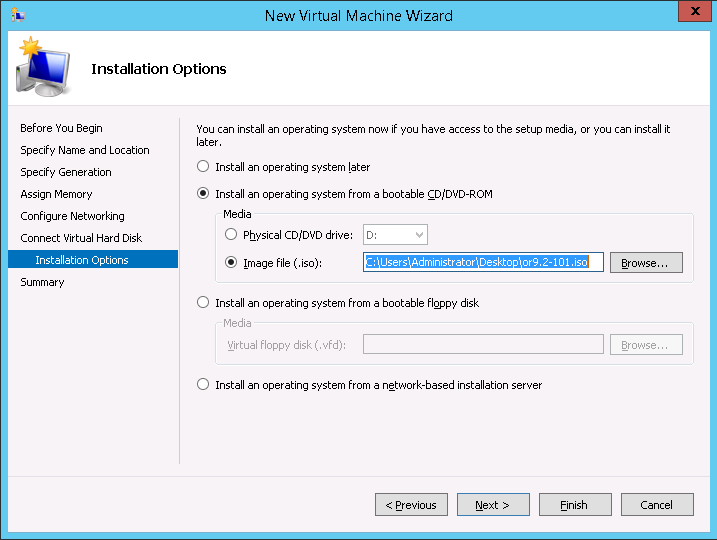
Installation Options: Choose Install an operating system from a boot CD/DVD-ROM. Under Media, select Image file (
.iso). Browse or enter the path to the Corente Gateway Software.isofile that you downloaded to your hard drive. Click Finish.
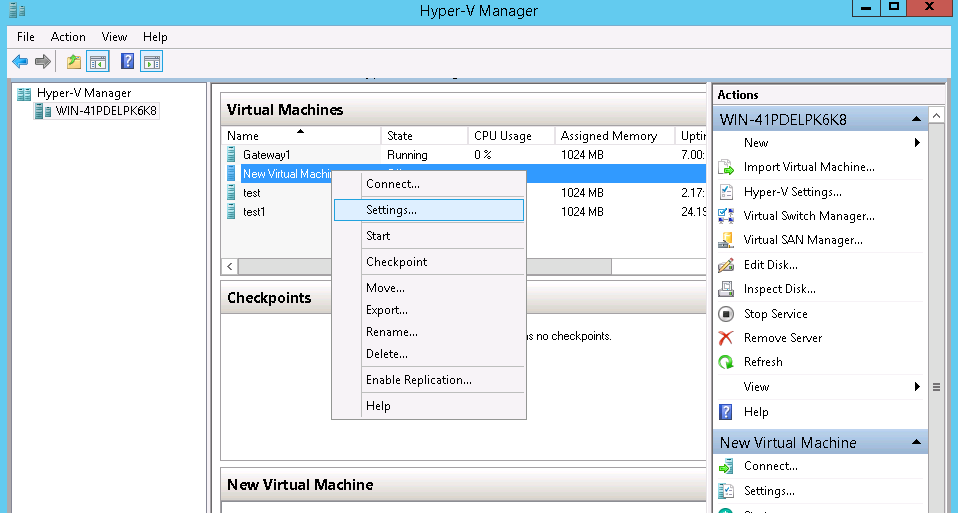
Your new VM has been created. Edit its settings by right-clicking its name under the Virtual Machines heading and selecting Settings….
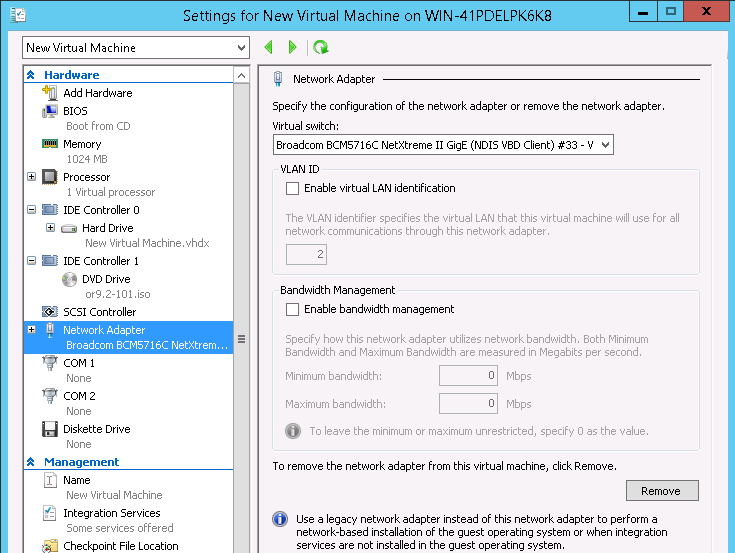
On the left side of the window that is displayed, select Network Adapter. On the screen that is displayed, click the Remove button to remove the Network Adapter.
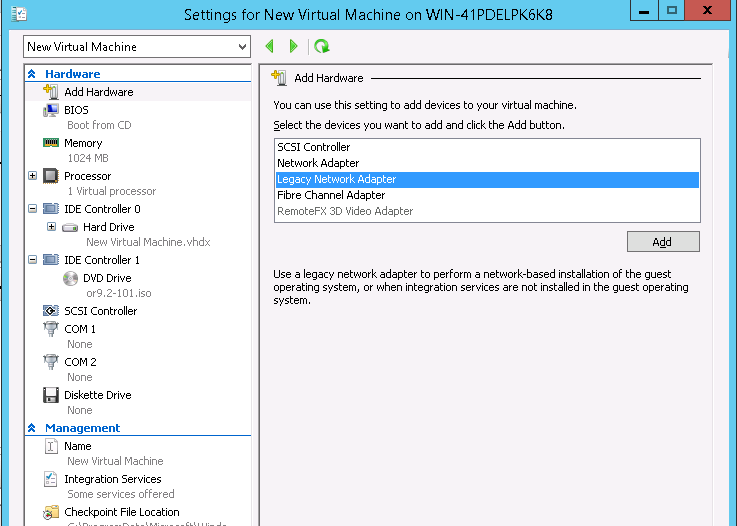
Now select Add Hardware on the right side of the window. Select Legacy Network Adapter from the list and click Add. Make sure Local Area Connection – Virtual Network is selected when you add.
If you are creating a VM in the Inline configuration, repeat step 5 to add a second Legacy Network Adapter to the VM. (Peer configuration uses one adapter; Inline configuration uses two.)
Select OK when you are done to save your changes.
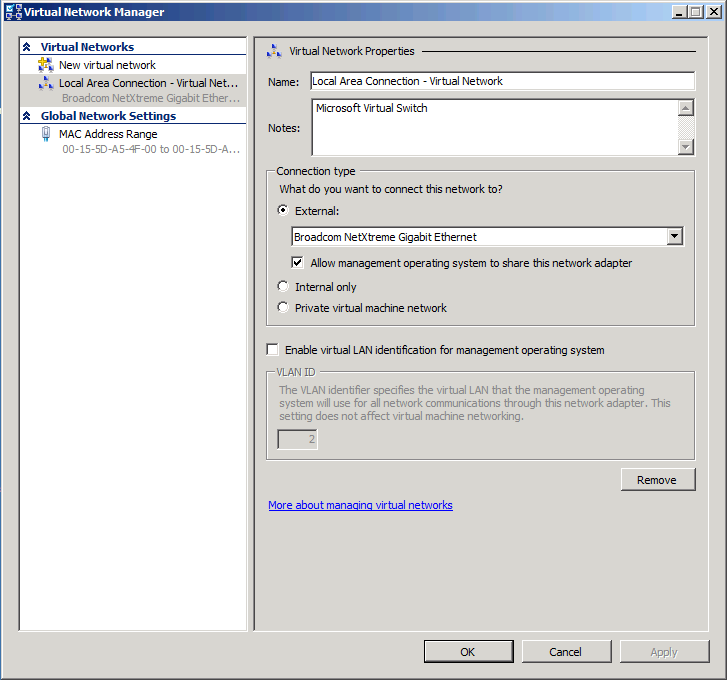
When you are finished adding the network adapter(s), edit the Hyper-V Virtual Network Manager Settings. On the left side of the window that is displayed, select Local Area Connection – Virtual Network. On the screen that is displayed, under the Connection Type heading, select External and then select the desired physical interface (repeat for all NICs). If you added a second legacy network adapter (for an Inline configuration), repeat step 6 to bind that adapter to the appropriate physical interface. Click OK when you are finished.
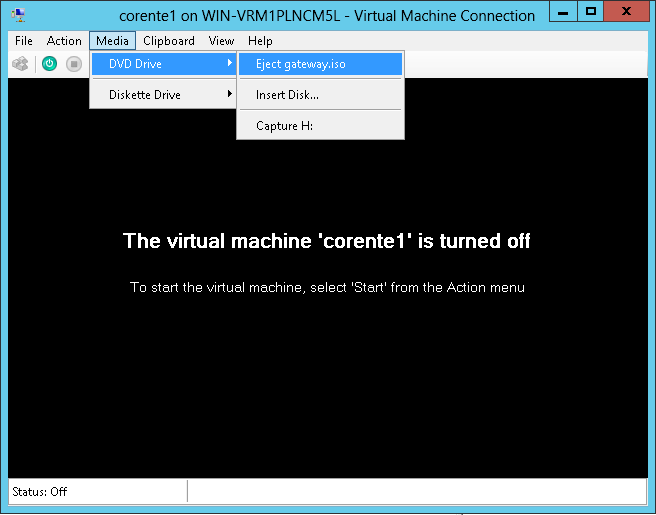
Finally, install the Corente Gateway Software. Begin by bringing up the console for the Corente virtual machine. Right-click the name of the VM and select Connect….
On the console, make sure that the
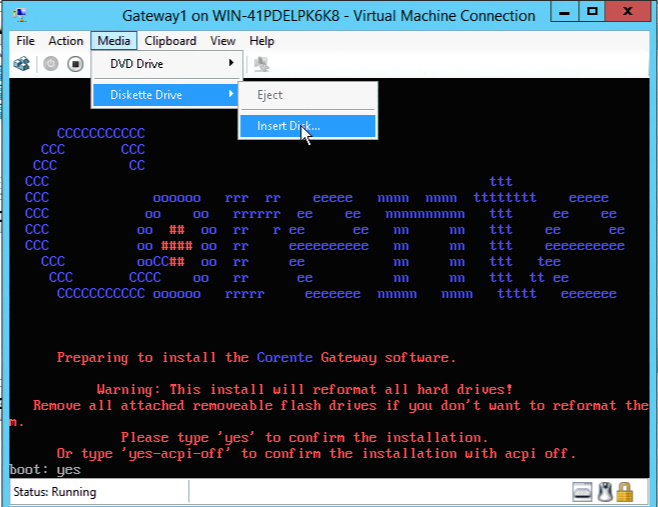
.isofile for the Corente Gateway Software is attached and set as the virtual disc in the virtual machine’s CD drive. Select Media from the options at the top of the window, then highlight DVD Drive. If there is no option to eject the Corente Gateway Software.isofile, then select Insert Disk to point to the location of the.isofile.Next, make sure that the floppy image is not connected. Select Media from the options at the top of the window, then highlight Diskette Drive. There should be no disk listed.
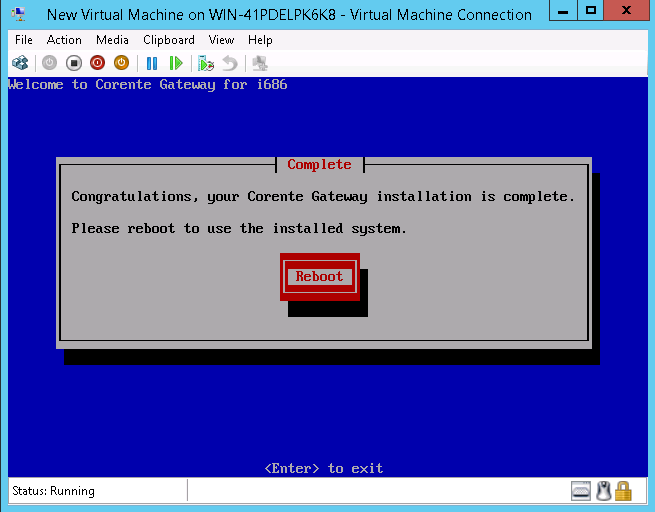
Power on the virtual machine and proceed with the installation of the Corente Gateway Software, which will start automatically.
Hit Enter to reboot when prompted.
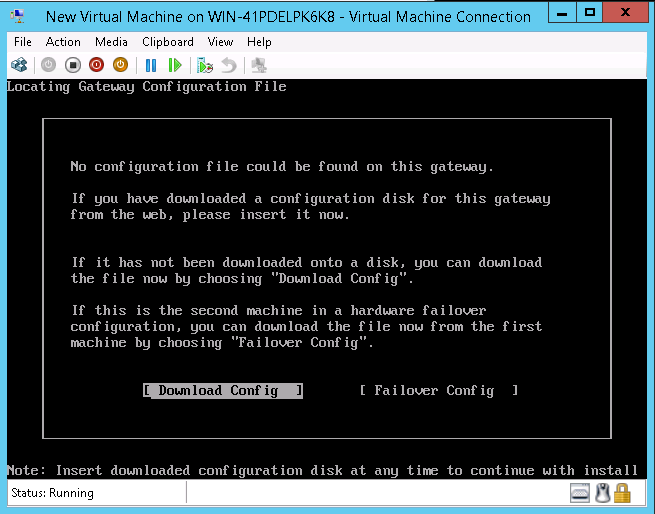
Once the VM has booted, you will be prompted for a configuration file. Select Media from the options at the top of the window, then highlight Diskette Drive, then select Insert Disk. Point to the virtual floppy image containing the new gateway’s
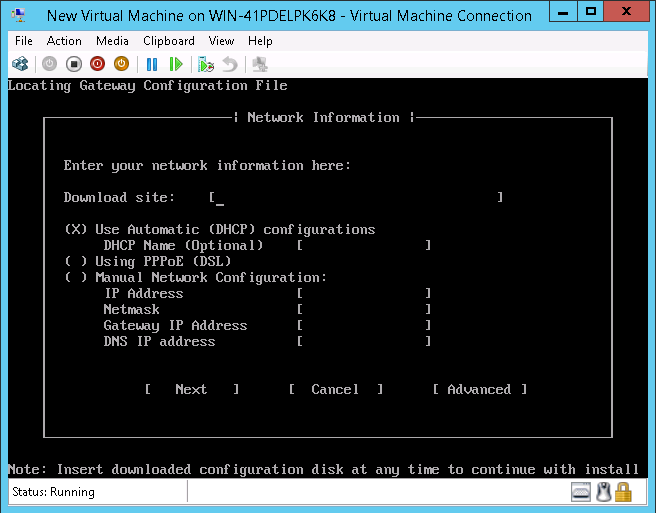
org.xmlconfiguration file that you downloaded to your hard drive in Step 1.Complete the network information on this screen. For the Download site, enter www.corente.com. Select Next and hit Enter.
Once the configuration file has been installed, eject the virtual floppy.