
This option is used when the customer themselves will order their own hardware, install the software, load the personality, and activate the new Corente Virtual Services Gateway directly at their own site.
The customer will order hardware for the site from the hardware provider. The hardware should be ordered as determined in the planning phase, based on the specifications for the site.
The customer should have the hardware delivered directly to the customer site.
After you have created your new Locations in App Net Manager (or App Net Manager Lite), the personality file for your new Location has been created, but has not yet been installed on your Location hardware. A new Corente Virtual Services Gateway requires two files: the Location software and the Location personality file. Before you can install the personality file, you must install the Corente software. Follow the instructions in this section to obtain the software and then install this software onto each piece of hardware.
To begin, you must decide how to load this software onto each machine. You can perform either a USB Flash Drive Installation or a CD Installation.
USB Flash Drive Installation: This method allows you to create a new Location gateway using a USB flash drive. You must download the Corente software onto a USB flash drive and then boot the Location gateway off of the drive.
CD Installation: You can also perform installation using a CD. You will use an
.isoimage to burn your Corente Virtual Services Gateway Software CD.
To begin USB Flash Drive Installation, you must create the bootable USB flash drive that will install the Corente Virtual Services Gateway software onto your new Location gateway.
To create this bootable flash drive:
Prepare a portable USB flash drive that uses the FAT format with 100 MB or more of free space.
Access the Administration Homepage (http://www.corente.com/web) and click the USB Flash Drive Installation hyperlink. Download the
.zipfile to your hard disk. The duration of the download depends upon the speed of your Internet connection.When the
.zipfile has downloaded, extract the.exefile.Double-click the
.exefile to open the USB flash drive installer. Click Next to move through the screens and create the bootable USB flash drive.When prompted, insert your flash drive into a USB port on your computer. The installer will automatically detect the removable drive on which to install the bootable USB flash drive files.
WarningMAKE SURE THIS IS THE CORRECT DRIVE! You could damage your system if the installer loads the files onto your hard drive.
Once the installer has completed, you can use this bootable USB flash drive to install a new Location.
NoteIf you are using Microsoft Windows Vista, Windows 7, or Windows 8 on your computer and User Account Control (UAC) is enabled, when the installer has completed, you may receive the following error message: "This program might not have installed correctly." Ignore this message. The bootable USB flash drive has been created successfully. Select "The program installed correctly."
To begin CD Installation, you must create the CD that will install the Corente Virtual Services Gateway software onto your new Location gateway.
To create this CD:
Access the Administration Homepage (http://www.corente.com/web) and click the For CD Installation hyperlink.
Download the
.isofile that appears in this directory.Burn this CD image onto a blank CD using your preferred CD burning software.
After creating the media you will use to load the Corente software onto the hardware, you can then install the software. This section outlines the procedures for both CD installation and USB flash drive installation.
Corente Virtual Services Gateways do not need to operate day-to-day with a monitor or keyboard. However, when you install the software and personality file on your new Location gateway, you will need to monitor the process in order to enter commands and make certain that it succeeds.
All installation messages can be output to a monitor. You will need to attach a monitor and keyboard to your new Location gateway before starting the installation process.
To install the software using a Corente Virtual Services Gateway Software USB flash drive, you must change the BIOS of the Location gateway server so that the USB Port is first in the boot order. (This may require you to boot the Location gateway without the USB flash drive and, once it has finished starting up, insert the USB flash drive. When the server detects the drive, you will be able to set the USB port as the first boot drive.)
Complete the following steps:
Insert the Corente Virtual Services Gateway bootable USB flash drive into one of the server’s USB ports and boot the server.
The software will load and request a reboot. Eject the USB flash drive.
Once the server has booted, the software will be installed and you will be prompted for the Location gateway’s personality file.
To install the software using a Corente Virtual Services Gateway Software CD, you must change the BIOS of the server so that the boot order is:
CDROM, C:Drive, Floppy Drive
Complete the following steps:
Insert the Corente Virtual Services Gateway Software CD into the server's CD-ROM drive and boot the server.
The software will load and request a reboot.
Once the server has booted, the software will be installed and you will be prompted for the Location gateway's personality file.
To install the personality file, you can use Zero Touch installation, download the file directly to the Location gateway from the Internet, download the file to a floppy disk or USB flash drive via App Net Manager and then load it onto the Location gateway.
You can install a new Corente Gateway or Corente Gateway – Virtual Edition simply by placing a server loaded with the Corente software on the network and turning it on using Zero Touch Installation. For information about configuring Zero Touch Installation, see the Corente Services Policy Definition and Provisioning manual.
If you are using a static IP address, PPPOE, a modem, or a proxy server to connect the Location gateway to the Internet, then you must download its personality file using another option. Note that these options may be used for normal operation of the Location gateway, however they cannot be used to download the configuration via Zero Touch Installation.
When Zero Touch Installation is enabled, the configuration file is downloaded upon the first reboot after software installation. If there is no configuration file found on a floppy, a USB, or on the hard drive, the new Location gateway will attempt to acquire a dynamic IP address via DHCP. To utilize Zero Touch Installation, the Location gateway must be able to connect to the Internet, and the DNS server must be able to resolve www.corente.com to the Corente Services Control Point (SCP). Communication between the new gateway and the Corente SCP is secured using the HTTPS protocol.
If you cannot use Zero Touch Installation, downloading the personality file directly to the Location gateway is often more convenient than obtaining a floppy disk or USB flash drive and downloading the file to it, especially if you are installing multiple Location gateways in multiple locations.
If you are using PPPoE with a username or password longer than 30 characters or a modem to connect the Location gateway to the Internet, then you must download its personality file to a floppy disk or USB flash drive. You cannot download the file directly to that Location gateway during installation.
To download the personality file directly to the Location gateway:
After starting up the new Corente Virtual Services Gateway, you will be asked if you would like to obtain the personality file over the network. Select the Network Setup option and answer the questions when prompted.
To scroll through the options on the installation screens, use the keyboard's arrow keys. Hit Enter to make your selections. If prompted for additional information after making your selection, input that information.
You will be asked to specify the Location gateway's Internet connection settings.
To protect the download via SSL encryption, you will be prompted to login. You must use a login that is internal to this domain and therefore can be used to access App Net Manager Lite for this Location gateway (i.e., the login created at registration or a local login created for this domain in App Net Manager – not an external admin login).
The personality file will now be downloaded to the Location gateway. The duration of this download will depend on the speed of the Internet connection.
After the personality file has loaded onto the Location gateway, the Location gateway will attempt to contact the Corente SCP for activation. You must make sure that the Location gateway is using the same addressing information that was specified for it in the Location Wizard (or on the Network tab of its Location form). The Location gateway will not be able to activate until its addressing and LAN positioning corresponds to the information that has been specified for it in its personality file.
If you do not want to download the personality file directly to the Location gateway, you can transfer the file from App Net Manager Lite to a floppy disk or USB Flash Drive.
To begin, you must prepare a floppy disk or USB flash drive for the personality file.
If you decide to use USB Flash Drive Installation to install the software and have created the bootable USB flash drive, you can download the personality file onto the USB flash drive. This is convenient if you are only installing one new Location gateway at this time; however, when loaded with a personality file, the bootable disks/drive can only be used to create one Location gateway. If you do not want to download the personality file to the first installation disk or the USB flash drive, prepare a separate, DOS-formatted floppy disk or portable USB flash drive in the FAT format.
Access App Net Manager Lite and launch the Download Location Wizard using one of these methods:
On the map, right-click on a Location icon in the Download state (
 ) and select Download Location.
In the domain directory, right-click on a Location icon in the Download state and select Download Location.
Open the File menu, highlight Wizards, and select Download Location.
This will launch the Download Location Wizard that guides you step-by-step through the download process.
The steps for downloading the personality file to a floppy disk or USB flash drive are as follows:
Location Download: Select the Location whose personality you want to download and click Next.
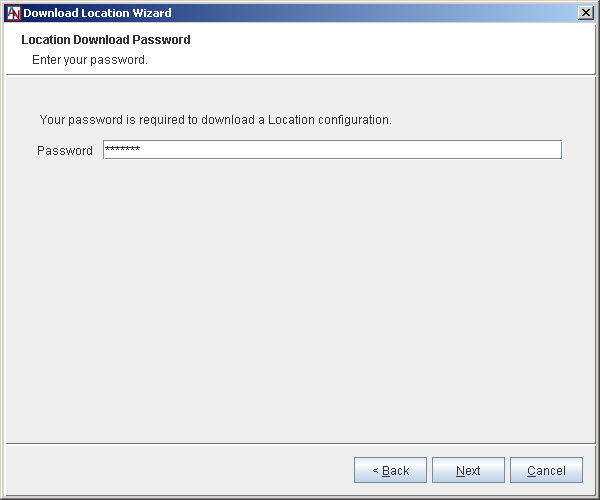
Location Download Password: Enter your administrator password and click Next.
Location Download Type: Select the type of download you would like to perform and click Next.
Choose Download to Directory to download the file to the floppy or flash drive.
Directory Specification: Insert the formatted floppy disk or USB flash drive into the computer that you are currently using.
Browse your system and choose the drive where the floppy or flash drive is located. Click Next.
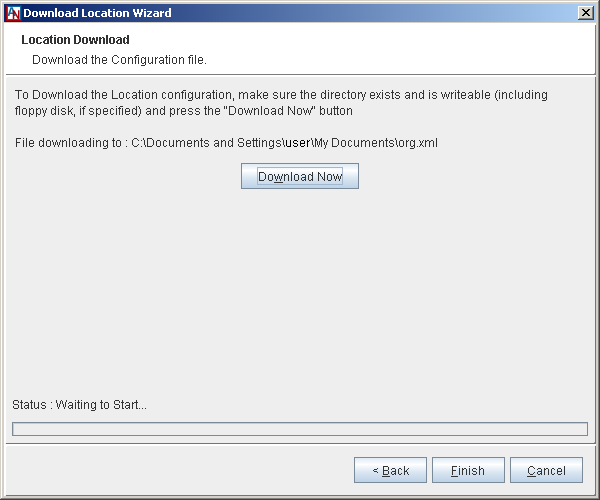
Location Download: Click Download Now. The status bar at the bottom of the screen will indicate progress. The Location gateway's personality file will be downloaded onto the floppy disk or flash drive.
When the download has completed, click Finish to close. You can eject the floppy or flash drive from your computer.
After installing the Corente Virtual Services Gateway Software, you were prompted to install the personality file. Insert the floppy or flash drive you just created into the new Location gateway and boot it (if it is not already on) to install the file.


Keep your floppy disk or flash drive in a secure location
Anyone with access to this disk/drive can create another Location gateway that can masquerade as your Location gateway. This counterfeit Location gateway can then access your application network. Do not compromise your security. Make sure this disk/drive is kept in a safe place.
After the personality file has loaded onto the Location gateway and it has rebooted, the Location gateway will attempt to contact the Corente SCP for activation. Make sure that the Location gateway is using the same addressing information that was specified for it in the Location Wizard (or on the Network tab of its Location form). The Location gateway will not be able to activate until its addressing and LAN positioning corresponds to the information that has been specified for it in its personality file.
In general, you should eject the floppy disk or USB flash drive from the Location gateway after the personality file has been loaded. If you leave the disk/drive in the Location gateway, each time the Location gateway starts, it will ask if it should replace the old personality file with the new one on this disk/drive. However, the default answer is No and the Location gateway will continue start-up after 60 seconds if no answer has been received.
Therefore, if you would like to install a new personality file on the Location gateway at any time, view your Location gateway with a monitor/keyboard connected, insert a new personality file floppy disk or flash drive, and select the Yes option.
Determine which party will deploy the new Corente Virtual Services Gateway into the correct place on the customer LAN.
Once the new Corente Virtual Services Gateway has been correctly installed on the LAN, the Location gateway will automatically authenticate and activate itself with the Corente SCP. Upon successful activation, the policies that were established for this Location gateway will be automatically downloaded onto the hardware and put into use.