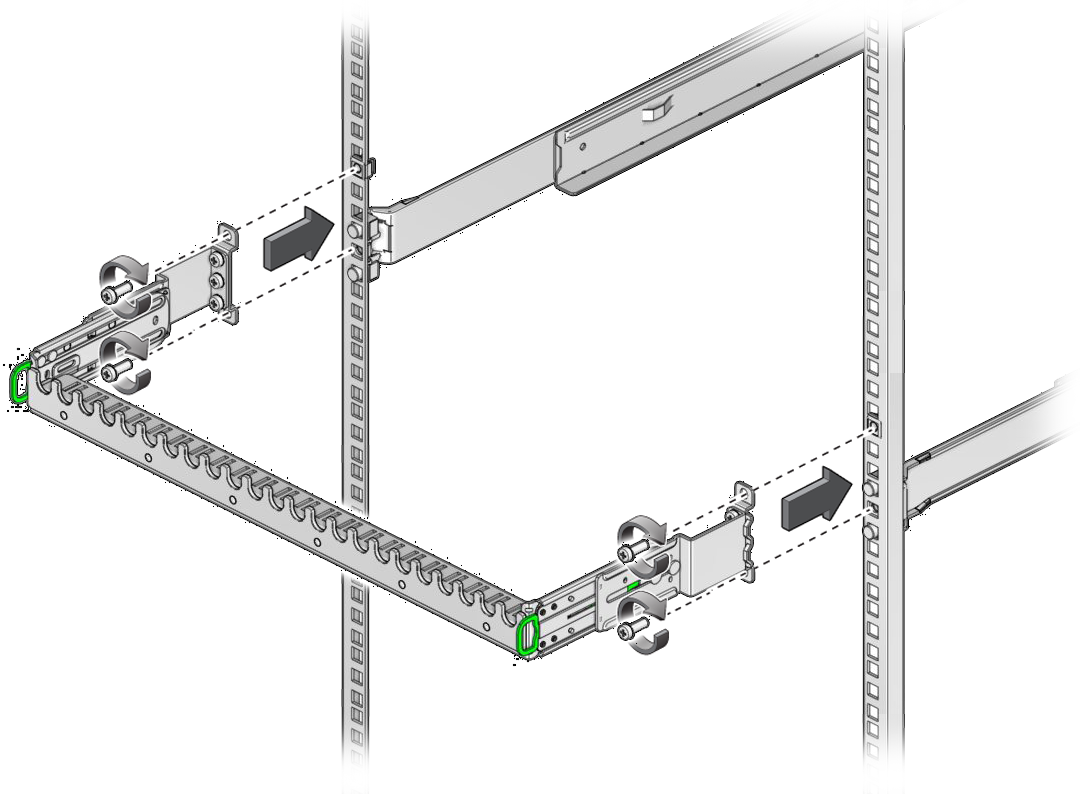
Install the Cable Management Comb
- Identify the prerequisite and subsequent installation tasks that you must perform in conjunction with this task.
-
Orient the upper mounting holes of the cable management comb to where you just
installed the 10-32 cage nuts.

- Using a No. 2 Philips screwdriver, secure the upper mounting holes of the cable management comb to the 10-32 cage nuts with two 10-32 screws.
- Secure the lower mounting holes of the cable management comb to the hole in the end center of the shelf rails with two 10-32 screws.
- Route the power cords and management cables.