Install the Switch
 | Caution - The weight of the switch is such that a lift or two people are used to raise the switch to the shelf rails. |
- Identify the prerequisite and subsequent installation tasks that you must perform in conjunction with this task.
-
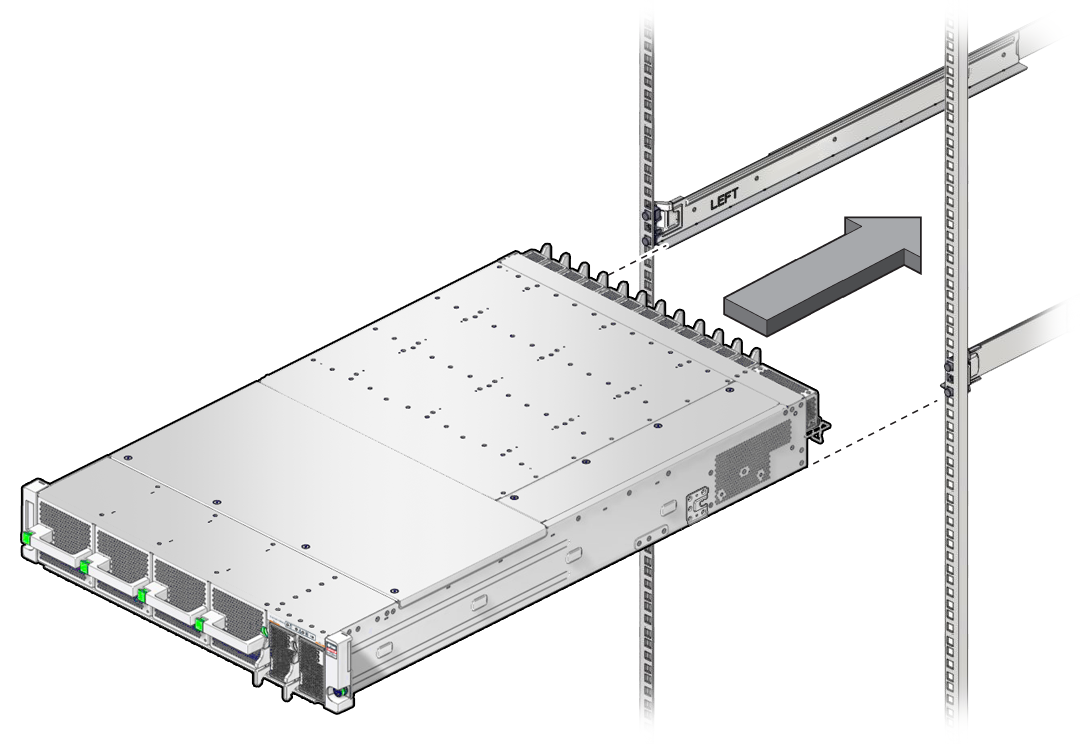
Locate the bracket on each side of the switch.
This bracket will used to correctly seat the switch in the rack.
-
Carefully lift the switch and begin sliding it into the rack, from the front
of the rack rearward.

-
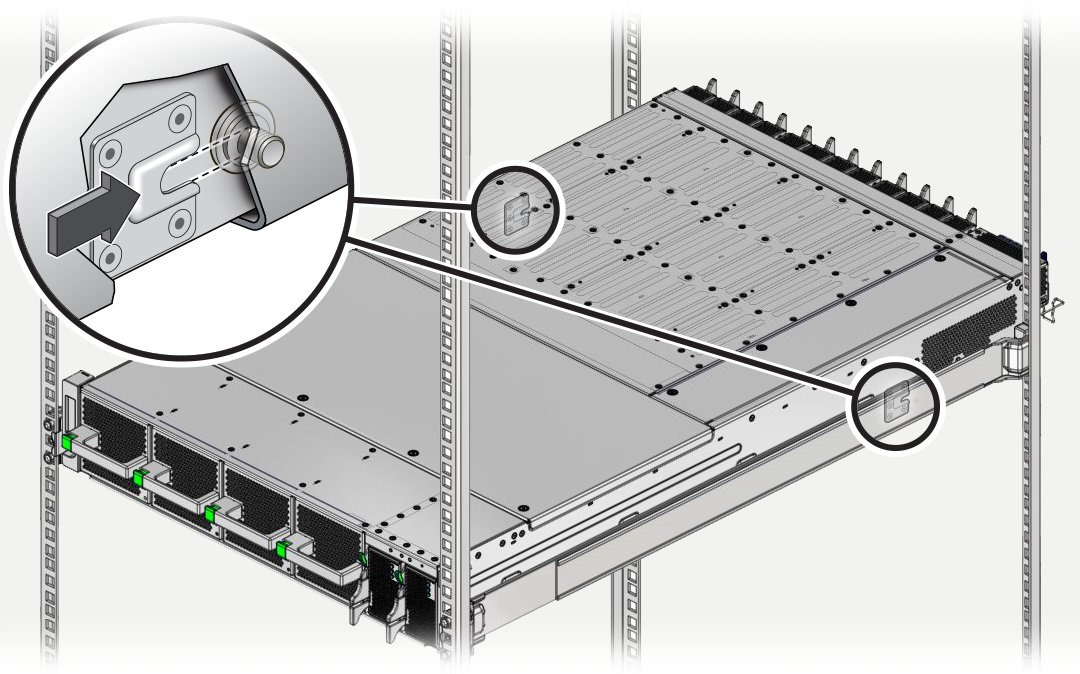
While sliding the switch into the rack, on each side of the switch, make sure
each mushroom screw slips into the slot in its bracket.

-
If the screws are not seated in each bracket's slot, slide the switch out far
enough to realign the brackets and screws, then slide the switch in again.
The switch is correctly installed when you have slid it completely into the rack, and each screw is seated in its bracket.
-
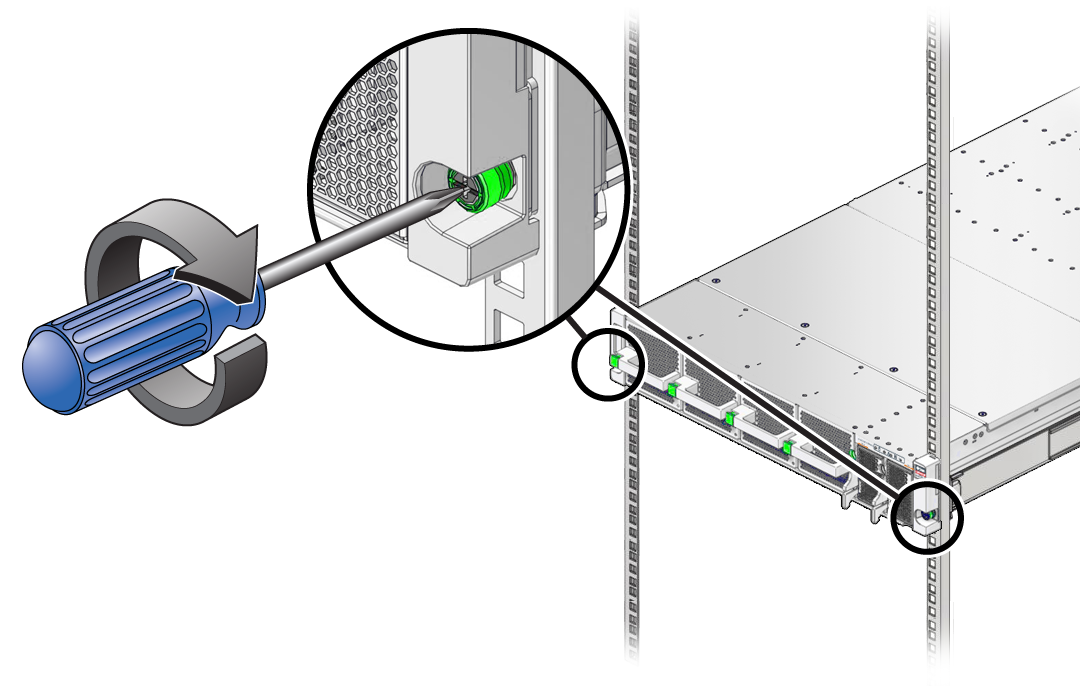
When the chassis is correctly installed, use a No. 2 Phillips screwdriver to
secure the switch chassis to the front rack posts with the captive screws at
each side.

-
Consider your next task.
- If you are installing I/O modules, do that now.
- If you are not installing additional components, go to Step 8.
- Consider your next task.