How to Populate a Project With Existing Users
Use this procedure to add existing users to a newly created project.
- On the left panel of the default screen, choose the Identity > Projects tab.
-
Click Modify Users for the project to which you want to add existing users.
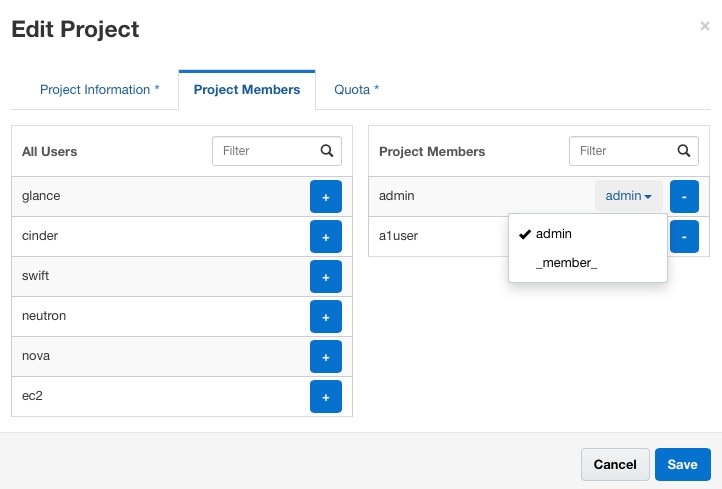
The Edit Project dialog box is displayed.
-
Under the All Users list, click the plus (+) sign to the right of the user name that you want to add to the project.
By default, the added user has a member role on that project.
Note - Do not add these users of the service project to other projects:-
glance
-
cinder
-
swift
-
neutron
-
nova
-
ec2
-
- (Optional)
To modify the role of any user of the project, perform the following steps:
- From the list of project members, open the drop down list for the user whose role you want to change.
-
Select the new role you want to assign the user.
In this sample figure, the Project Members of the current project are a1user and admin. The admin user is granted administrative privileges to the project. You can assign both the member and admin roles to a user.