Install the Rackmount Hardware
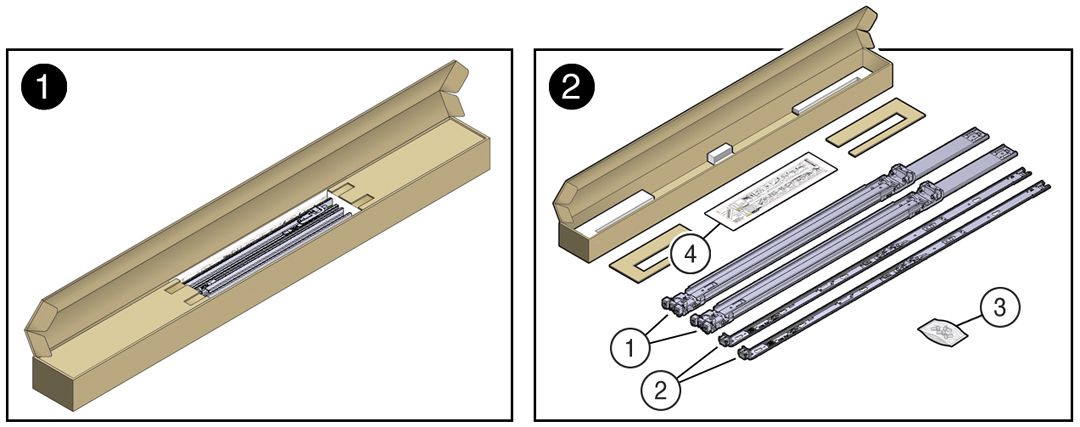
Complete the following task to remove the mounting brackets from the slide rail assemblies before installation.
- Unpack
the slide rails.
The rackmount kit contains two slide rails, two mounting brackets, and optional securing screws.
Note - Refer to the rackmount kit installation card for simplified instructions about installing your server into a 4-post rack, using the slide rail and CMA options. No.Description1Slide rails2Mounting brackets3Four M4 x 5 fine-pitch mounting bracket securing screws (not used)4Installation card
 - Position
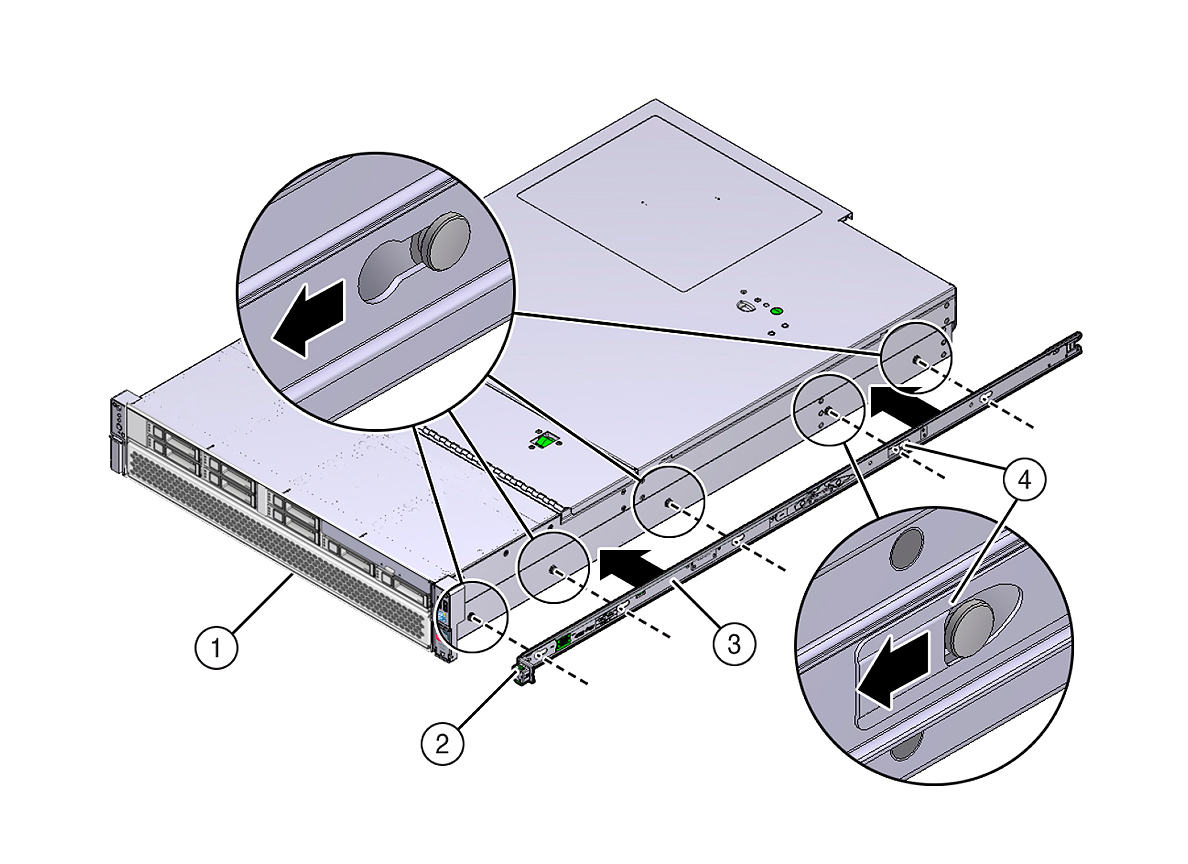
a mounting bracket against the chassis so that the slide rail lock
is at the server front, and the five keyhole openings on the mounting
bracket are aligned with the five locating pins on the side of the
chassis.
 No.Description1Server front2Slide rail lock3Mounting bracket4Mounting bracket clip
 - With the heads of the five chassis locating pins protruding through the five keyhole openings in the mounting bracket, pull the mounting bracket toward the front of the chassis until the mounting bracket clip locks into place with an audible click.
- Verify that the rear locating pin has engaged the mounting bracket clip.
- Repeat Step 2 through Step 4 to install the remaining mounting bracket on the other side of the server.
- Attach slide rail assemblies to the rack.