Install the Server Into the Slide Rail Assemblies
Use this procedure to install the server chassis, with mounting brackets attached, into the slide rail assemblies that are mounted to the rack.
 | Caution - This procedure requires a minimum of two people because of the weight of the server. Attempting this procedure alone could result in equipment damage or personal injury. |
 | Caution - Always load equipment into a rack from the bottom up so that the rack does not become top-heavy and tip over. Extend the rack's antitilt bar to prevent the rack from tipping during equipment installation. |
-
Attach the rackmount hardware to the server and the rack.
See Install the Rackmount Hardware and Attach Slide Rail Assemblies to the Rack.
- Push the slide rails into the slide rail assemblies in the rack as far as possible.
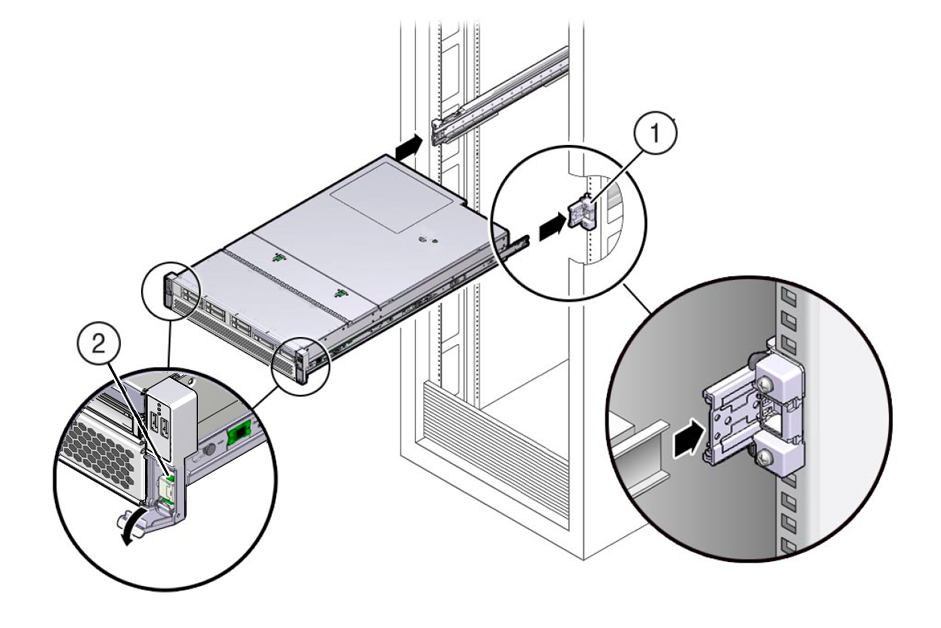
- Position the server so that the rear ends of the mounting brackets are aligned with the slide rail assemblies that are mounted in the rack.
- Insert the mounting brackets into the slide rails, and then push the server into the rack
until the mounting brackets encounter the slide rail stops (approximately 12 inches,
or 30 cm).
 No.Description1Inserting mounting bracket into slide rail2Slide rail release lever
 - Simultaneously pull down and
hold the slide rail release levers on each mounting bracket while
you push the server into the rack.
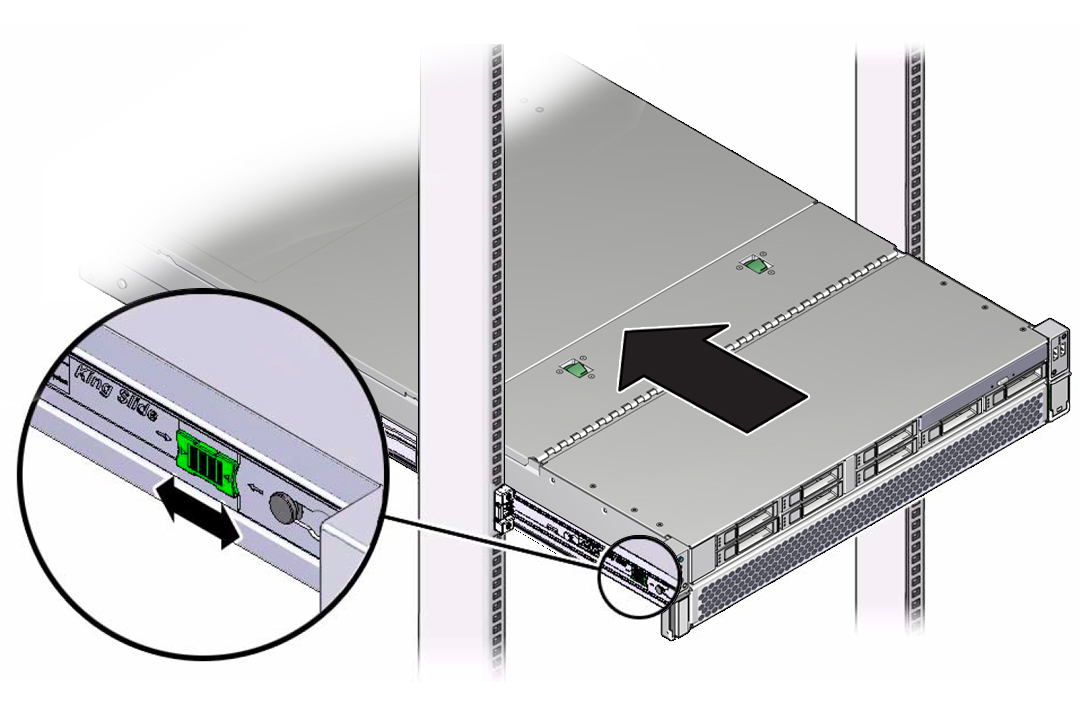
Continue pushing the server into the rack until the slide rail locks (on the front of the mounting brackets) engage the slide rail assemblies.
You hear an audible click when the slide rail locks are engaged.


Caution - Verify that the server is securely mounted in the rack and that the slide rail locks are engaged with the mounting brackets before you install the optional CMA.
-
(Optional) Attach the CMA.
See Prepare the CMA for Installation.
If you are not using the CMA, see Verify Operation of Slide Rails and CMA.