Creating a Project From a Binary File
With a C/C++/Fortran project from a binary file, you can create a project from an existing binary file in multiple ways.
Creating a Project from a Binary File With New Project Wizard
-
Choose File > New Project.
-
Select the C/C++/Fortran category.
-
Select C/C++/Fortran Project from Binary File and click Next.
-
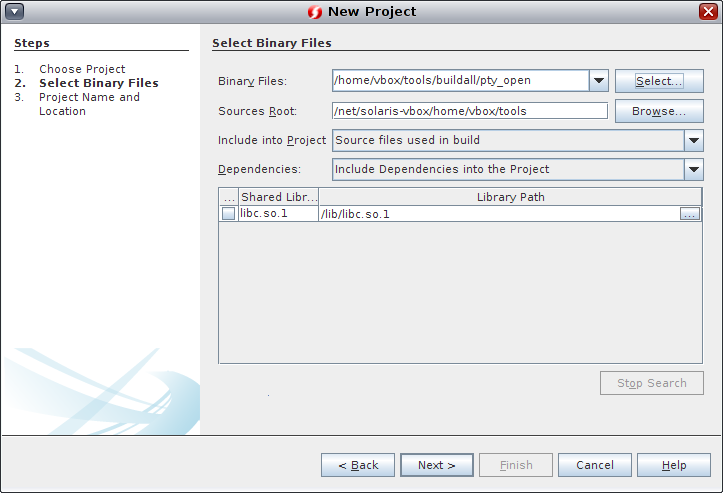
On the Select Binary File page of the New Project wizard, click the Browse button. In the Select Binary File dialog box, navigate to the binary file from which you want to create a project.
The root directory for the source files from which the binary was built is filled in automatically. By default, only the source files from which the binary was built are included in the project. By default, dependencies are included in the project. The shared libraries required by the project are automatically listed.

-
Click Next.
-
On the Project Name and Location page, you can choose the name and location of the project. Click Finish.
Creating a Project from Binary File in Files Window
-
In the Files window, go to the Arguments_1 project and expand the build node all the way down to args.o.
-
Do one of the following to bring up the Create Project wizard:
-
Right-click the args.o file and click Create Project.
-
Drag the args.o file to the source editor.

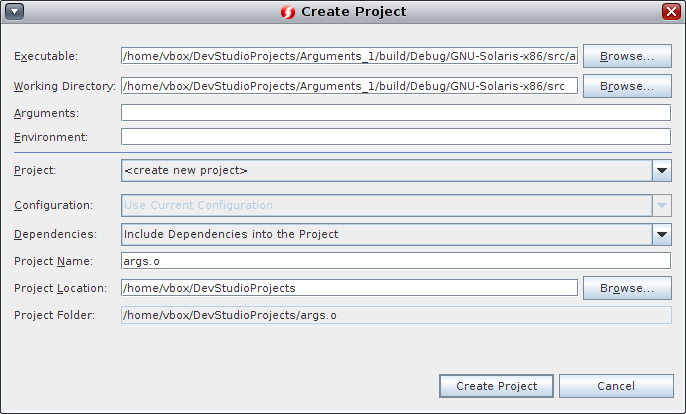
The Create Project wizard pops up, with Executable and Working Directory pre-filled out.
-
-
Input any arguments and environment variables you would like to use when running the project. In the Project drop-down menu, choose <create new project>.
If you click the Create Project button on the bottom right corner, a new project called Args.o will be created in the projects tab.
-
Click cancel.