Setting Properties and Configurations
The following sections describe how to set and manage your properties for both the current project and individual files.
Setting Project Properties
When the project is created, it has two configurations, Debug and Release. A configuration is a collection of settings used for the project, which enables you to easily switch many property settings at once. The Debug configuration builds a version of your application that includes debug information. The Release configuration builds an optimized version.
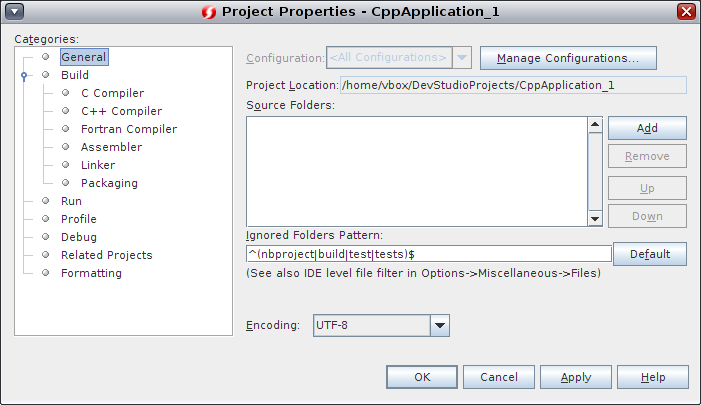
The Project Properties dialog box contains build and configuration information for your project. To open the Project Properties dialog box:
-
Right-click the project node of the CppApplication project and choose Properties.

You can modify the compiler settings and other configuration settings in the Project Properties dialog box by selecting a node in the left panel and modifying the properties in the right panel. Select some of the nodes and property values and notice the properties you can set. When you set General properties, you are setting them in all configurations of the project. When you set Build, Run, or Debug properties, you are setting properties in the currently selected configuration.
Managing Configurations
When a project is created, it has a Debug configuration and a Release configuration. A configuration is a collection of settings used for the project. You can easily switch many settings at once when you select a configuration. The Debug configuration builds a version of your application that includes debug information. The Release configuration builds an optimized version.
Properties changed in the Project Properties dialog box are stored in the makefile for the current configuration. You can edit the default configurations or create new ones.
To create a new configuration:
-
Click the Manage Configurations button in the Project Properties dialog box.
-
In the Configurations dialog box, select the configuration which most closely matches your desired configuration. In this case, select the Release configuration and click the Duplicate button. Then click Rename.
-
In the Rename dialog box, rename the configuration to Performance Release. Click OK.
-
Click OK in the Configurations dialog box.
-
In the Project Properties dialog box, select the C Compiler node in the left panel. Note that the PerformanceRelease configuration is selected in the Configuration drop-down list.
-
In the property sheet in the right panel, change the Development Mode from Release to PerformanceRelease. Click OK.
You have created a new configuration that will compile the application with a different set of options.
Tip - You can also set the active configuration in the IDE's toolbar, or by right-clicking the project node and selecting Set Configuration.
Setting Source File Properties
When you set the project properties for your project, the relevant properties apply to all files in the project. You can set some properties for a specific file.
-
Right-click the newmain.c source file and choose Properties.
-
Click the General node in the Categories panel and see that you can select a different compiler or other tool to build this file. You can also select a checkbox to exclude the file from the build of the currently selected project configuration.
-
Click the C compiler node and note that you can override the project compiler settings and other properties for this file.
-
Cancel the Project Properties dialog box.