
The software described in this documentation is either no longer supported or is in extended support.
Oracle recommends that you upgrade to a current supported release.
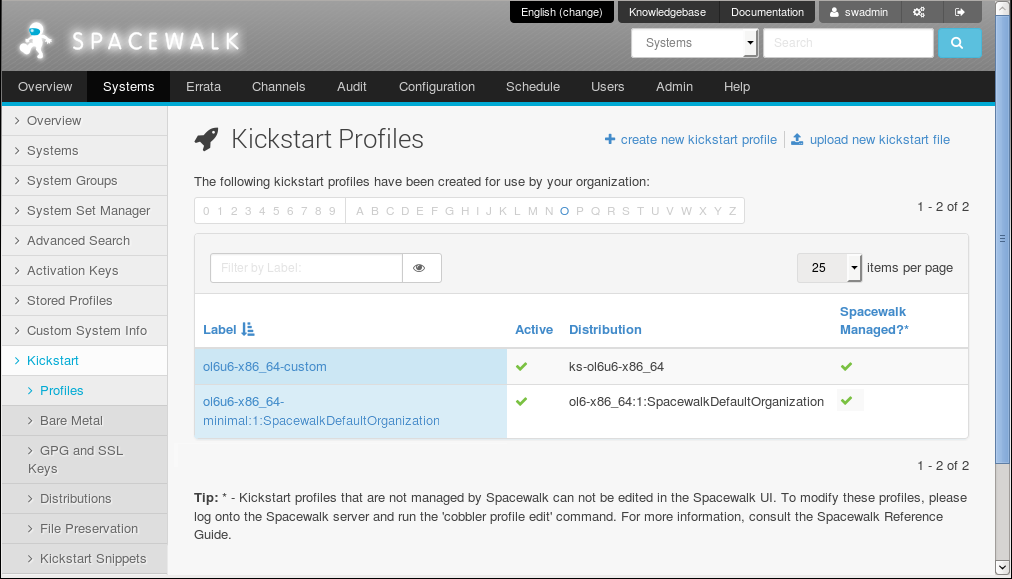
Go to Systems, select Kickstart and then Profiles:
To create a profile that contains a Kickstart file generated by Spacewalk:
Click + create new kickstart profile.
On the Step 1: Create Kickstart Profile page, enter the profile settings in the following fields:
- Label
Enter a label for the profile. For example:
ol6-x86_64-minimal.- Base Channel
Select the base channel with which the distribution is associated. For example:
Oracle Linux 6 (x86_64) Base.- Kickstartable Tree
Select the Kickstart distribution with which the profile is associated. For example:
ol6-x86_64-server.- Virtualization Type
Select the virtualization type.
For Oracle Linux installations on virtual machines that are hosted by Oracle VM or Oracle VM VirtualBox, select None.
For Oracle Linux 6 and Oracle Linux 7 on a KVM guest, select KVM Virtualized Guest.
Click Next.
On the Step 2: Distribution File Location page, click Next to accept the default download location that Spacewalk creates from the Kickstart tree.
On the Step3: Root Password page, enter and verify the root password for newly installed systems, and click Finish to create the profile.
You can now configure the Kickstart profile itself. The following steps describe the changes that are usually required to create a usuable profile.
NoteAt any stage, you can select Kickstart File to view the Kickstart file that Spacewalk would generate from the profile using the saved configuration settings.
Select Kickstart Details to display the Details page:
On the Details page, you can:
Edit the Kickstart label.
Change the virtualization type.
Activate or de-activate the profile.
Configure custom post and pre script logging.
Choose whether to save a copy of the Kickstart configuration to
/rooton an installed system.Select an organization default profile.
Specify installation and post-installation kernel options.
Add a description of the profile.
Click Update Kickstart to save your changes.
Select Operating System and select the check boxes for the child channels that you want to associate with the profile.
NoteTo allow Spacewalk to register the system automatically, select the Spacewalk Client channel.
The Software URL path is the virtual location where Spacewalk hosts the installation packages. It is not a real path in the file system.
Click Update Kickstart to save your changes.
(Optional) Select Variables, define any Kickstart variables that you require, and click Update Variables to save your changes.
Select Advanced Options, modify the Kickstart options, and click Update Kickstart to save your changes.
For more information about the available Kickstart options, see Appendix A, Kickstart Options.
If you intend to install bare-metal systems, select Bare Metal Kickstart and follow the instructions on the Bare Metal Kickstart page, which lists the URL of the Kickstart file that you can use to install bare-metal systems and allows you to define the IP address ranges that are associated with the profile.
Select System Details to display the Details page:
On the Details page, you can:
Choose the default SELinux mode for the installed system.
Enable or disable Spacewalk configuration file management by selecting or deselecting the Enable Spacewalk Configuration Management check box.
NoteYou must also include the
rhncfg,rhncfg-actions, andrhncfg-clientpackages for installation.Enable or disable Spacewalk remote commands by selecting or deselecting the Enable Spacewalk Remote Commands check box.
NoteYou must also include the
rhncfg,rhncfg-actions, andrhncfg-clientpackages for installation.Choose whether to reuse an existing profile, replace the existing profile, or create a new profile but retain the existing profile.
Change the root password for installed systems.
NoteIf you make any other changes on this page, you must re-enter and verify the root password.
Click Update System Details to save your changes.
Select Locale, select the default time zone for installed systems and whether the hardware clock uses UTC, and click Update Locale Preferences to save your changes.
Select Partitioning, define the partitions to be created during installation, and click Update Partitions to save your changes.
NoteClear the partitioning configuration if you select the automatic-partitioning option
autoparton the Advanced Options page.
Select Software to display the Package Groups page:
Edit the list of packages to be installed:
For sample lists of packages, see Appendix B, Sample Package Lists.
The
@ Baseentry installs a minimal group of packages that are required to install a system.If you want to specify the list of base packages explicitly, select the Don't install @Base package group check box.
If you do not want the installation to halt if it cannot locate a package, select the Ignore missing packages check box.
If you have associated the Spacewalk Client channel with the profile, Spacewalk installs the Spacewalk Client packages automatically. You do not need to specify them in this list.
If you enable configuration file management and remote commands by selecting the Enable Spacewalk Configuration Management and Enable Spacewalk Remote Commands check boxes on the Details page, include the
rhncfg,rhncfg-actions, andrhncfg-clientpackages.If you want to be able to apply updates and actions to a client system immediately from the Spacewalk server, include the
osadpackage.For Oracle Linux 5 installations, exclude the
pirut,up2date, andup2date-gnomepackages from installation by inserting a dash character (-) in front of the package names, for example:@Base -pirut -up2date -up2date-gnome
Click Update Packages to save your changes.
Select Activation Keys, select the activation key to associate with the profile, and click Update Activation Keys to save your changes.
Select Scripts to define commands that you want to run on the system before or after installation.
You can configure a pre- or post-installation script by using the following fields:
- Scripting Language
(Optional) The path name of the script language interpreter, such as
/usr/bin/python.Leave blank if you want to run bash shell commands.
- Script Name
Enter a name for the script.
- Script Contents
Select the script type from the pull-down list: Shell, XML, Ruby, Python, or perl, and enter the script in the text area.
- Script Execution Time
Select the time at which the script is executed from the pull-down list: Pre Script for before installation or Post Script for after installation.
- nochroot
(Optional) Select if the script should run outside a chroot jail.
- erroronfail
(Optional) Select to stop the installation if an error occurs when the script runs.
- Template
(Optional) Select to enable Cobbler templating for the script.
NoteIf you want to be able to apply updates and actions to a client system immediately from the Spacewalk server, include the
osadpackage for installation, which contains the OSA daemon and use the following Kickstart option to enable theosadservice:services --enabled=osad
If you do not enable configuration file management and remote commands by selecting the Enable Spacewalk Configuration Management and Enable Spacewalk Remote Commands check boxes on the Details page, you can alternatively include the
rhncfg,rhncfg-actions, andrhncfg-clientpackages for installation and configure the command rhn-actions-control to run on the client system in the post-installation shell, for example:rhn-actions-control --enable-all
For more information, see the
rhn-actions-control(8)manual page.To create a profile that contains a Kickstart file that you upload or copy into Spacewalk:
Click upload new kickstart file.
On the Kickstart Details page, enter the key settings in the following fields:
- Label
Enter a label for the profile. For example:
ol6-x86_64-custom.- Kickstartable Tree
Select the Kickstart distribution with which the profile is associated. For example:
ol6-x86_64-server.- Virtualization Type
Select the virtualization type. For Oracle Linux installations on virtual machines that are hosted by Oracle VM or Oracle VM VirtualBox, select None.
Do one of the following:
Copy and paste the contents of a Kickstart file into the File Contents text box.
Click Browse..., select the path of a Kickstart file and click Upload file to upload it to the File Contents text box.
If necessary, edit the Kickstart file contents in the File Contents text box.
Click Update.
To view a profile, select its entry to display its details.
To modify a profile:
Select the profile whose settings you want to modify.
Select each tab and page that contains settings that you want to modify.
Click the confirmation button on each page to save your changes.
To delete a profile:
Select the distribution that you want to delete.
On the Kickstart Details page, click delete kickstart and then click Delete Kickstart to confirm.