Creating Integrations

Integrations use the connections you created to your applications, and define how information is shared between those applications. You can create new integrations, import integrations, modify or delete integrations, create integrations to publish messages, create integrations to subscribe to messages, and add and remove request and response enrichment triggers. Click one of the following topics for more information.

Creating an Integration

Creating an integration includes defining the trigger and invoke application connections, and defining how data is mapped between the two applications. The procedure below provides general instructions for creating an integration, with links to more detailed information for certain steps. As you perform each step, the progress indicator changes to let you know how close you are to completing the integration.

If you want to use a lookup table in your data mapping, create the lookup first. See Creating Lookups for instructions.
To create an integration:
  1. In the Integration Cloud Service toolbar, click Designer.

  2. On the Designer Portal, click Integrations.
  3. On the Integrations page, click Create New Integration.
    The Create Integration — Select a Pattern dialog is displayed.
  4. Select the type of integration pattern applicable to your business needs. For more information, see Understanding Integration Patterns.
    The New Integration — Information dialog is displayed.
  5. Enter the following information:
    Field Description

    Integration Name

    Provide a meaningful name so that others can understand the integration. You can include English alphabetic characters, numbers, underscores, and dashes in the identifier.

    Identifier

    Accept the default identifier value. The identifier is the same as the integration name you provided, but in upper case.

    Version

    Accept the default version number of 01.00.0000. Or, if you want to change the version number, enter the version using numbers only in this format: xx.xx.xxxx.

    Integrations are uniquely identified by an identifier and version. Note the version format of xx.yy.zzzz, where xx is the major version and yy.zzzz is the minor version.

    Integrations having the same identifier, but a different major version, can be active at the same time. For example, INT-A/1.00.0000 and INT-A/2.00.0000 can be active at the same time.

    When activating an integration while another integration of the same identifier and same major version is already active, the currently activated integration is deactivated prior to activating the selected integration.

    For example, if two integrations have the following integration states:
    • INT-A/2.00.0000 - Not active

    • INT-A/2.10.0000 - Not active

    Integration INT-A/2.00.0000 is then activated.
    • INT-A/2.00.0000 is now active.

    • INT-A/2.10.0000 is not active.

    Integration 2.10.0000 is then activated.
    • INT-A/2.00.0000 is now not active.

    • INT-A/2.10.0000 is now active.

    Package Name

    Enter a new or existing package name in which to place your integration. As you enter the initial letters of an existing package, it is displayed for selection. For more information about packages, see Managing Packages and About Integration Cloud Service Packages.

    Description

    Provide a meaningful description so that others can understand the integration.

  6. Click Create.
    The integration designer is displayed with the type of integration pattern you selected in the previous step.
  7. Click Save.
  8. If creating an integration pattern with blank trigger and invoke connections in which to add your own adapters:
    1. Create the trigger connection, as described in Adding a Source Connection.
    2. Create the invoke connection, as described in Adding a Target Connection.
    3. Map data between the two connections, as described in Mapping Data of Using the Oracle Mapper.
  9. If creating an integration in which to publish to Integration Cloud Service:
    1. Create an integration in which you add a trigger adapter to publish messages to Integration Cloud Service through a predefined Integration Cloud Service Messaging invoke, as described in Creating an Integration to Publish Messages to Integration Cloud Service. No data mapping between the trigger and invoke is permitted.
  10. If creating an integration in which to subscribe to Integration Cloud Service:
    1. Create an integration in which you add an invoke adapter to subscribe to messages from Integration Cloud Service through an Integration Cloud Service Messaging trigger, as described in Creating an Integration to Subscribe to Integration Cloud Service.
    2. Map data between the invoke adapter and the Integration Cloud Service Messaging trigger to which to subscribe, as described in Mapping Data of Using the Oracle Mapper.
  11. When complete, click Save and then click Exit Integration.
You now see your new integration in the Integrations list ready to be activated. See Activating an Integration for instructions.

Understanding Integration Patterns

You can select from several types of patterns when creating an integration in the Create Integration — Select a Pattern dialog.

Pattern Description

Map My Data

Create an integration with a blank trigger and invoke in which to add your own adapters.

Publish to ICS

Create an integration in which you add a trigger adapter to publish messages to Integration Cloud Service through a predefined Integration Cloud Service Messaging invoke. No configuration of the invoke subscriber is required.

The publisher and subscribers participating in this integration pattern can be activated and deactivated independently of each other.

For more information, see Creating an Integration to Publish Messages to Integration Cloud Service.

Subscribe to ICS

Create an integration in which you add an invoke adapter to subscribe to messages from Integration Cloud Service through an Integration Cloud Service Messaging trigger. You are prompted to select the publisher to which to subscribe. You must have already created a publisher to which to subscribe. The publisher does not need to be active, but must already be completely configured.

Any business identifiers defined on fields in the published integration are copied to the subscriber. Any changes made to the published integration’s business identifiers after copying are not reflected in the subscriber. The publisher and subscribers participating in this integration pattern can be activated and deactivated independently of each other.

For more information, see Creating an Integration to Subscribe to Integration Cloud Service.

For more information, see Integration Cloud Service Messaging.

Importing a Prebuilt Integration

You can import prebuilt integrations into your Integration Cloud Service environment.

There are two types of prebuilt integrations:
  • User-created integrations. These are integrations that you or another user created.

  • Oracle-created integrations from the Oracle Marketplace. You import integrations from the Oracle Marketplace as part of a package. These integrations are designated with a BUILT BY ORACLE message that is displayed next to the integration name on the Integrations page. You cannot edit these integrations, but you can view their contents, including mappings and business identifiers. You must edit the connections in these integrations to include endpoint credentials relevant to your business requirements. You can also clone these integrations, which enables you to edit the cloned version of the integration.
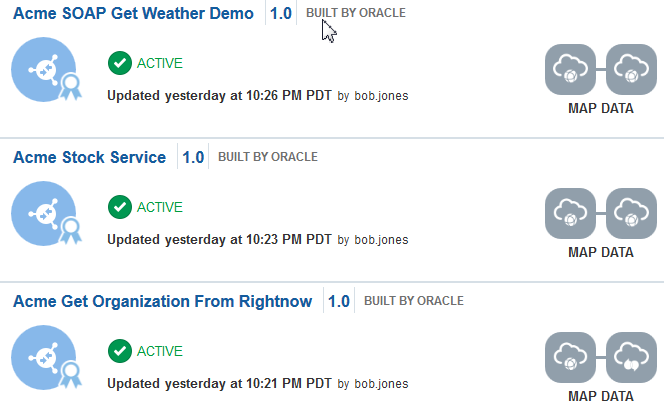
    Description of GUID-5D5D4B71-B079-4D99-A006-8B623D73CD46-default.png follows
    Description of the illustration GUID-5D5D4B71-B079-4D99-A006-8B623D73CD46-default.png

Importing a User-Created Integration

To import a user-created integration:

  1. In the Integration Cloud Service toolbar, click Designer.
    Description of GUID-0A2469E0-5861-4D97-886D-4397926B1834-default.png follows
    Description of the illustration GUID-0A2469E0-5861-4D97-886D-4397926B1834-default.png

  2. On the Designer Portal, click Integrations.

  3. Above the Integrations list, click Import Integration.
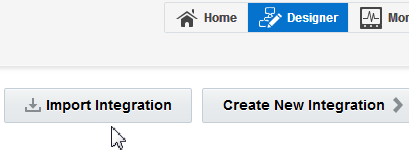
    Description of GUID-A8C5393E-BF45-4D2B-A8B8-63F78DA6B7C3-default.png follows
    Description of the illustration GUID-A8C5393E-BF45-4D2B-A8B8-63F78DA6B7C3-default.png

  4. Click Browse to select the file to import. If you are importing a single integration, select the JAR file to import. If you are importing a package of integrations, select the PAR file to import.

Importing a Prebuilt Integration from Oracle Marketplace

To import a prebuilt integration from Oracle Marketplace.
  1. In the upper right corner of the page, click Oracle Marketplace.

  2. The Oracle Marketplace is displayed.

  3. Click Applications.

  4. Browse through the list of applications and select the prebuilt integration package to import.

  5. When prompted, select the server to which to upload the prebuilt integration file.

    The prebuilt integration is imported as a package file that is visible on the Packages page in Integration Cloud Service. If you go to the Integrations page, the individual integrations of that imported package file are designated with a BUILT BY ORACLE message to the right of the integration name.

You can customize the mappings in the prebuilt integrations imported from Oracle Marketplace. See Adding Customized Mappings to Prebuilt Integrations.

Adding a Trigger (Source) Connection

The trigger (source) connection sends requests to Integration Cloud Service. The information required to connect to the application is already defined in the connection. However, you still must specify certain information, such as the business object and operation to use for the request and how to process the incoming data.

To add a trigger connection:
  1. In the Integration Designer, drag a connection from the Connections or Technologies panel on the right to the Source area on the canvas.
  2. On the Basic Info page, enter a name and optional identifier for this connection. See Basic Info Tab Properties for instructions.
  3. Click Next.
  4. On the next pages of the wizard, enter information for the connection you chose. See the topic below for your connection type to get started with configuring your trigger (source) connection:
  5. After you configure the connection, the Summary page appears.
  6. Review your changes, and click Done.
    The connection information appears on the canvas, along with arrows depicting the configured operations.
  7. Click Save.
To add the Oracle Commerce Cloud Adapter, see Using the Oracle Commerce Cloud Adapter.
To add the Oracle E-Business Suite Adapter, see Using the Oracle E-Business Suite Adapter.
To add the Oracle Database Adapter, see Using the Oracle Database Adapter.
To add the Oracle Siebel Adapter, see Using the Oracle Siebel Adapter.
To add the SAP Adapter, see Using the SAP Adapter.

Adding an Invoke (Target) Connection

Integration Cloud Service sends requests or information to the invoke (target) connection. The information required to connect to the application is already defined in the connection. However, you still must specify certain information, such as the business object and operation to use for the request and how to process the data.

To add an invoke (target) connection:
  1. In the Integration Designer, drag a connection from the Connections or Technologies panel on the right to the Target area on the canvas.
  2. On the Basic Info page, enter a name and optional identifier for this connection. See Basic Info Tab Properties for instructions.
  3. Click Next for instructions.
  4. On the next pages, enter information for the connection you chose. See the topic below for your connection type:
    To add the Eventbrite Adapter, see Using the Eventbrite Adapter.
    To add the Evernote Adapter, see Using the Evernote Adapter.
    To add the Facebook Adapter, see Using the Facebook Adapter.
    To add the FTP Adapter, see Using the FTP Adapter.
    To add the Gmail Adapter, see Using the Gmail Adapter.
    To add the Google Calendar Adapter, see Using the Google Calendar Adapter.
    To add the Google Task Adapter, see Using the Google Task Adapter.
    To add the LinkedIn Adapter, see Using the LinkedIn Adapter.
    To add the MailChimp Adapter, see Using the MailChimp Adapter.
    To add the Microsoft Calendar Adapter, see Using the Microsoft Calendar Adapter.
    To add the Microsoft Contact Adapter, see Using the Microsoft Contact Adapter.
    To add the Microsoft Email Adapter, see Using the Microsoft Email Adapter.
    To add the MySQL Adapter, see Using the MySQL Adapter.
    To add the Oracle Commerce Cloud Adapter, see Using the Oracle Commerce Cloud Adapter.
    To add the Oracle Database Adapter, see Using the Oracle Database Adapter.
    To add the Oracle E-Business Suite Adapter, see Using the Oracle E-Business Suite Adapter.
    To add the Oracle Siebel Adapter, see Using the Oracle Siebel Adapter.
    To add the SAP Adapter, see Using the SAP Adapter.
    To add the SurveyMonkey Adapter, see Using the SurveyMonkey Adapter.
    To add the Twitter Adapter, see Using the Twitter Adapter.
  5. After you configure the connection, the Summary page appears.
  6. Click Done, then click Save.
The connection information appears on the canvas, along with arrows depicting the configured operations.
Description of GUID-84861421-D3F2-4EB1-B8B6-3C580A536A5E-default.png follows
Description of the illustration GUID-84861421-D3F2-4EB1-B8B6-3C580A536A5E-default.png

Creating an Integration to Publish Messages to Integration Cloud Service

You can create integrations that enable you to publish messages to Integration Cloud Service. Message publishing is accomplished through use of Integration Cloud Service Messaging.

To create an integration to publish messages to Integration Cloud Service:

Note:

Integration Cloud Service Messaging does not support messages larger than 512 KB. Messages larger than 512 KB result in instance failure.
  1. Select Publish To ICS in the Create Integration — Select a Pattern dialog, as described in Creating an Integration.
  2. Complete the fields of the New Integration — Information dialog, as described in Creating an Integration.
    This creates an integration pattern with a predefined Integration Cloud Service Messaging invoke that enables you to publish messages to Integration Cloud Service.
  3. In the integration designer, drag an adapter from the Connections panel on the right to the trigger (source) area on the canvas. For this example, an Oracle Sales Cloud Adapter is selected.
    The wizard for the Oracle Sales Cloud Adapter is displayed.
  4. On the Basic Info page, enter an endpoint name and optional identifier for this connection. See Configuring Basic Information Properties for instructions.
  5. Click Next.
  6. On the Request page, select a business object (for this example, Account is selected), then click Next.
  7. On the Response page, select None as the response type, then click Next.
  8. On the Summary page, click Done.
    The Oracle Sales Cloud Adapter is configured to publish messages to Integration Cloud Service through use of Integration Cloud Service Messaging. Note that there is no request mapper available with this type of integration pattern.

  9. Click Save, then click Exit Integration.
    To subscribe to the message configured in this section, you must now configure Integration Cloud Service to act as a publisher. This enables Integration Cloud Service to publish the messages to which other adapters can then subscribe. For instructions, see Creating an Integration to Subscribe to Integration Cloud Service.

Creating an Integration to Subscribe to Integration Cloud Service

You can create integrations that enable you to subscribe to messages from Integration Cloud Service. Message subscription is accomplished through use of Integration Cloud Service Messaging.

To create an integration to subscribe to Integration Cloud Service:
  1. Complete the steps in section Creating an Integration to Publish Messages to Integration Cloud Service to first configure Integration Cloud Service as a subscriber to messages from an adapter.
  2. Select Subscribe To ICS in the Create Integration — Select a Pattern dialog, as described in Creating an Integration.
  3. Complete the fields of the New Integration — Information dialog, as described in Creating an Integration. This creates an integration pattern with Integration Cloud Service Messaging that enables you to subscribe to messages from Integration Cloud Service.
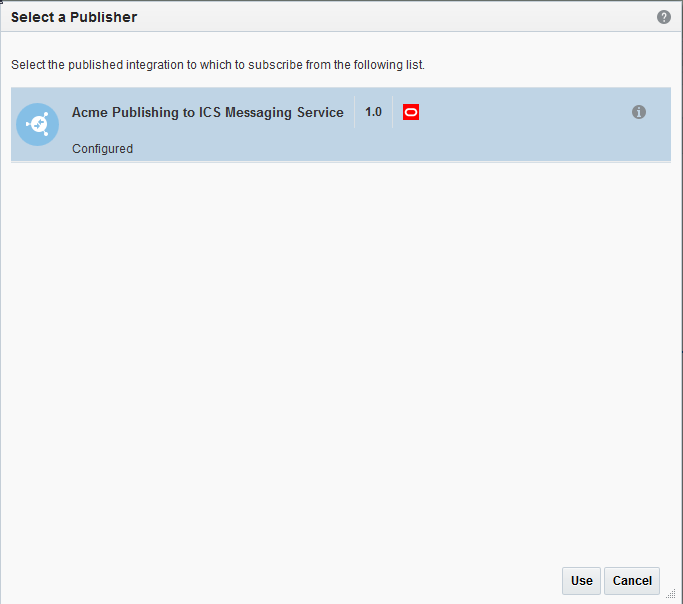
    The Select a Publisher dialog is displayed.
  4. Select the integration to which to subscribe, then click Use. For an integration to be displayed for selection, you must first configure Integration Cloud Service as a subscriber, as described in Creating an Integration to Publish Messages to Integration Cloud Service. Only integrations that are 100% completed and unlocked are displayed. Integrations that are locked (meaning that they are being edited) are not displayed.

  5. Drag an adapter to the invoke (target) area of the integration designer. For this example, an Oracle RightNow Cloud Adapter is added.
  6. On the Basic Info page, enter a name and optional identifier for this connection. See Basic Info Tab Properties for instructions.
  7. Click Next.
  8. On the Operations page, select an appropriate operation and business object, then click Next. For this example, a CRUD Create operation and Organization business object are selected.

  9. On the Summary page, review your changes, then click Done.
    The request mapper is available with this type of integration pattern.
  10. Click the Request Mapping icon, then click Create.
  11. Map source fields to the corresponding target fields. For information, see Mapping Data of Using the Oracle Mapper.
  12. When complete, click Save, then click Exit Mapper.
    The Oracle RightNow Cloud Adapter is configured to subscribe to messages from Integration Cloud Service through use of Integration Cloud Service Messaging.

  13. Click Save, then click Exit Integration.
  14. Activate the publishing integration described in Creating an Integration to Publish Messages to Integration Cloud Service and the subscribing integration described in this section. For instructions, see Activating an Integration.
    The completed publishing and subscription integrations enable you to:
    • Create an object in one application that causes the object to be created in other applications.

    • Enable multiple applications to subscribe to Integration Cloud Service and be registered for updates.

    • Enable additional subscribers to be added or removed without impacting other subscribers or publishers.

Business identifier tracking data is copied when a subscriber is created. If a publishing integration is updated later, you must update the subscribing integration.

For example, assume you create a publishing integration, then create a subscribing integration and select to subscribe to the publishing integration. Select the Configuration icon, and note that the tracking attributes of the selected publishing integration are displayed. Assume you then edit the publishing integration and change the operation of the trigger adapter (as an example), save, and exit the canvas. If you then edit the subscribing integration and click the Configuration icon, note that the business identifier tracking attributes of the publishing integration that are displayed are those that existed before the updates were made. The tracking fields are not updated as per the updated publisher integration. This is the expected behavior.

Adding Request and Response Enrichments

When you create an integration, you also have the option of adding both request and response message enrichment points to the overall integration flow. Enrichments participate in the overall integration flow and can be used in the request and/or response payloads between the trigger and invoke.

To add request and response enrichments:
  1. Design an integration with trigger and invoke connections and request and response mappings. For this example, the integration looks as follows when complete. Note the two enrichment point circles in the design; one appears on the inbound (request) side and the other appears on the outbound (response) side.

    The request and response mappings for this example are as follows:
    Mapping Source Target
    Request HelloRequest/FirstName sayHello/name
    Response sayHelloResponse/sayHelloReturn HelloResponse/Greeting
    You are now ready to add enrichments to the integration. For this example, a response message enrichment is added to the Drag and drop an enrichment source for the response message area. You can also add request message enrichments on the request (inbound) side.

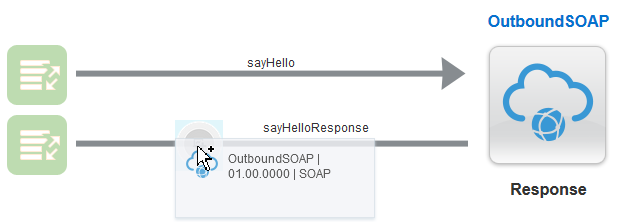
  2. From the Connections panel on the right, drag an adapter to the enrichment area on the response message shown below.
    For this example, a SOAP Adapter is dragged to the Drag and drop an enrichment source for the response message area. This action invokes the wizard for configuring the SOAP Adapter.

  3. Complete the pages of the wizard to configure the SOAP Adapter, then click Done. For this configuration, a different operation for selecting timestamp details is chosen.
    You are prompted with a dialog to delete any impacted response mappings that you previously configured for the response mapper. The response mapper requires updates because of the enrichment response adapter configuration you just performed.
  4. Click Yes. You recreate the response mappings later in these steps.
  5. Click Save.
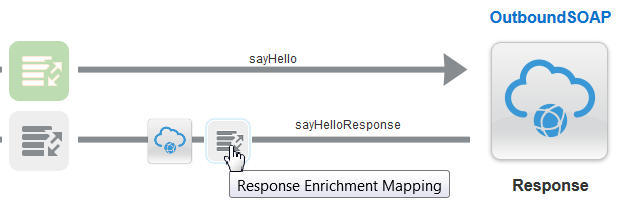
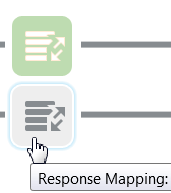
    A SOAP Adapter icon and response enrichment mapper are added to the response side of the integration. Note that because you deleted the response mappings in the previous step, that icon is no longer shaded in green. This indicates that the response mapper requires configuration.
  6. Click the Response Enrichment Mapping icon between the trigger and invoke.
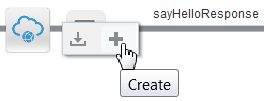
  7. Click the Create icon that is displayed. This invokes the mapper.

  8. Map source elements to target elements to include a timestamp with the response, then click Save when complete.
    The response enrichment mappings are as follows:
    Mapping Source Target
    Response Enrichment sayHelloResponse/sayHelloReturn visitTimestampReq > reqMsg
    The Response Mapping icon is displayed in green, indicating that it has been configured.
  9. Click the Response Mapping icon to invoke the mapper again. This mapper requires updates because of the enrichment response mapping you performed.

  10. Remap the source elements to target elements in the response mapper.
    The response mappings are updated. Note that a different source is now mapped to the original target of HelloResponse/Greeting.
    Mapping Source Target
    Response $ResponseEnrichmentApplicationObject > visitTimestampResp > respMsg HelloResponse/Greeting
    The Response Enrichment Mapping icon is displayed in green, indicating that it has been reconfigured.
  11. Click Save, then click Exit Mapper when complete.
    The integration with response enrichments added to the invoke (target) area looks as follows:

  12. Click Save, then click Exit Integration when complete.
    You are ready to activate the integration. While not demonstrated in this example, you can also configure the enrichment area on the request message shown below by dragging and dropping an adapter to the Drag and drop an enrichment source for the request message area. This invokes the adapter configuration wizard.

You can also update existing enrichments at a later time, such as the objects selected in the adapter configuration wizard and the enrichment mappings.
For more information about enrichments, see About Integration Cloud Service Enrichments.

Deleting Request and Response Enrichments

You can delete the request and response message enrichment point mappings added to an integration. After deleting the enrichment point mappings, the integration is returned to its original pre-enrichment state.

To delete request and response enrichments:
  1. On the Integration page, select the integration. The integration must not be active.
  2. Click the enrichment area on the request message or response message to delete.
  3. Select the Delete icon that is displayed.
    This deletes the mappings.
  4. Click Yes when prompted to confirm.
    Click Save, then click Exit Canvas.
For more information about enrichments, see About Integration Cloud Service Enrichments.

Creating Routing Paths for Two Different Invoke Endpoints in Integrations

You can create an integration in which you define routing paths for two different invoke endpoints. During runtime, the expression filtering logic for the routing paths is evaluated and, based on the results, the path to one of the invoke endpoints is taken. If the filtering logic for neither routing path is satisfied, then neither invoke endpoint is contacted.

The expression logic works as follows:
  • You define an expression filter on the first (upper) invoke endpoint.

  • You define either an ELSE condition or an expression filter on the second (lower) invoke endpoint.

During runtime, if the expression filtering logic for the first (upper) invoke endpoint evaluates to true, then the path to that invoke endpoint is taken. If the expression evaluates to false, then that invoke endpoint is skipped, and the path to the second (lower) invoke endpoint is taken through either an ELSE condition or an expression filter.

In addition to creating routing paths, you also define request and response (and optionally, enrichment) mappings on both invoke endpoints.

To create routing paths for two different invoke endpoints in integrations:

  1. On the Integrations page, select the integration in which to define a routing filter. Ensure that the integration is fully defined with trigger and invoke connections, business identifier tracking, and mappings.
  2. Click the Filter icon on the trigger side of the integration to create a filtering expression. Routing is created after any defined request enrichment and before the initial request mapping.
    Description of GUID-87CBBFAC-E79E-462B-A37F-3EEC4D05F366-default.png follows
    Description of the illustration GUID-87CBBFAC-E79E-462B-A37F-3EEC4D05F366-default.png
  3. Click the Routing icon in the menu that is displayed.
    The Expression Builder is displayed for building routing expressions. The Expression Builder supports multiple source structures. You can create OR expressions using both source structures. You can also name expressions and calculate expression summaries with the Expression Summary icon. Elements and attributes with and without namespace prefixes are also supported.
  4. Drag an element from the Source area to the Expression field.
  5. Define a value.
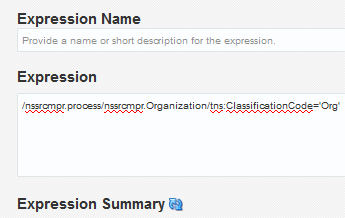
    For this example, the ClassificationCode element is defined as equal to Org. This means that Org is retrieved when this expression evaluates to true.
  6. If you want to calculate the expression, click the Expression Summary icon. This shows the summary of the expression and defines a more user-friendly, readable version of the expression you just created.
  7. If that name is not sufficiently user-friendly, copy and paste the expression to the Expression Name field for additional editing.
    Description of GUID-3BF73809-D1B0-488E-8588-B65256C1137C-default.png follows
    Description of the illustration GUID-3BF73809-D1B0-488E-8588-B65256C1137C-default.png
  8. Click Save, then click Exit Expression Builder.
    The defined expression is displayed above the integration. The Filter icon has now changed to indicate that an expression is defined.
    Description of GUID-339675AF-37F6-4FAD-B608-72A1E59969B5-default.png follows
    Description of the illustration GUID-339675AF-37F6-4FAD-B608-72A1E59969B5-default.png
  9. On the right side of the integration, click the Routing Drawer icon to display a graphical routing diagram with two potential paths. The first route that you just defined (the upper trigger and invoke) shows the defined expression above the line. The second route (the lower trigger and invoke) is displayed as a dotted line because it is not yet defined.

    You can activate the integration now if additional filtering is not required or define an additional routing filter. For this example, a second route is defined.
  10. Click the bull’s eye icon in the lower trigger icon to define routing on the second trigger and invoke route.
    Description of GUID-A3F8891D-E1DA-4A96-8E37-F623AF3BF8AA-default.png follows
    Description of the illustration GUID-A3F8891D-E1DA-4A96-8E37-F623AF3BF8AA-default.png
    This refreshes the integration to display the lower trigger and invoke route in the integration. The trigger side remains as defined for the first route, but the invoke route is undefined.
  11. Click Show Palette to display the list of available connections and technologies.
  12. Drag an adapter to the invoke (target) area of the integration (for this example, an Oracle RightNow adapter is added).
    The Adapter Configuration Wizard is invoked.
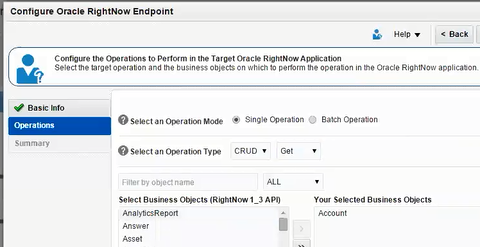
  13. Configure the pages of the wizard for the Oracle RightNow adapter. For this example, the Get operation and Account business object are selected on the Operations page.
    Description of GUID-C6F03948-3D9A-4886-AF4F-18ED29D1B785-default.png follows
    Description of the illustration GUID-C6F03948-3D9A-4886-AF4F-18ED29D1B785-default.png
    The integration is now defined for the second invoke. You now need to create a filtering expression for the second invoke.
  14. Click the Filter icon to create a filtering expression.
  15. If no additional expression is required, click the E icon (to create an ELSE condition).
    Description of GUID-2618C32F-7742-41BE-8D07-5687475D7DEC-default.png follows
    Description of the illustration GUID-2618C32F-7742-41BE-8D07-5687475D7DEC-default.png
    This defines an ELSE condition for the second trigger and invoke. The ELSE condition is taken if the first route evaluates to false (that is ClassificationCode does not equal Org). You can toggle back and forth between the two trigger routes by clicking the adapter icon on the individual line. The line in blue is the currently visible invoke in the integration.
    Description of GUID-BF479DE7-495B-4F97-BB36-FE0819CF231E-default.png follows
    Description of the illustration GUID-BF479DE7-495B-4F97-BB36-FE0819CF231E-default.png
  16. If you want to define your own expression filter for the second route instead of using the ELSE condition, perform the following steps:
    1. Click the Filter icon.
    2. Select Clear Expression to remove the ELSE condition.
    3. Click Yes when prompted to confirm.
    4. Click the Filter icon again and select the Edit icon to invoke the Expression Builder as you did in Step 3.
    5. Define an expression.
    6. Click Save, then click Exit Expression Builder.
      Request and response mappings must now be defined.
  17. Click the Request Mapper icon to define the mapping.
    For this example, the following mapping is defined.
    Source Target

    process > Organization > Organizationid

    Get > Account > ID > id

  18. Click the Response Mapper icon to define the mapping.
    For this example, the following mapping is defined.
    Source Target

    process > GetResponse > Account > ID > LookupName

    processResponse > Organization > Name

    Integration design in now 100% complete.

  19. Activate the integration.

Creating Routing Expression Logic in Both Expression Mode and Condition Mode

You can create XPath expressions for routing conditions in two different user interface modes:

  • Expression mode: This mode provides an interface for creating and viewing the entire XPath expression.

  • Condition mode: This mode provides an easier-to-read interface to create and view XPath condition expressions. This mode is useful for business analysts who may be less experienced with XPath expressions.

You can toggle between expression mode and condition mode when creating and viewing your expressions. Elements and attributes for which mapping is required are identified by a blue asterisk (*) to the left of their names. You can also place your cursor over elements and attributes to display specific schema details such as the data type, if mapping is required, and so on. When creating an expression, note the following functionality in the tree:
  • Three levels of elements are loaded by default in the tree in the Source area. When you reach the third level, a Load more link is displayed. Click this link to display all the direct children of that element. Only base types are loaded automatically. To load the extended types of the base type, click the base type, which is identified by a unique icon. This invokes a menu of extended types that you can select to load one by one into the tree.
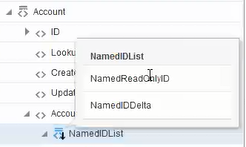
    Description of GUID-F683F4B2-71E1-413C-9D63-CAAFA180F688-default.png follows
    Description of the illustration GUID-F683F4B2-71E1-413C-9D63-CAAFA180F688-default.png

  • Elements in the tree in the Source area that you have already dragged to an expression are identified by green checkboxes. These elements are displayed even if they are deeper than three levels in the tree.

  • You can search for an element that is not yet loaded in the tree by entering the name in the Find field and clicking the Search icon. This action loads that specific element into the tree.

This section provides an example of building an expression using both modes.

To create routing expressions in both expression mode and condition mode:

  1. Click the Filter icon on the source side of an integration to create a filtering expression.
    Description of GUID-87CBBFAC-E79E-462B-A37F-3EEC4D05F366-default.png follows
    Description of the illustration GUID-87CBBFAC-E79E-462B-A37F-3EEC4D05F366-default.png
  2. Click the Routing icon in the menu that is displayed.
    The Expression Builder is displayed for building routing expressions. Expression mode is the default mode.
  3. In the field immediately below Expression Name, optionally enter a short description about the expression you want to build.

  4. Add an element from the Source area on the left side to the expression field immediately below the short description field. If needed, you can also add functions from the Components section.
    There are two ways to add an element to the expression field:
    1. Drag the element from the Source area.
    2. Select the row of the element in the Source area, then click the Move icon in the middle of the page to move the element.

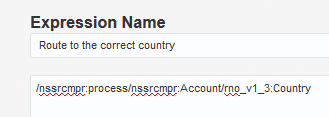
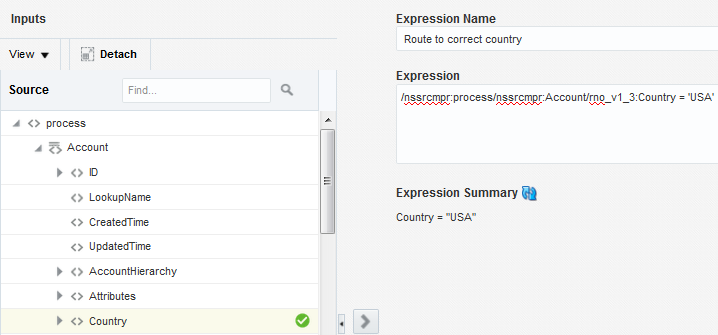
      The expression for the selected element is displayed in the expression field (for this example, the expression for the Country element was added). The selected element is identified by green checkbox in the Source area.

  5. To the right of the added expression, define an operator and a value within single or double quotes (for this example, = “USA” is defined).
  6. Click the Expression Summary icon to view a simplified, user-friendly version of the expression.. Easy-to-read output is displayed.
    Description of GUID-2F29392D-2743-4A82-AD86-7E43453750C9-default.png follows
    Description of the illustration GUID-2F29392D-2743-4A82-AD86-7E43453750C9-default.png

    Note:

    • To add additional elements to the expression, you can place your cursor in the exact location of the expression, select the row of an element in the Source area, and click the Move icon. These actions add that element to the exact location of your cursor.

    • You can drag an element to the exact location of your cursor in the expression, and the expression of the element is added to the cursor location, and not the location in which you drop the element.

    • You can drag an element on top of an existing expression element to replace it.

  7. In the upper right corner, click Condition Mode to view the expression you created in condition mode. Condition mode provides an easy-to-read interface for creating and viewing your expressions.

    Note the following details about accessing condition mode:

    • Condition mode can only be accessed if the expression field is empty or completely defined with an expression that returns true or false. If you only partially define an expression (for example, you drag an element to the expression field, but forget to define expression logic and a value such as = “USA”), you receive an error saying that you must provide a valid condition to access condition mode.

    • The Condition Mode button toggles to Expression Mode.

    Note:

    At any time, you can click Expression Mode to view the entire XPath expression.
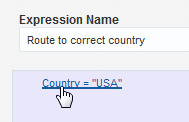
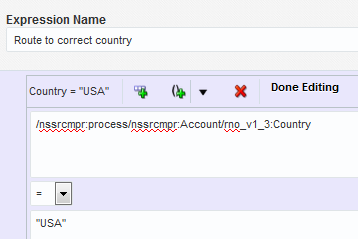
  8. Click the expression.

    Description of GUID-E1D0F8AA-950E-445C-912C-979591A34E8A-default.png follows
    Description of the illustration GUID-E1D0F8AA-950E-445C-912C-979591A34E8A-default.png

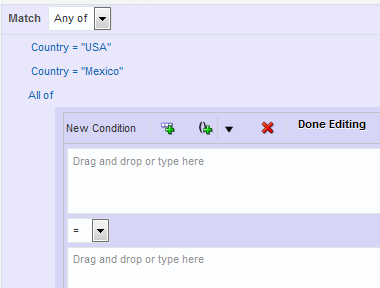
    This refreshes the page to display icons for adding additional conditions and conditions groups. Groups enable you to combine multiple conditions into a single logical expression.


    Description of GUID-6851086F-D4C7-40AE-BAEE-F422BA3DCBAE-default.png follows
    Description of the illustration GUID-6851086F-D4C7-40AE-BAEE-F422BA3DCBAE-default.png
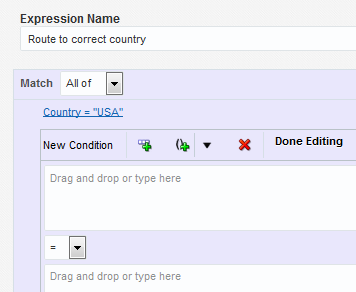
  9. Click the Add Condition icon (first icon) to add additional condition expressions.
    This creates an additional field for entering additional expression logic. The message Drag and drop or type here is displayed in this field.
    Description of GUID-0D61CF81-A628-4AD8-B17F-CEDA1ECBF16D-default.png follows
    Description of the illustration GUID-0D61CF81-A628-4AD8-B17F-CEDA1ECBF16D-default.png
  10. Drag an element from the Source area to the first Drag and drop or type here field (for this example, the Country element is again added).
  11. Select an operator (for example, =, >,!=, and so on) and enter a value (for this example, “Mexico” is added).
  12. From the Match list, select an option. This list is hidden until at least two conditions are defined.
    • Any of: Select if any of the added expressions must be true. This equates to an OR condition in the entire XPath expression shown in expression mode.

    • All of: Select if all expressions must be true. This equates to an AND condition in the entire XPath expression shown in expression mode.


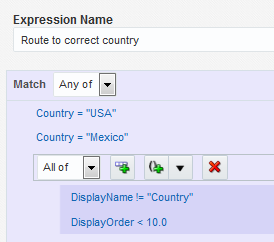
  13. Select the Add Group icon (second icon) to group a series of conditions. This option enables you to build a number of conditions within a single group. The group is identified by the gray outline and the indentation.
  14. Add an element from the Source area.
    For this example:
    • The DisplayName element is added to the first Drag and drop or type here field.

    • The not equal operator (!=) is selected.

    • The Country element is added to the second Drag and drop or type here field.

  15. Click the Add Condition icon (first icon) to add an additional condition expression within the group.
    For this example:
    • The DisplayOrder element is added to the first Drag and drop or type here field.

    • The less than operator (<) is selected.

    • A value of 10 is entered in the second Drag and drop or type here field.

  16. Continue building your group condition, as necessary.
    When complete, the expression is displayed. For this example, there are the conditions: if Country is USA OR Country is Mexico OR DisplayName does not equal country and DisplayCount is less than 10, the integration continues.
    Description of GUID-6C9F8E88-EAF4-470D-891F-4B32845E9E38-default.png follows
    Description of the illustration GUID-6C9F8E88-EAF4-470D-891F-4B32845E9E38-default.png
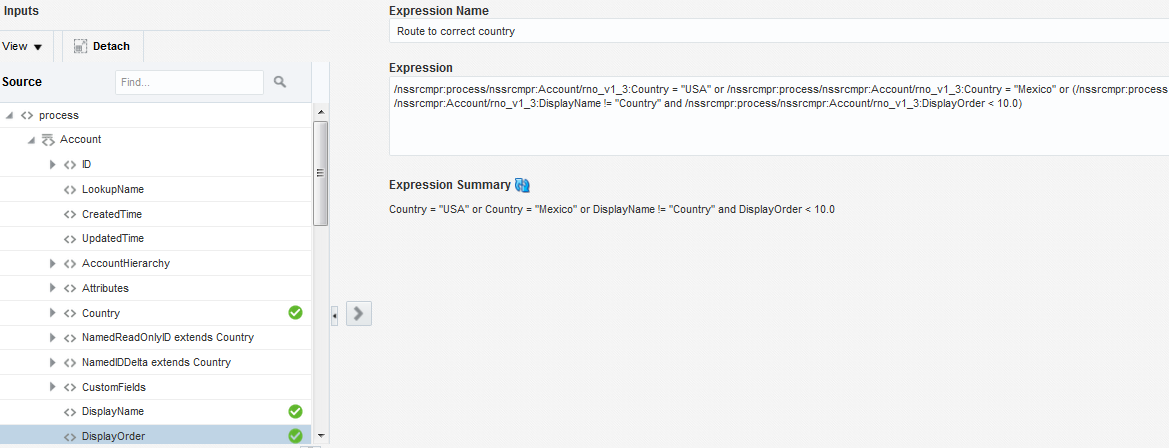
  17. Click Expression Mode.
    Note the entire XPath expression and the expression summary at the bottom. The selected elements are displayed (no matter their level of depth in the tree) and identified by green checkboxes in the Source area.
    Description of GUID-2325D7F0-B6CC-4908-8C1C-76A1F1D17ADD-default.png follows
    Description of the illustration GUID-2325D7F0-B6CC-4908-8C1C-76A1F1D17ADD-default.png
  18. If you want, you can place your cursor in the XPath expression and edit it as necessary (for example, change USA to Canada), then click the Expression Summary icon to refresh the calculation. If you make an error when editing the XPath expression (for example, forget to add a double quote to a value), an error message is displayed.
  19. Click Save to view the expression in read-only mode. You can also click Done Editing at any time during the creation process to view the expression in read-only mode.
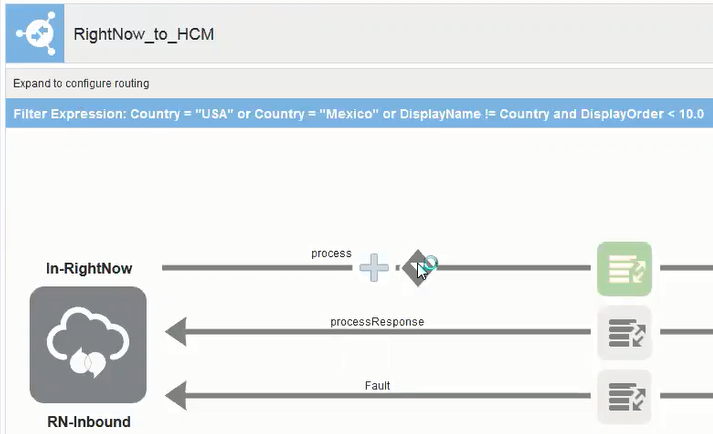
  20. Click Exit Expression Builder to return to the integration. The user-friendly expression is displayed in the blue banner above the integration.

Deleting Routing Paths

You can delete routing paths that have been created on different target endpoints in an integration.

There are two methods for deleting routing paths:
  • Delete the routing path and expression filter.

  • Delete the endpoint and routing path, but retain the expression filter.

Deleting the Routing Path and Expression Filter

To delete the routing path and expression filter:

  1. In the Integrations page, select the integration in which to delete a routing path.

  2. Expand the Routing Drawer icon to display the diagram of routing paths.

  3. Above the integration, select the routing path to delete.
    Description of GUID-FAA6A13F-18B9-4E42-A7AA-80FF05587F18-default.png follows
    Description of the illustration GUID-FAA6A13F-18B9-4E42-A7AA-80FF05587F18-default.png

  4. Click the Filter icon.

  5. Select Delete Route from the menu that is displayed.
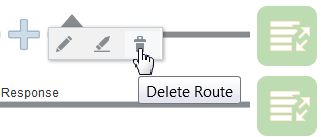

    Description of GUID-126304B0-7FA9-4135-8E3A-ADDD2B0CB6A8-default.png follows
    Description of the illustration GUID-126304B0-7FA9-4135-8E3A-ADDD2B0CB6A8-default.png
  6. Click Yes when prompted to confirm.

    This action deletes the routing path, including the expression filter and the request mapping for the selected path. The diagram above the integration shows that the routing path is deleted.
    Description of GUID-4DD73D66-5704-4ECC-AAE2-EF31A93C6C53-default.png follows
    Description of the illustration GUID-4DD73D66-5704-4ECC-AAE2-EF31A93C6C53-default.png

Deleting the Endpoint and Routing Path

To delete the endpoint and routing path:

  1. In the integration, click the target endpoint to delete.

  2. Click Delete in the menu that is displayed.

  3. Click Yes when prompted to confirm.

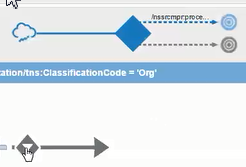
    This action deletes the target endpoint and routing path. The diagram above the integration shows that the routing path is deleted. Within the integration, only the expression remains defined in the integration because it is not using anything from the deleted target endpoint.
    Description of GUID-CA8392F4-A169-45AC-A223-AD0CB739F997-default.png follows
    Description of the illustration GUID-CA8392F4-A169-45AC-A223-AD0CB739F997-default.png