Creating sources
Learn more by watching the video!
You will need to create sources in Oracle Unity so that customer data can be imported into the data model. These sources will provide all the details needed so that Oracle Unity can run ingest jobs and import data.
Ensure source files are formatted correctly by reviewing CSV file standards for Oracle Unity.
Note: To create the source, you will need to provide your own Secure FTP site to enable the data transfer. Oracle Unity does not provide Secure FTP sites.
Create a source
To create a source:
-
Click the Oracle icon
 in the bottom-right corner to open the navigation menu.
- Select Sources.
- In the top-right corner, click Create source.
Step 1: Define source details
The job details section allows you to define how Oracle Unity will access the source and how the source will display in Oracle Unity.
Enter the details for the source.

- Type: Use the drop-down list to select the source type: Secure FTP, Eloqua, or CX Sales.
- Name: Enter a name. The name must be 1 or more characters, up to a maximum of 50. Other than underscores (_) and hyphens (-), special characters are not allowed. The first character cannot be a space. You can use characters from all languages supported in the language settings.
-
Source ID: When Oracle Unity ingests data using this source, it uses this value for the Source ID attribute of each object. You can't change this value after you create the source.
- If the source name uses English characters, the Source ID field is auto-populated from the source name you enter. You can change this value before the source is created.
- If the source name uses characters from another language supported in the language settings, the Object ID field will be left blank. You will need to enter a name using English characters.
- Description: Enter a description. This field is optional, but it is highly recommended to add descriptions for any entity created. This helps all other users get additional context when using and navigating Oracle Unity. The description can have a maximum of 512 characters with no restrictions on characters used. You can use characters from all languages supported in the language settings.
Step 2: Configure source
Important: When defining the authentication settings, make sure that one of the approved algorithms below is used to access the source. If one of these algorithms is not used, Oracle Unity will not be able to successfully connect to the source.
| Algorithm type | Algorithm |
|---|---|
| Cipher | aes256-ctr |
| Cipher | aes192-ctr |
| Cipher | aes128-ctr |
Based on the source type selected, you will have to complete specific details for the source.
To create a Secure FTP destination, refer to the steps below.
For other types of destinations, refer to the respective help topics:
Server
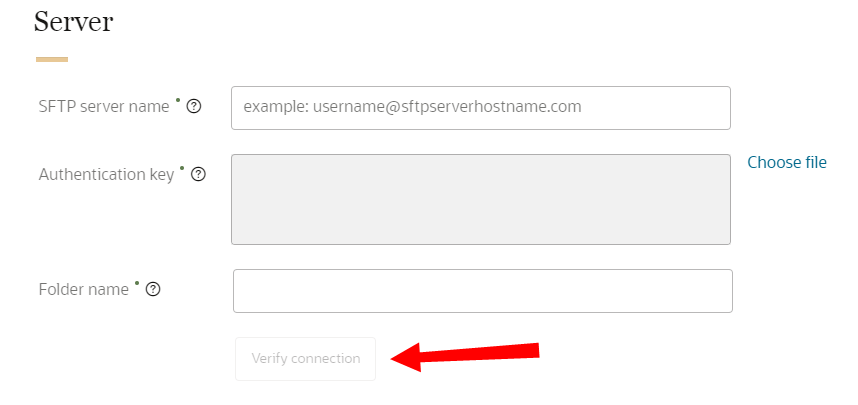
Provide the SFTP server details of the source so that Oracle Unity can access the data from the source.
- SFTP server name: Enter the SFTP server name on your organization's server. This field requires a user name and host name, formatted as username@sftpserverhostname.com. You have the option of using a custom port by adding it to the end of the server name. For example, if you want to configure a connection to port 999, you would enter username@sftpserverhostname.com:999.
- Authentication key: Select the file that has the authentication key needed to access the SFTP server. Oracle Unity will process the file and display the authentication key.
- Oracle Unity only supports private authentication keys in RSA format. You can't upload a public authentication keys.
- To create an RSA authentication key, learn how to Generate SSH Keys in PEM Format to Connect to a Public or On-Premises sFTP Server from the Using the FTP Adapter with Oracle Integration Help Center.
- Folder name: Enter the path name to the folder on the SFTP server where the source files are located. You can use characters from all languages supported in the language settings.
- An incorrect SFTP server name or invalid username for the server.
- An incorrect authentication key.
- An incorrect folder name or the folder is not accessible to the user.
Once you enter all the details, click Verify connection to ensure that Oracle Unity can access the server.
If there are connection issues, it could be for one of the following reasons:
If you still encounter connection issues, contact your IT administrator for further investigation.
Files
The files details section defines the format of the source files.
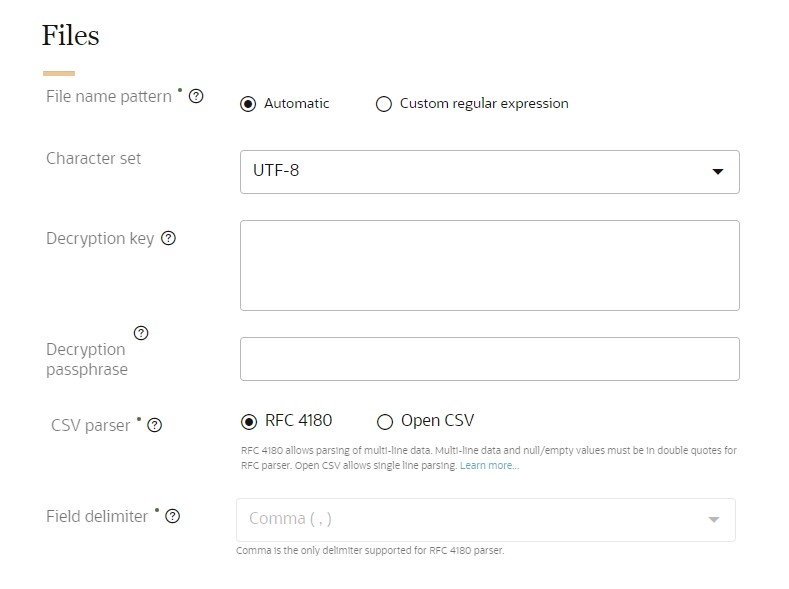
File name pattern
Please keep the following in mind for the file name pattern.
- The file name pattern defines what files Oracle Unity will import.
- If your source files use the file creation date as a prefix or suffix, select the correct timestamp format.
- If the source file is compressed, you have the option of using the following file extensions: .gz, .zip, and .gpg. You can also combine multiple compressed file types within a gpg archive.
- You can choose to define the following file name pattern formats: Automatic or Custom regular expression.
- Unless you want to define specific files for import, we recommend using an Automatic file name pattern. This allows Oracle Unity to automatically identify the appropriate files.
- The file name you define for Custom regular expression is case sensitive. If you select an Automatic file name pattern, the source object name you define when configuring the ingest job is case sensitive as well.
- Make sure that the name you give the Source object when configuring the ingest job allows the correct files to be imported. For example, to import address data, include "address" in the source object name.
To define an automatic file name pattern:
- Select Automatic.
When you select Automatic, Oracle Unity will do the following:
- Create a file name pattern based on the source object names in the ingest job configuration.
- Include files with a prefix or suffix in the file name pattern matching criteria.
- If there are compressed files (.gz, .zip, or .gpg), the appropriate extensions will be included in the file name pattern matching criteria.
- Match and import files that meet the matching criteria for the source object names in the ingest job configuration.
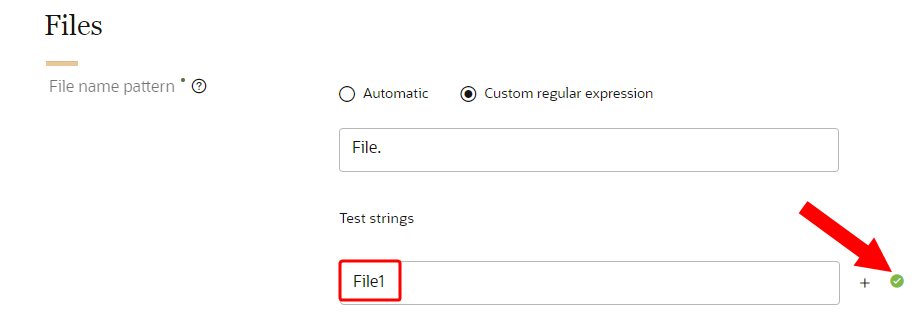
To enter the file name pattern in Custom regular expression:
- Select Custom regular expression.
- In the text field enter the regular expression so that Oracle Unity can search for and find the correct files to import.
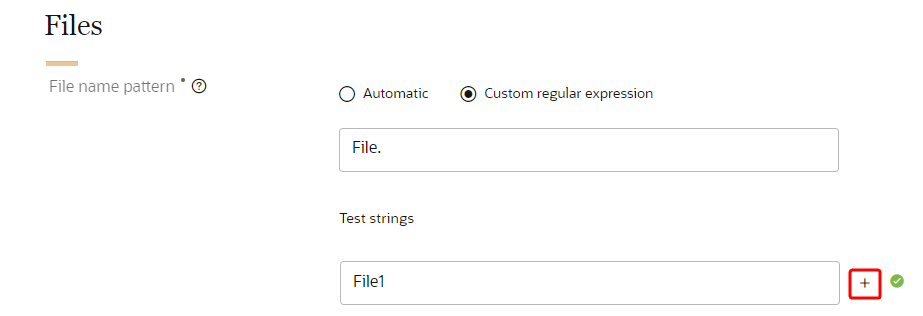
- Under Test strings, enter a sample file name to ensure that the regular expression is valid. A checkmark will display to show the test string is valid.
- To enter additional test strings, click Add
 . You can enter up to 10 test strings for validation.

Character set
Select the format of the character set for the source file. The following character sets are supported: UTF-8, ISO-8859-1, Windows-1251, and Windows-1252.
Decryption key
If the file is encrypted with a key, paste the key to decrypt it. PGP encryption will be applied to any files with a .gpg suffix. Compressed files inside the gpg file must use the .zip.gpg or .gz.gpg suffix.
The following encryption keys are supported.
| Key type | Bit lengths |
|---|---|
| RSA (RSA cryptosystem) |
2048 |
| 3072 | |
| 4096 |
Decryption passphrase
If the file is encrypted with a passphrase, paste the passphrase to decrypt it. If no encryption key is used with the passphrase, the passphrase will act as the encryption key and symmetric encryption will be used.
CSV parser
Select the type of CSV parser for the source: RFC 4180 or Open CSV. Learn more about CSV file standards.
-
RFC 4180 allows parsing of single-line and multi-line data. Learn more about the RFC 4180 parser.
-
Open CSV only allows parsing of single-line data. Learn more about the Open CSV parser.
Field delimiter
The field delimiter is the character in the source files that divides the fields. If you select the RFC 4180 parser, the comma (,) delimiter must be selected.
If you select the Open CSV parser, you can select one of the available characters (comma (,), semi-colon (;), pipe (|), or tab) or enter a custom delimiter.
When entering a custom delimiter, keep the following in mind:
- You cannot use the backward slash or double quote characters.
- You must use a single character. You cannot enter multiple characters for the delimiter.
Step 3: Save and publish the new source
When finished defining the source, scroll to the top of the page and click Save or Save and close.
Once you create the source, you will need to publish the changes.