Setting up the ongoing import of Oracle CX Sales data
After completing the initial import of data from Oracle CX Sales, you can set up the ingest job that will allow for the ongoing import of data.
If needed, review Oracle CX Sales troubleshooting tips for importing data.
Important: The Version 1.0 of this feature is enabled by default and only displays the available parent CX Sales objects in Step 2: Field mapping of the ingest job. The Version 2.0 of this feature displays all CX Sales objects available for export. To enable Version 2.0 of this feature, contact Oracle Support.
Learn more about correctly formatting source files and ingest jobs so that you can successfully import data:
-
Ensure source files are formatted correctly by reviewing CSV file standards for Oracle Unity and supported CSV parsers.
-
Review how to import empty or null data and the restrictions on empty/null data in the Oracle Unity data model.
Create the CX Sales source
The CX Sales source will configure where Oracle Unity will import the data from.
To create the CX Sales source:
-
Click the Oracle icon
 in the bottom-right corner to open the navigation menu.
- Select Sources.
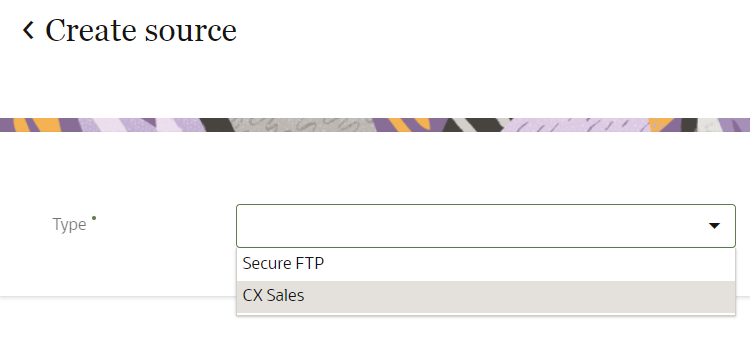
- In the top-right corner, click Create source.
- Use the drop-down list to select CX Sales.
Step 1: Define source details
The job details section allows you to define how Oracle Unity will access the source and how the source will display in Oracle Unity.
Enter the details for the source.
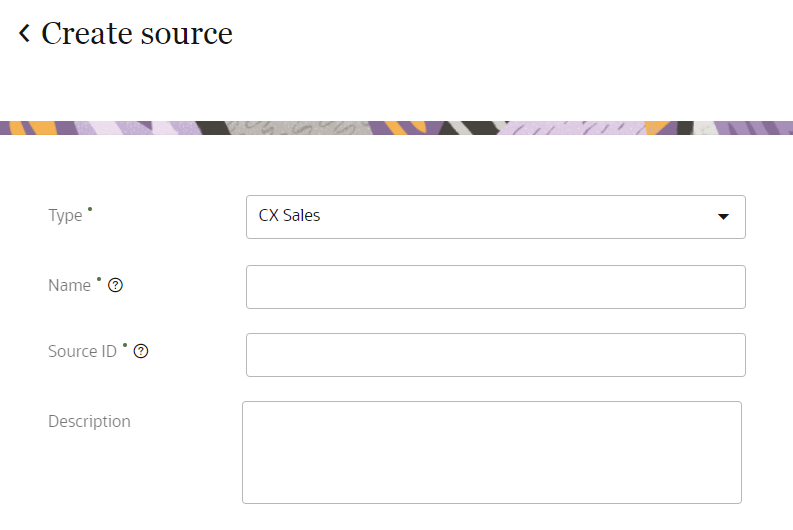
- Name: Enter a name. The name must be 1 or more characters, up to a maximum of 50. Use only letters (a–z and A–Z), numbers (0–9), underscores (_), hyphens (-), and spaces. The first character cannot be a space.
- Source ID: When Oracle Unity ingests data using this source, it uses this value for the Source ID attribute of each object. The Source ID is auto-populated from the source name you enter. You can't change this value after you create the source.
- Description: Enter a description. This field is optional, but it is highly recommended to add descriptions for any entity created. This helps all other users get additional context when using and navigating Oracle Unity. The description can have a maximum of 512 characters with no restrictions on characters used. You can use characters from all languages supported in the language settings.
Step 2: Configure authentication settings
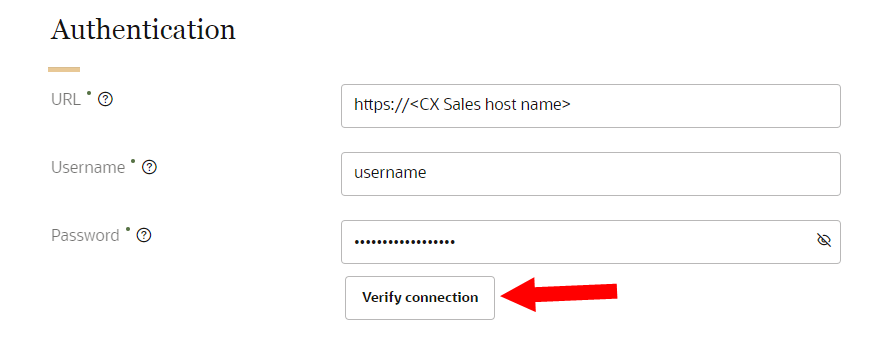
Enter the information to allow Oracle Unity to access the source.
- URL: Enter the required base URL for your CX Sales instance in this format: https://<CX Sales host name>.
- Username: Enter the username to access the URL.
- Password: Enter the password to access the URL.
Once you enter all the details, click Verify connection to ensure that Oracle Unity can access the source.
Step 3: Save and publish the new source
When finished defining the source, scroll to the top of the page and click Save or Save and close.
Once you create the source, you will need to publish the changes.
Create the ingest job
After creating and publishing the CX Sales source, you can create the ingest job that will import the data and map it to the Oracle Unity data model.
-
Click the Oracle icon in the bottom-right corner to open the navigation menu.
- Select Data feeds.
- In the top-right corner, click Create data feed, then select Ingest job.
The Create ingest job page is displayed.
Step 1: Define job details
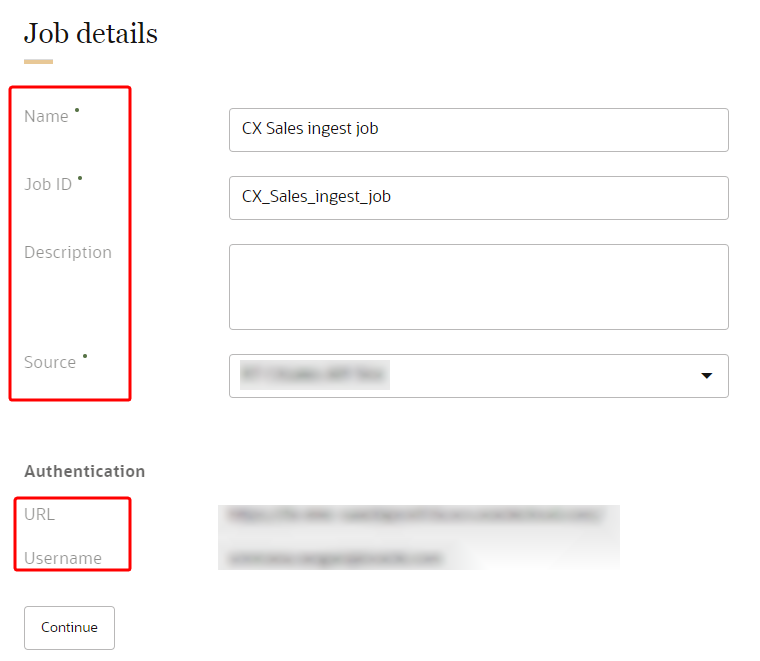
The job details section allows you to define how the ingest job will display in Oracle Unity.
To define the job details:
- Enter the details for the ingest job.
- Name: Enter a name. The name must be 1 or more characters, up to a maximum of 50. Use only letters (a–z and A–Z), numbers (0–9), underscores (_), hyphens (-), and spaces. The first character cannot be a space.
-
Job ID: The unique system identifier that is auto-populated from the job name you enter. You can't change this value after you create the job.
- Description: Enter a description. This field is optional, but it is highly recommended to add descriptions for any entity created. This helps all other users get additional context when using and navigating Oracle Unity. The description can have a maximum of 512 characters with no restrictions on characters used. You can use characters from all languages supported in the language settings.
- Source: Select the CX Sales source you created. Review the details and make sure they are accurate.
- Once you have confirmed that the details are correctly configured, click Continue.
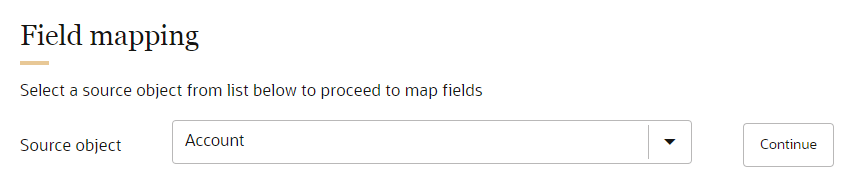
Step 2: Field mapping
Field mapping allows you to define how fields from your source objects are mapped to the attributes in the data model.
- Version 1.0 of this feature is enabled by default and only displays the available parent CX Sales objects for field mapping. The Version 2.0 of this feature displays all CX Sales objects available for export. To enable Version 2.0 of this feature, contact Oracle Support.
- If you have the Version 1.0 feature and would like to customize the list of available CX Sales objects for field mapping, contact Oracle Support.
The list of available CX Sales objects will load (parent objects for Version 1.0 and all objects available for export for Version 2.0). You can map one CX Sales object for the ingest job. If you need to map multiple objects, you will have to create separate ingest jobs for each CX Sales object mapped.
To select a CX Sales object:
- Use the drop-down list for Source object to select the object you want to map.
- Click Continue.
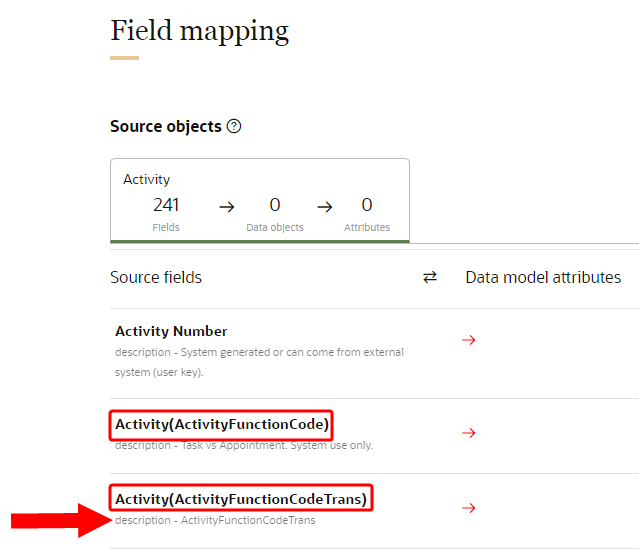
- Version 1.0: Oracle Unity will retrieve attributes from the CX Sales object as well as attributes for any applicable child objects. You can identify child object attributes with the format [child object name.attribute name]
- Version 2.0: Oracle Unity will retrieve attributes from the selected CX Sales object.
- Make changes as needed by completing Step 3: mapping source object fields to data model attributes.
Please note the following additional information for CX Sales field mapping:
- For Version 1.0 of this feature, you can only map attributes from one child object for the ingest job. If you need to map attributes for multiple child objects, you will have to create separate ingest jobs for each child object.
- If needed, you can map multiple CX Sales attributes to one Oracle Unity data model attribute.
- If there are multiple CX Sales source fields with duplicate names, then the id will display in parentheses after the source field name. You can also review the source field description to get more context on the source field.
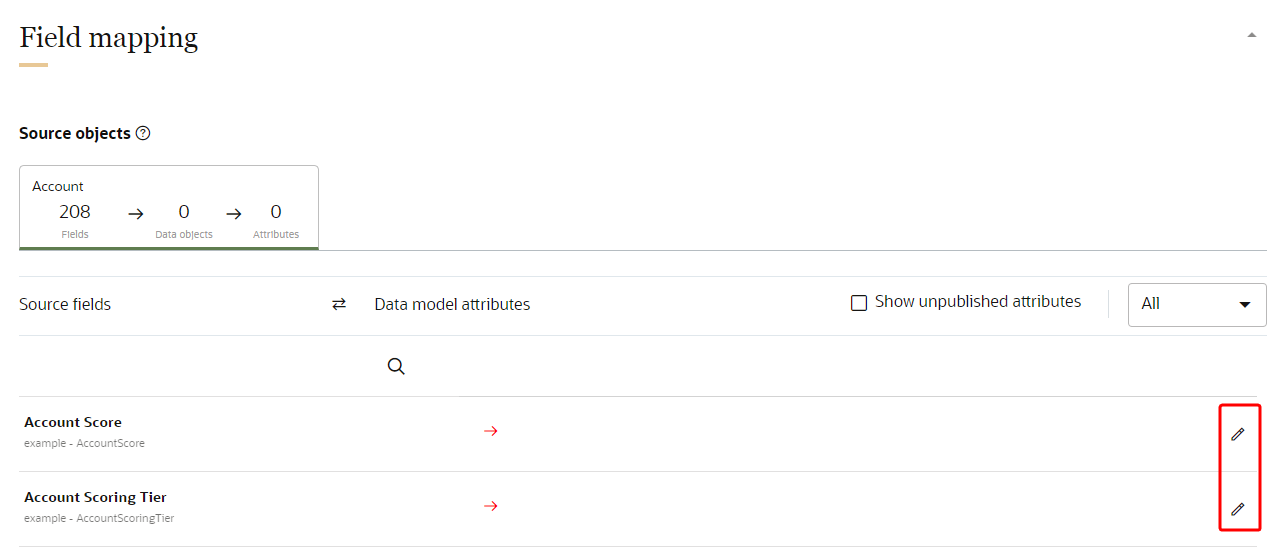
Step 3: Mapping source object fields to data model attributes
To map source object fields to attributes:
- For each of the mapped source fields, click Edit
 to start adding attributes from the data model.
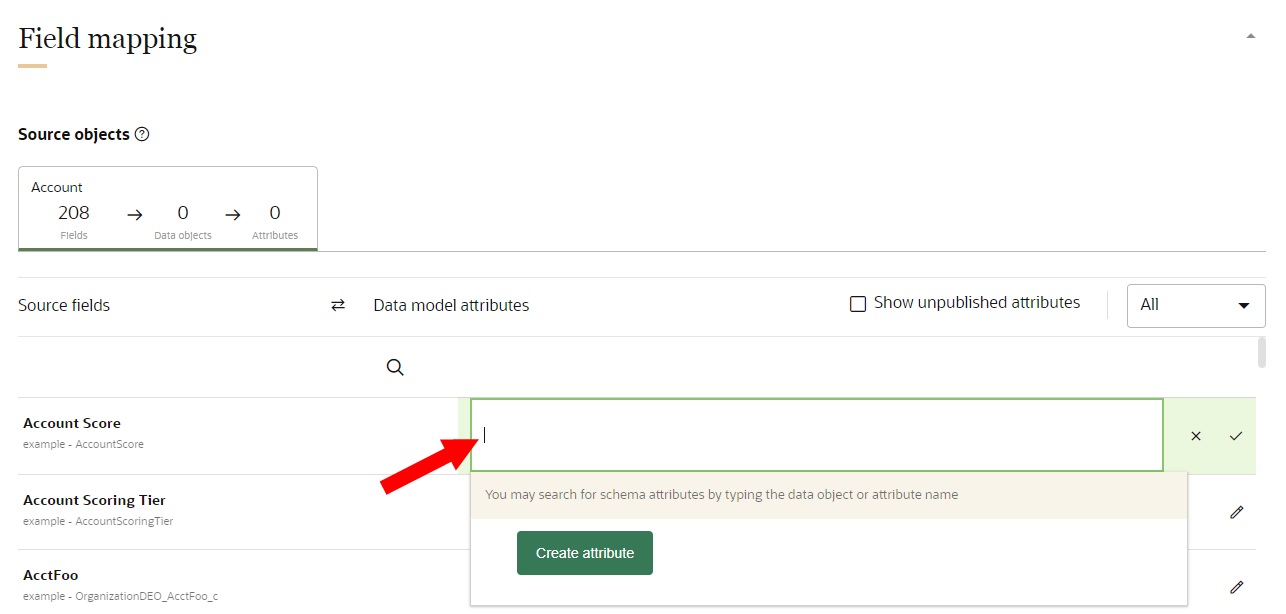
 - A list of recommended attributes may display for you to add. You can also use the search field to find attributes to add. You can search by data object name, attribute name, or attribute description.
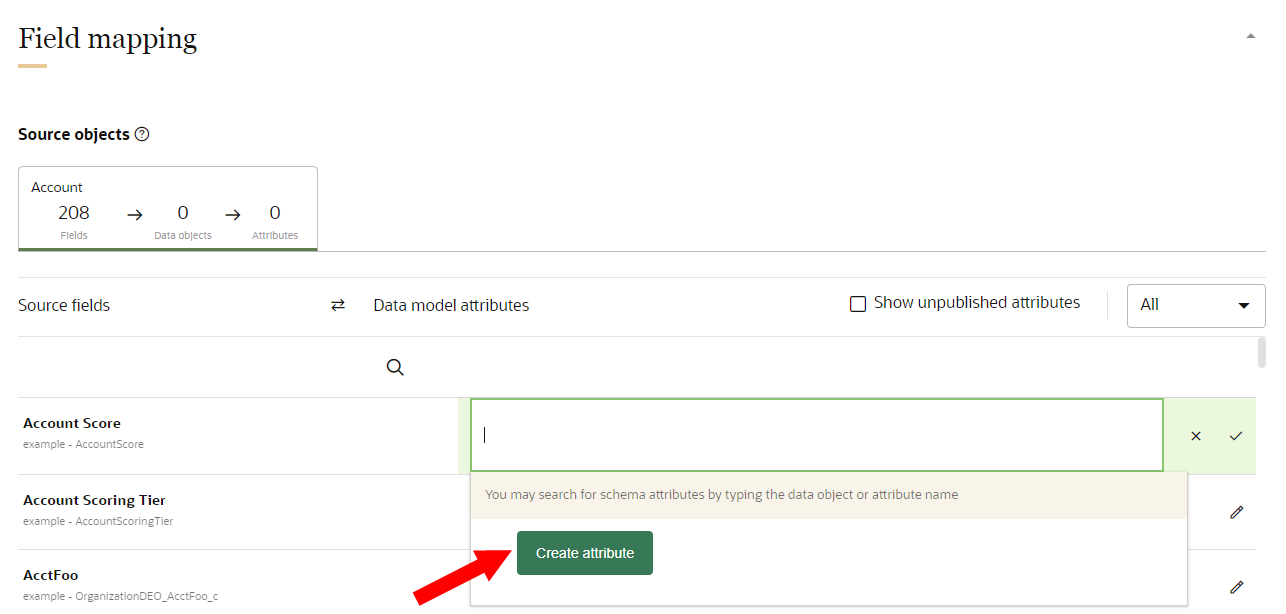
- If you need to add an attribute that is not currently part of the data model, click Create attribute. Attributes you create will need to be published before the ingest job runs. You can review attributes that need to be published by clicking the checkbox for Show unpublished attributes. Learn more about Creating attributes.
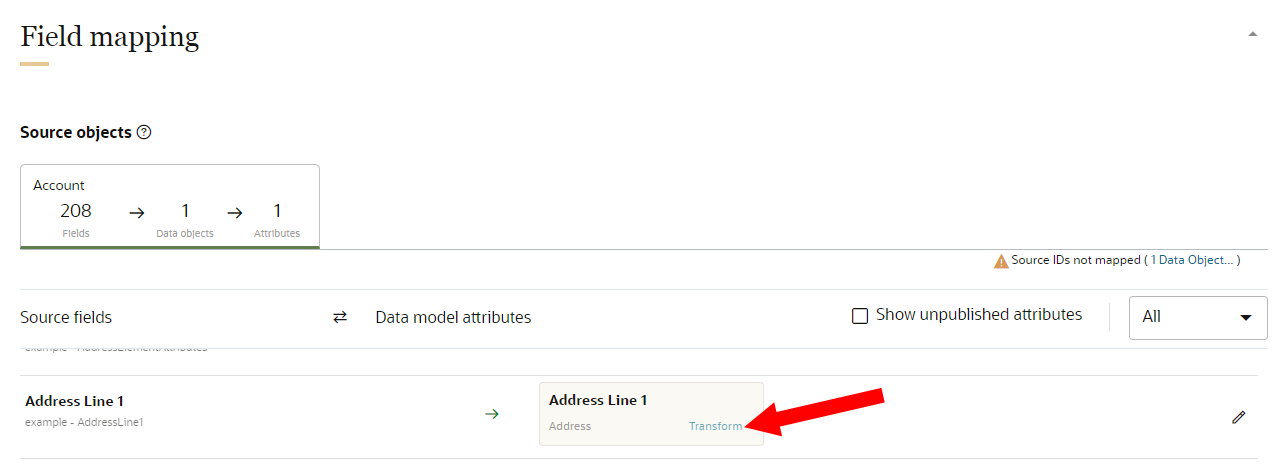
- To add the attribute, click the Checkmark
 .
. - To add a transformation on an attribute, click Transform.
Learn more about the different transformations available:
Step 4: Schedule and notify
You will need to configure the schedule and notification settings for the ingest job.
To schedule the ingest job and define the notification settings:
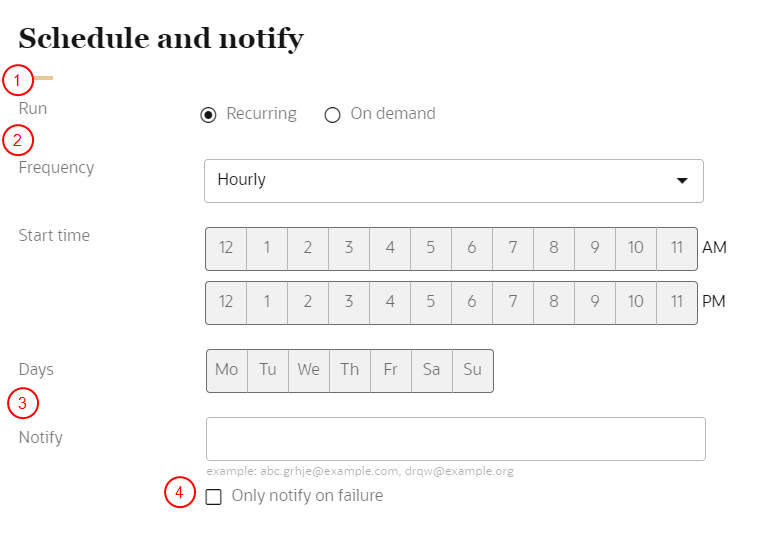
- Configure the schedule for the ingest job:
- Click Recurring to automatically run the job on a regular schedule.
- Click On demand to run the job as needed.
- If the job is recurring, select the Frequency, Start time, and Days it will run.
- In the field for Notify, enter the email addresses of people to be notified when the job runs. Separate multiple emails with a comma.
- If you only want a notification if the job fails, click the checkbox for Only notify on failure.
Step 5: Save and publish the ingest job
After saving the ingest job you will need to publish the changes before it can run.
To save and publish the ingest job:
- Scroll to the top of the page and click Save or Save and close.
- Follow the steps for Publishing changes.
When the publishing task is completed, the ingest job can run either on a regular schedule or manually from the Data feeds page.
After running the segment delivery, you can follow the steps for Reviewing imported data from Oracle CX Sales.
Setting up the export of data to Oracle CX Sales