Adding Filters to Custom Reports
Note: Custom reports are supported for the Email, SMS, Mobile App (for Push notifications, In-app messages, and messages sent to Message Center), and Web Push channels. Learn more about the prerequisites to creating custom reports. Additionally, when creating custom reports, keep in mind these important considerations for Mobile App custom reports and for Message Center dimensions.
Dashboards provide the ability to create custom reports (also called analysis), and you can use filters to narrow the data that appears in a column.
To add filters to a custom report:
-
Navigate to Interactive Dashboards.
-
Open a custom report by creating a new one and adding columns, or by editing one from the Catalog.
-
In the Selected Columns panel, click
 of the column you want to filter and selectFilter.
 -
The New Filter dialog opens.

-
Add an additional filter to improve report performance: add Date Range filter for Last 30 Days. Double click Last 30 Days in the left panel.

Tip: If you are using the Sent Date Range filter, you could experience performance issues for longer date ranges. Responsys recommends that you add an additional filter to improve the report performance. The following screenshot shows how to add a filter when your Sent Date Range filter is ‘Last 30 Days’. Use the corresponding filter for the Sent Date Range used in the report.
-
Click OK in the following pop up:

-
The report criteria appears as follows. This enhances report performance.


Note: We recommend you use the default operator is equal to/is in. Choosing any other operator will create a more advanced rule-based filter condition which requires deep understanding of the particular column’s data. Using other operators might produce unexpected filter results. We expect that the default operator will meet the most common filter requirements.
- Do one of the following to select a value:
- Select a value from the Value list and click OK.
- Click
 , select the value you want and click
  , then click OK.
 The Select Values dialog opens.

Tip: The Value list works better for columns which don’t have many values. The
icon works better for columns with many values, such as Campaign. Additionally, for most columns, such as Campaign and Program, you can select multiple values.
Pre-defined date range filters are available when Sent Date Range is used. Date Range Filters improve query performance, and are optional. These filters are available for all channels. An example: Add a Date Range Filter to a new report, or an existing report. Select Sent Date Range in the Subject Area tab. Then use the Catalog section to specify the date range filter, say 180 days, or 2 years. The date range filters appear in the Filters section, after the Selected Columns section.
Important: However, for columns that provide only predefined values, such as Sent Date Range, you can select only one value. Please use only one date range filter. Multiple date range filters will give you incorrect results, or display an error.
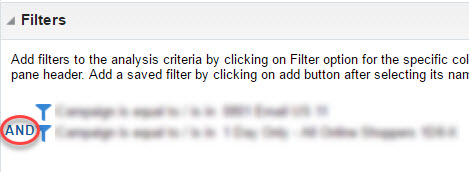
- Select more filters as needed, using the AND or OR operator between them. Click the operator to change it.

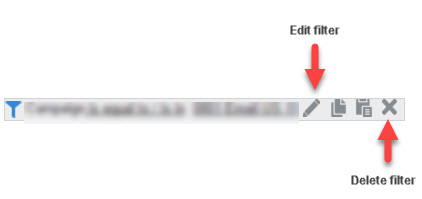
- To edit a filter, mouse over it and select
 .
.