Using the barcode widget
Important: This feature is currently released under our Controlled Availability program. To request access to this feature, please log in to My Oracle Support and create a service request.
Users can drag and drop the barcode widget to their email in the message designer. Once a user has configured and launched the campaign that includes the barcode, the email's recipients can then use the barcode for promotional or transactional purposes. Account administrators can enable this widget via the Account page.
The barcode widget makes it easy for recipients to bring the promotions or transactions you send them to your stores or events; for example, when a contact enters a retail store for which you sent them a discount barcode, they can access the barcode via their mobile device and a cashier scan it in-store.
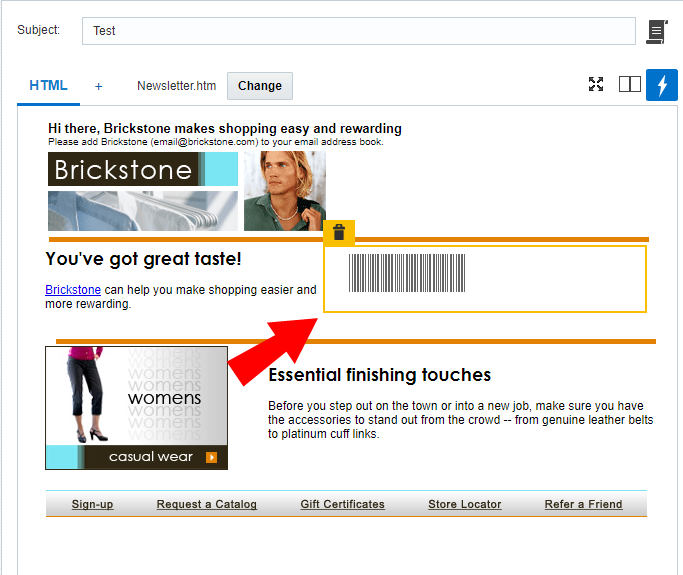
Once you've added the barcode widget to your message, you can customize the barcode's settings and appearance to match your needs. The message designer will display the changes you make to the barcode's configuration in real-time. You can also preview the barcode in Preview Mode or in a Proof Launch.
To configure your barcode widget:
- Add the barcode widget to a region.
- Enter the Code Value.
This is the value that will be converted to the barcode. It can include RPL that can, for instance, reference a field in your profile list, PET, or supplemental table.
- Select one of two barcode types:
Note: Certain barcode scanners might only support one barcode type.
 1D (linear)
- Select the Symbology.
These are the different ways to code and display the code value.
- Select the Height and Rotation of the barcode.
Consider how you might use these settings if you think the email will be printed.
- (Optional) Check the Check Digit checkbox. This option inserts a digit at the end of your barcode to check the barcode's integrity. It is only available for some symbologies.
- (Optional) Check the Display Code Value checkbox and specify the Space Between Barcode (cm).
Your barcode is now configured and ready to be sent to your target audience. Find out more about launching an email campaign.
2D- Configure your barcode's appearance in the Appearance section.
- Under Advanced, select the barcode's Mode.
Different modes allow for different amounts of data to be stored.
- Specify the Error Correction Level.
This is the level at which data in the barcode can be restored if the barcode can't easily be read (for example, in case of damage).
- (Optional) Check off the options you would like applied to your barcode:
- Truncation: the right-hand side of the barcode will be truncated.
- Process Tilde(~): special characters will be recognized.
- Enable Macro PDF: with this option, you can make use of PDF417.
- (Optional) Set the File ID, Segment Index, and Last Segment options. These are tied to the Macro PDF option.
Your barcode is now configured and ready to be sent to your target audience. Find out more about launching an email campaign.
- Select the Symbology.