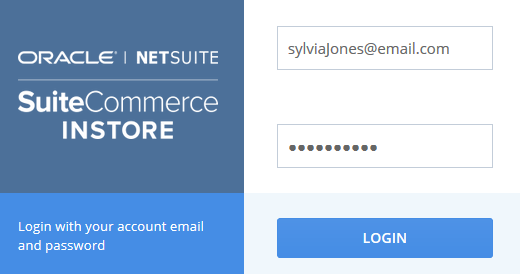
SuiteCommerce InStore Login
To start working with SuiteCommerce InStore (SCIS), you must first log in. The login steps change if you work at more than one location or if your stores use advanced cash management. This section includes information about:
Logging In
To access SCIS, launch SCIS for iOS or SCIS for Windows. Then enter your login credentials.

To log in to SuiteCommerce InStore:
-
Launch the SCIS POS application.
-
In the Email field, enter your email address.
-
In the Password field, enter the password provided by your manager or system administrator.
Note:After five failed login attempts you will be locked out and you must wait 30 minutes to log in again.
-
Tap Login. If you are only assigned one role, then you are automatically logged in with that role.
-
If you are assigned multiple roles, the list of available roles is displayed. Tap the role you want to use.
-
Select a Sales Rep. This step is optional depending on your system configuration. For more information, see Selecting a Sales Representative.
Recording a video that includes a login. It has been found that if you're using iOS versions prior to 14.3, the built-in iOS Screen Recorder can show the keystrokes and characters you type when logging in. To keep your password safe exposed when recording, ensure that you upgrade your devices to iOS 14.3 or later.
Logging in with iOS Touch ID for SCIS
You can log in to SCIS using Touch ID, but you'll need to set up Touch ID on your point-of-sale (POS) mobile device. The first time you log in to SCIS, enter your email address and password, then check the Touch ID Login box. Your login credentials are saved on the device, so you can use Touch ID to log in next time.
To log in with iOS Touch ID for SCIS:
-
Start the SCIS for iOS mobile application.
-
Tap your fingerprint on the Touch ID for SCIS prompt.
-
If you have multiple roles, you can choose the role to log in. If you only have one role, you are automatically logged in to SCIS.
After successfully entering your login credentials, select a printer.
Selecting a Printer
To generate receipts for each transaction, you must select a printer. A local printer is typically configured by your system administrator. You can choose the printer you want from options in the User menu.
If your store uses Advanced Cash Management, you'll need to select a printer when you open a shift. For information, read Opening the Cash Drawer with SCIS.
To select a printer:
-
Tap the User menu.
-
Tap Select Printer.
-
Select a printer from the list.
-
Tap Select.
Receipts for all the transactions you submit will be output to that printer.
For more information about choosing a printer when opening a shift, read Opening the Cash Drawer with SCIS.
You only have permission to complete the operations authorized for your role. The system administrator must specifically assign permissions to roles. For example, if your role does not have permission to add a discount or void a line in a transaction, you must request a manager override to complete those operations. For more information, see Manager Override.