Using the Resource Allocation Chart/Grid
Customizing Resource Allocation Chart/Grid Filters
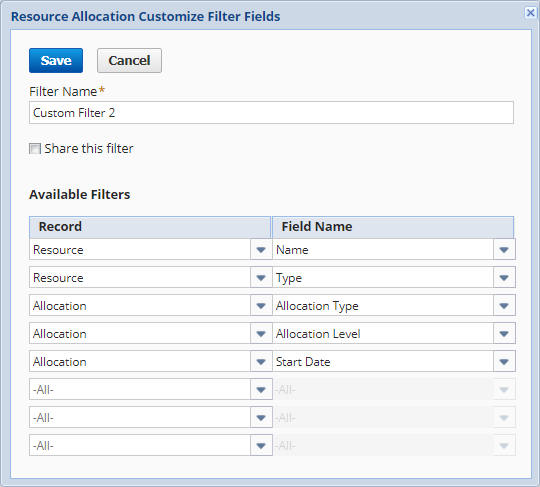
You can customize the filters that appear on the filter panel of the Resource Allocation page. The filters let you limit the data on the resource allocation chart or grid so that only information that matches the specified conditions are shown. You can define up to 8 filters.
To customize the filters for the Resource Allocation Chart and Grid:
-
Click Customize Filter or Edit Filter next to the Filter dropdown.
Note:The option that you set for the View Allocations By preference comes with default filter configuration. You can customize a filter to add more conditions, but you can't change or remove the default filter conditions.
-
In the Filter Name field, enter a name for your new custom filter.
-
Check the Share this filter box to make this filter available to other users when they use the Resource Allocation Chart or Grid. Values selected for each filter are also shared.
Note:Only the filter owner can change the selected values in the shared filter.
-
In the Available Filters section, set values for the following options:
-
Record - Select either Resource or Allocation.
Note:To use custom segments that you applied to a Customer, Generic Resource, and Vendor as a filter, you must select Record. You can use both the List/Record and Multi-select types of custom segment.
-
Field Name - Fields available in this selection are taken from the specified record. Select the field that you want to use as a filter.
Note:Billing classes, locations, departments, classes, subsidiary, approval status, and project task are only available as filters if these features are enabled on your account.
-
-
When you're done, click Save. The custom filter will be added to the Filter dropdown. Custom filters are grouped according to the default filter from which they were created.
Note:The fields you select for your custom filters don't have default values. You must select the values for each field from the filter panel area.
Using Default Filters to Change the Chart or Grid View
Default filters lets you view the allocations on the chart and grid by resource, customer, or project. The default fields assigned to each filter can't be removed. You can, however, further customize each filter by adding more fields or conditions. For more information, see Customizing Resource Allocation Chart/Grid Filters.
If you don't set a value for the Start Date field on the default filters, the system will automatically set it to the current date.
From the Filter dropdown on the Resource Allocation Chart or Grid, the following default filters are available:
-
Resource - Select this option to view the allocations of each resource. The chart or grid will display the resource and their corresponding allocations for a project.
-
Customer - Select this option to view the allocations of each resource that is assigned to a customer. The chart or grid will display the customer, the project for that customer, and the resources on the project. This preference is currently available for the Resource Allocation Chart.
-
Project - Select this option to view the allocations of each resource that is assigned to a project. The chart or grid will display the project name, the resources for the project, and their corresponding allocation. This preference is currently available for the Resource Allocation Chart.
When you view allocations by project or customer, the following fields or settings aren't available:
-
Project Task field in the Edit Resource Allocation form
-
Show project task box in the Settings popup
-
Include resources without allocations box in the Settings popup
Note:To view both the project name and customer name on the chart, you must enable Auto-Generated Numbers for projects. When the setting is disabled, only the project name is visible on the chart. For more information, see Set Auto-Generated Numbers.
-
Creating a New Allocation from the Resource Allocation Chart or Grid
To create a new allocation:
-
Click New Resource Allocation at the top of the Resource Allocation Chart or Grid.
-
Set values for the following fields:
-
Resource - Select a resource for this allocation.
To search for a resource, click the search icon next to the Resource field. You can search by availability, required skills, billing class, labor cost, and years of experience.
The resource search points you to the resource portfolio where you can check the resume and other files.
Note:Searching for resources by billing class and required skills requires enabling Per-Employee Billing Rates and Resource Skill Sets.
For more information about searching with skill sets, see Using Resource Skill Sets.
Work calendars are required to search for resources. For more information, see Project Resource Work Calendars.
-
Customer:Project - Select a project for this allocation.
-
Project Task - If you're using allocations to assign tasks for this project, select the project task you want this resource allocated to. This field is available if you've chosen to show project tasks in the chart or grid settings menu.
Note:This field isn't available if you're viewing allocations by Customer or Project.
Important:For each project, it's best to either allocate resources directly to tasks or allocate them to the project and then assign them to tasks. Mixing both methods can cause inconsistencies in your project data. For more information, see Assigning Resources with Allocations.
-
Start Date - Select a start date for this allocation.
-
End Date - Select an end date for this allocation.
Resource allocations can begin and end on non-working days if at least one working day is included in the duration of the allocation.
-
Allocate - Enter the percentage or number of hours that you want to allocate.
You can select how you want to allocate by clicking the Settings icon at the top of the Resource Allocation Chart.
-
Allocation Type - Select the type of allocation. The allocation type pertains to project scheduling and staffing methodology. You can still edit records with hard allocation. It is best practice to use the allocation types as suggested when creating resource allocations in NetSuite.
-
Hard - This allocation request isn't flexible; the resource is committed to the dates and hours required on this request.
-
Soft - This allocation request is flexible; adjustments can be made to the date and hours if needed to accommodate other priorities.
-
-
Next Approver - If you use approval routing for resource allocations, select the next approver.
-
Recurrence - Select how often this allocation should occur.
-
Daily - Enter the interval between days if this allocation is every day or every few days, or select every weekday if this allocation is every day except Saturdays and Sundays.
Enter 1 as the interval if this allocation is every day, for example, or enter 2 if the allocation is every other day.
-
Weekly - Enter the interval between weeks, and select the day of the week this allocation repeats on.
-
Monthly - If this allocation occurs on the same day of every month or every few months, enter the date the allocation repeats, and select the interval between months.
If this allocation occurs on the same day of the week every month or every few months, select the week, the day of the week, and enter the interval between months.
-
Yearly - If this allocation occurs one time a year, select the month and day of the allocation, or select the week, day and month.
In the End By field, set the date this allocation stops recurring. If the allocation continues indefinitely, check the No End Date box.
Note:After saving your allocation, a recurring symbol appears on the grid next to each instance of a recurring allocation. Editing options aren't available in the grid view for recurring allocations.
-
-
-
When you're done, click OK.
Note:Resource Allocation records that don't match the filter values for Resource and Customer:Project in the current view aren't visible on the chart or grid after saving. You can modify the filter values to view the resource allocation.
Note:You can switch between the grid and chart without losing any information. You don't need to save your changes made on the grid before switching to the chart.
Customer, Resource, and Project Popup Details
When you hover your cursor over a resource, customer, or project on the chart or grid, a tooltip pops up to display additional information. The following popup details are available:
Project and Project Template Details
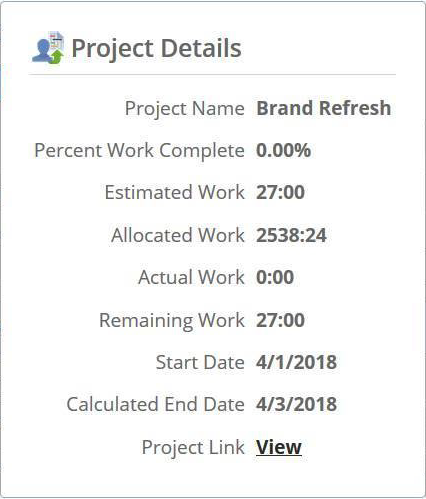
The Project Details popup shows the project's overall progress. It shows the estimates, actual work done, and the remaining work. It also shows total allocated hours. If there are changes that affect the allocated work, you'll see an icon next to the total hours to show they might not be up to date. When you save your changes, the total hours will update and the icon will disappear.
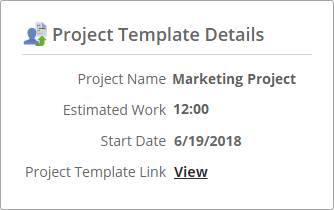
The Project Template Details popup shows the start date, estimated work for the project, and a link to the project template record.
You can allocate a generic resource to a project template from the Project Template record. On the Project Template record, go to Resources > Resource Allocations, and then click New Resource Allocation. For more information, see Project Templates.
Employee Details
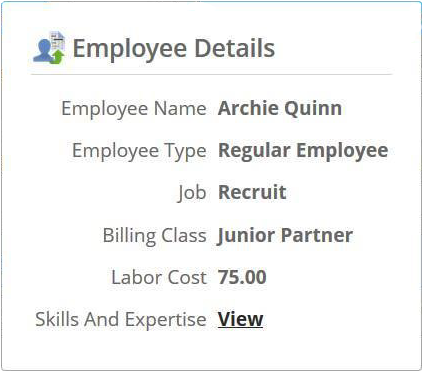
The employee details popup provides information about the employee's labor cost, type, job, and skills and expertise. The labor cost displays the hourly overhead labor rate for the employee.
For new employees, the Job information will be available on the Employee details popup if the Job Management feature is enabled on your account. For more information, see Job Management.
The Skills and Expertise field displays a View link if the Resource Skill Sets SuiteApp is installed in your account. Clicking the link opens the Resource Skills record, where you can view the Skills & Expertise of the employee. For more information, see Resource Skill Sets.
You can view the Resource Skills record if the Project Resource box is checked on the Employee record.
Vendor Details
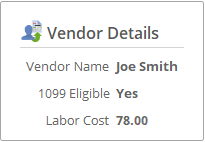
The vendor details popup provides information about the vendor's 1099 eligibility and labor cost. The labor cost displays the hourly overhead labor cost rate for the vendor.
Customer Details
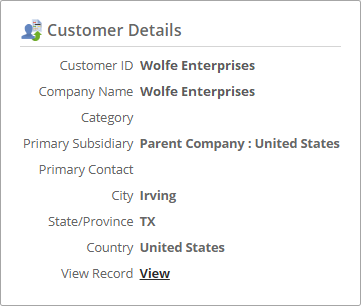
The customer details popup shows information about the customer's ID, name, category, subsidiary, primary contact, and address. Click the View link to open the customer record.
Generic Resource Details
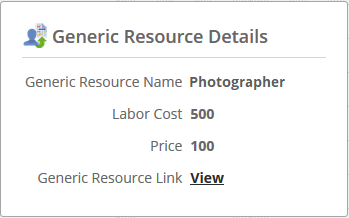
The generic resource details popup shows the generic resource name, labor cost, price, and a link to view the generic resource record.