Mass Processing Records in a Workflow
You can process multiple instances of a specific workflow simultaneously for the same record type in NetSuite. You can mass process instances of a workflow to transition them from the current state of the workflow instance to the next state. You can use this feature to reevaluate transitions or run a transition that executes on a button. This feature only applies to records that are already in a running workflow instance.
For example, you want to transition all employee records in a workflow named New Employee Process from State 2 Approve Training to State 3 Training Approved. The workflow contains an Approve Training button, added with the Add Button action, that approves the records and transitions them to State 3. Instead of opening each employee record and approving the training, you can mimic the click of the Approve Training button to approve all or a subset of the records and transition them to State 3.
To mass process a workflow for multiple records:
-
Go to Lists > Mass Update > Mass Updates.
-
On the Mass Updates page, expand Workflow.
For each record type in NetSuite, the Mass Updates page lists the workflows that you can initiate, process, cancel, or transition for each record type.
-
Click Process <workflow name> to process the appropriate workflow. The Mass Update page displays.
-
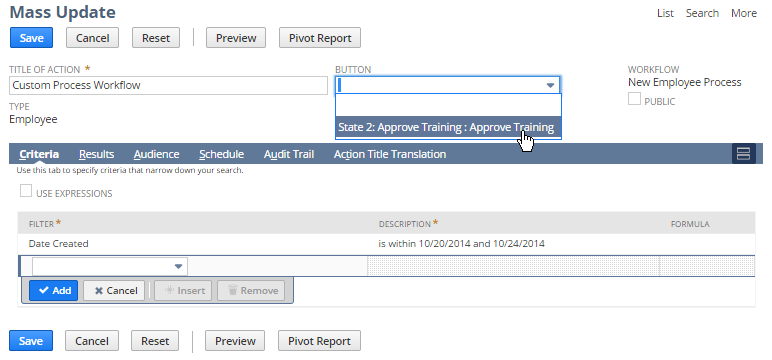
On the Mass Updates page, enter a Title.
-
If you want to mimic the click of a button to transition the record to the next state, select the button name in the Button dropdown list.
Note:This must be a button added with the Add Button action to the current state of the workflow instance.
-
Define the filters and other options on the following subtabs:
Subtab
Required / Optional
Description
Criteria
Required
Select a field or formula in the dropdown list and enter values in the popup that appears.
Results
Optional
Set display options for mass update results. The results appear when you preview the records for the mass update.
Audience
Optional
Choose the users who can perform the mass update.
Schedule
Optional
Define a schedule on which to perform the update.
The following screenshot shows the Mass Updates page for employee records created between two dates:
-
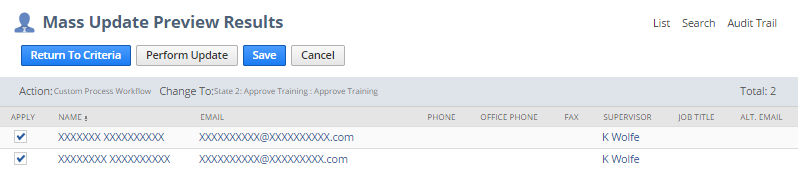
Click Preview to view the records on which the mass update will run:
-
Do one of the following:
-
To update immediately, in the Apply column, select the records you want to transition and click Perform Update. The status of the mass update is displayed on the Mass Update Status page.
-
To save the update and update later, click Save. NetSuite saves the mass update and displays the Saved Mass Updates page. You can return to this page to transition the records by going to Lists > Mass Update > Saved Mass Updates. Click Preview next to the name of the update. On the Mass Update Preview page, click Perform Update to transition the records.
-
Optionally, from the Mass Update page, you can use the Audit Trail subtab to view the changes to the current mass update or use the Action Title Translation subtab to localize the title of the mass update.