Creating Custom Merchandise Hierarchy Workbooks
With SuiteAnalytics Workbook, you can create custom workbooks with any merchandise hierarchy elements you need, including attributes. SuiteAnalytics Workbook supports multilevel joins, which means you can join fields from multiple records in one single workbook. SuiteAnalytics Workbook also enhances the visualization of data in workbooks, with better grouping of hierarchical data in pivot tables, and charts.
If the Merchandise Hierarchy workbook doesn't include all fields you require, you can create a custom workbook by adding the required fields to the dataset. For more information, see the Custom Workbooks and Datasets topic.
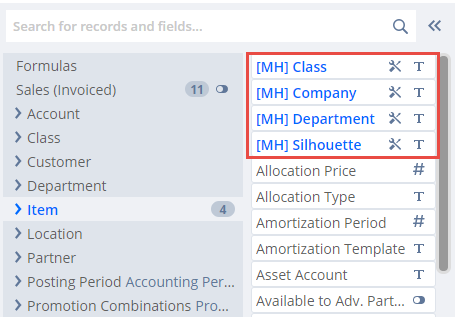
To include Merchandise Hierarchy fields in a custom workbook, you must add them manually. You should start with a Sales record type and find the Merchandise Hierarchy fields under Item in the Records list:
When you have only one hierarchy version defined in your system, you will create merchandise hierarchy workbooks that display the current hierarchy structure and item classification. These workbooks use custom merchandise hierarchy fields that have been added to the item record. They only show the current classification of items in the hierarchy and can't show different classifications from different hierarchy versions.
For reports that use historical hierarchy data when your system includes multiple merchandise hierarchy versions, see Using Hierarchy Versions in Workbooks and Reports.
Including Attributes in a Custom Merchandise Hierarchy Workbook
The following example shows how to create a workbook that includes merchandise hierarchy attributes. To demonstrate how merchandise hierarchy attributes can be utilized, the workbook will show transactions for items assigned to a specific node: the Women's Wear department. You can change the criteria to produce different types of merchandise hierarchy workbooks as needed.
You can open the default Merchandise Hierarchy Workbook displaying contextual attribute data directly from the Merchandise Hierarchy Manager. However, it won't display all attributes for all items in the hierarchy. For more information, see Merchandise Hierarchy Workbook.
For more information regarding attributes, see Applying Attributes to Items in a Merchandise Hierarchy.
To create a custom workbook to include merchandise hierarchy fields and attributes you must complete the following steps in order:
-
Start with the Merchandise Hierarchy workbook
-
Add attribute fields to the dataset
-
Set up your pivots and charts
Open the Merchandise Hierarchy Workbook for Customization
You should use the default Merchandise Hierarchy workbook as the starting point. The dataset used by this workbook includes all your custom Merchandise Hierarchy fields by default. It also provides a default Sales by Hierarchy Node pivot table which can incorporate attributes after they have been added to the dataset.
To open the Merchandise Hierarchy workbook:
-
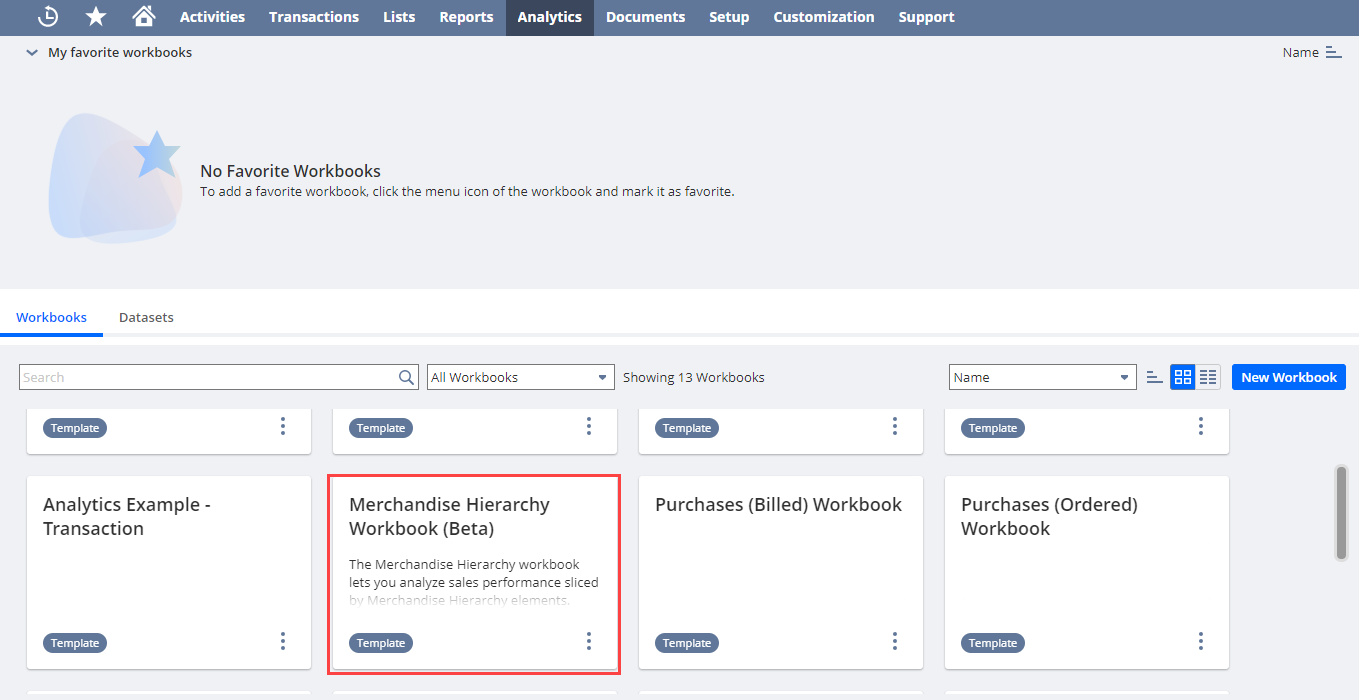
Click the Analytics tab in the NetSuite navigation menu.
-
On the Analytics dashboard, select the Workbooks list.
-
Select the Merchandise Hierarchy workbook.
You can also open this workbook directly from the Hierarchy Manager. See Merchandise Hierarchy Workbook.
Add Custom Fields to the Dataset in Merchandise Hierarchy Workbooks
The following steps show you how to add attribute fields to the dataset of your Merchandise Hierarchy workbook. Merchandise hierarchy attributes are custom item fields and therefore are located under Item in the Records list on the Dataset tab. Only fields in the Data Grid can be used to generate a pivot table or chart.
In this example we'll add the following attribute fields:
-
Fabric
-
Seasonal Collection
To add attribute fields to the dataset of your workbook:
-
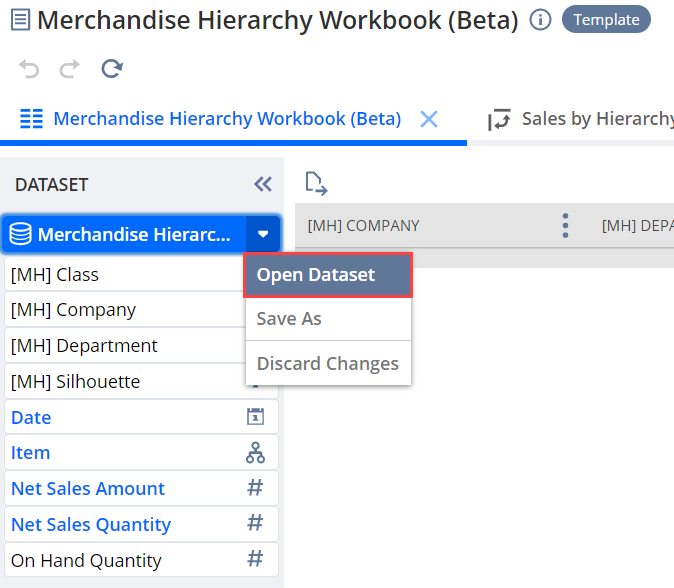
On the Dataset tab click the More icon for the Merchandise Hierarchy workbook and click Open Dataset.
-
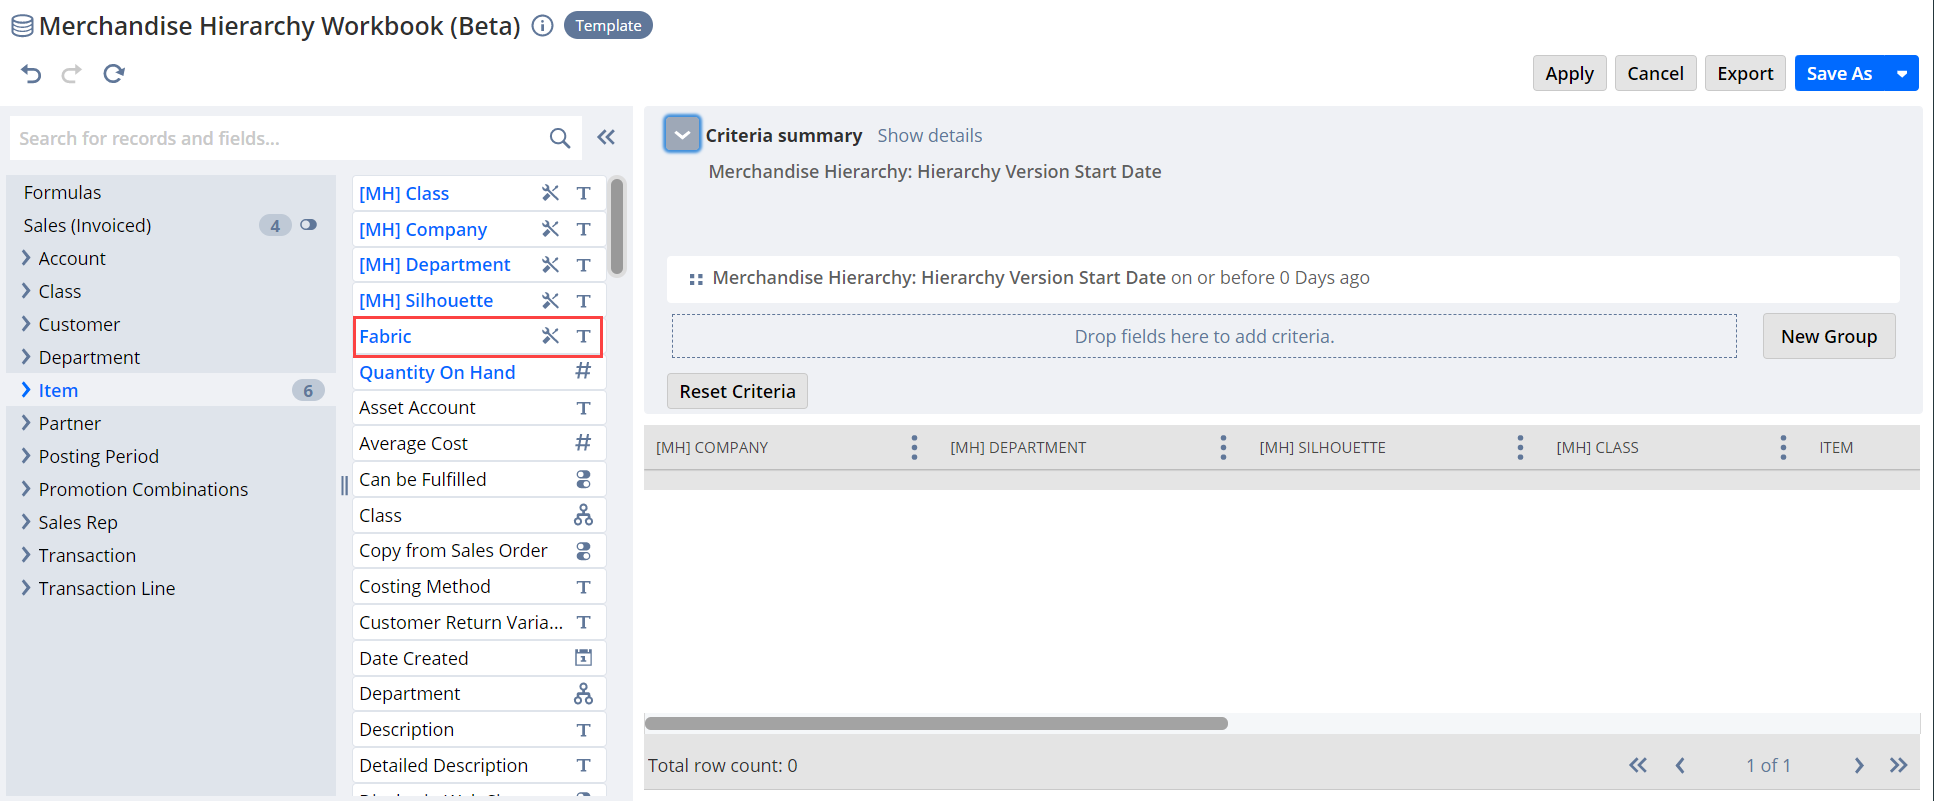
Click Item in the Records list.
-
Double-click the attribute you want to add in the Fields list. In our example, the first attribute we select is Fabric.
-
Repeat steps 2 through 3 to add the Seasonal Collection attribute.
-
Click Apply to apply the changes.
-
Click Save As and enter a unique name to save your new custom Merchandise Hierarchy workbook.
Your selected attributes are now included in the dataset for your workbook. You can now customize your pivots and charts to include the attribute values.
Customize Pivots and Charts in Merchandise Hierarchy Workbooks
The Merchandise Hierarchy Workbook has one predefined pivot table by default, the Sales by Hierarchy Node pivot table. In our example we will customize the Sales by Hierarchy Node pivot table to include Fabric attribute values. You can add merchandise hierarchy attributes to any available pivot tables and charts provided by workbook templates, or create your own as needed.
To customize a pivot table in your merchandise hierarchy workbook:
-
Click the Sales by Hierarchy Node tab. Note, this tab appears by default in Merchandise Hierarchy Workbook.
-
Double-click the desired fields in the Fields list to add them to the Rows list in the Layout panel.
In this example we add the following to the Rows tab:
-
[MH] Department
-
[MH] Silhouette
-
[MH] Class
-
Fabric
In this example we also add Quantity (Sum) to the Measures tab.
-
-
Select the Item field in the Rows panel and click the Down Arrow icon in the Rows panel header to move it to the last row.
-
Click the Refresh icon
 to generate the pivot table.
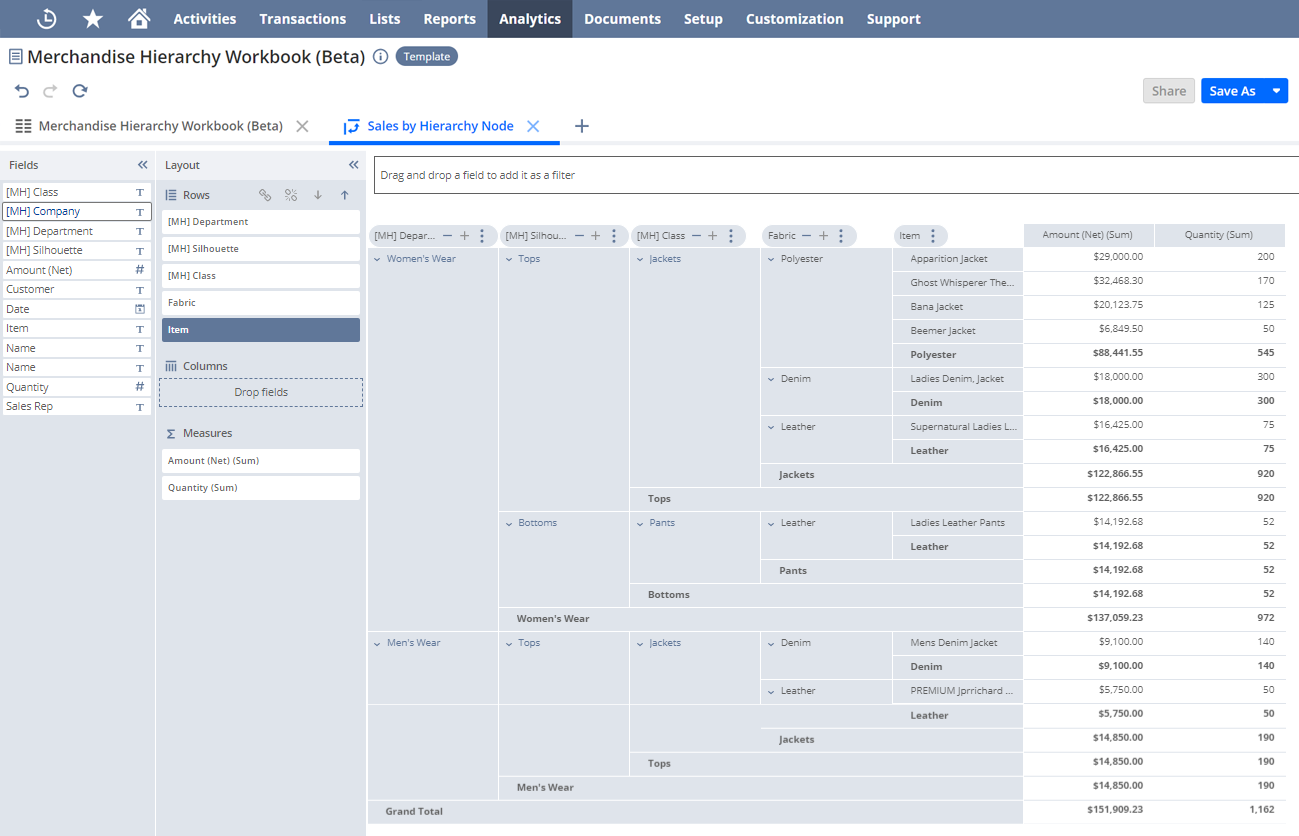 Important:
If you make changes on the Dataset tab or Pivot table tab, click the Refresh icon in the Pivot table tab to update the pivot table.
Remember to save your workbook. You can save your workbook at any time, click the Menu icon, and select Save or Save As in the top right-hand corner of the page.
For more details regarding working with pivots, including formatting the layout, changing the summary type, or adding filters, see the Pivot Your Dataset Query Results topic.