Inbound Sorting
UI Configuration
All IB Sorting configurations are made through the Inbound Sorting screen.
The Sorting feature is managed by Sort Zones. A Sort Zone is a group of drop locations that use the same sorting criteria. Only one location can be associated to one Sort Zone. However, the same sorting criteria can be used in multiple Sort Zones independently.
To setup Inbound Sorting click create to create a Sort Zone record on the “Inbound Sorting” screen. Enter a name for the Sort Zone and choose the sorting criteria in which the IBLPNs are sorted by.
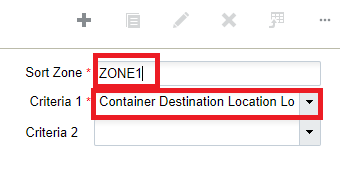
The sorting criteria selections use the destinations calculated for “Directed Putaway” using the putaway type on the LPN and the configured “Putaway Priorities.”
Select this newly created Sort Zone record and click on its details via the details button. This will open a new window, which displays the Location, Pallet and Criteria Value (Area, Aisle, Allocation Zone, Location Size-Type):
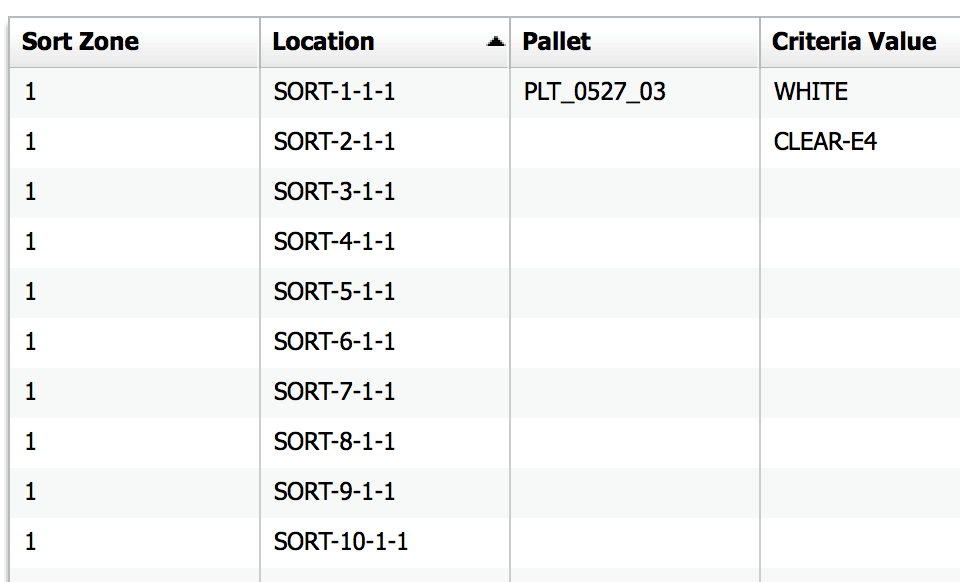
The Location column displays the Sort Locations that are configured for the Sort Zone. In the figure above, there are 10 sort locations configured for Sort Zone 1.
The Pallet column displays the current active pallet per the Sort Location. A pallet is considered ‘active’ when there is an open pallet with merchandise located at the Sort Location. There are a few points to consider when scanning a pallet to a Sort Location:
- There may only be one active pallet in a Sort Location at a time. This active pallet is populated in the “Pallet” column.
- When the pallet is closed (via the Ctrl-E option in the RF), the pallet value will
disappear from the Pallet column, but its Criteria Value will remain.
- For example, in the figure above, location SORT-2 has no pallets but is assigned to criteria “CLEAR-E4”. This means that the next CLEAR-E4 item scanned is directed to this location, but the user will have to scan a new pallet.
- The Criteria Value is only cleared when all pallets for that criteria (Putaway Type)
have been located out of the Sort Location.
- Users can search for pallets located in specific Sort Locations via the
magnifying glass button in the “IB LPNs” screen:
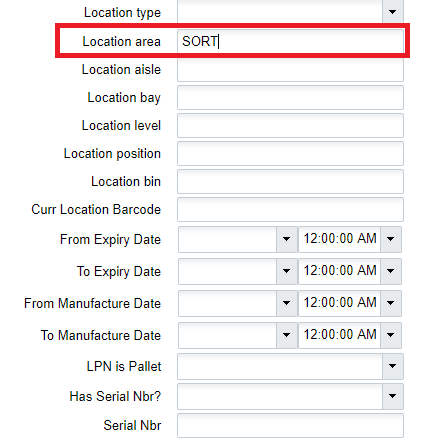
- Users can search for pallets located in specific Sort Locations via the
magnifying glass button in the “IB LPNs” screen:
- When an LPN (Serial Number) is scanned into a pallet, it will change to “Allocated” status. Its status will only reset to “Located” when its pallet is closed. This means that a pallet or LPN cannot be moved until its pallet is closed. The user can validate this by searching for the LPN and verifying its status and location via the “IBLPN” screen.
Using the Sorting RF Module
These are the steps to use the Sort to Pallet RF module:
Enter the RF module Sort to Pallet.

Enter the Sort Zone and scan the Item’s Serial Number in the “LPN:” field.
If there are no active pallets with the Item’s Putaway Type, the RF will not prompt for a Sort Location. In this case, the user must pick an empty Sort Location and scan a new pallet.

If there is an active pallet with the scanned Item’s Putaway Type, the RF will direct the you to the Sort Location and Pallet Number. Scan the Pallet label to confirm Item movement.
Continue sorting into the active pallet until it is complete. When the pallet is complete, you must systematically close the pallet via the Ctrl-E: Close Pallet option. When the pallet message is prompted, scan the pallet that will be closed:

If done correctly, you are taken to the original RF display to continue sorting.