Configuring Codes
...continued from step 4
-
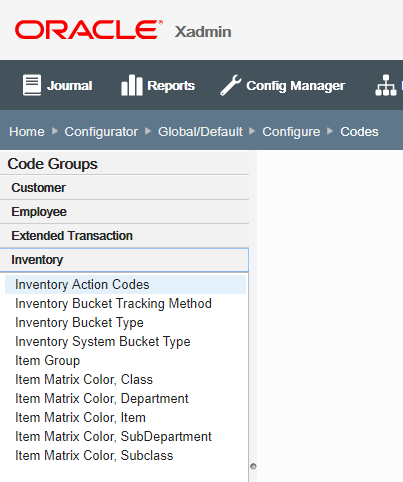
The Oracle Retail Xstore Point-of-Service codes have been organized by groups. Select a Code Group to view the codes in the group.
Figure 5-4 Code Groups List - Inventory Codes Group Expanded Example

-
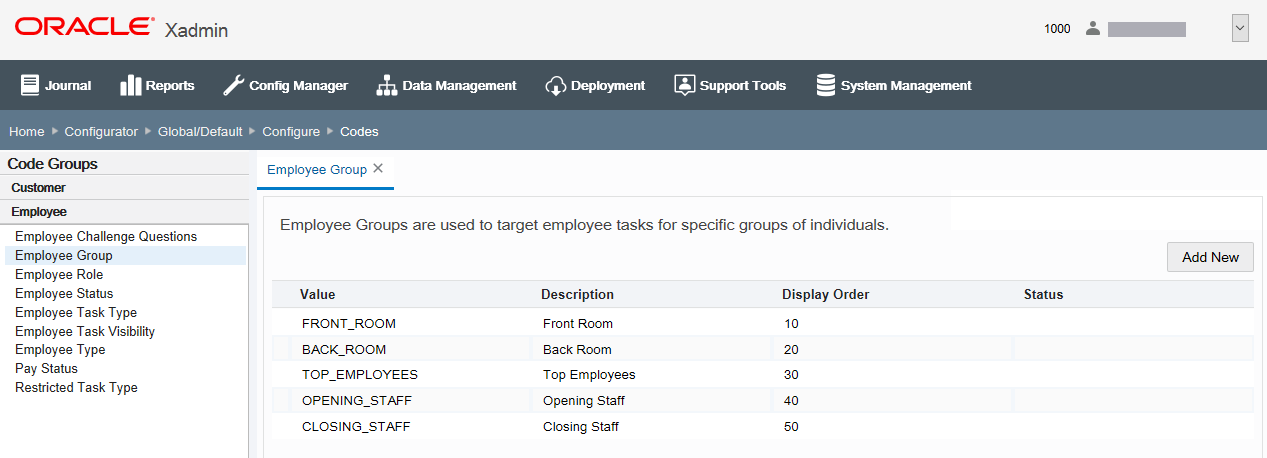
Select a code from the expanded Code Groups list to modify.
Figure 5-5 Configure Codes Page - Employee Group Code Example

-
Add a new code or edit an existing code:
If adding a new code:
-
Click Add New.
-
Complete the fields as required, then click Save. See Code Configuration Options.
If editing an existing code:
Note:
You can only edit global records if you are in a global configuration.
-
Select the code in the list.
-
Edit the fields as required, then click Save. See Code Configuration Options.
-
-
After completing code setup, you have the following options:
-
To deploy your changes, see Deploying Configuration Changes
-
To view a summary list of a profile element's configuration changes to identify how it differs from the global configuration, see Viewing Configuration Changes.
-
[CONFIGURATION OVERRIDES & STORE SPECIFIC OVERRIDES ONLY] - To delete the current profile element configuration changes, see Delete Profile Configuration Overrides.
-
[STORE SPECIFIC OVERRIDES ONLY] - To copy store configurations from another store, see Copy Store Configurations.
-
Code Configuration Options
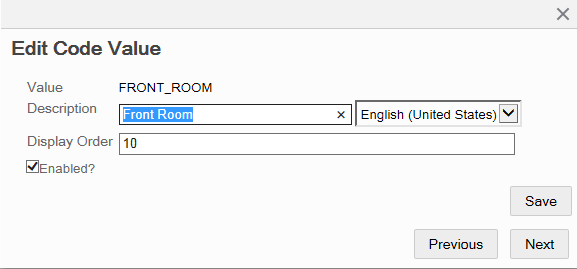
Figure 5-6 Edit Code Value Window

-
Value - The name of the code: required, alphanumeric field. In edit mode, this value cannot be changed.
-
Description - A description of the code: not required, alphanumeric field.
-
Display Order - Determines the sort order of the code value as compared to other code values for this group.
-
Locale - If needed, select a translation locale and enter the description for the locale.
-
Image URL - If applicable, specify the URL of the image file. If this does not apply to the selected code, this option is not displayed.
-
Rank - If applicable, specify the rank value for this code. If this does not apply to the selected code, this option is not displayed.
-
Enabled? - Determines whether this code is available for use. A check mark indicates the code is enabled. The Disabled label in the Status column indicates a code is not available for use.
Figure 5-7 Configure Codes Page - Disabled Code Example
